Расширение типов каналов уведомлений
NocoBase поддерживает расширение типов каналов уведомлений по мере необходимости, например для SMS-уведомлений и пуш-уведомлений приложений.
Клиент
Регистрация типа канала
Интерфейсы конфигурации канала и сообщения на клиенте регистрируются через метод registerChannelType, который предоставляет клиентская часть менеджера уведомлений:
import PluginNotificationManagerClient from '@nocobase/plugin-notification-manager/client';

class PluginNotificationExampleClient extends Plugin {
  async afterAdd() {}

  async beforeLoad() {}

  async load() {
    const notification = this.pm.get(PluginNotificationManagerClient);
    notification.registerChannelType({
      title: 'Example SMS', // Название типа канала
      type: 'example-sms', // Идентификатор типа канала
      components: {
        ChannelConfigForm, // Форма настройки канала
        MessageConfigForm, // Форма настройки сообщения
      },
    });
  }
}

export default PluginNotificationExampleClient;
Сервер
Расширение абстрактного класса
Основа серверной разработки — расширить абстрактный класс BaseNotificationChannel и реализовать метод send, который содержит бизнес-логику отправки уведомлений через расширение.
import { BaseNotificationChannel } from '@nocobase/plugin-notification-manager';
export class ExampleServer extends BaseNotificationChannel {
async send(args): Promise<any> {
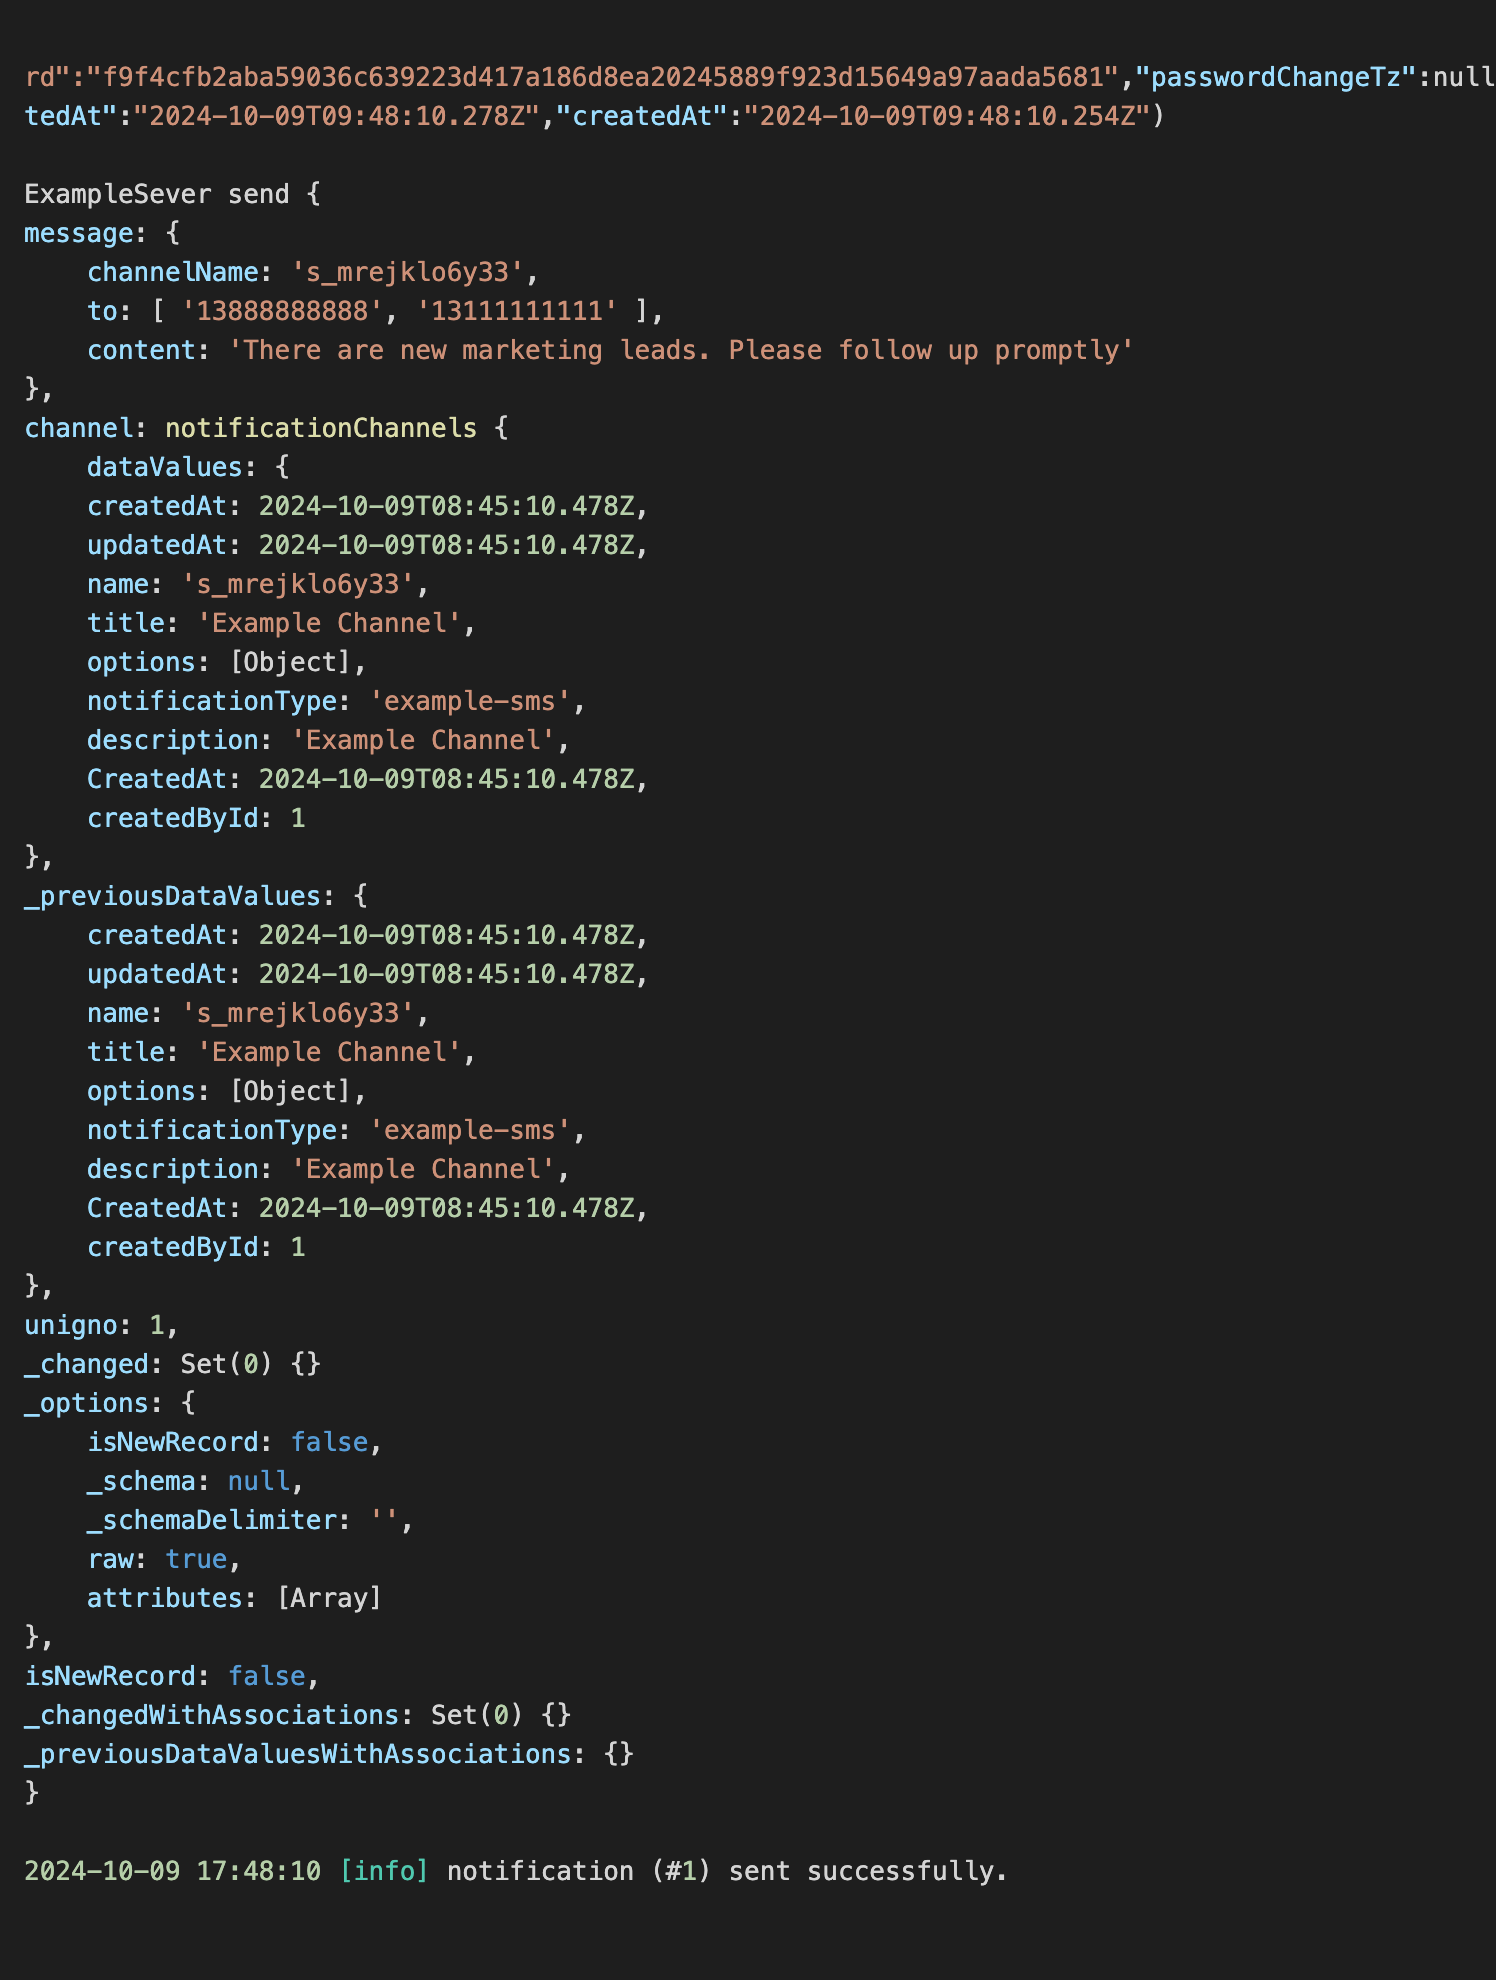
console.log('ExampleServer send', args);
return { status: 'success', message: args.message };
}
}
Регистрация на сервере
Нужно вызвать метод registerChannelType ядра сервера уведомлений, чтобы зарегистрировать класс серверной реализации:
import PluginNotificationManagerServer from '@nocobase/plugin-notification-manager';
import { Plugin } from '@nocobase/server';
import { ExampleServer } from './example-server';
export class PluginNotificationExampleServer extends Plugin {
  async load() {
    const notificationServer = this.pm.get(PluginNotificationManagerServer) as PluginNotificationManagerServer;
    notificationServer.registerChannelType({ type: 'example-sms', Channel: ExampleServer });
  }
}

export default PluginNotificationExampleServer;
Полный пример
Ниже приведён пример расширения уведомлений, который подробно показывает, как разрабатывать расширение.
Предположим, мы хотим добавить SMS-уведомления в NocoBase с использованием SMS-шлюза некоторой платформы.
Создание плагина
- Выполните команду создания плагина:
yarn pm add @nocobase/plugin-notification-example
Разработка клиента
На клиенте разработайте два компонента форм: ChannelConfigForm и MessageConfigForm.
Чтобы отправлять SMS, требуются ключ API и secret. Создайте новый файл ChannelConfigForm.tsx в директории src/client:
import React from 'react';
import { SchemaComponent } from '@nocobase/client';
import useLocalTranslation from './useLocalTranslation';

const ChannelConfigForm = () => {
  const t = useLocalTranslation();
  return (
    <SchemaComponent
      scope={{ t }}
      schema={{
        type: 'object',
        properties: {
          apiKey: {
            'x-decorator': 'FormItem',
            type: 'string',
            title: '{{t("Transport")}}',
            'x-component': 'Input',
          },
          secret: {
            'x-decorator': 'FormItem',
            type: 'string',
            title: '{{t("Transport")}}',
            'x-component': 'Input',
          },
        },
      }}
    />
  );
};

export default ChannelConfigForm;
Форма настройки сообщения в основном включает настройки получателей (receivers) и содержимого сообщения (content). Создайте новый файл MessageConfigForm.tsx в директории src/client. Компонент получает variableOptions как параметр переменных. Форма содержимого настраивается в узле рабочего процесса и, как правило, должна использовать �переменные этого узла. Содержимое файла:
import React from 'react';
import { SchemaComponent } from '@nocobase/client';
import useLocalTranslation from './useLocalTranslation';

const MessageConfigForm = ({ variableOptions }) => {
  const { t } = useLocalTranslation();
  return (
    <SchemaComponent
      scope={{ t }}
      schema={{
        type: 'object',
        properties: {
          to: {
            type: 'array',
            required: true,
            title: `{{t("Receivers")}}`,
            'x-decorator': 'FormItem',
            'x-component': 'ArrayItems',
            items: {
              type: 'void',
              'x-component': 'Space',
              properties: {
                sort: {
                  type: 'void',
                  'x-decorator': 'FormItem',
                  'x-component': 'ArrayItems.SortHandle',
                },
                input: {
                  type: 'string',
                  'x-decorator': 'FormItem',
                  'x-component': 'Variable.Input',
                  'x-component-props': {
                    scope: variableOptions,
                    useTypedConstant: ['string'],
                    placeholder: `{{t("Phone number")}}`,
                  },
                },
                remove: {
                  type: 'void',
                  'x-decorator': 'FormItem',
                  'x-component': 'ArrayItems.Remove',
                },
              },
            },
            properties: {
              add: {
                type: 'void',
                title: `{{t("Add phone number")}}`,
                'x-component': 'ArrayItems.Addition',
              },
            },
          },
          content: {
            type: 'string',
            required: true,
            title: `{{t("Content")}}`,
            'x-decorator': 'FormItem',
            'x-component': 'Variable.RawTextArea',
            'x-component-props': {
              scope: variableOptions,
              placeholder: 'Hi,',
              autoSize: {
                minRows: 10,
              },
            },
          },
        },
      }}
    />
  );
};

export default MessageConfigForm
Регистрация клиентских компонентов
После разработки форм конфигурации зарегистрируйте их в ядре менеджера уведомлений. Предположим, название платформы — Example. Отредактируйте src/client/index.tsx следующим образом:
import { Plugin } from '@nocobase/client';
import PluginNotificationManagerClient from '@nocobase/plugin-notification-manager/client';
import { tval } from '@nocobase/utils/client';
import ChannelConfigForm from './ChannelConfigForm';
import MessageConfigForm from './MessageConfigForm';

class PluginNotificationExampleClient extends Plugin {
  async afterAdd() {}

  async beforeLoad() {}

  async load() {
    const notification = this.pm.get(PluginNotificationManagerClient);
    notification.registerChannelType({
      title: tval('Example SMS', { ns: '@nocobase/plugin-notification-example' }),
      type: 'example-sms',
      components: {
        ChannelConfigForm,
        MessageConfigForm,
      },
    });
  }
}

export default PluginNotificationExampleClient;
На этом разработка клиентской части завершена.
Разработка сервера
Основа серверной разработки — расширить абстрактный класс BaseNotificationChannel и реализовать метод send. Метод send содержит бизнес-логику отправки уведомлений расширением. Поскольку это пример, мы просто выведем полученные аргументы в консоль. В директории src/server добавьте файл example-server.ts:
import { BaseNotificationChannel } from '@nocobase/plugin-notification-manager';

export class ExampleServer extends BaseNotificationChannel {
  async send(args): Promise<any> {
    console.log('ExampleServer send', args);
    return { status: 'success', message: args.message };
  }
}
Затем зарегистрируйте серверный плагин расширения, отредактировав src/server/plugin.ts:
import PluginNotificationManagerServer from '@nocobase/plugin-notification-manager';
import { Plugin } from '@nocobase/server';
import { ExampleServer } from './example-server';
export class PluginNotificationExampleServer extends Plugin {
  async load() {
    const notificationServer = this.pm.get(
      PluginNotificationManagerServer,
    ) as PluginNotificationManagerServer;
    notificationServer.registerChannelType({
      type: 'example-sms',
      Channel: ExampleServer,
    });
  }
}

export default PluginNotificationExampleServer;
Регистрация и запуск плагина
- Выполните команду регистрации:
yarn pm add @nocobase/plugin-notification-example
- Выполните команду включения:
yarn pm enable @nocobase/plugin-notification-example
Настройка канала
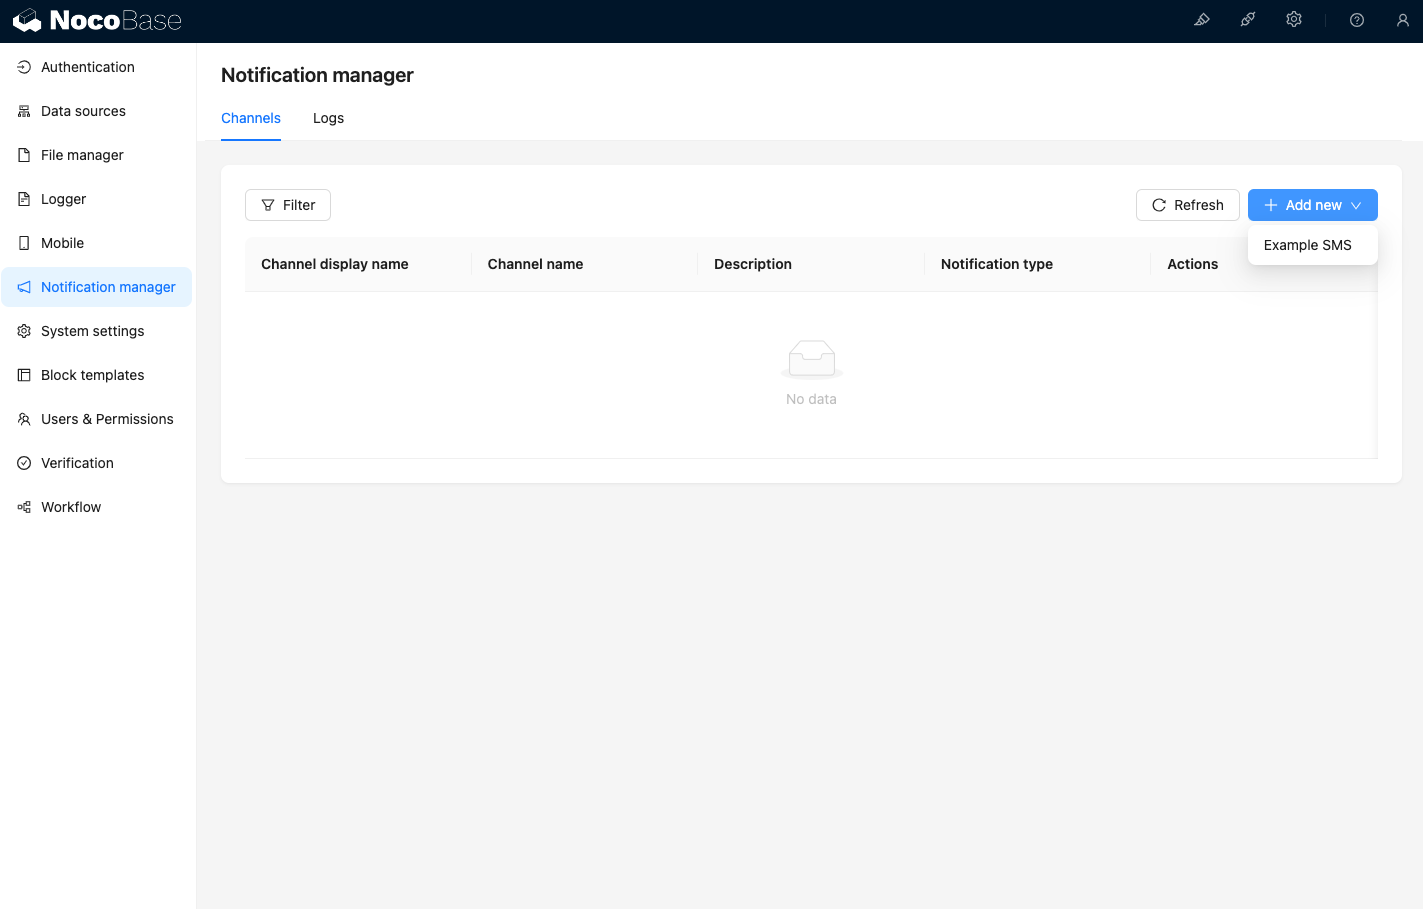
После перехода на страницу каналов менеджера уведомлений вы увидите, что канал Example SMS включён.
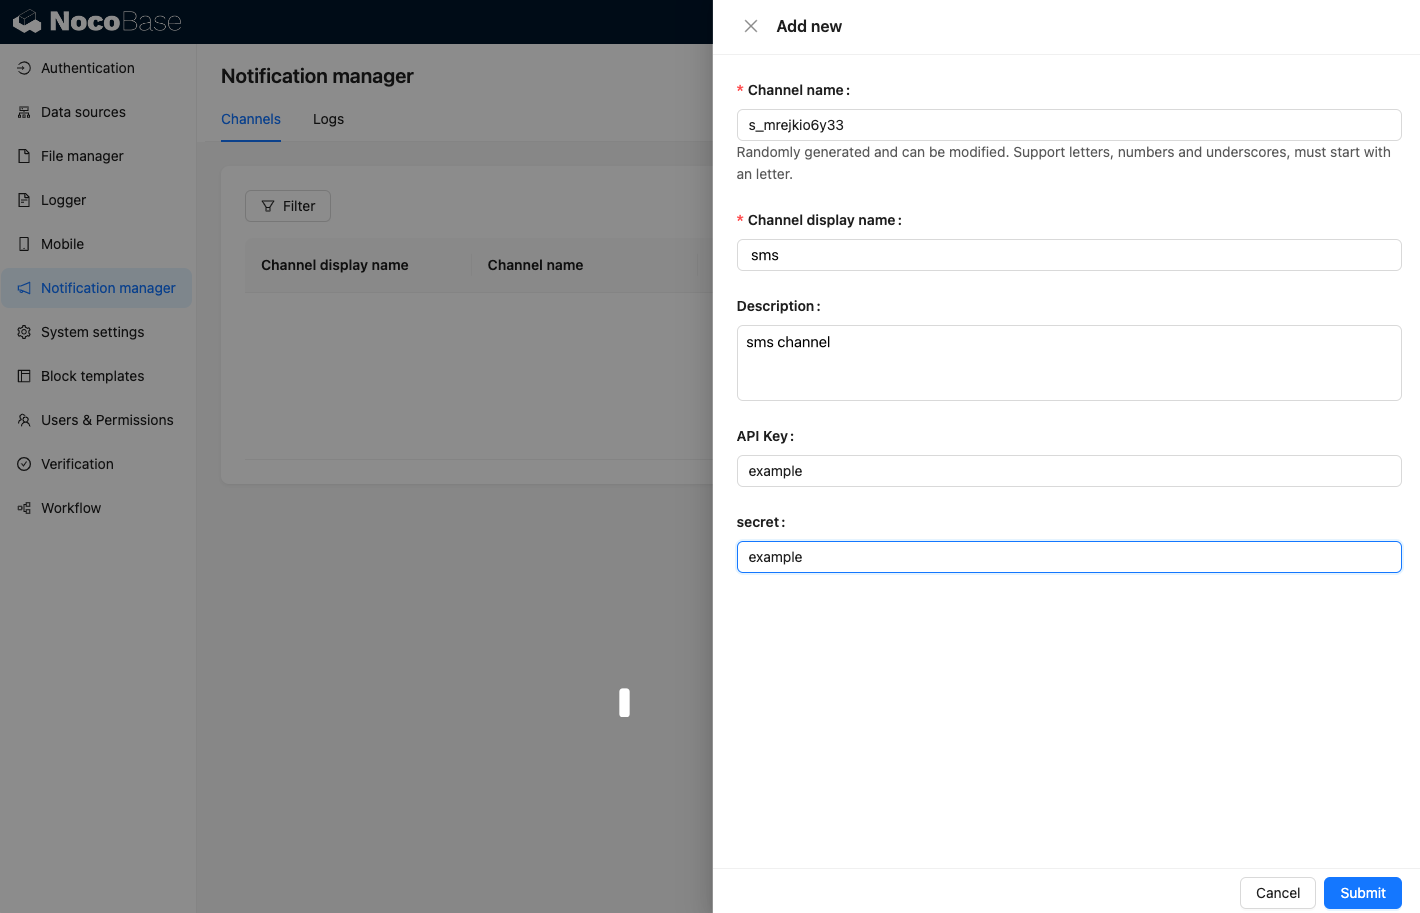
Добавьте пример канала.
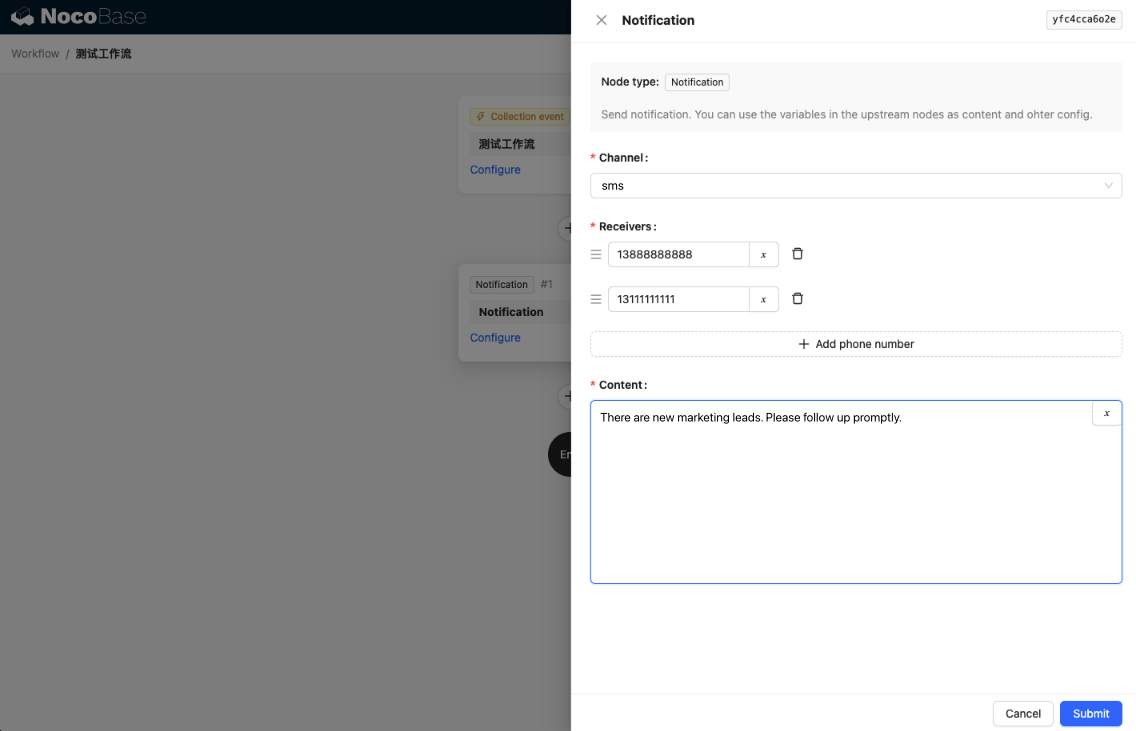
Создайте новый рабочий процесс и настройте узел уведомления.
Запустите рабочий процесс, чтобы увидеть следующий вывод в консоли.