

Quick Start: Building an Orchestratable Button Component
In React, we usually render a button component like this:
Although the code above is simple, it's a static component and cannot meet the needs of a no-code platform for configurability and orchestration capabilities.
In NocoBase's FlowEngine, we can quickly build components that support configuration and are event-driven using FlowModel + FlowDefinition, achieving more powerful no-code capabilities.
Step 1: Render the Component Using FlowModel
🧠 Key Concepts
FlowModelis the core component model in FlowEngine, encapsulating component logic, rendering, and configuration capabilities.- Every UI component can be instantiated and managed uniformly through
FlowModel.
📌 Implementation Steps
1. Create a custom model class
2. Create a model instance
3. Render using <FlowModelRenderer />
Step 2: Add PropsFlow to Make Button Properties Configurable
💡 Why Use PropsFlow?
Using Flow instead of static props allows for:
- Dynamic configuration
- Visual editing
- State replay and persistence
🛠 Key Modifications
1. Define the Flow for button properties
2. Use stepParams instead of static props
✅ Using
stepParamsis the recommended approach in FlowEngine, as it avoids issues with non-serializable data (like React components).
3. Enable the property configuration interface
Step 3: Support Button Event Flow (EventFlow)
🎯 Scenario: Show a confirmation dialog after clicking the button
1. Listen for the onClick event
Add onClick in a non-intrusive way
2. Define the event flow
Additional Notes:
- EventFlow allows the button's behavior to be flexibly configured through a flow, such as showing dialogs, messages, making API calls, etc.
- You can register different event flows for different events (like
onClick,onMouseEnter, etc.) to meet complex business requirements.
3. Configure event flow parameters
When creating the model, you can configure the default parameters for the event flow via stepParams:
Model Comparison: ReactComponent vs FlowModel
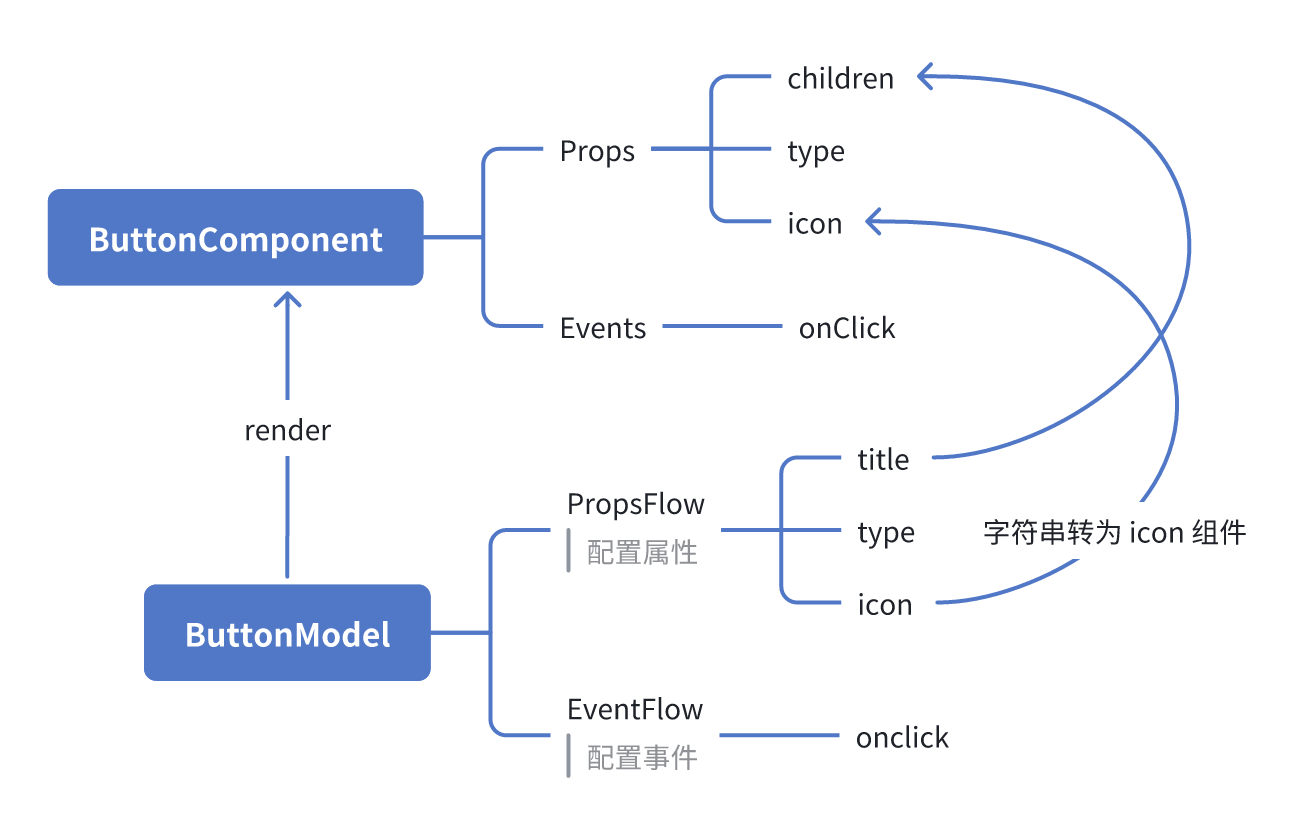
Flow does not change how components are implemented. It simply adds support for PropsFlow and EventFlow to a ReactComponent, allowing the component's properties and events to be configured and orchestrated visually.
ReactComponent
FlowModel
Summary
Through the three steps above, we have completed a button component that supports configuration and event orchestration, with the following advantages:
- 🚀 Visually configure properties (like title, type, icon)
- 🔄 Event responses can be managed by a flow (e.g., click to show a dialog)
- 🔧 Supports future extensions (like conditional logic, variable binding, etc.)
This pattern is also applicable to any UI component, such as forms, lists, and charts. In NocoBase's FlowEngine, everything is orchestratable.