

CRM Sales Pipeline Visualization
1. Introduction
1.1 Preface
This chapter is the second part of the How to Implement CRM Lead Conversion in NocoBase tutorial series. In the previous chapter, we covered the fundamentals of lead conversion, including creating the necessary collections, configuring data management pages, and implementing the conversion of leads to companies, contacts, and opportunities. This chapter will focus on implementing the lead follow-up process and status management.
🎉 NocoBase CRM Solution is Now Live — Ready for You to Explore
1.2 Chapter Objective
In this chapter, we will learn how to implement CRM lead conversion in NocoBase. Through lead follow-up and status management, you can boost operational efficiency and achieve more refined sales process control.
1.3 Preview of the Final Outcome
In the previous chapter, we explained how to associate data between leads and the Company, Contact, and Opportunity collections. Now, we focus on the Lead module, primarily discussing how to perform lead follow-up and status management. Please watch the following demo:
![]()
2. Structure of the Lead Collection
2.1 Introduction to the Lead Collection
In the lead follow-up functionality, the "status" field plays a crucial role. It not only reflects the current progress of the lead (e.g., Unqualified, New, Working, Nurturing, In Transaction, Completed) but also drives the dynamic display and changes of the form. The following table block shows the field structure of the Lead collection along with its detailed description:
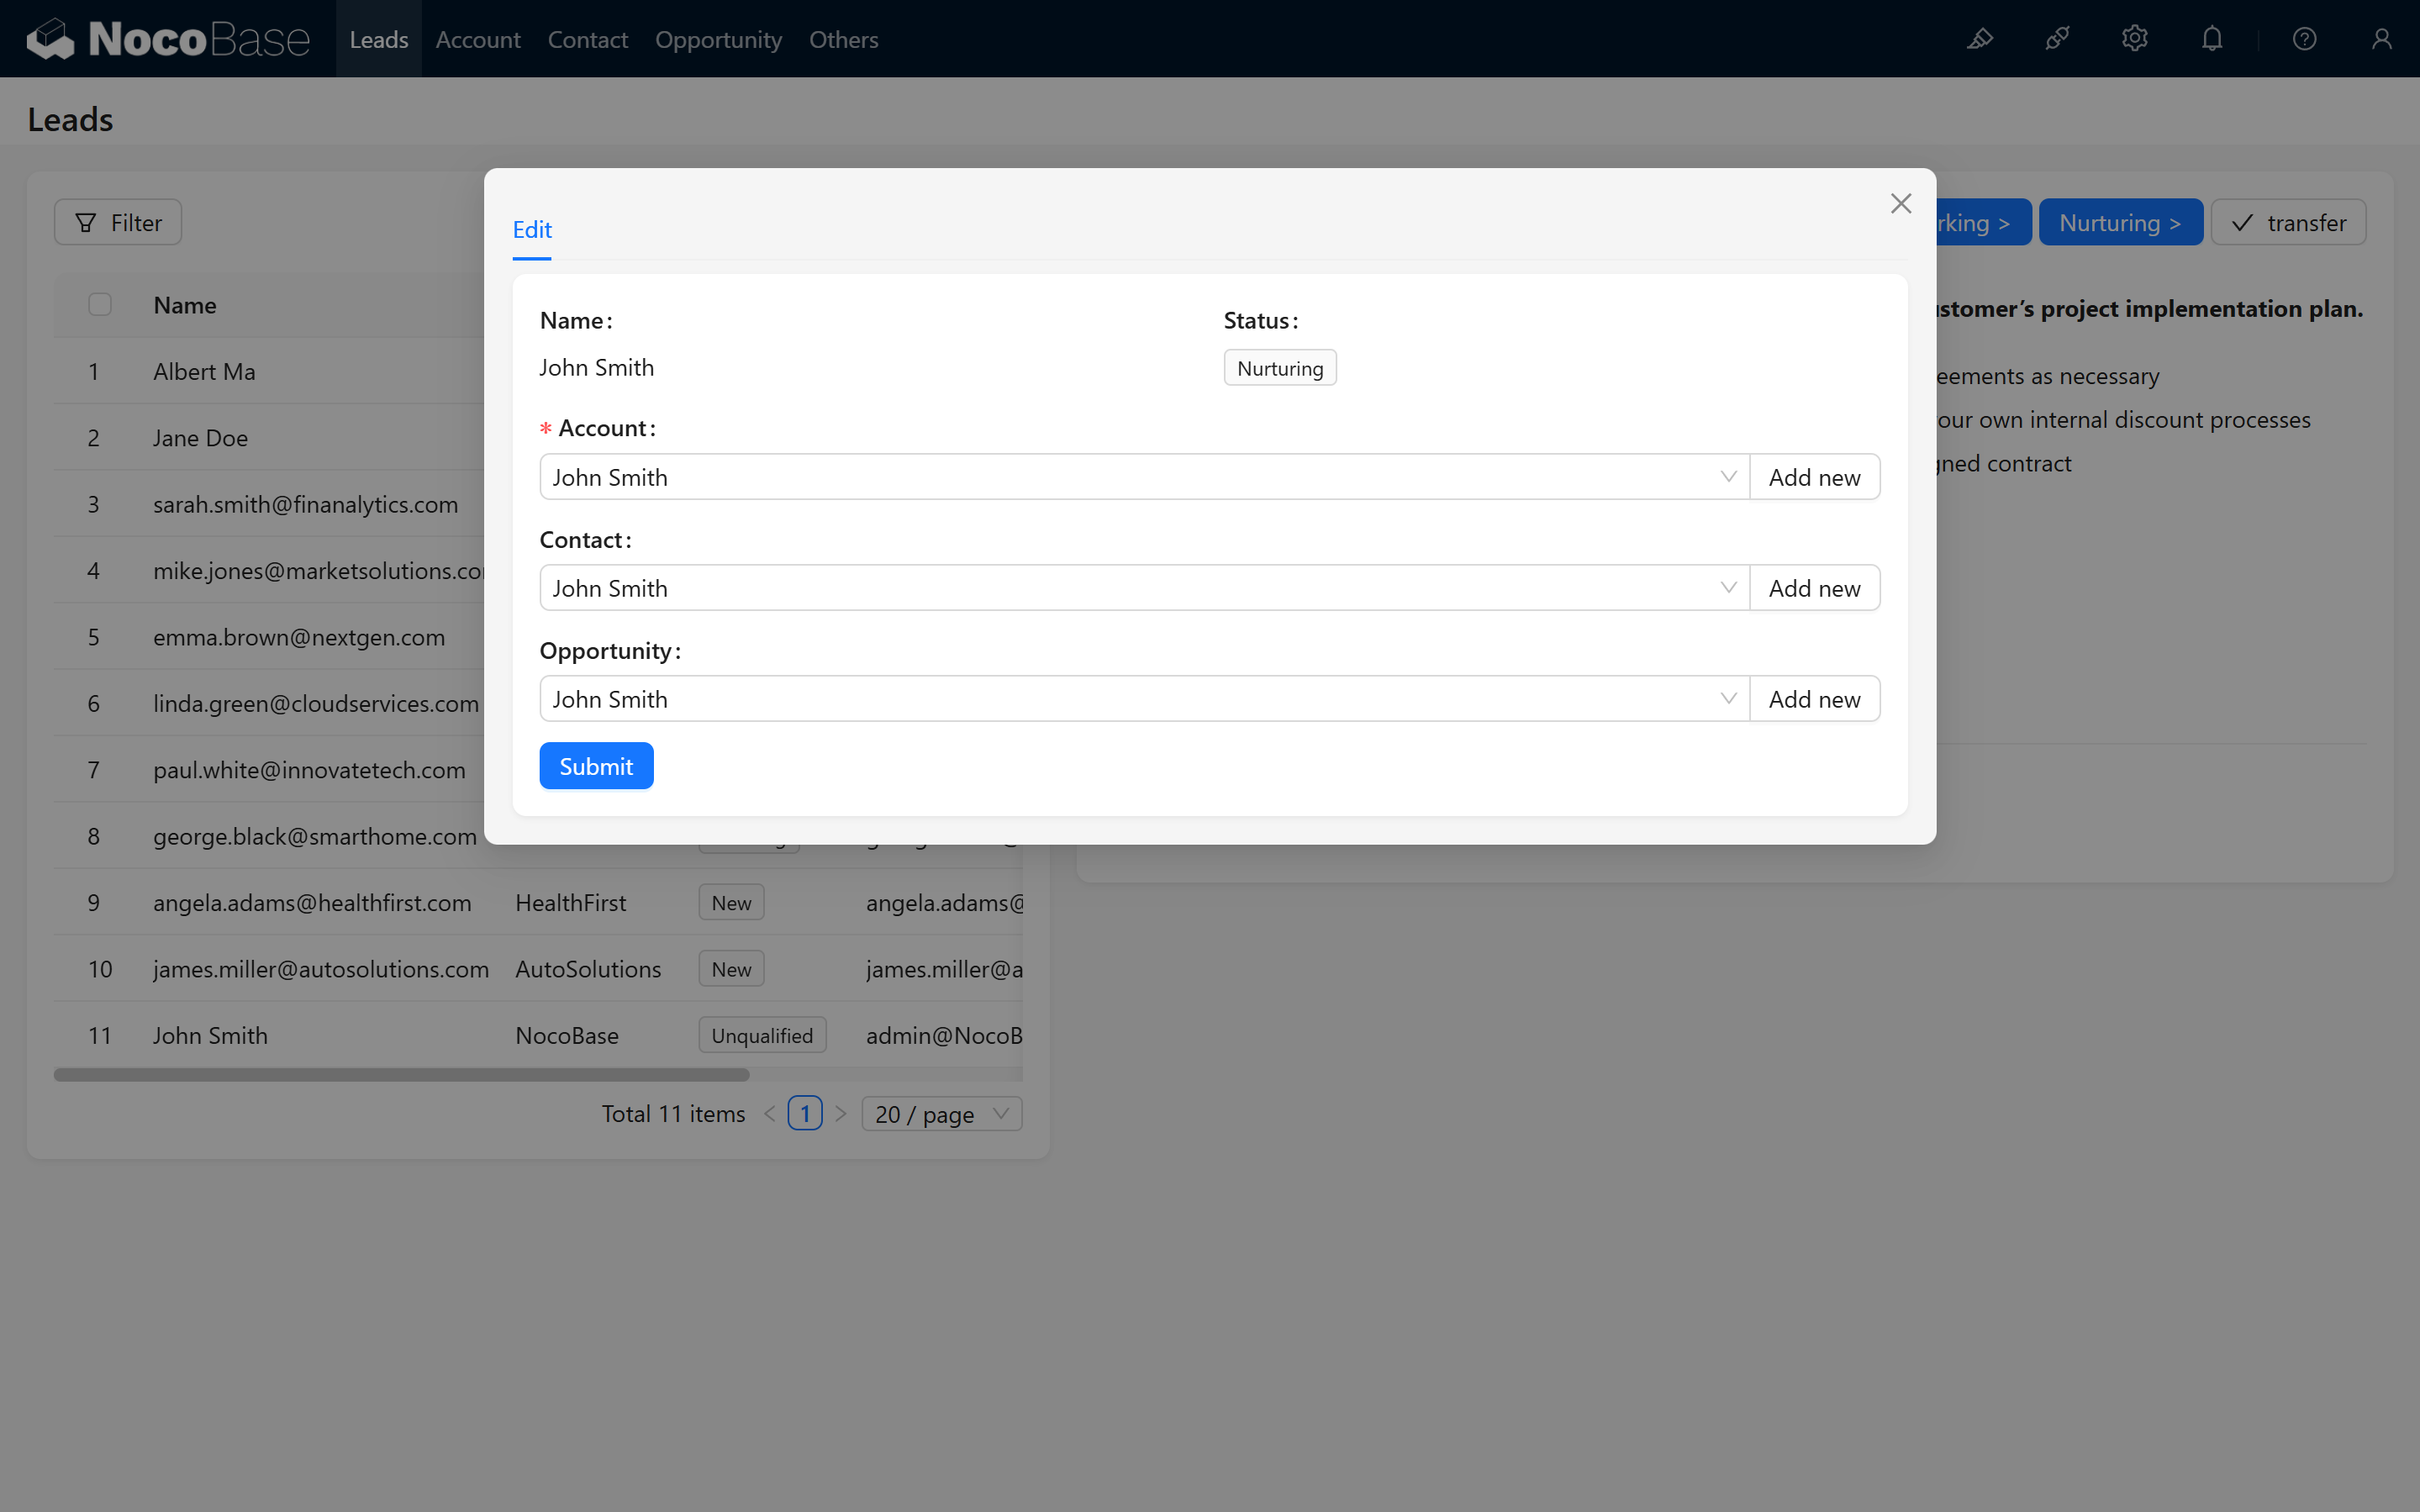
3. Creating the Leads Table Block and Detail Block
3.1 Instructions for Creation
First, we need to create a "Leads" table block to display the necessary fields. At the same time, configure a detail block on the right side of the page so that when you click on a record, the corresponding details are automatically displayed. Please refer to the demo below:

4. Configuring Action Buttons
4.1 Overall Description of the Buttons
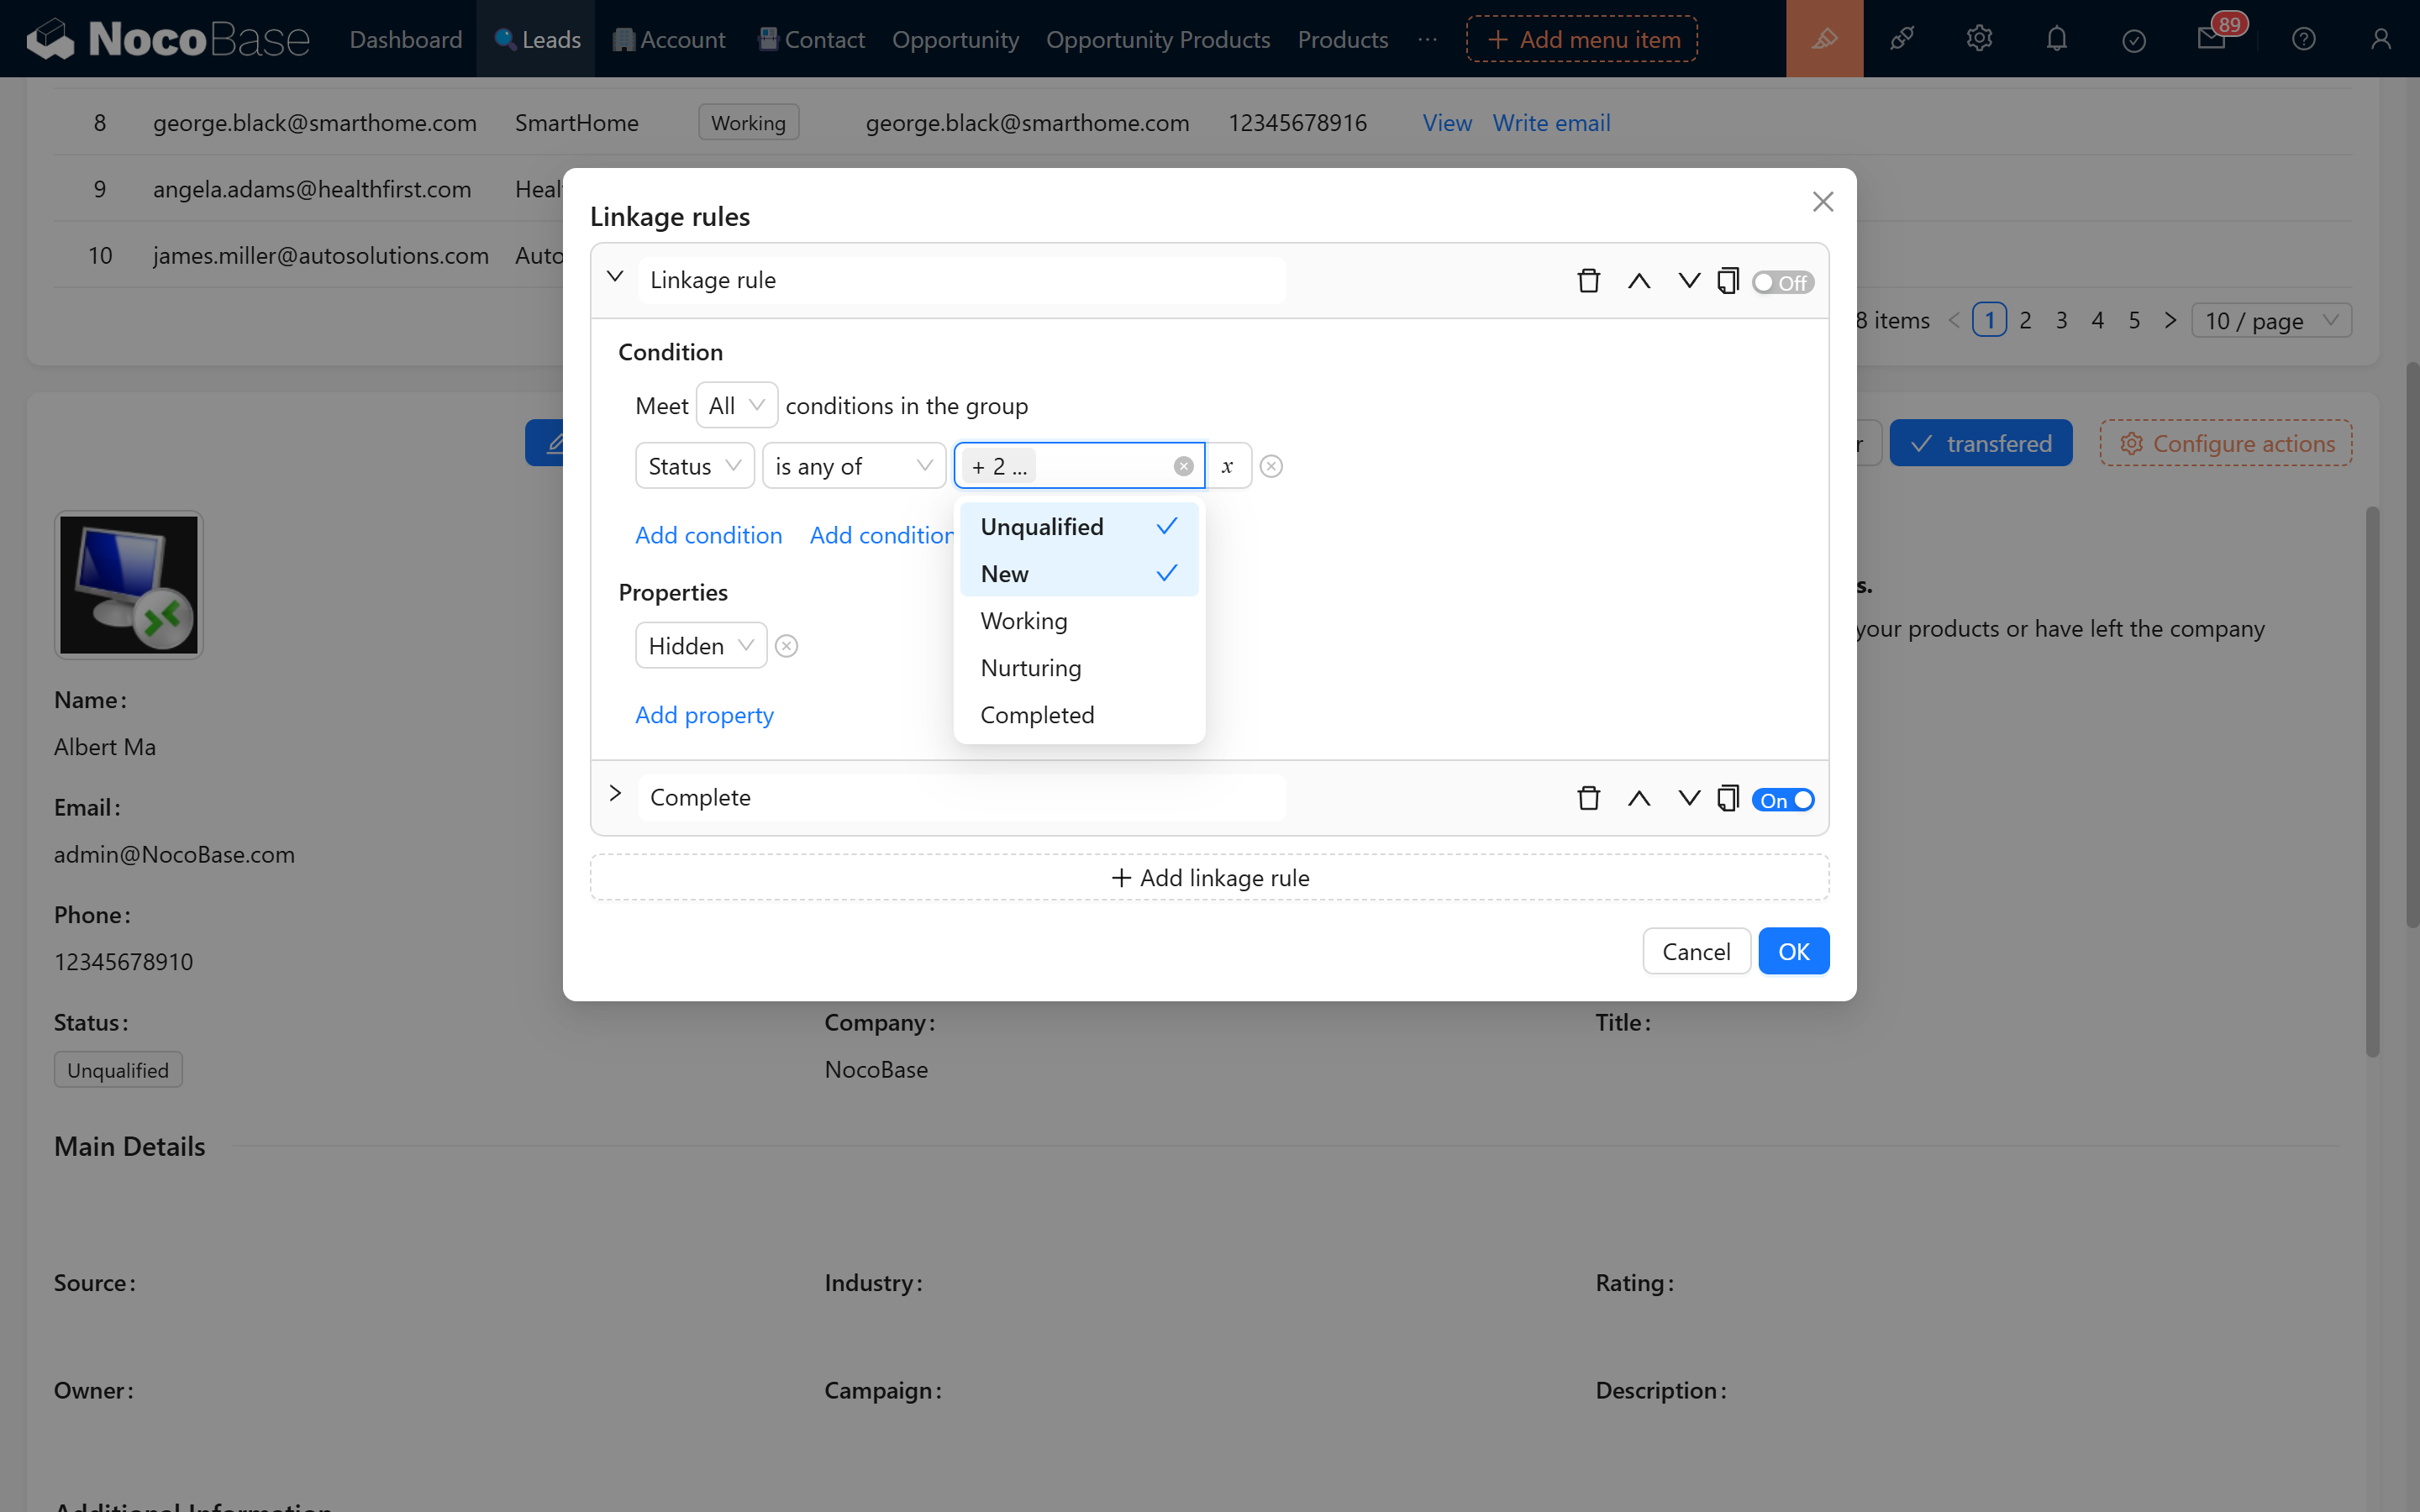
To meet various operational needs, we need to create a total of 10 buttons. Each button will display differently (hidden, active, or disabled) based on the record's status, guiding the user through the correct business process.

4.2 Detailed Configuration for Each Function Button
- Linkage Rule Example:
Working Button (Inactive)
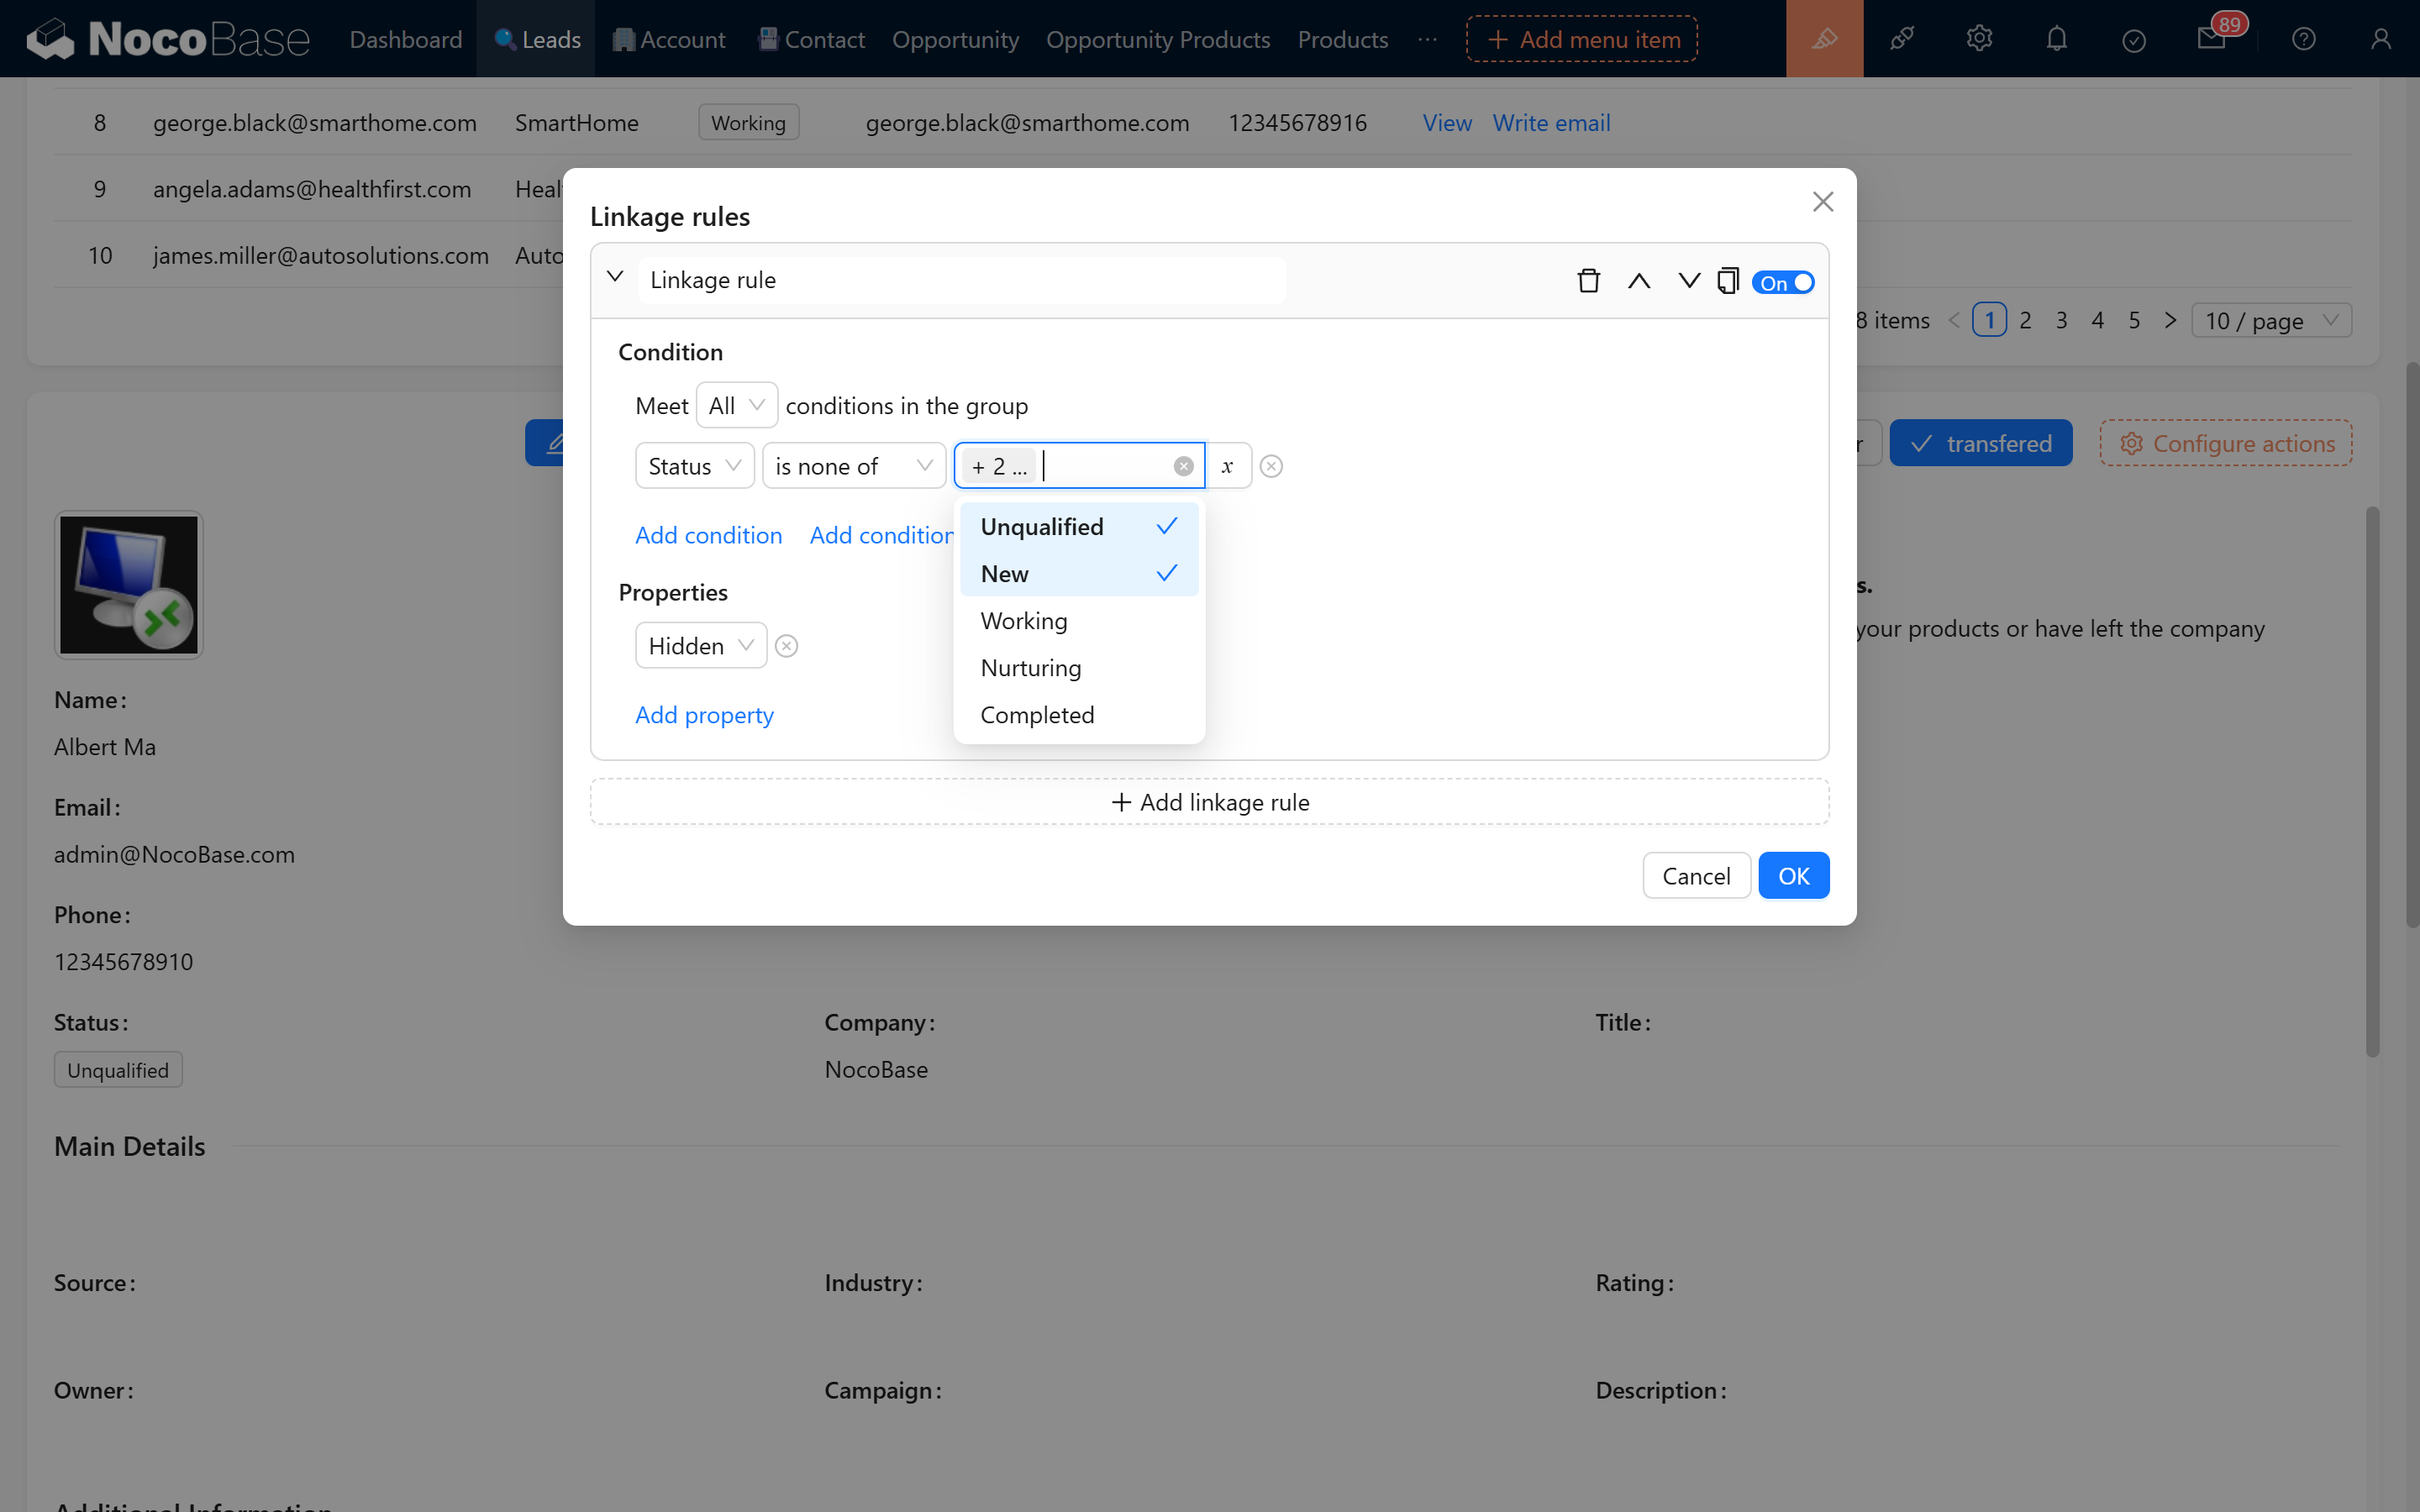 Working Button (Active)
- Transfer Form:
Transfer Button (Inactive)
 Transfer Button (Active)
- Prompt shown during transfer submission:

4.3 Summary of Button Configurations
- Each function provides different button styles for inactive and active states.
- Linkage rules dynamically control the display (hidden or disabled) of the buttons based on the record's status, guiding sales personnel to follow the correct workflow.
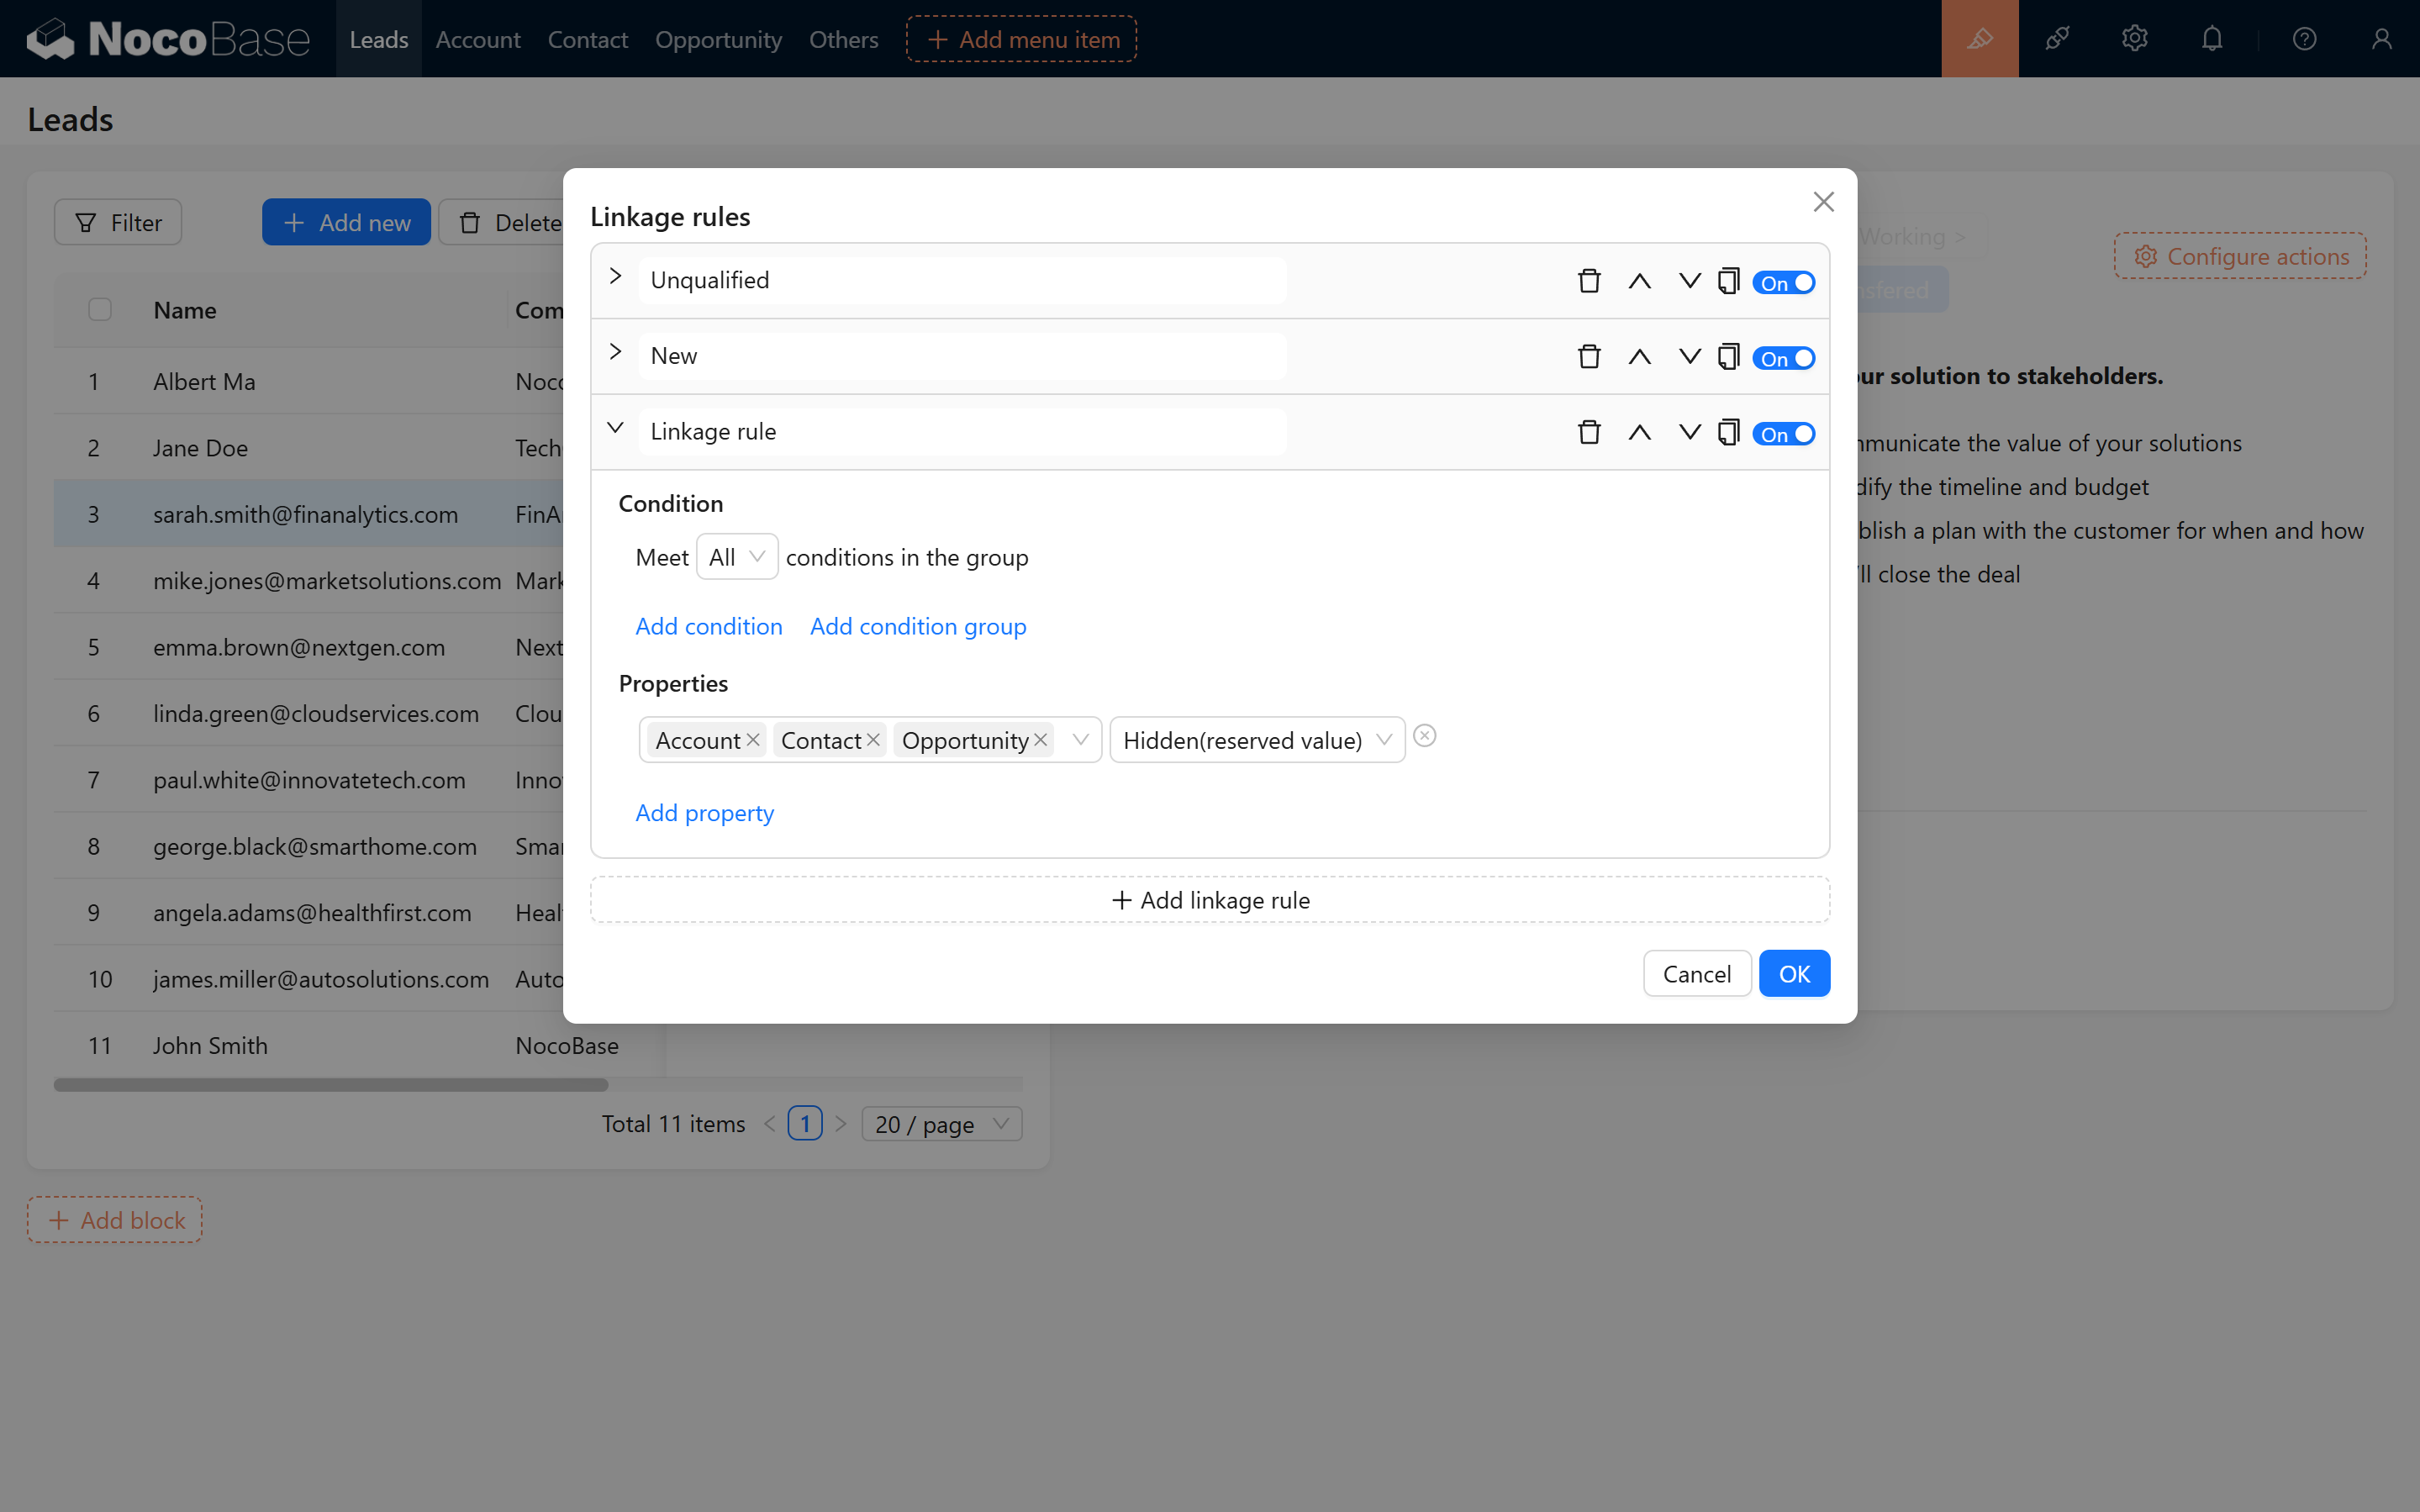
5. Form Linkage Rule Settings
5.1 Rule 1: Display Only the Name
- When the record is not confirmed or the status is empty, only the name is displayed.


5.2 Rule 2: Optimized Display Under "New" Status
- When the status is "New", the company name is hidden and the contact information is displayed.

6. Page Markdown Rules and Handlebars Syntax
6.1 Dynamic Text Display
In the page, we use Handlebars syntax to dynamically display different prompt messages based on the record's status. Below are example codes for each status:
When the status is "Unqualified":
When the status is "New":
When the status is "Working":
When the status is "Nurturing":
When the status is "Completed":
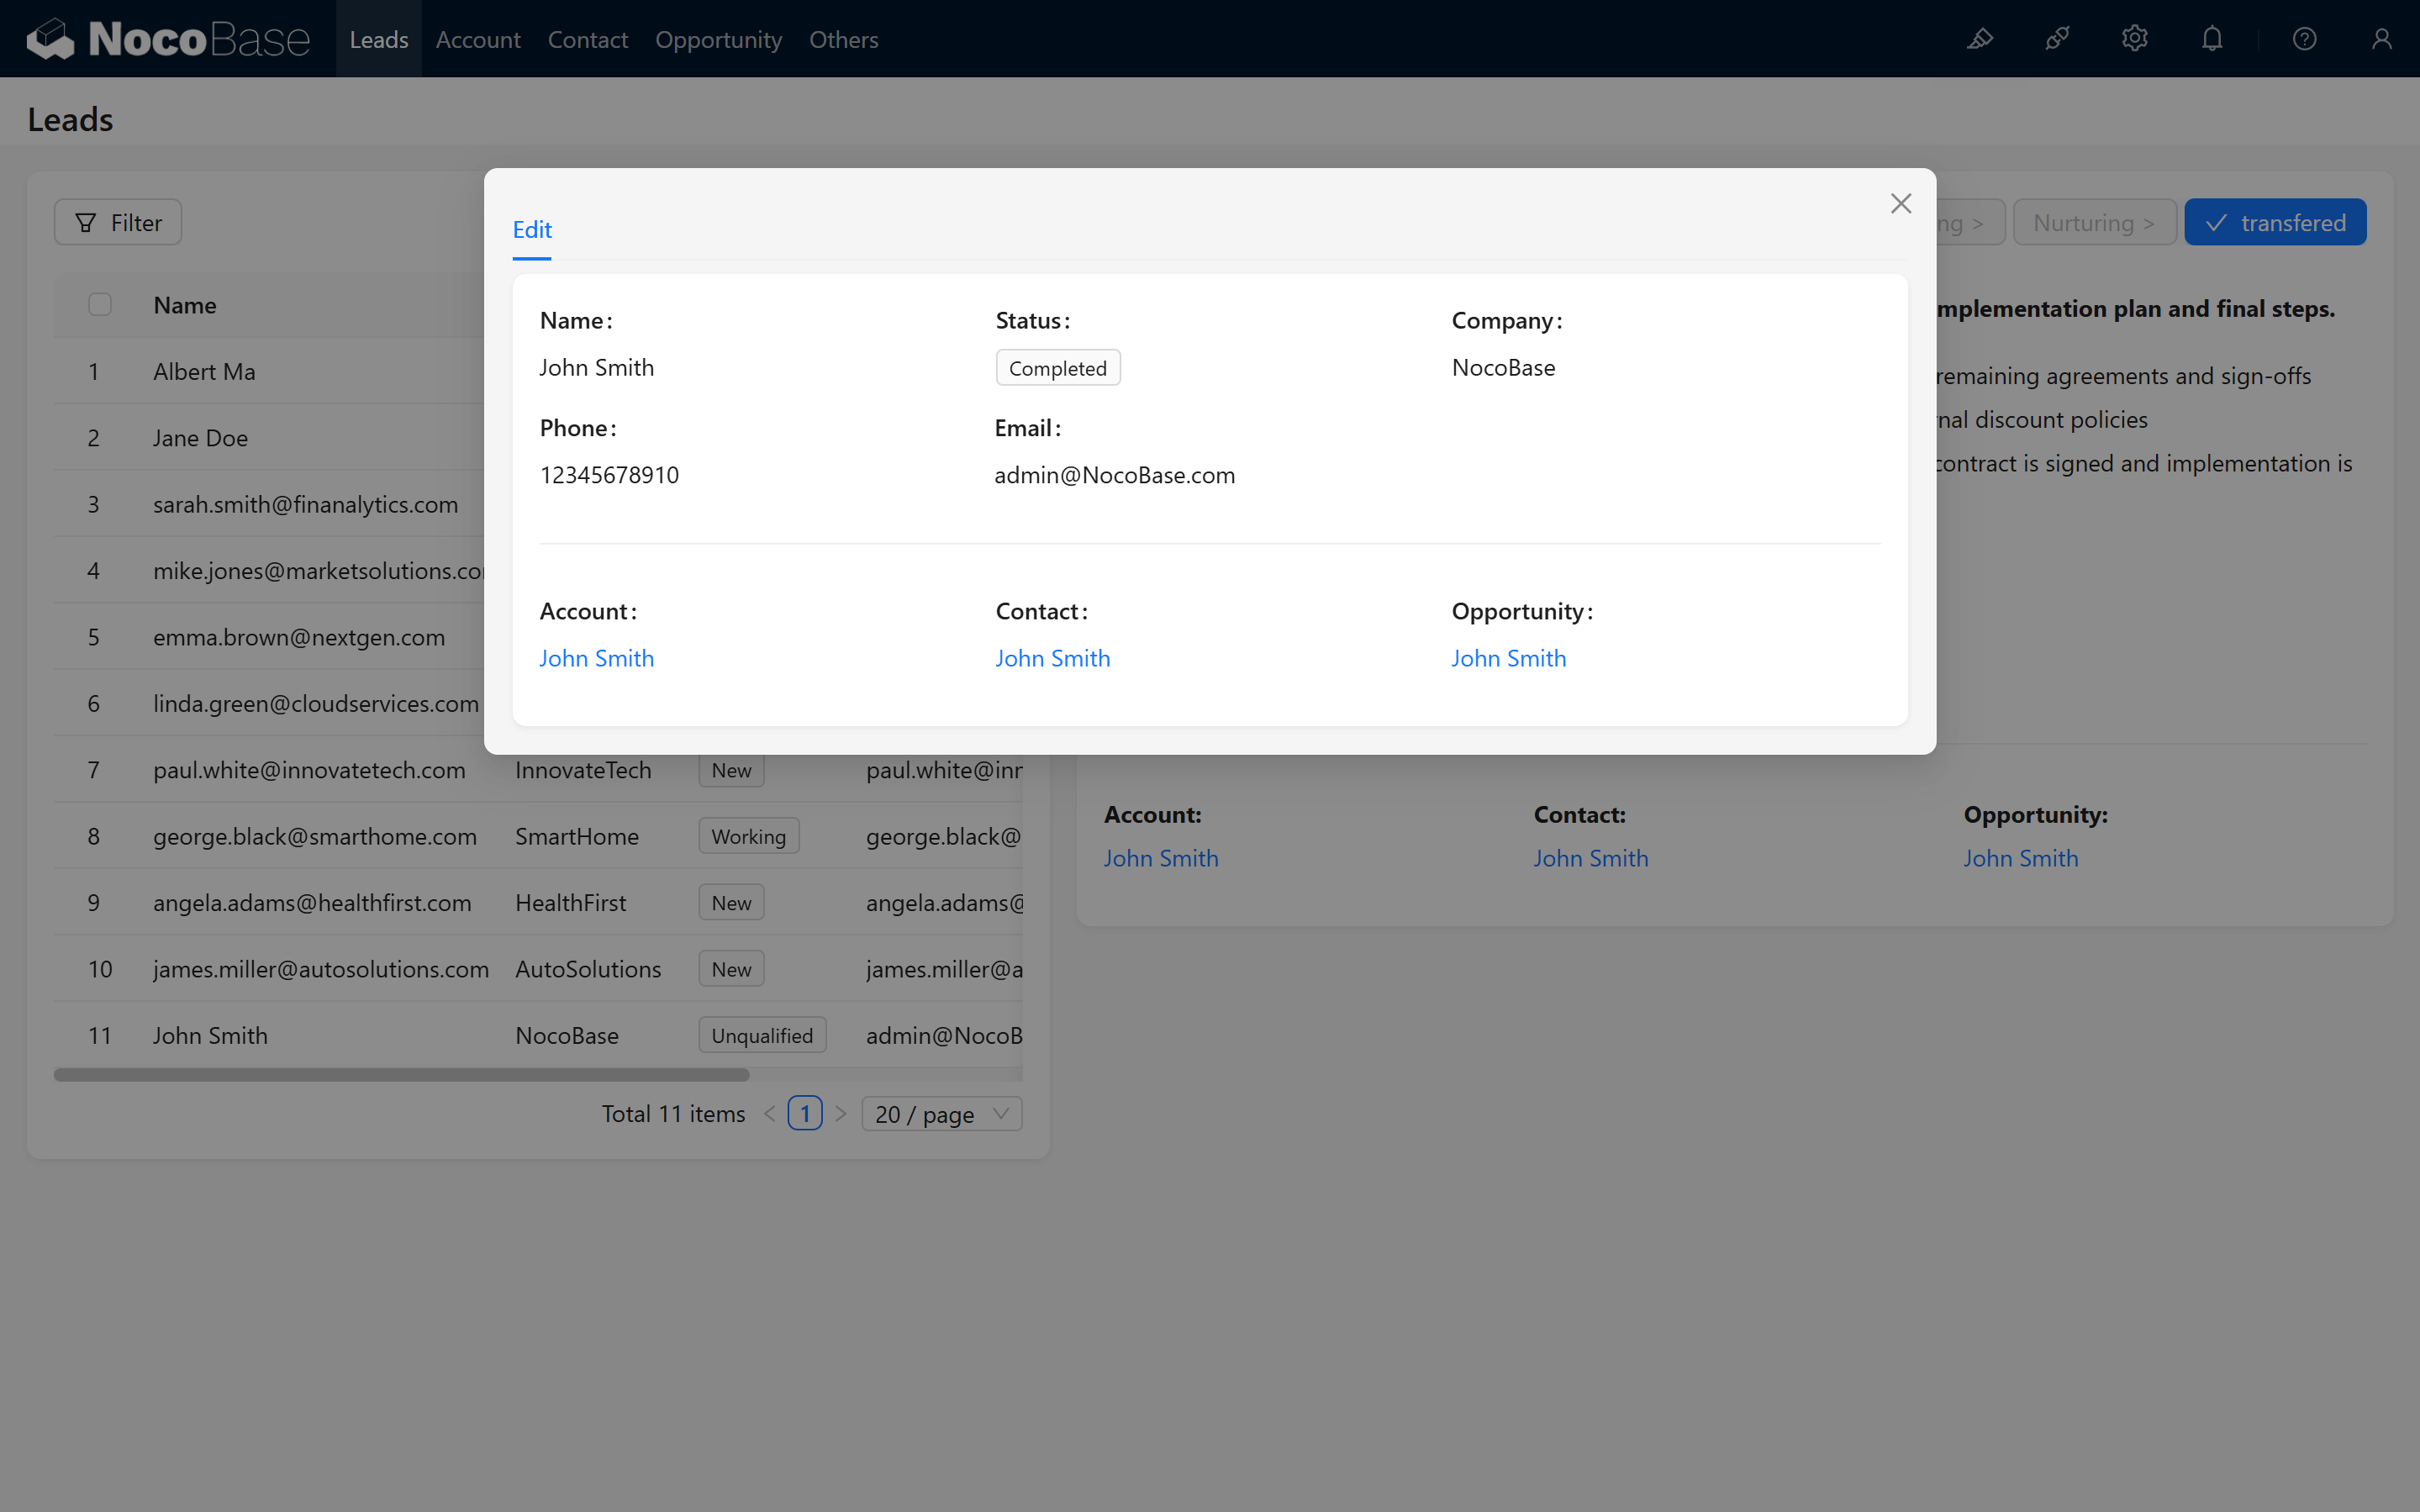
7. Displaying Associated Objects and Jump Links After Conversion
7.1 Description of Associated Objects
After conversion, we want to display the associated objects (Company, Contact, Opportunity) along with links to their detail pages.
You can find a detail popup, such as a company, and copy the link.
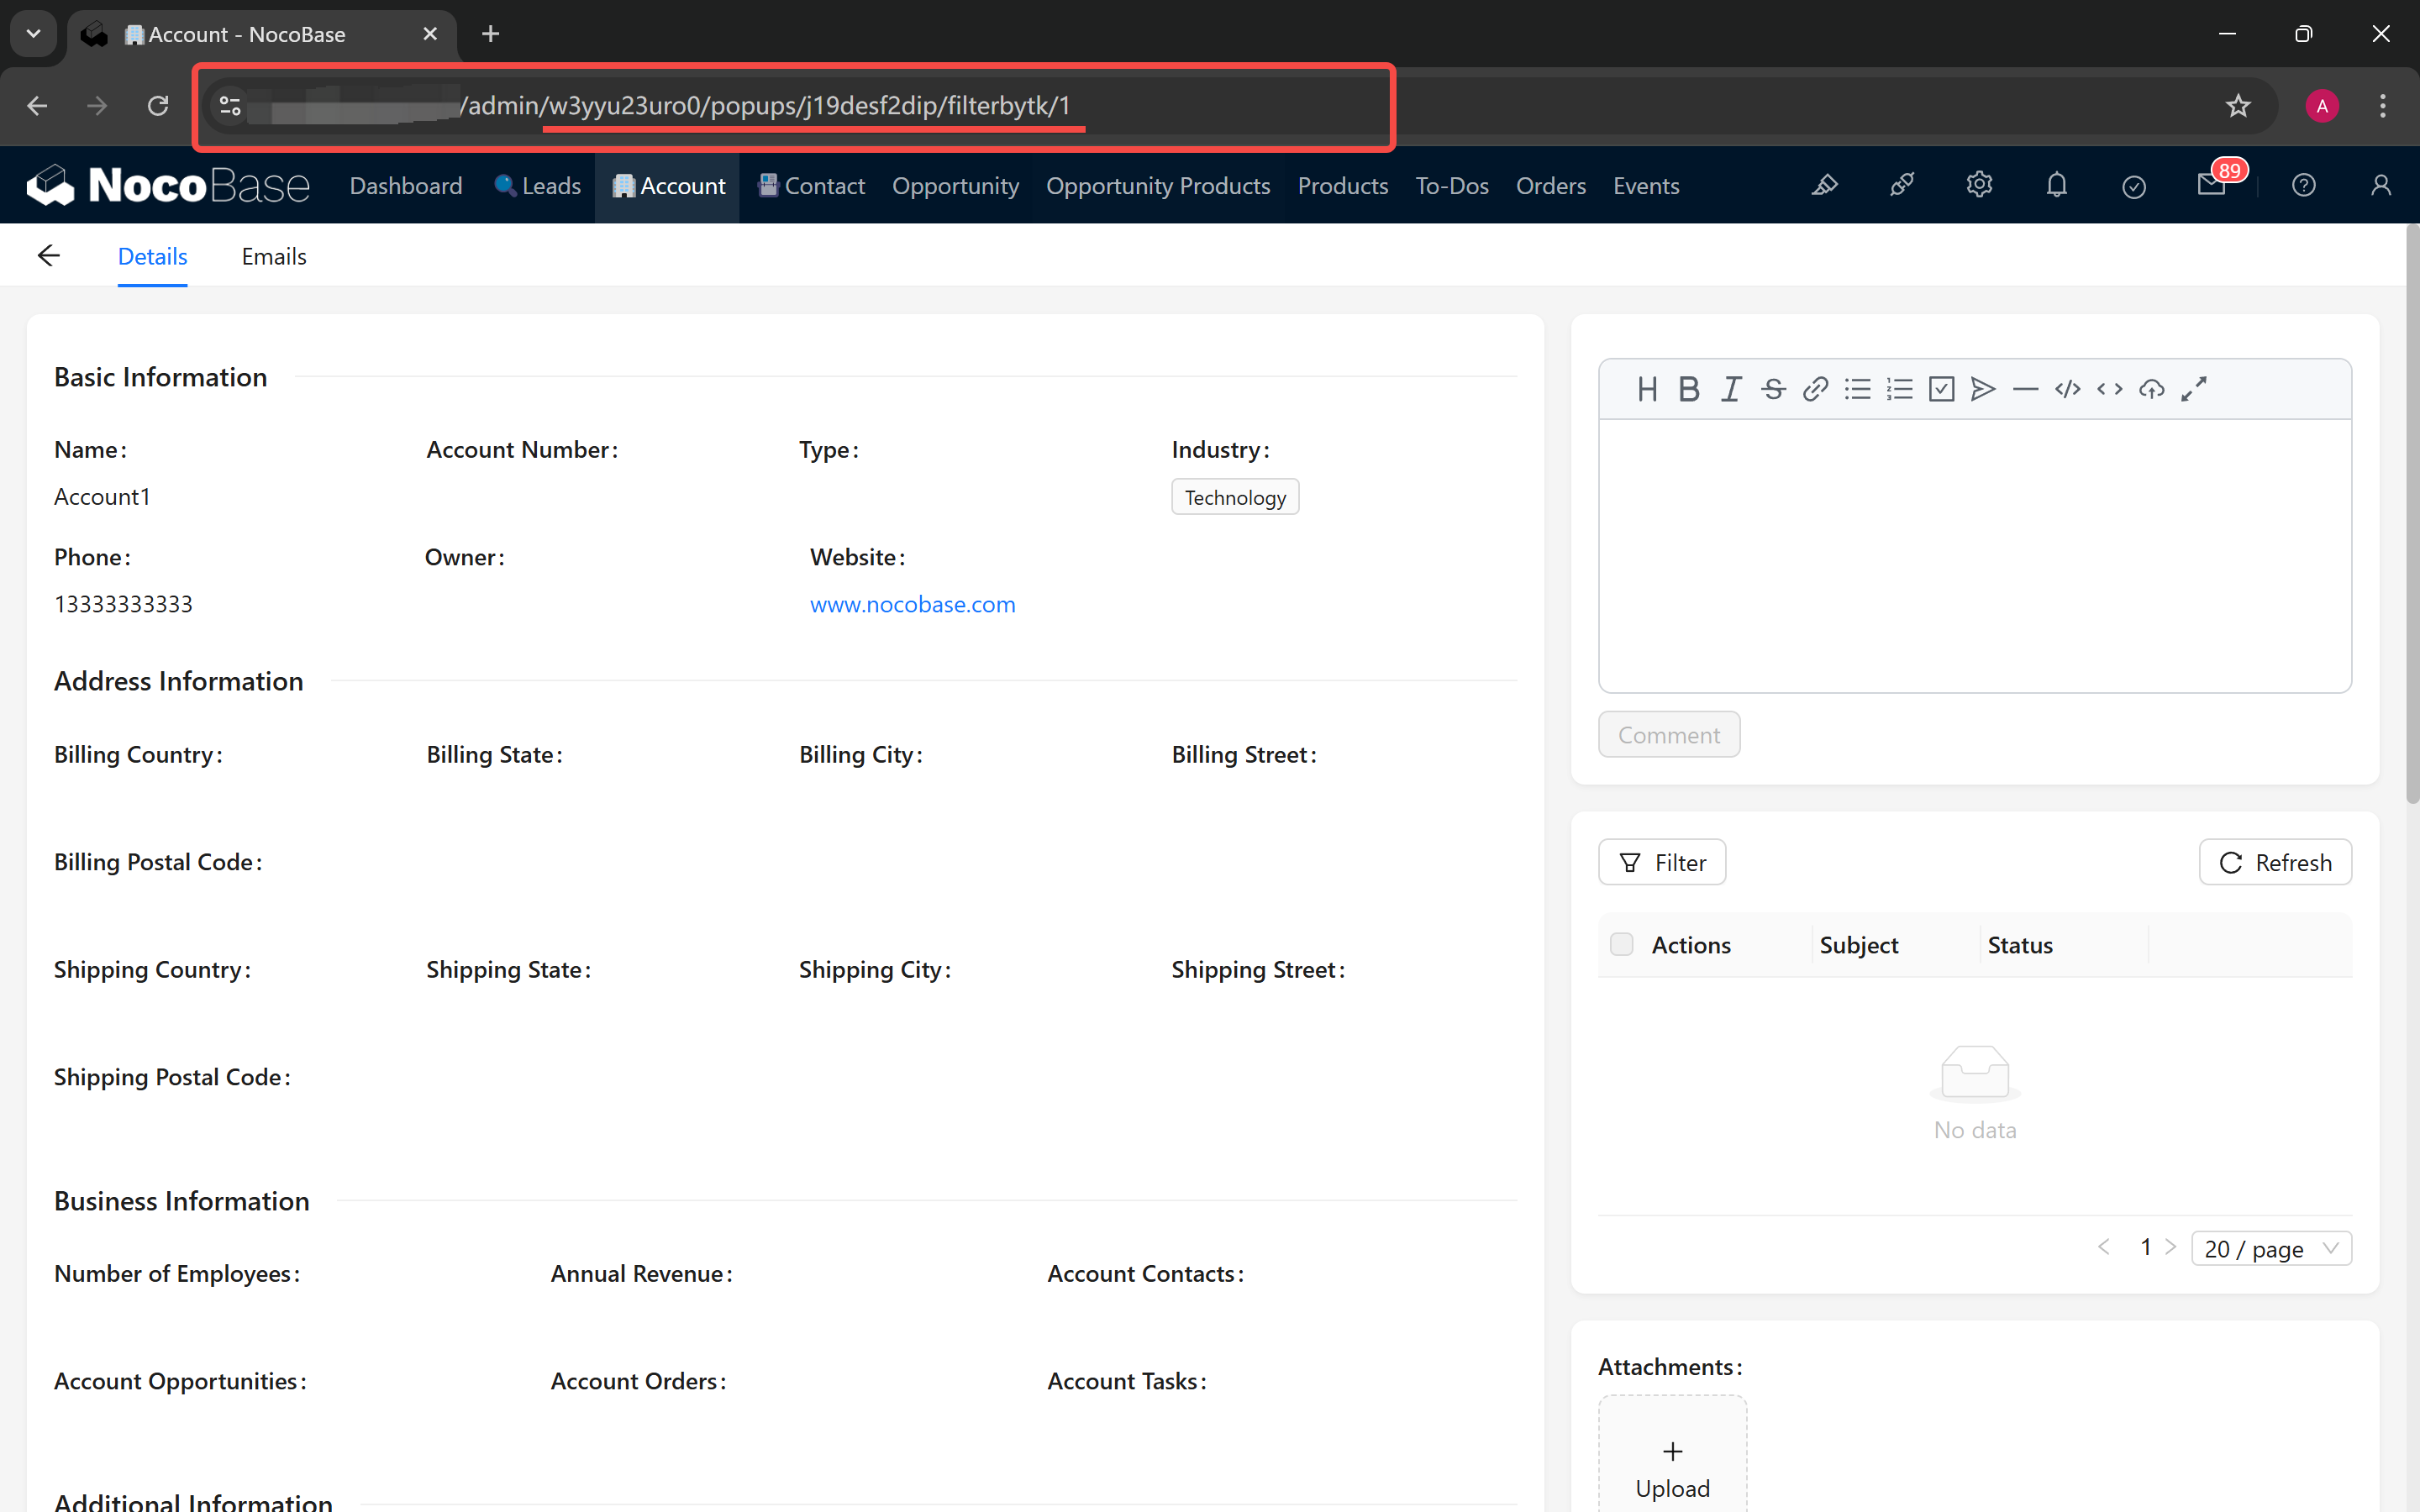 Note: In other pop-ups or pages, the last part of the detail link (after filterbytk) represents the current object's id. For example:
7.2 Generating Associated Links Using Handlebars
For Company:
For Contact:
For Opportunity:

8. Hiding Associated Objects but Retaining Their Values
To ensure that associated information is displayed properly after conversion, the statuses for "Company", "Contact", and "Opportunity" should be set to "hidden (retain value)". This way, even though these fields are not shown on the form, their values are still recorded and passed along.
9. Preventing Status Modification After Conversion
To prevent accidental changes to the status after conversion, we add a condition to all buttons: when the status is "Completed", all buttons will be disabled.

10. Conclusion
After completing all of the above steps, your lead follow-up conversion functionality is complete! Through this step-by-step guide, we hope you have gained a clearer understanding of how status-based form dynamics and linkages are implemented in NocoBase. Wishing you smooth operations and an enjoyable experience!