

Install using CLI
After NocoBase 2.1.0, the official CLI-based installation and management method is provided. You can use it to complete installation, connection, upgrade and daily maintenance, and you can also prepare a connectable and operable environment for AI Agent.
Install NocoBase CLI
Only executed when installing the CLI for the first time.
First install the CLI globally:
If you will open multiple terminals or shells at the same time, or want the AI Agent to operate in parallel with yourself, it is recommended by default to execute nb session setup first. In this way, each session can maintain its own current env and will not easily affect each other.
The CLI checks for self-updates by default. You can adjust the update strategy according to your own habits:
prompt: Prompt when a new version is foundauto: automatic updateoff: Turn off automatic updates
Self-update is only supported when the CLI is managed by a standard global npm, pnpm, or yarn install. If you are running from source or from a local project dependency tree, use nb self check to see the detected install method and update that parent project instead.
If you are going to deploy NocoBase to the server and want to open the nb init --ui wizard from a remote browser, it is recommended to first change the CLI's default host to the current server IP:
Replace <server-ip> with the actual IP of the current server that is accessible to you.
nb config is the global configuration of the CLI. Usually it only needs to be set once, and these default values will be automatically used when running nb init --ui again later, so there is no need to repeat the configuration every time.
Generally speaking:
default-ui-hostis used to generate the browser-accessible URL for thenb init --uiwizard; the wizard service itself always listens on0.0.0.0default-api-hostfor the API address generated by default on new installations
If deployed on a server, both values should usually be changed to IPs accessible to the current server, rather than continuing to use the default local address.
Set default-ui-host / default-api-host to the server IP, mainly so that you can open nb init --ui from a remote browser, or temporarily verify whether the service is accessible after the installation is completed.
This does not mean that the production environment should use IP + port to provide external services for a long time. When formally deploying, it is still recommended to use a domain name and provide unified access through a reverse proxy such as Nginx or Caddy, and then enable HTTPS.
Install NocoBase
Method 1: Install through UI wizard
This is the default recommended entry. You just need to run:
If you want to specify a fixed port for the wizard page, you can add --ui-port directly, for example:
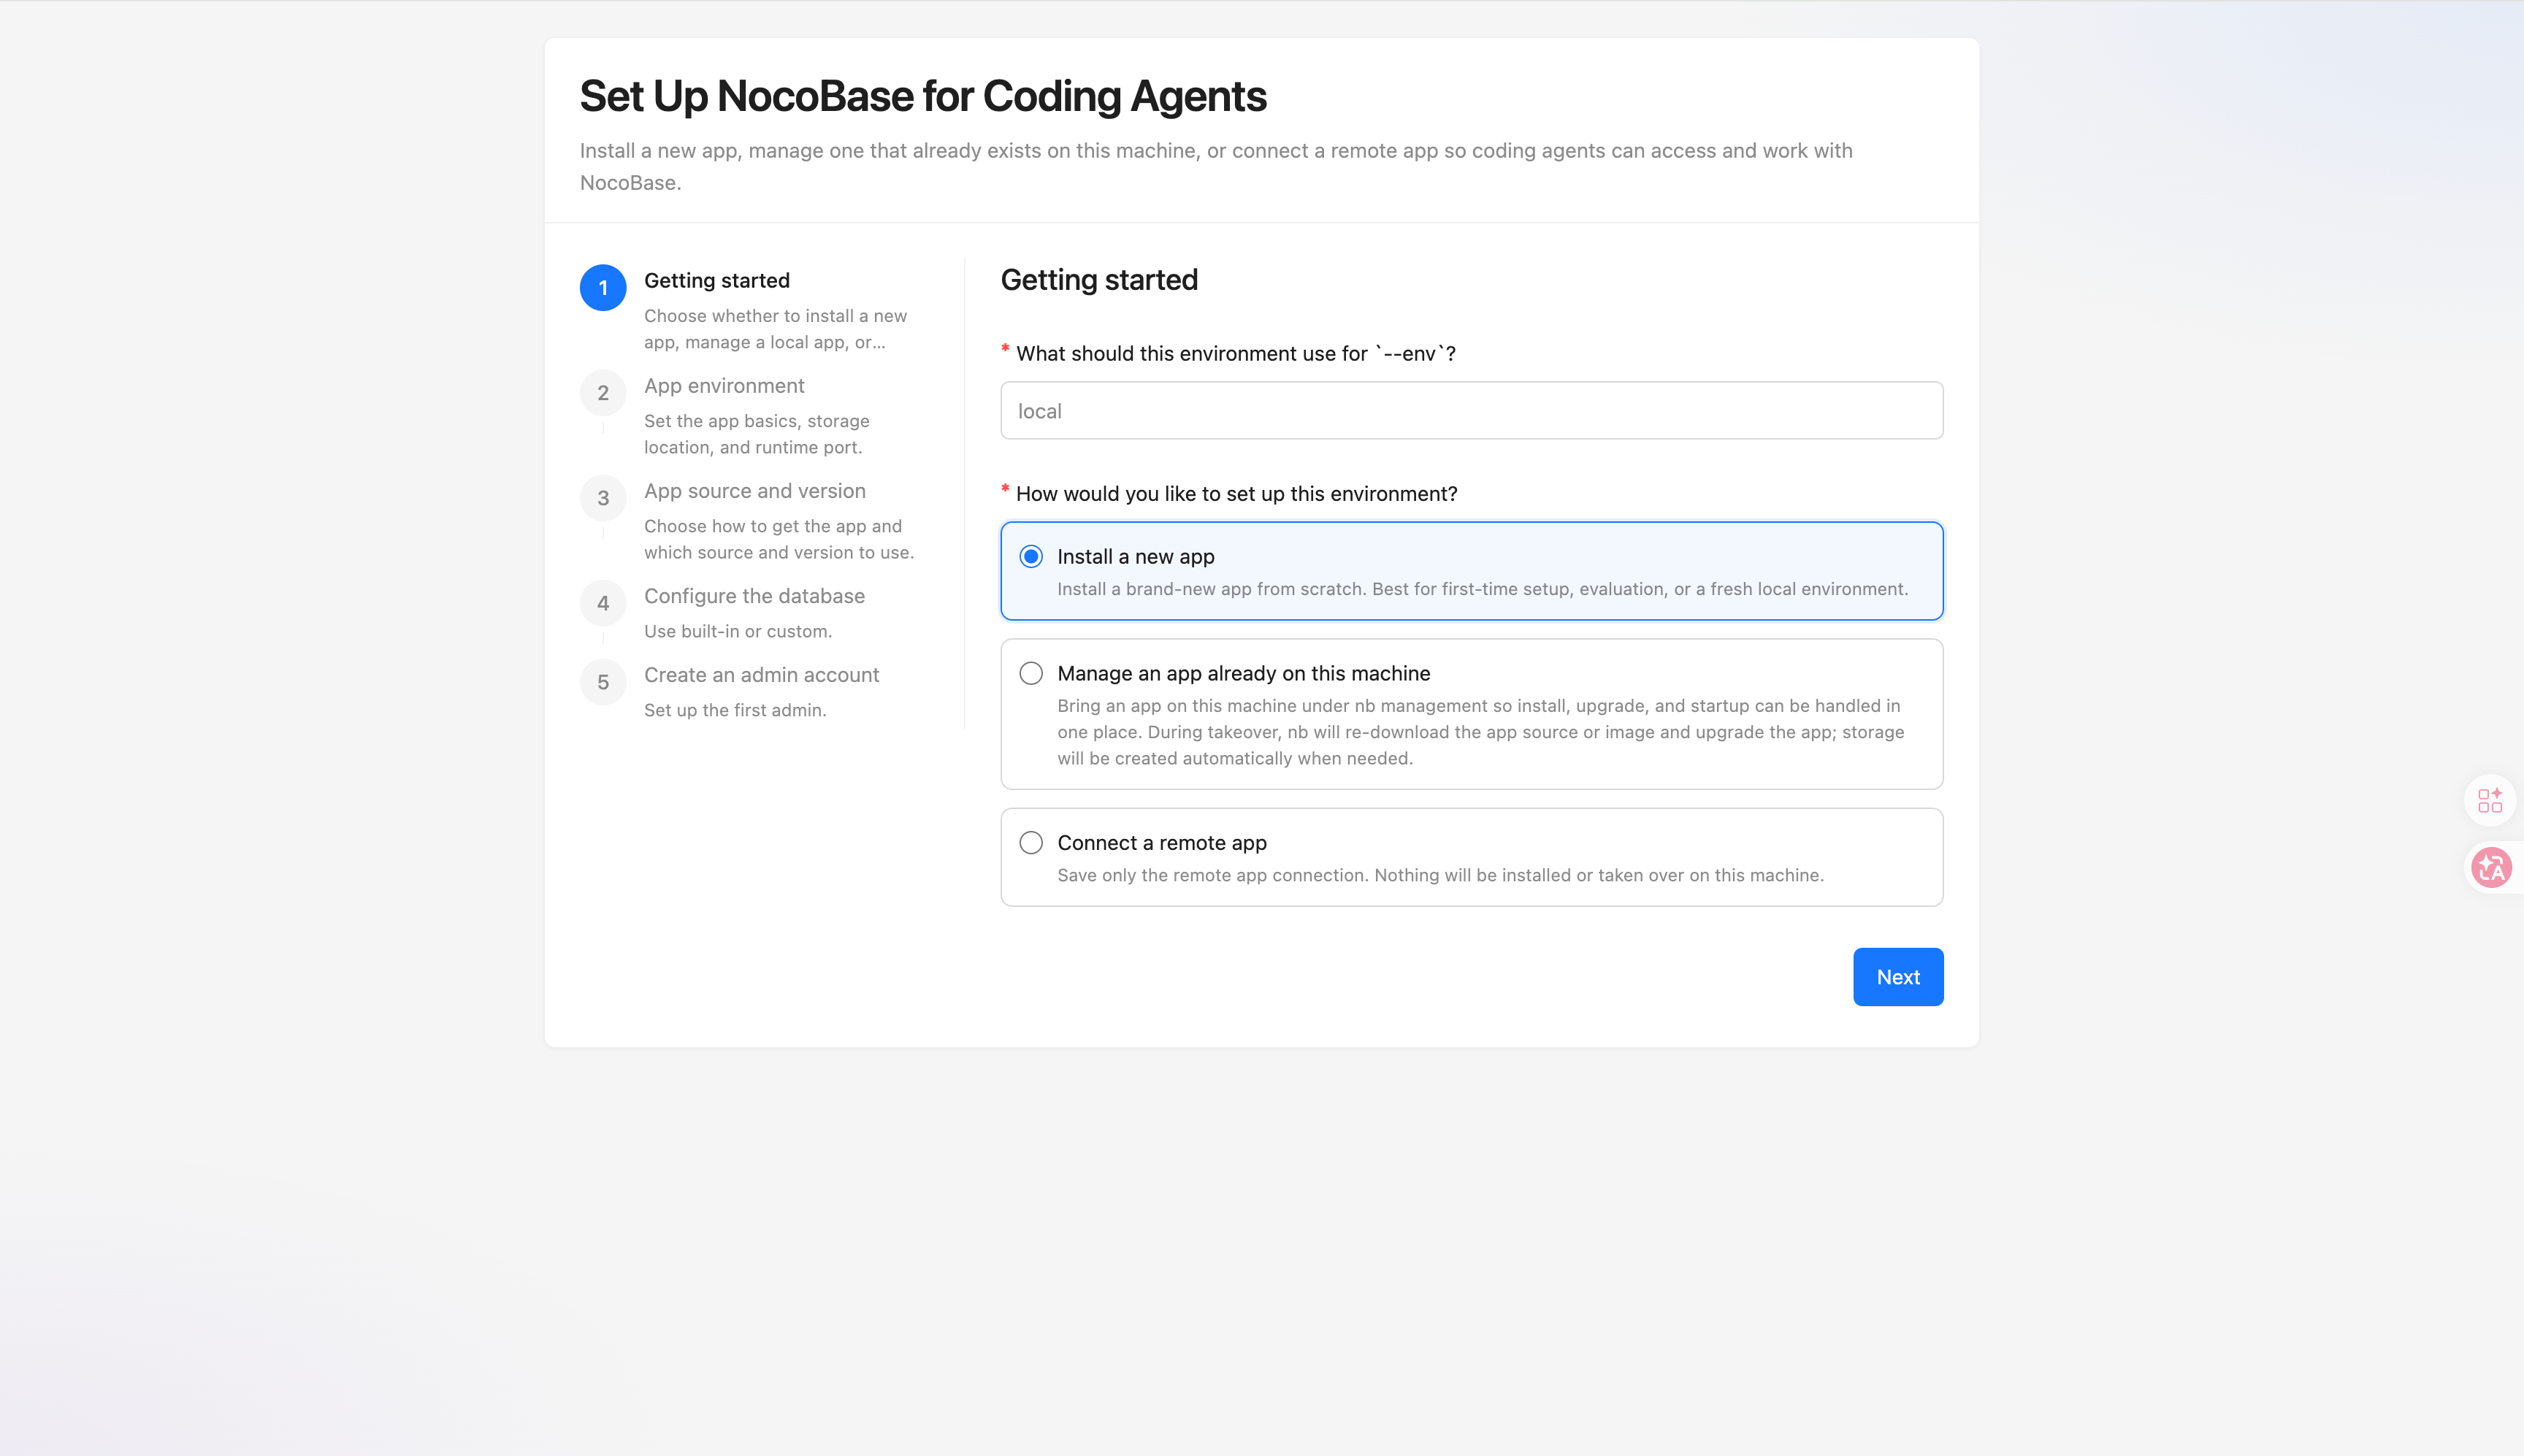
The wizard will take you step by step to complete the configuration required for installation or connection based on the current scenario.
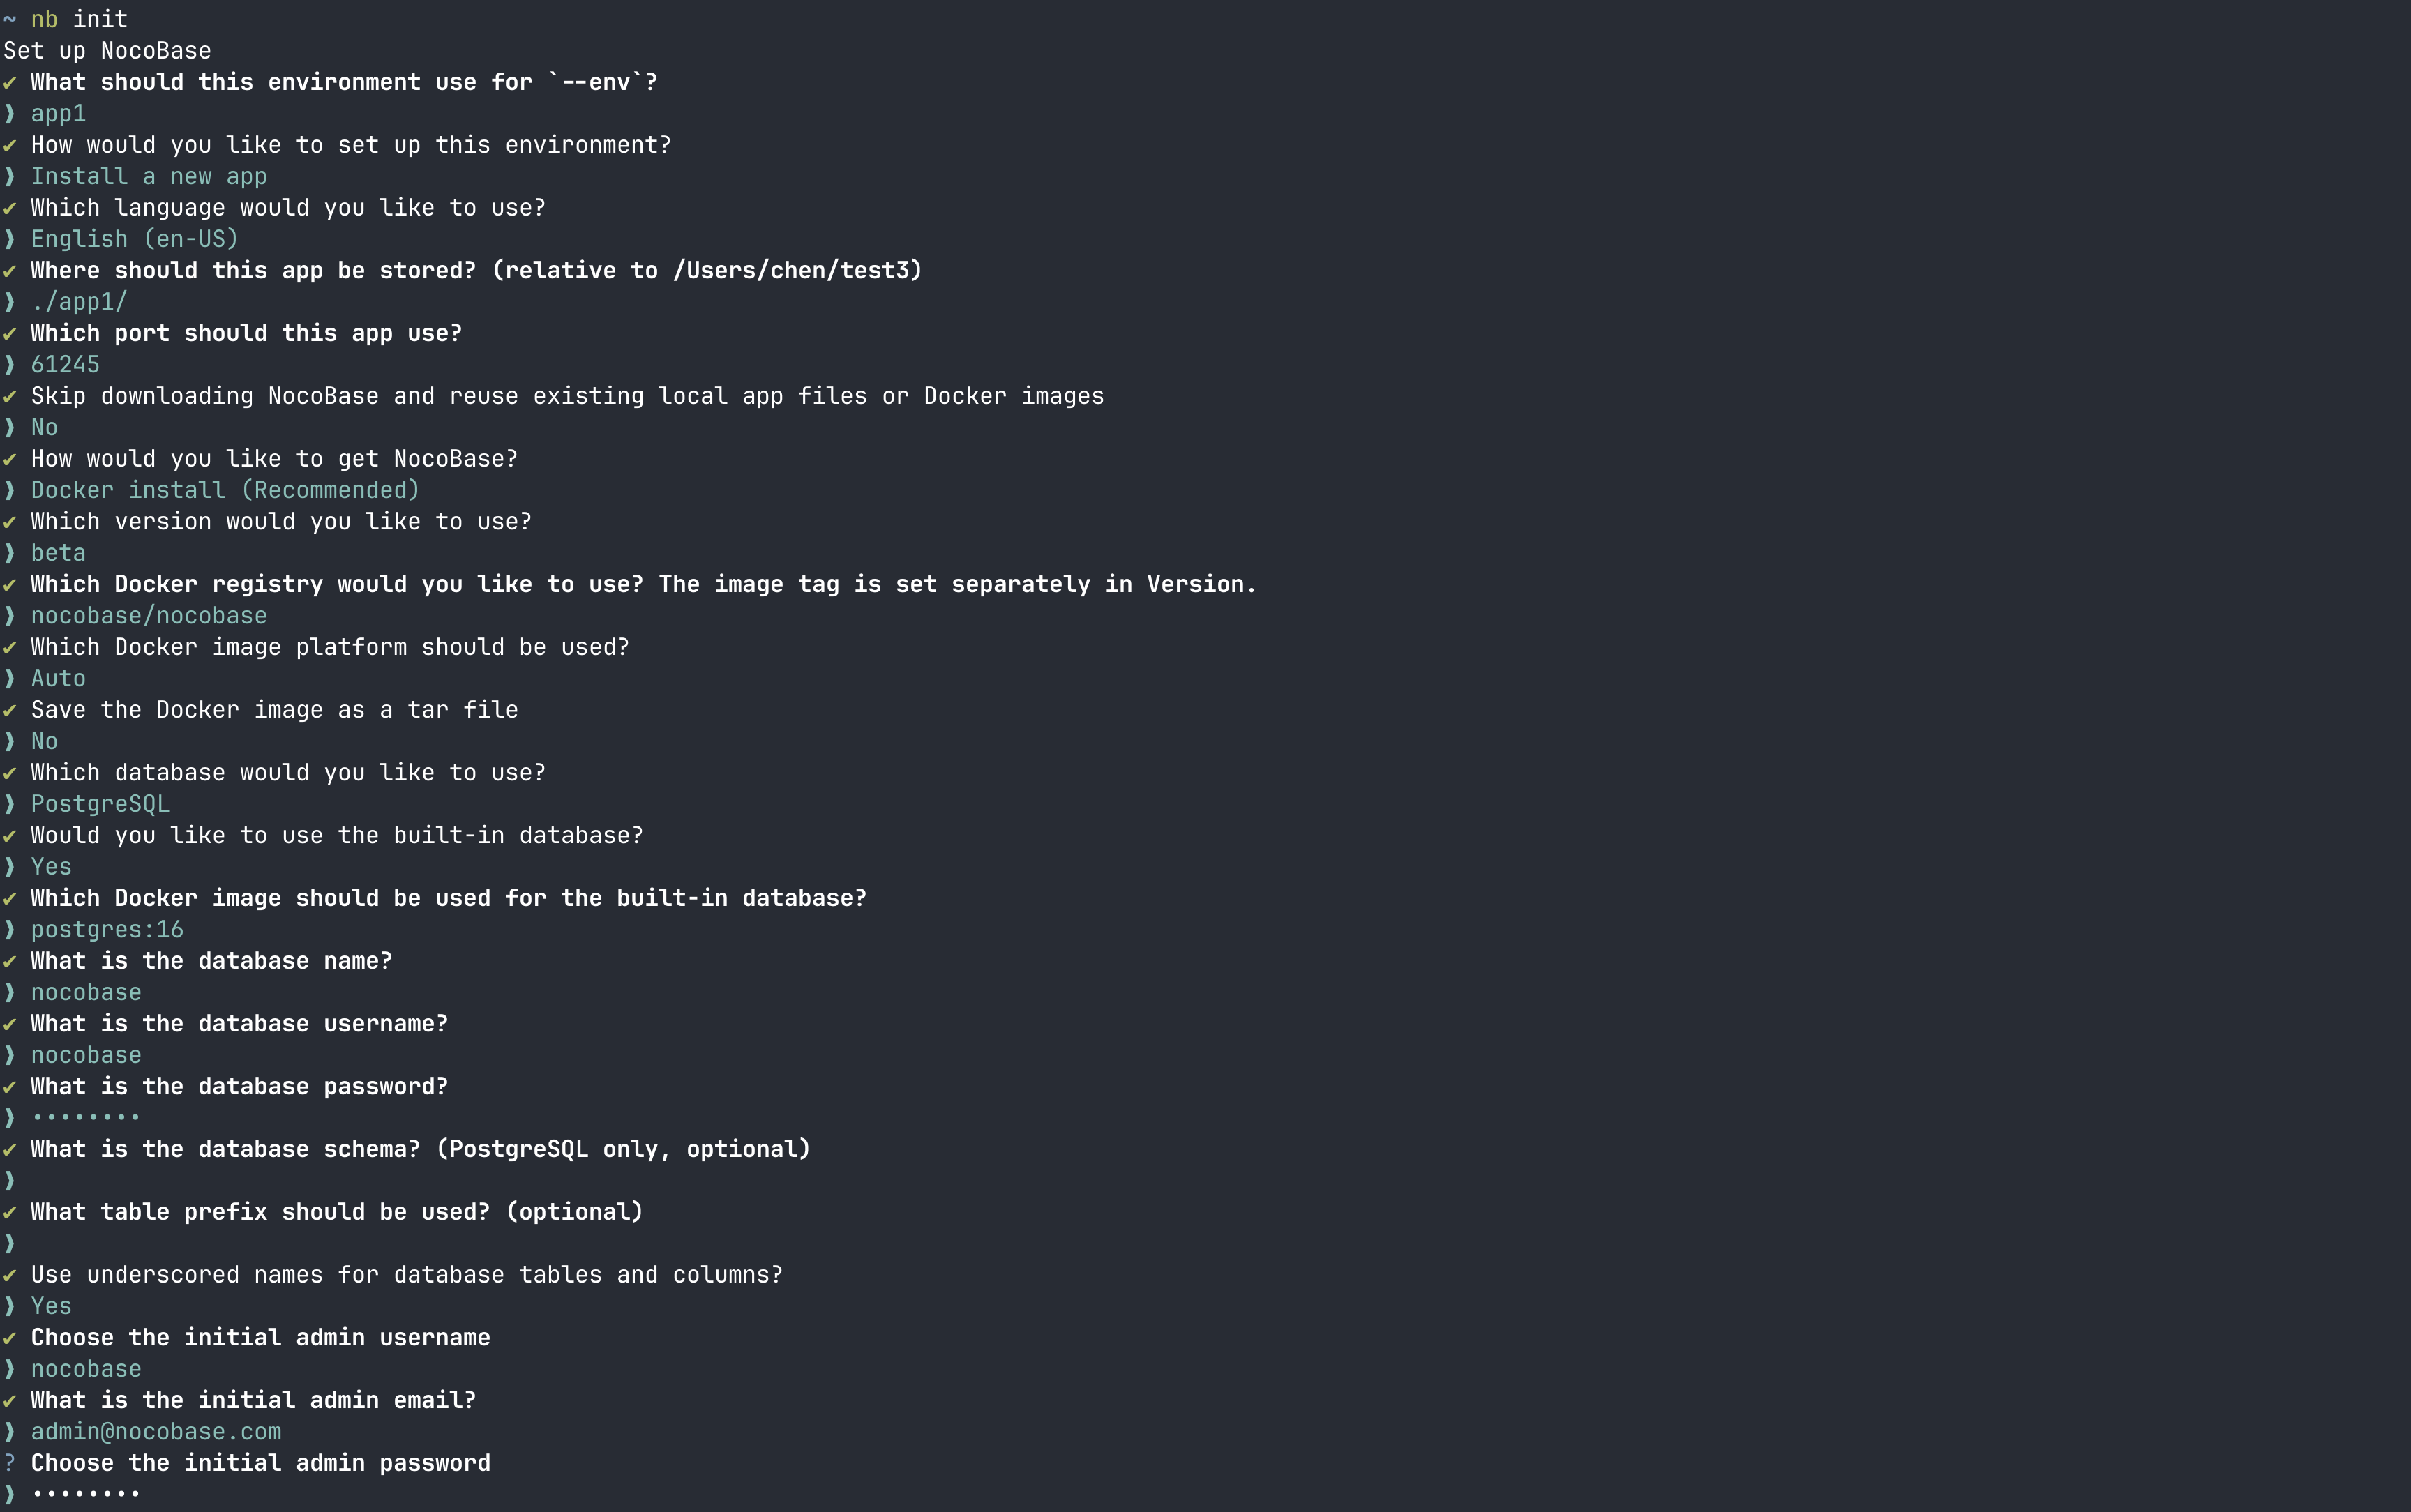
Method 2: Interact through terminal
If you are more comfortable typing step by step in the terminal, you can run directly:
Method 3: Through non-interactive commands
If you are running in a script, CI/CD, or other non-interactive environment, just use --yes. In this mode, --env must be passed explicitly, and parameters not explicitly specified will be processed by default values.
The shortest default way to write it is:
Specific to common combinations such as different installation sources, version selection, basic certification, CI/CD connection to existing applications, and database naming, just look at [nb init command reference example](../../api/cli/init.md# example).
What should you confirm first after the installation is complete?
--env is the environment name in the CLI. Generally speaking, the next thing you do after the installation is completed revolves around this env.
It is usually recommended to confirm these 3 things first:
- Whether env has been created and saved successfully
- Whether the application can be started normally and whether the logs are normal
- If you are going to officially open it to the outside world, have you planned the entrance to the production environment instead of continuing to use
IP + portdirectly?
Installation directory
If you have just installed a local application using nb init --env app1, you can view the full path through nb env info app1 --field app.appPath.
By default, the CLI organizes local files under app-path according to the following convention:
Generally speaking:
source/mainly corresponds to the local application directory of npm/Git env. For Docker env, the CLI will also retain this set of default path derivation, but most of the time you don't need to care about it manuallystorage/is used to store runtime data, such as built-in database data, plug-ins, logs, etc..envis an optional application environment variable file. Only when you need to customize environment variables, you need to add it in<app-path>/.env; if this file exists, Docker, npm and Git installation sources will read it by default.
See nb init Command Reference for a more complete description.
Production environment deployment reminder
If you have just finished the installation and want to verify the installation results first, there is usually no problem in opening the page with IP + port.
But if this env is going to officially provide services to the outside world, special attention needs to be paid:
nb init --uiitself is just a temporary page of the installation wizard, used to complete the installation or initialization, and is not the official external service entrance of the application.- After the installation through
nb initis completed, theIP + portcurrently exposed by the application is more suitable for the debugging phase, verification phase or temporary access to the intranet - In the production environment, it is not recommended to directly expose the NocoBase application port to the public network for long-term use.
- For official external access, it is recommended to use a domain name and reverse proxy to NocoBase through Nginx or Caddy
- Production environments should prioritize enabling HTTPS over long-term use of exposed
http://IP:port
In other words, default-ui-host and default-api-host are just to make the installation wizard and default address generation more convenient, and do not represent the access entrance to the final production environment.
If this env is ready to be officially launched, it is recommended that "connect to the reverse proxy and enable HTTPS" as the next step after the installation is completed, rather than an optional optimization item.
If you are ready to proceed with formal deployment now, it is recommended to start with production environment deployment, and then continue to look at the reverse proxy configuration of Nginx or Caddy as needed.
Daily operations
You can first confirm whether this env has been saved successfully:
If you want to continue with the subsequent operations after installation, you can click on the following index to look down:
If you have just installed a local application, you can usually run these commands first:
If you maintain multiple envs at the same time, see Multiple Environment Management for subsequent switching and status viewing methods.
If you want to upgrade the application later, just look at Manage Application and nb app upgrade Command Reference.