

Building a Full-Stack Data Management Plugin
Previous examples were either purely client-side (blocks, fields, actions) or client-side with simple APIs (settings page). This example demonstrates a more complete scenario -- the server defines a data table, the client inherits TableBlockModel to get full table capabilities, plus custom field components and custom action buttons, forming a data management plugin with full CRUD functionality.
This example ties together the blocks, fields, and actions learned earlier, showcasing a complete plugin development workflow.
It's recommended to familiarize yourself with the following content for a smoother development experience:
- Writing Your First Plugin -- Plugin creation and directory structure
- Plugin -- Plugin entry point and
load()lifecycle - FlowEngine -> Block Extension -- BlockModel, CollectionBlockModel, TableBlockModel
- FlowEngine -> Field Extension -- ClickableFieldModel, bindModelToInterface
- FlowEngine -> Action Extension -- ActionModel, ActionSceneEnum
- i18n Internationalization -- Translation file conventions and
tExpr()usage - Server-Side Development Overview -- Server-side plugin basics
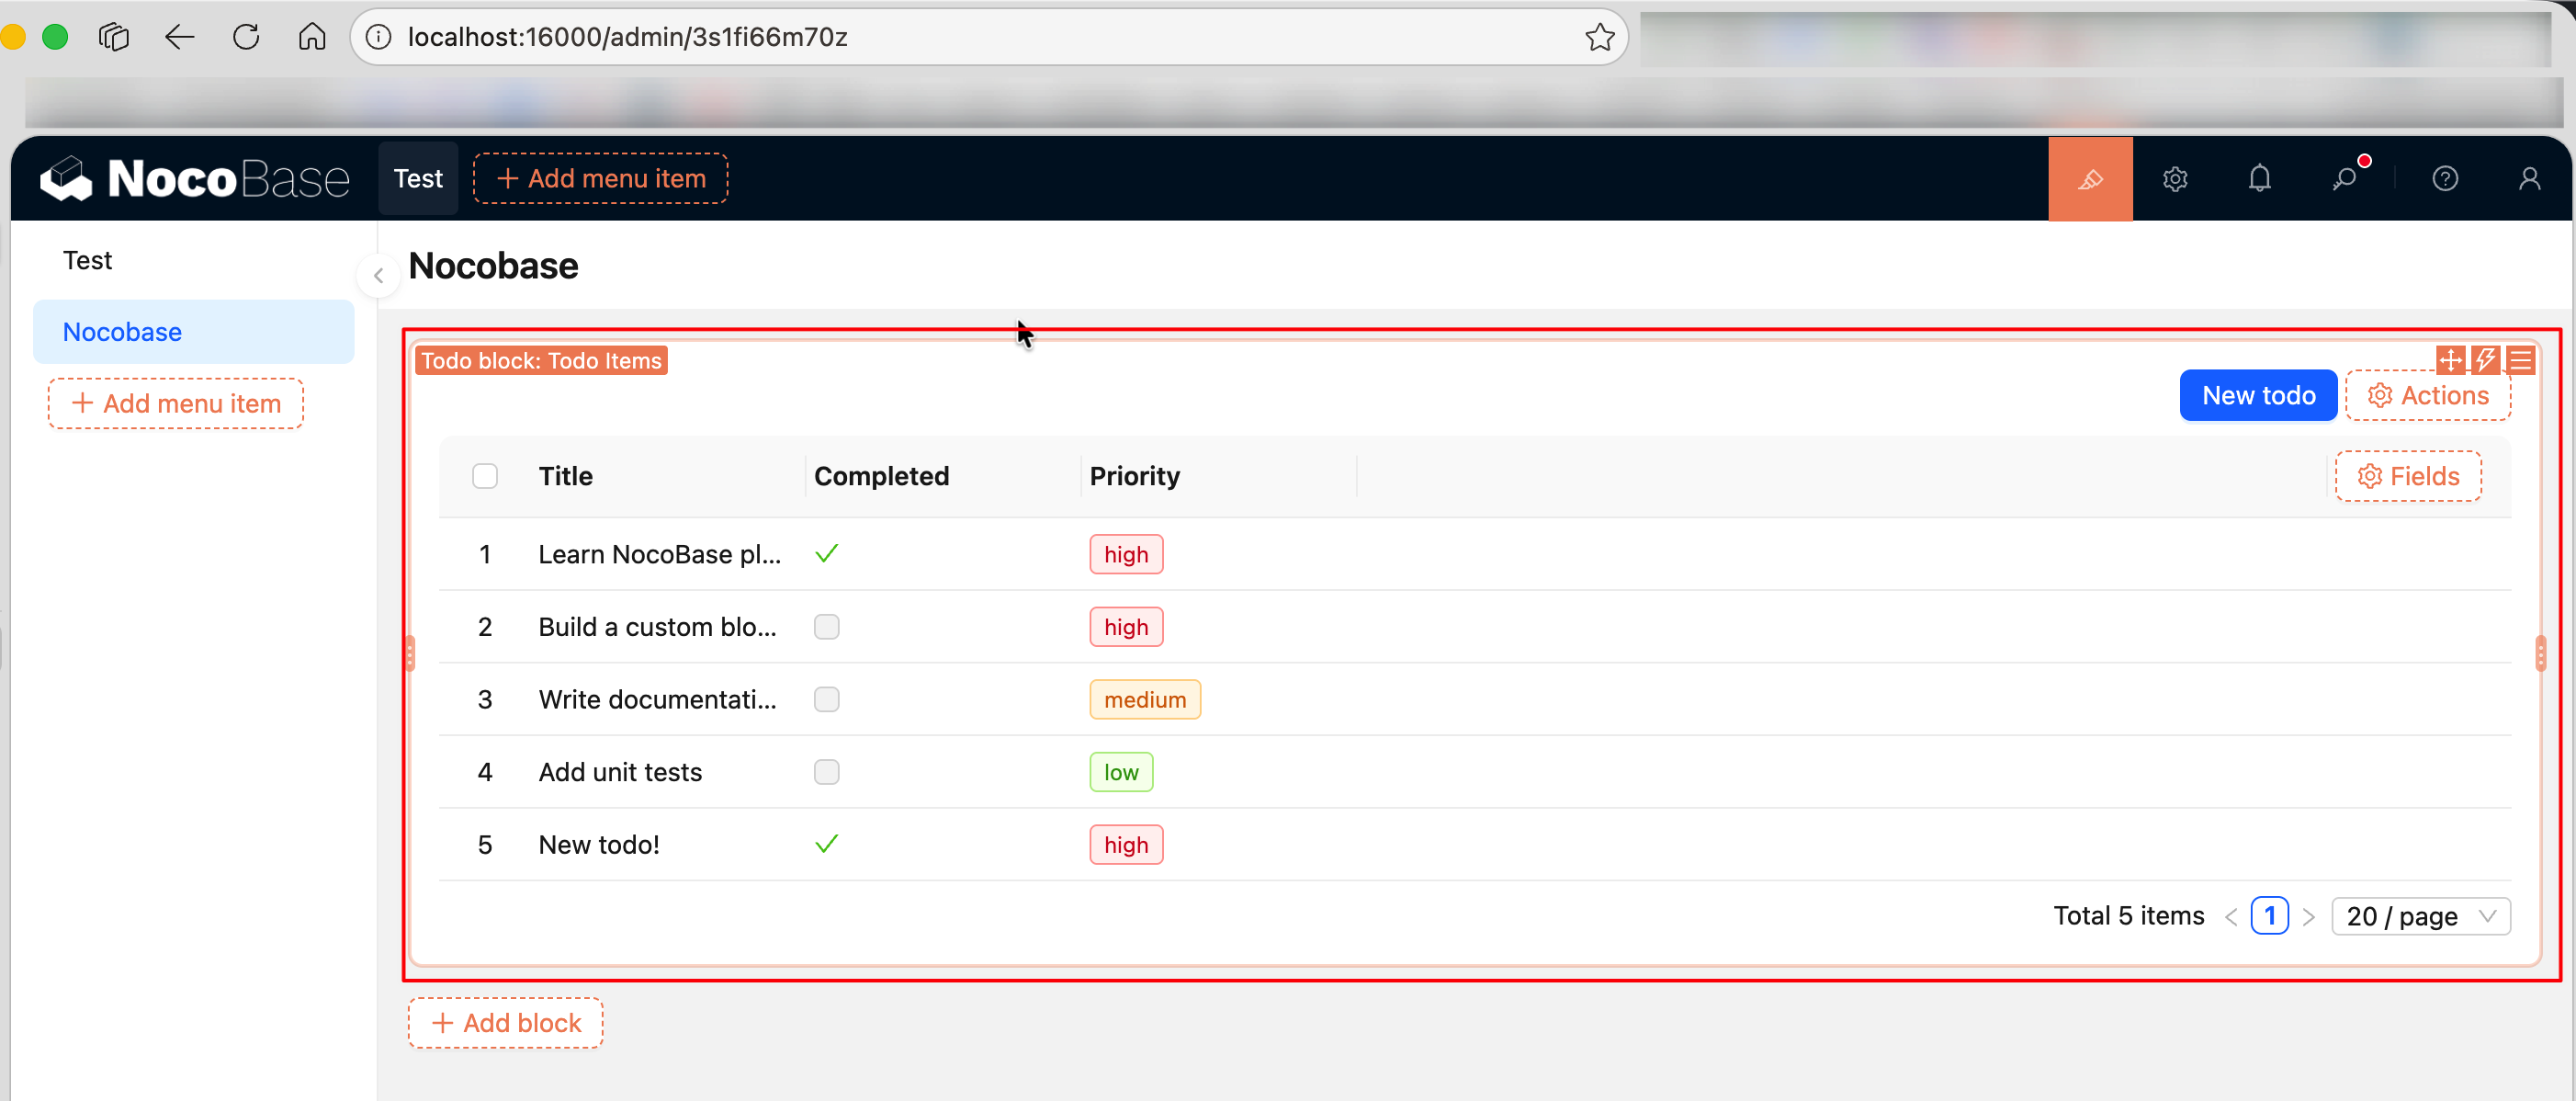
Final Result
We're building a "Todo Items" data management plugin with the following capabilities:
- Server-side defines a
todoItemsdata table, with sample data auto-inserted on plugin installation - Client-side inherits
TableBlockModelfor an out-of-the-box table block (field columns, pagination, action bar, etc.) - Custom field component -- renders the priority field with colored Tags
- Custom action button -- "New Todo" button that opens a dialog form to create records
Full source code is available at @nocobase-example/plugin-custom-table-block-resource. If you want to run it locally:
Let's build this plugin step by step from scratch.
Step 1: Create the Plugin Skeleton
Run the following in the repository root:
For detailed instructions, see Writing Your First Plugin.
Step 2: Define the Data Table (Server-Side)
Create src/server/collections/todoItems.ts. NocoBase will automatically load collection definitions from this directory:
Unlike the settings page example, there's no need to manually register a resource here -- NocoBase automatically generates standard CRUD APIs (list, get, create, update, destroy) for each collection.
Step 3: Configure Permissions and Sample Data (Server-Side)
Edit src/server/plugin.ts. Configure ACL permissions in load() and insert sample data in install():
Key points:
acl.allow()--['list', 'get', 'create', 'update', 'destroy']opens full CRUD permissions,'loggedIn'means any logged-in user can accessinstall()-- Only executes on first plugin installation, suitable for inserting initial datathis.db.getRepository()-- Gets a data operation object by collection name- No need for
resourceManager.define()-- NocoBase automatically generates CRUD APIs for collections
Step 4: Create the Block Model (Client-Side)
Create src/client-v2/models/TodoBlockModel.tsx. Inheriting TableBlockModel gives you complete table block capabilities out of the box -- field columns, action bar, pagination, sorting, etc., without needing to write renderComponent yourself.
In actual plugin development, if you don't need to customize TableBlockModel, you don't actually need to inherit and register this block -- just let users select "Table" when adding a block. This article inherits TableBlockModel with a TodoBlockModel to demonstrate the block model definition and registration process. TableBlockModel handles everything else (field columns, action bar, pagination, etc.).
filterCollection restricts this block to only the todoItems data table -- when users add a "Todo block", the data table selection list will only show todoItems, not other unrelated tables.
Step 5: Create a Custom Field Component (Client-Side)
Create src/client-v2/models/PriorityFieldModel.tsx. Rendering the priority field with colored Tags is much more intuitive than plain text:
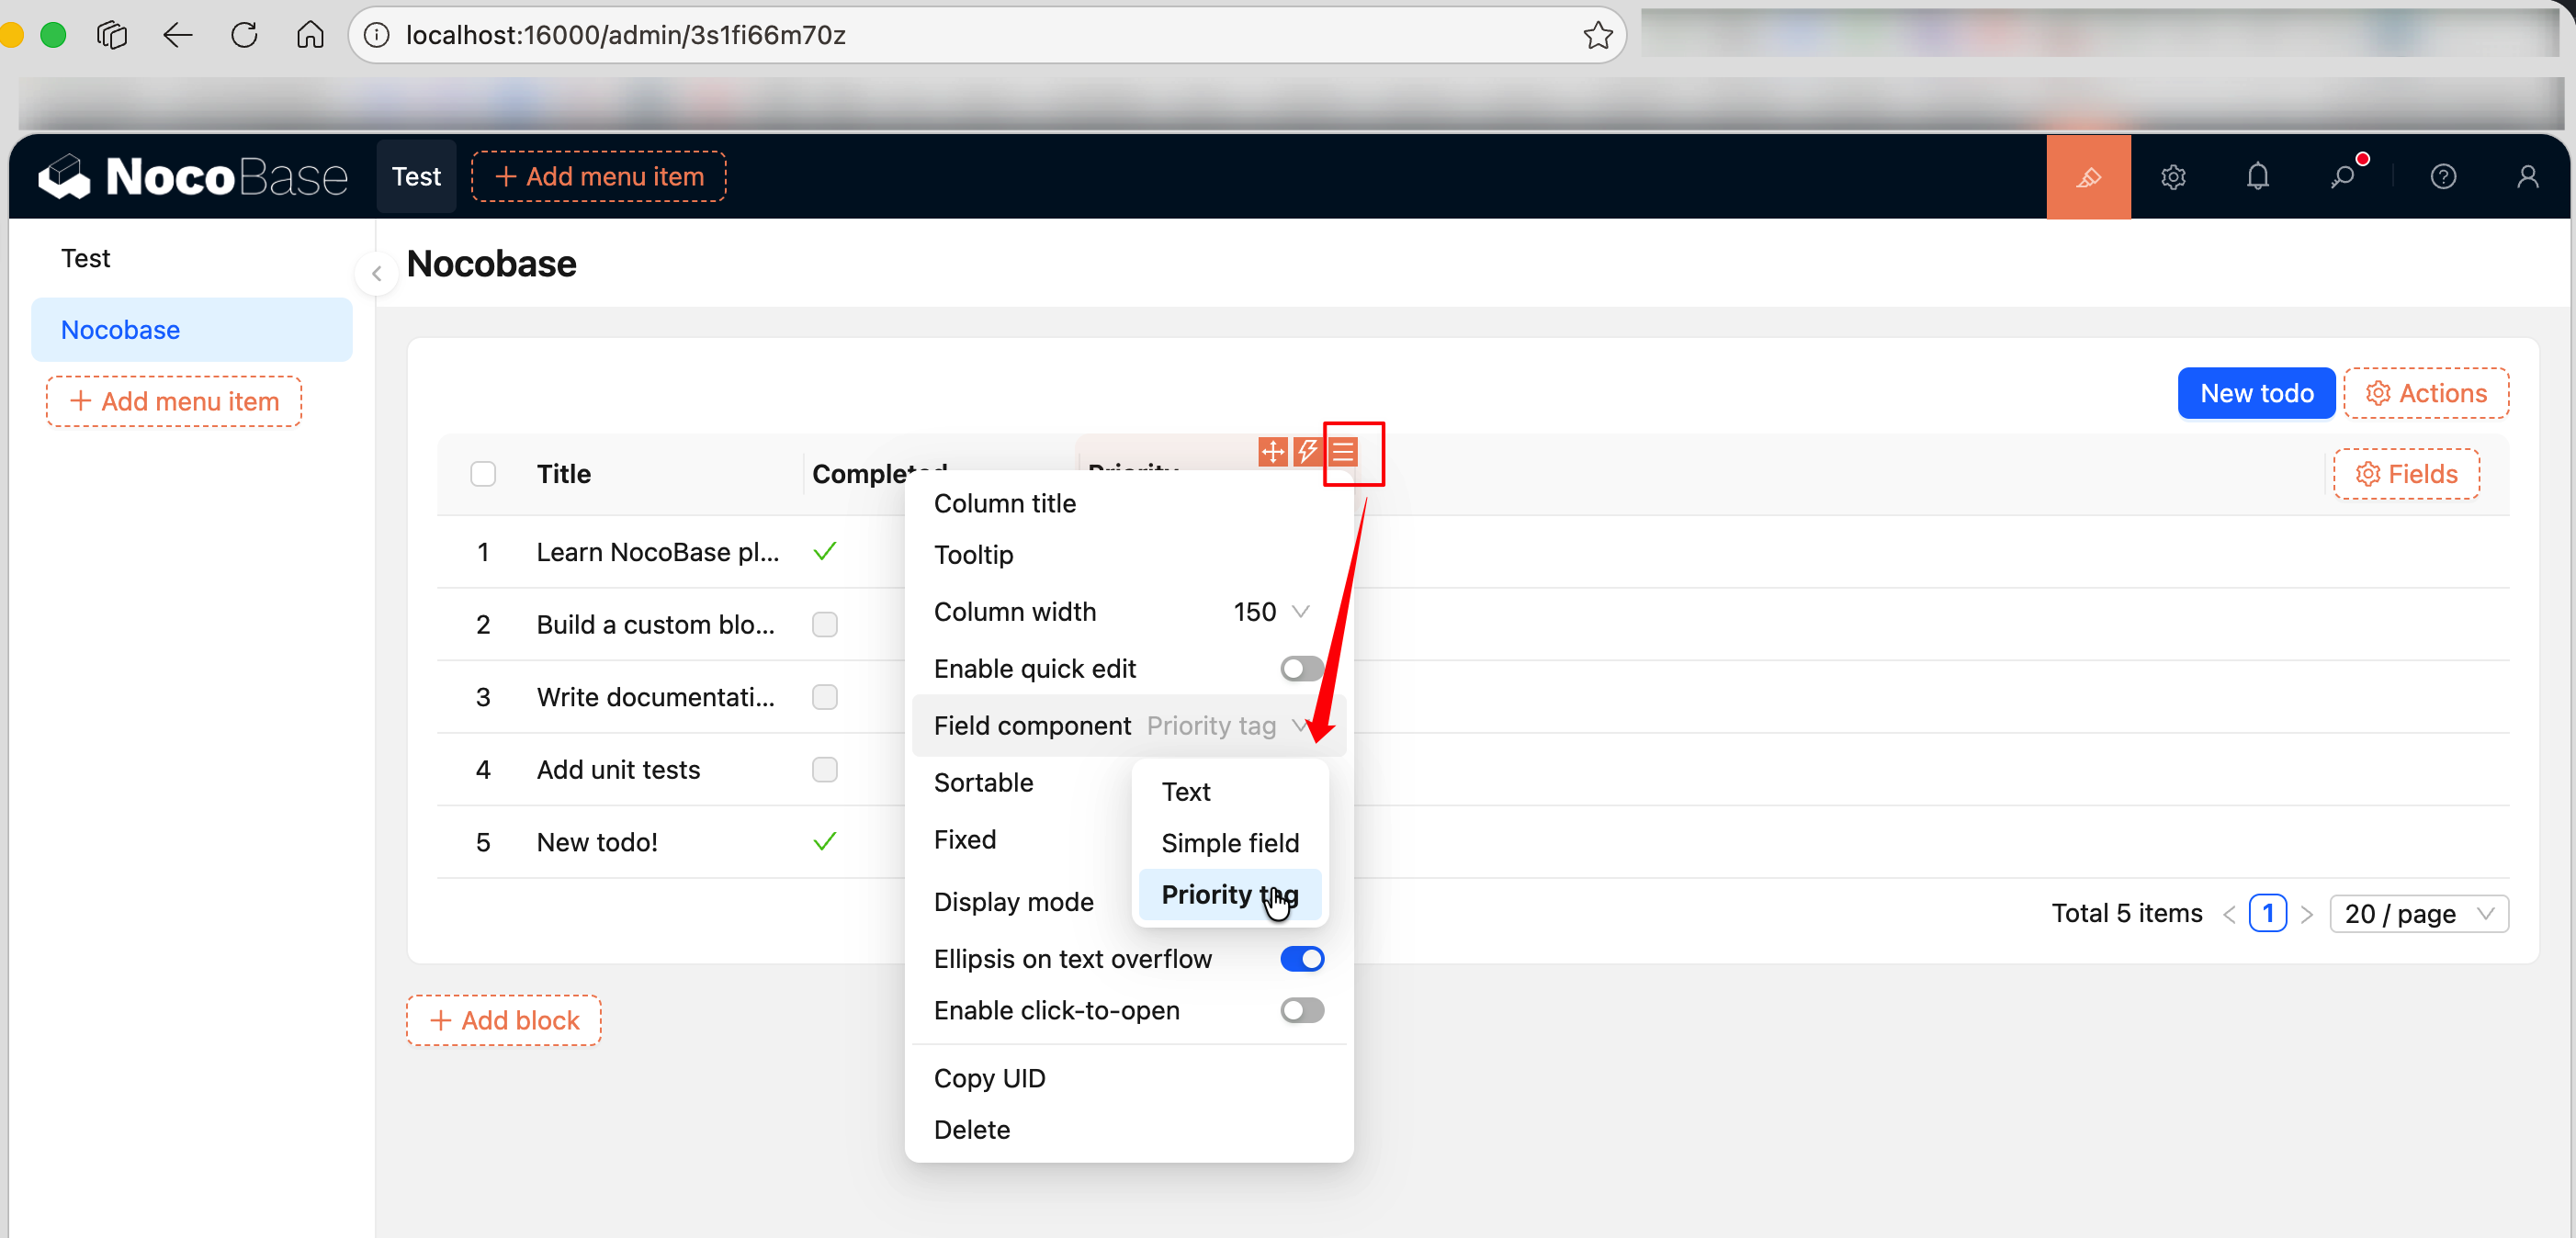
After registration, you can switch to "Priority tag" in the "Field Component" dropdown menu of the table's priority column configuration.
Step 6: Create a Custom Action Button (Client-Side)
Create src/client-v2/models/NewTodoActionModel.tsx. Clicking the "New Todo" button opens a dialog with ctx.viewer.dialog(), where users fill out a form to create a record:
Key points:
ActionSceneEnum.collection-- The button appears in the action bar at the top of the blockon: 'click'-- Listens for the button'sclickevent viaregisterFlowctx.viewer.dialog()-- NocoBase's built-in dialog capability.contentaccepts a function, and theviewparameter can callview.close()to close the dialogresource.create(values)-- Calls the data table's create API to create a record; the table automatically refreshes after creationobservable+observer-- Uses reactive state management from flow-engine instead ofuseState; the component automatically responds to changes informState.loading
Step 7: Add Multilingual Files
Edit the translation files under the plugin's src/locale/:
Adding language files for the first time requires restarting the application to take effect.
For more about translation file conventions and tExpr() usage, see i18n Internationalization.
Step 8: Register in the Plugin (Client-Side)
Edit src/client-v2/plugin.tsx. Two things need to be done: register models and register todoItems to the client-side data source.
Manually registering a data table in plugin code via addCollection is an uncommon practice -- it's only done here to demonstrate the complete full-stack workflow. In real projects, data tables are usually created and configured by users through the NocoBase UI, or managed via APIs / MCP, without needing explicit registration in plugin client code.
Tables defined via defineCollection are server-side internal tables that don't appear in the block's data table selection list by default. After manually registering via addCollection, users can select todoItems when adding blocks.
Key points:
registerModelLoaders-- Lazy-loads and registers three models: block, field, and actionthis.app.eventBus-- Application-level event bus for listening to lifecycle eventsdataSource:loadedevent -- Fires after data source loading completes. You must calladdCollectionin this event callback becauseensureLoaded()runs afterload()and clears then re-sets all collections -- callingaddCollectiondirectly inload()would be overwrittenaddCollection()-- Registers a collection to the client-side data source. Fields needinterfaceanduiSchemaproperties so NocoBase knows how to render themfilterTargetKey: 'id'-- Must be set; specifies the field used to uniquely identify records (typically the primary key). If not set, the collection won't appear in the block's data table selection list- The server-side
defineCollectionhandles creating the physical table and ORM mapping, while the client-sideaddCollectionlets the UI know the table exists -- both sides work together to complete the full-stack integration
Step 9: Enable the Plugin
After enabling:
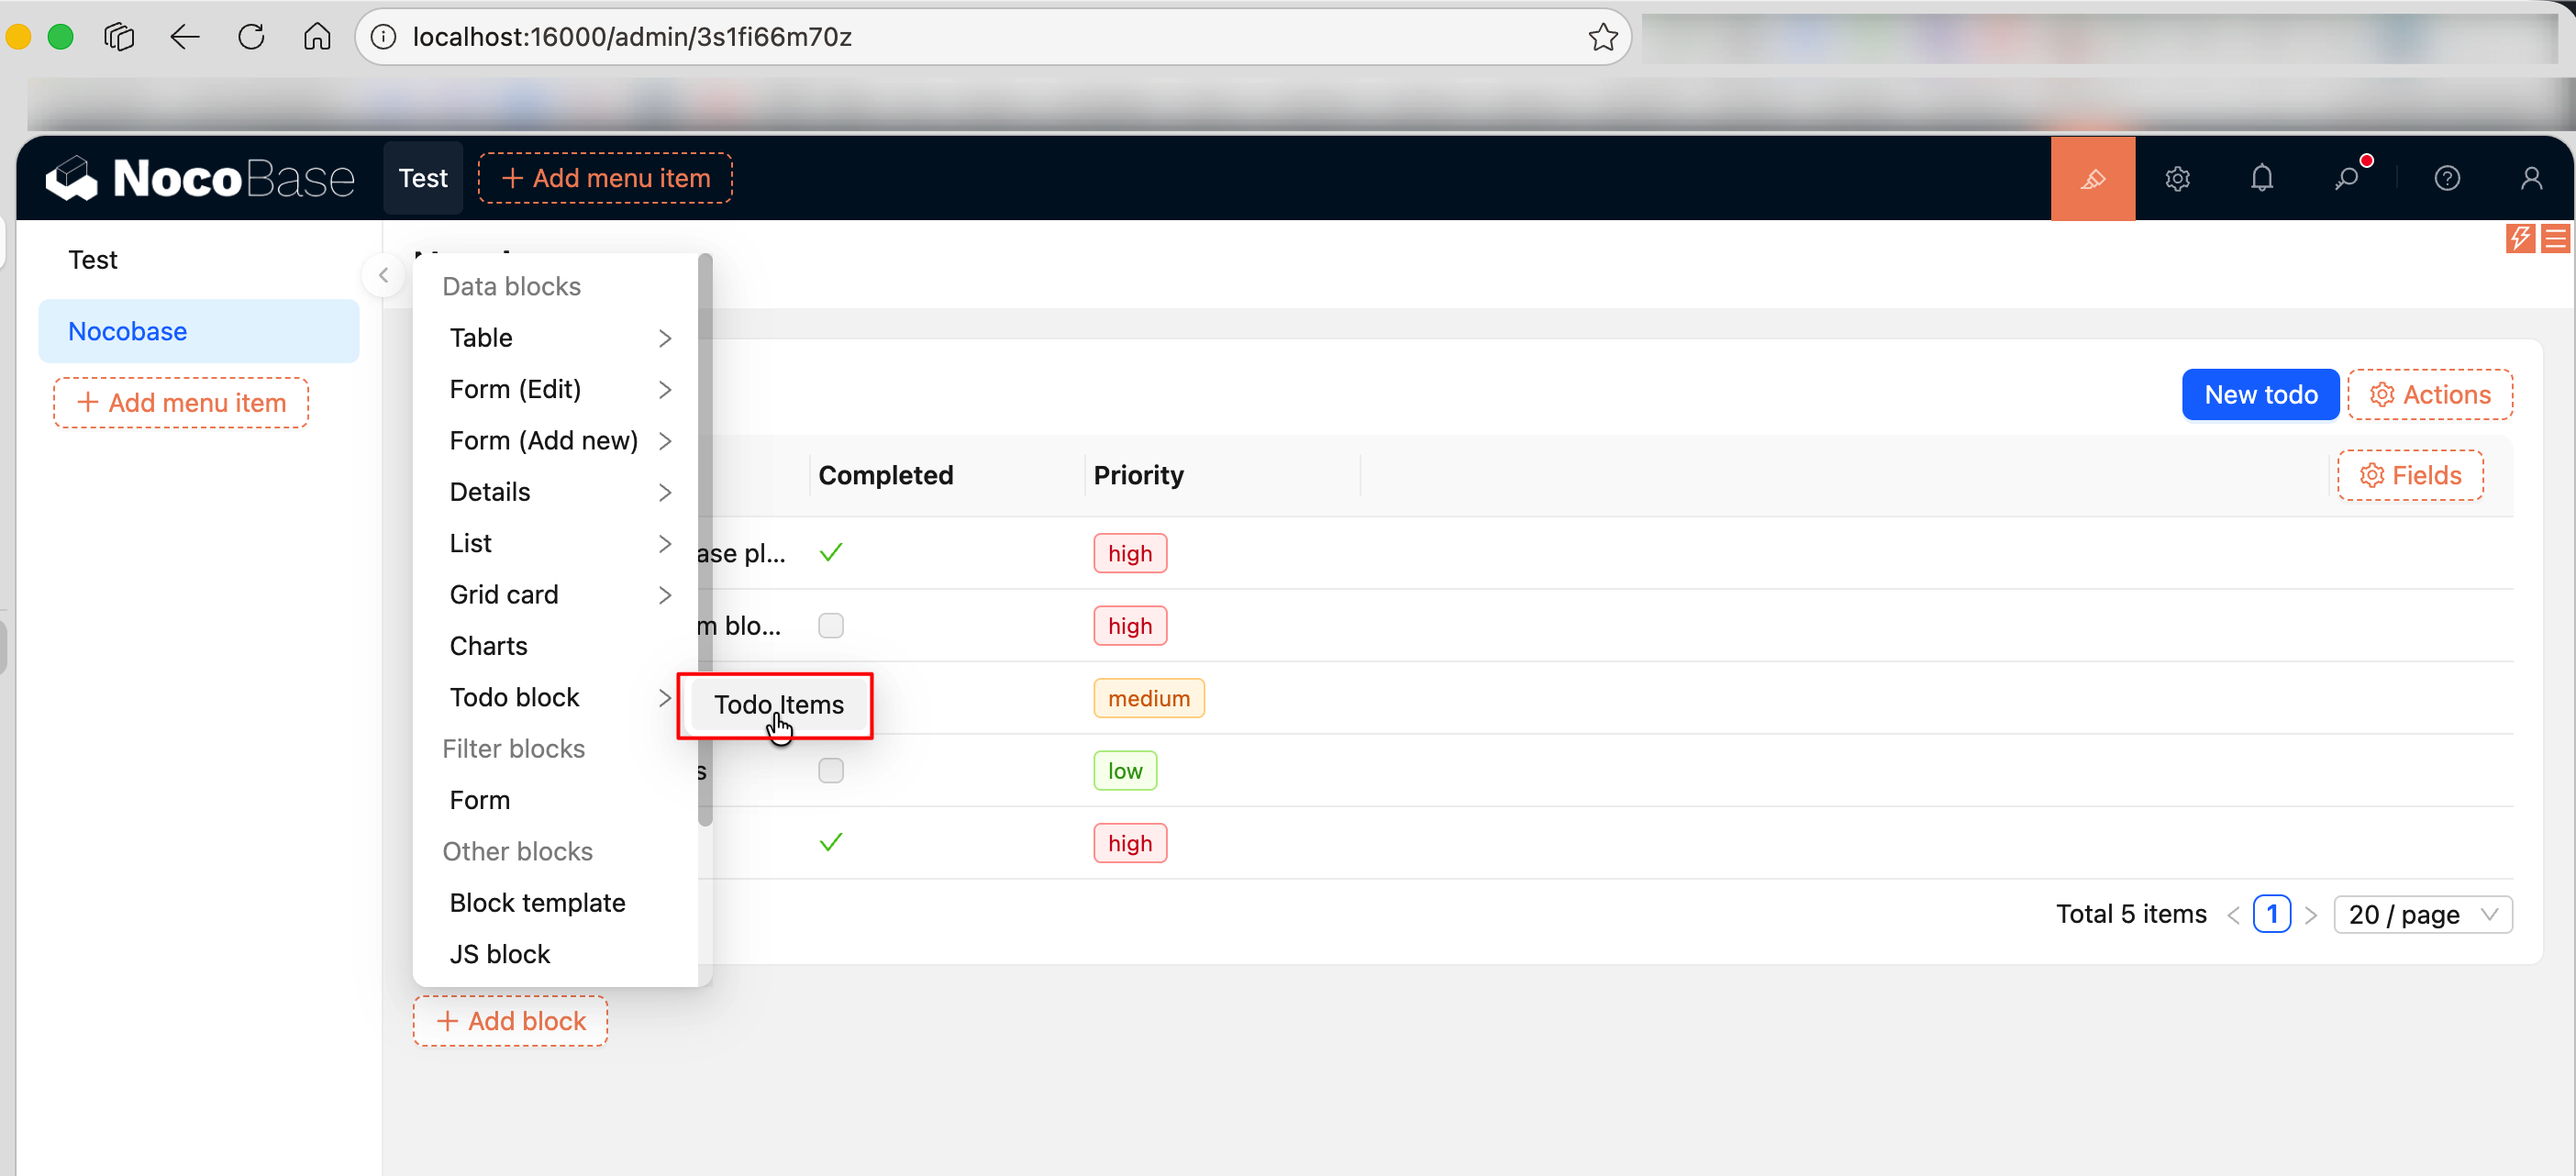
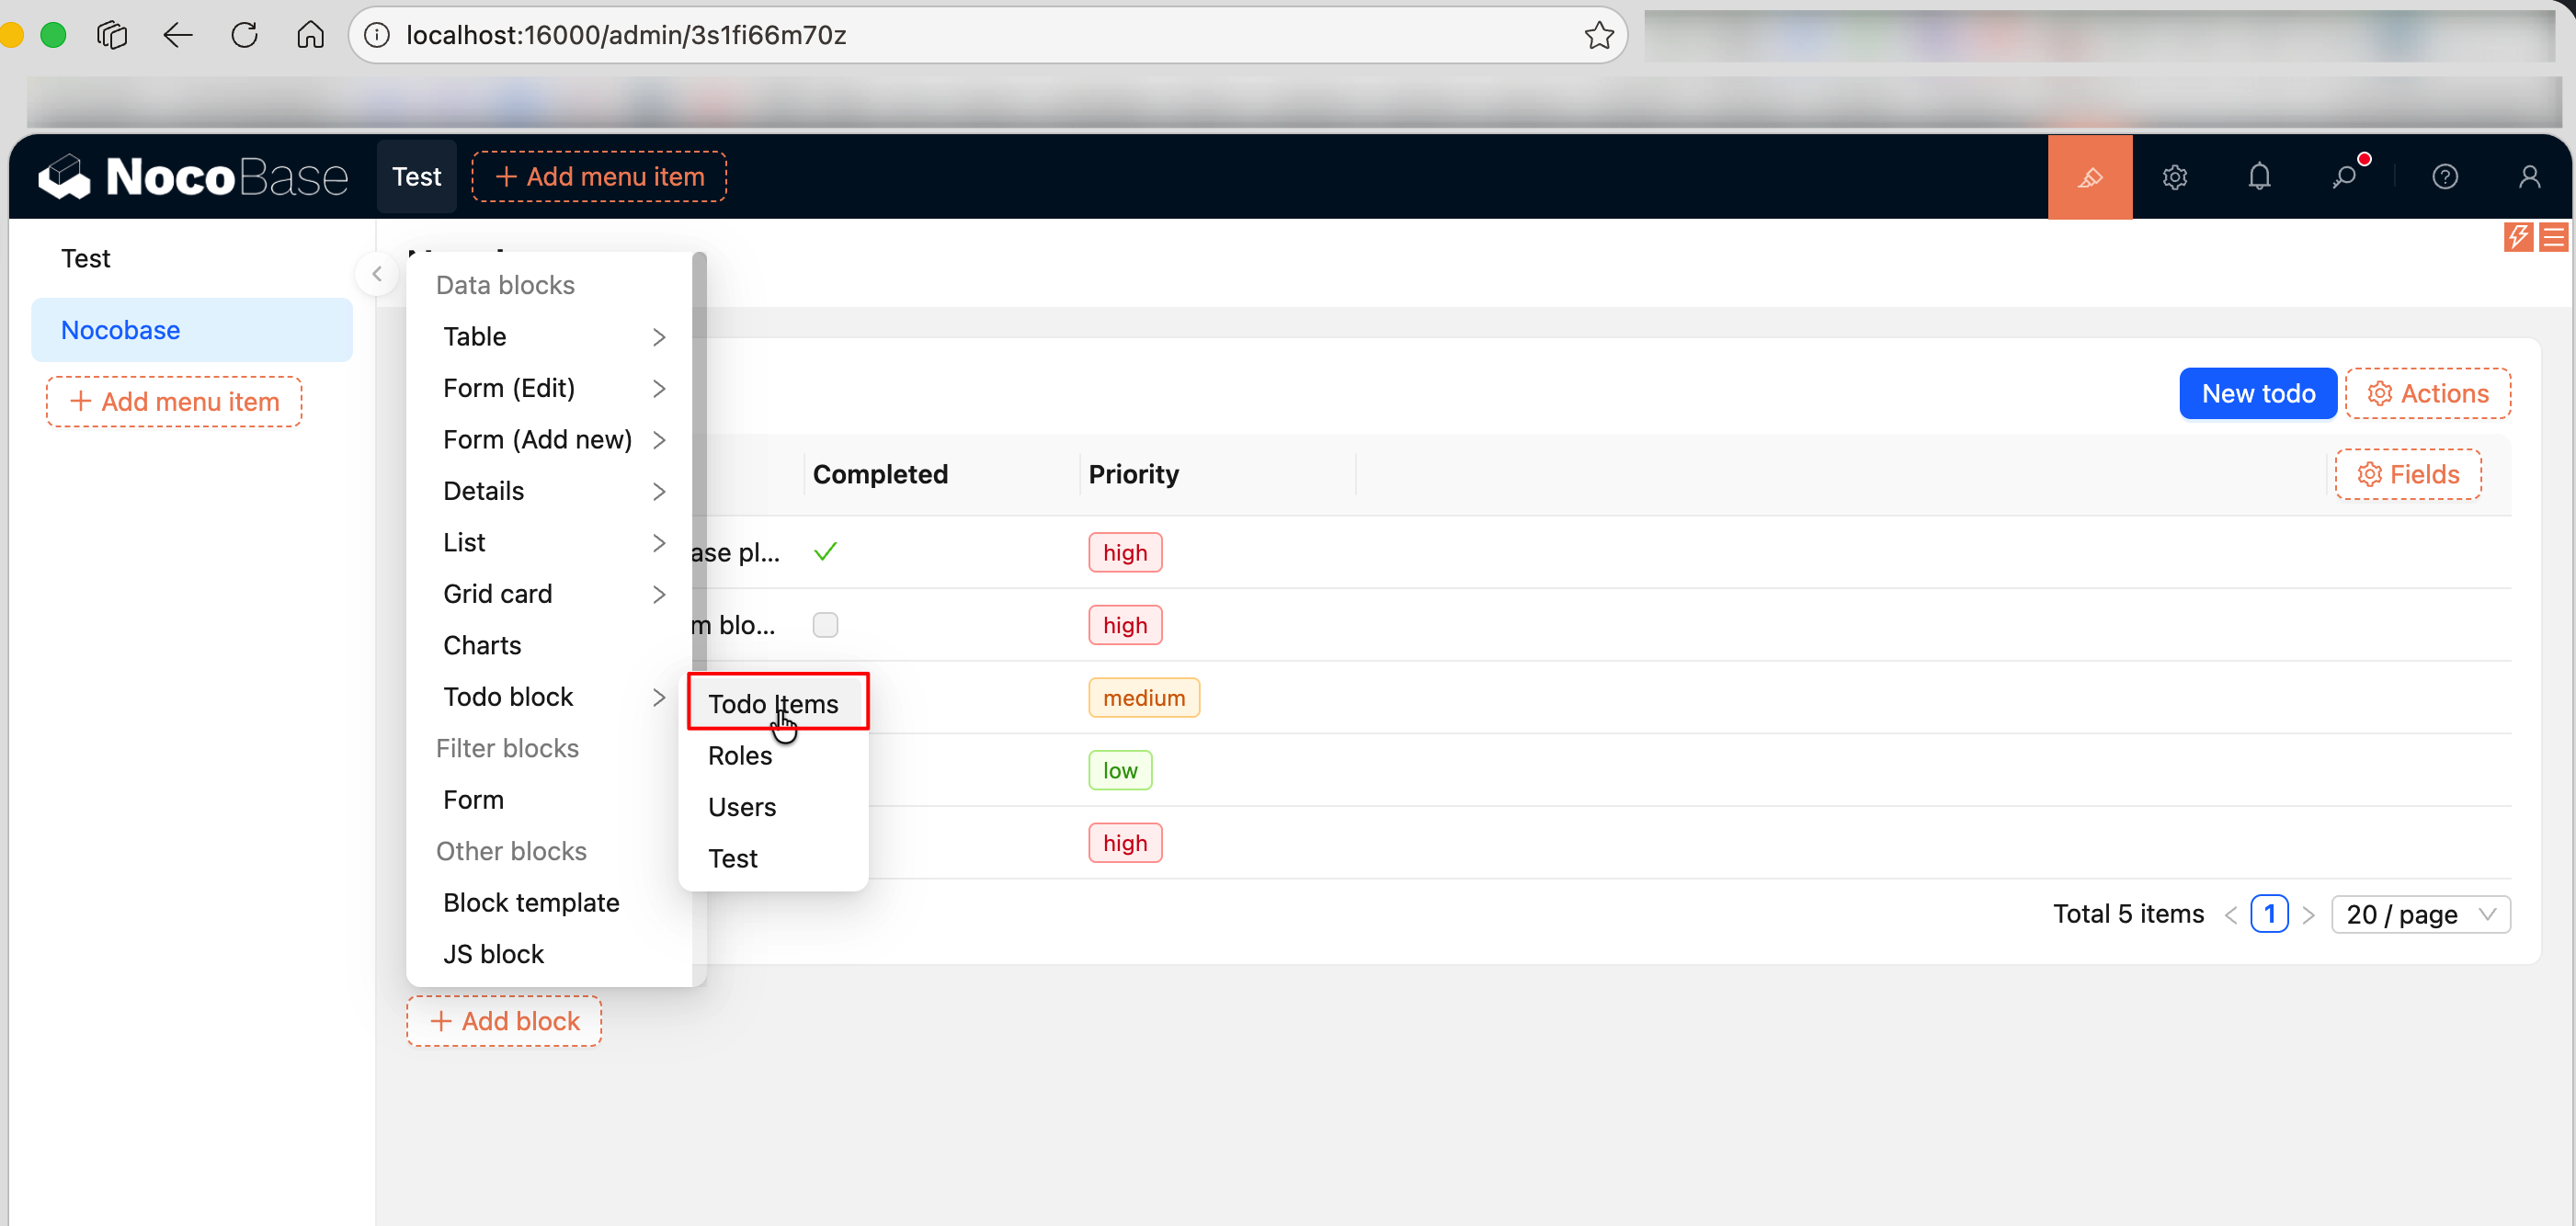
- Create a new page, click "Add Block", select "Todo block", and bind it to the
todoItemsdata table - The table will automatically load data and display field columns, pagination, etc.
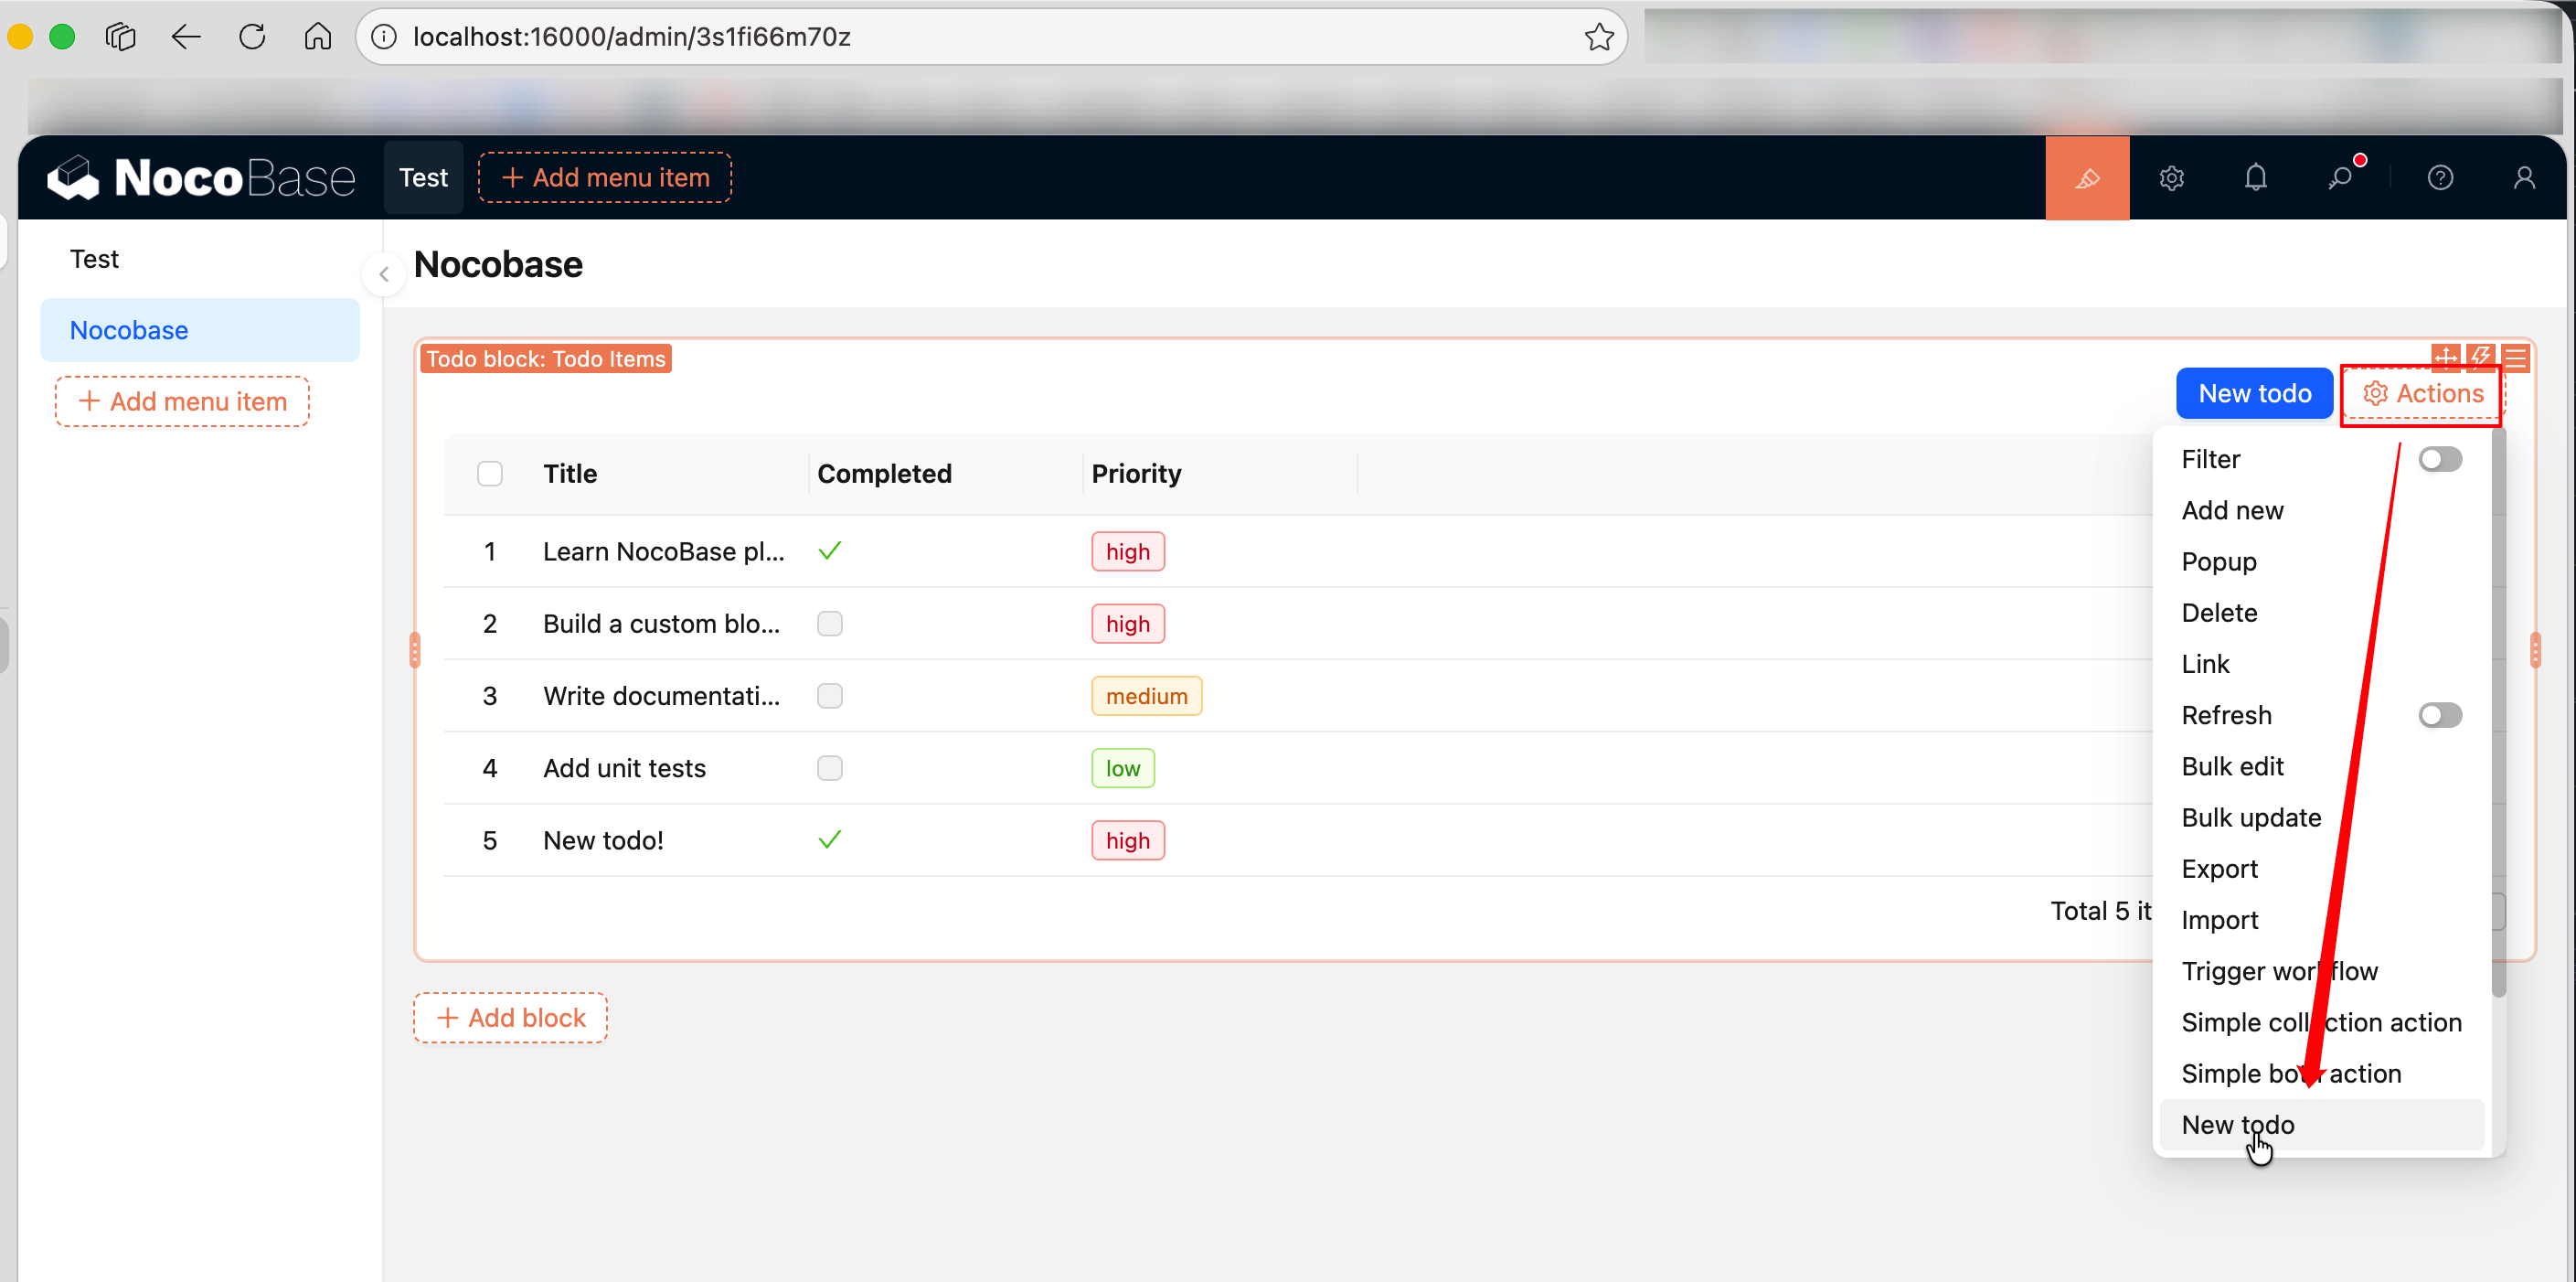
- Add a "New todo" button from "Configure Actions", click to open a dialog form to create records
- Switch to "Priority tag" in the priority column's "Field Component" menu to display priorities with colored Tags
Full Source Code
- @nocobase-example/plugin-custom-table-block-resource -- Complete full-stack data management plugin example
Summary
Capabilities used in this example:
Related Links
- Writing Your First Plugin -- Create a plugin skeleton from scratch
- FlowEngine Overview -- FlowModel basic usage and registerFlow
- FlowEngine -> Block Extension -- BlockModel, TableBlockModel
- FlowEngine -> Field Extension -- ClickableFieldModel, bindModelToInterface
- FlowEngine -> Action Extension -- ActionModel, ActionSceneEnum
- Building a Custom Display Block -- BlockModel basic example
- Building a Custom Field Component -- FieldModel basic example
- Building a Custom Action Button -- ActionModel basic example
- Server-Side Development Overview -- Server-side plugin basics
- Server -> Collections -- defineCollection and addCollection
- Resource API Quick Reference -- Complete method signatures for MultiRecordResource / SingleRecordResource
- Plugin -- Plugin entry point and load() lifecycle
- i18n Internationalization -- Translation file conventions and tExpr usage
- Server -> ACL Access Control -- Permission configuration
- Server -> Plugin -- Server-side plugin lifecycle
- Context -> Common Capabilities -- ctx.viewer, ctx.message, etc.
- Component Development -- Antd Form and other component usage
- FlowEngine Complete Documentation -- Complete reference for FlowModel, Flow, Context