

Advanced Configuration
Timeout Settings
Starting from version 2.1.0, workflows support timeout settings to limit the maximum duration of a single execution from the time it starts processing until it ends. Timeout settings are useful for preventing workflows from occupying execution resources indefinitely because of long-running operations, manual processing, or waiting for external callbacks.
In the workflow creation or editing dialog, expand "Advanced options" to configure "Timeout settings":
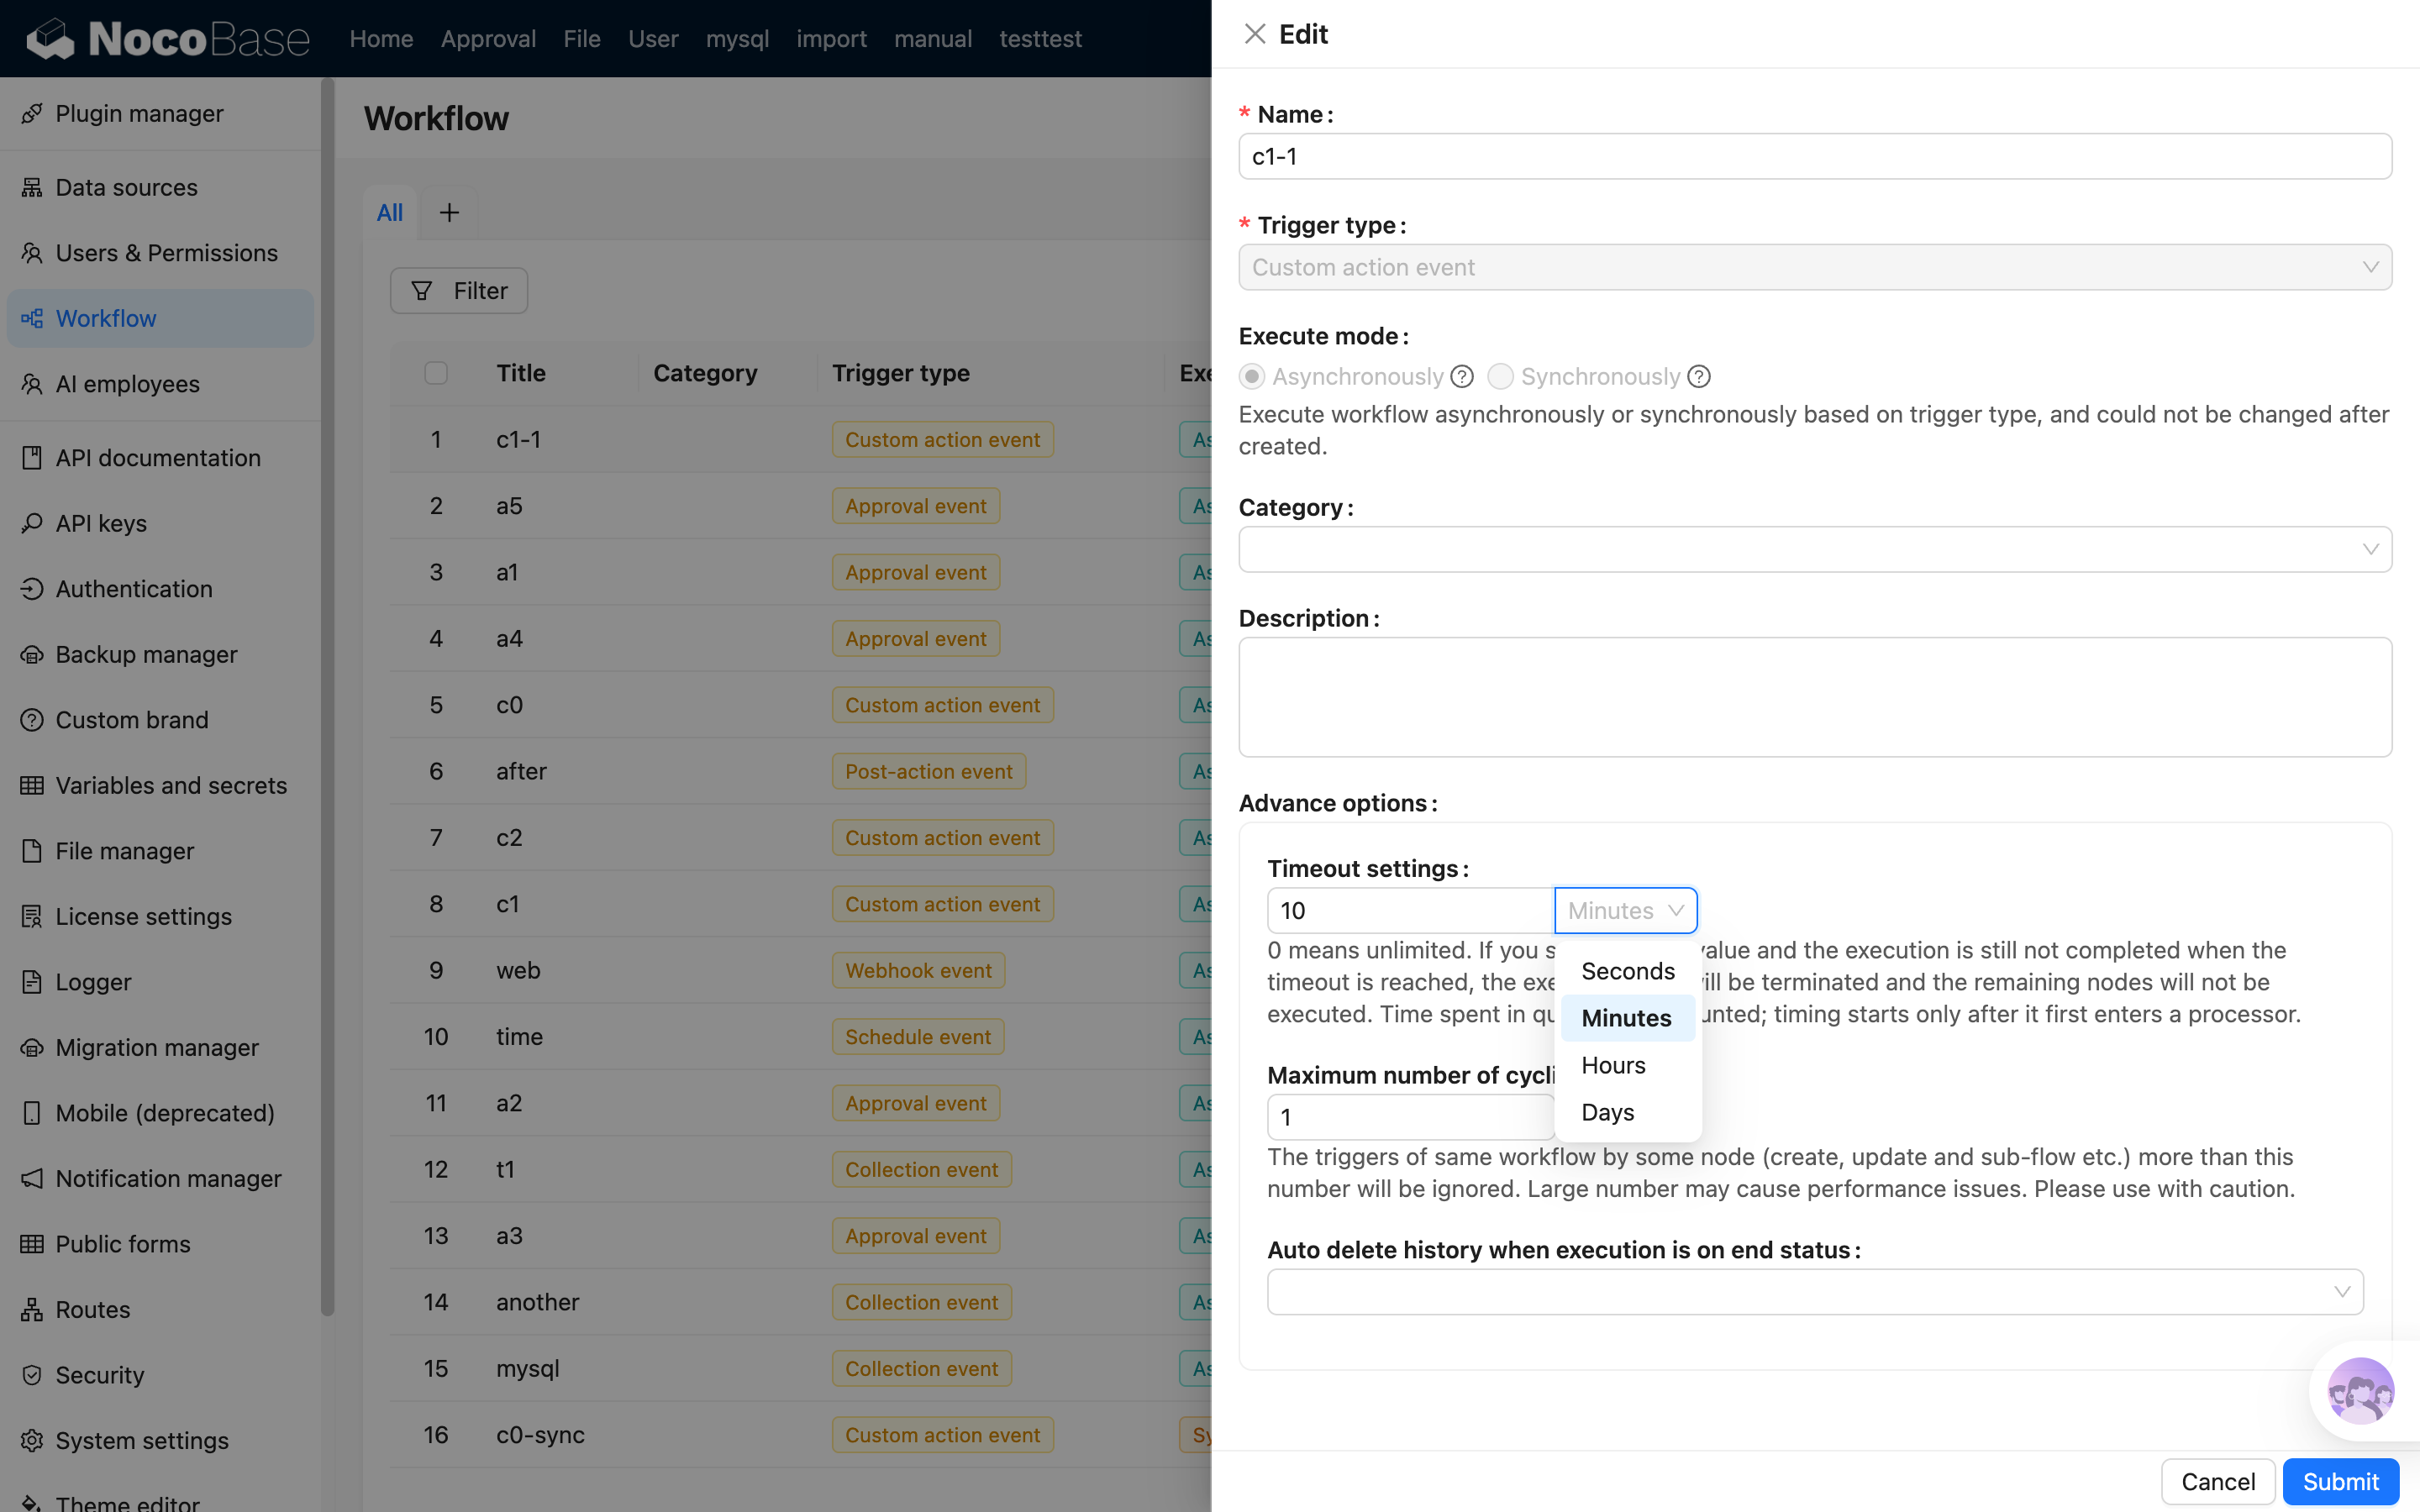
The available options are:
- Enter
0to set no timeout limit (default). - Enter a value greater than
0to enable the timeout limit. The interface supports seconds, minutes, hours, and days as units. - The maximum timeout is 180 days.
Timing Rules
The timeout starts counting when the workflow first enters a processor. After a workflow is triggered, time spent waiting in the queue for scheduling, or stored for delayed start, does not count toward the timeout.
After entering a processor, the timeout continues to count, including actual node execution time and time spent by nodes that have entered a waiting state, such as manual processing, approval, delay, or waiting for an external callback. The timeout does not pause when the workflow is waiting for user action.
The timeout deadline is determined when the execution starts. Changing a workflow's timeout settings only affects executions that start processing afterward; it does not recalculate executions that have already started.
Timeout Handling
If the execution has not ended when the timeout is reached, the system terminates it:
- The execution history status changes to "Aborted", and the termination reason is shown as "Timed out".
- Node jobs that are currently running or waiting are marked as "Aborted".
- Subsequent nodes will not continue to execute.
- If this execution has running subflow executions, those subflows are also aborted together with the parent execution.
Examples:
- If a loop node runs an extremely long loop and the processing inside the loop is time-consuming, causing the whole loop node to exceed the configured timeout, the currently running loop node and its internal nodes are forcibly terminated, and subsequent nodes will not continue to execute.
- If a manual processing or approval node waits for a long time and exceeds the configured timeout, the currently waiting manual processing node is forcibly terminated, subsequent nodes will not continue to execute, and the related tasks are canceled.
Timeout settings are a global limit for the entire workflow execution, not a timeout for an individual node. If you only need to limit the waiting time of a specific node, such as an HTTP Request or JavaScript Script node, use that node's own timeout settings.
If you need to implement business-level time-limited handling, such as "mark a work order as timed out if nobody processes it within 10 minutes", usually use the Delay node together with parallel branches to arrange the follow-up handling. The global timeout directly terminates the current execution, so it is suitable as a fallback protection mechanism, not for carrying subsequent business branches.
Execution Mode
Workflows are executed either asynchronously or synchronously, based on a trigger type selected during creation. Asynchronous mode means that after a specific event is triggered, the workflow enters a queue and is executed one by one by background scheduling. Synchronous mode, on the other hand, does not enter the scheduling queue after being triggered; it starts executing directly and provides immediate feedback upon completion.
Collection events, after action events, custom action events, scheduled events, and approval events are executed asynchronously by default. Before action events are executed synchronously by default. Both collection events and form events support both modes, which can be selected when creating a workflow:
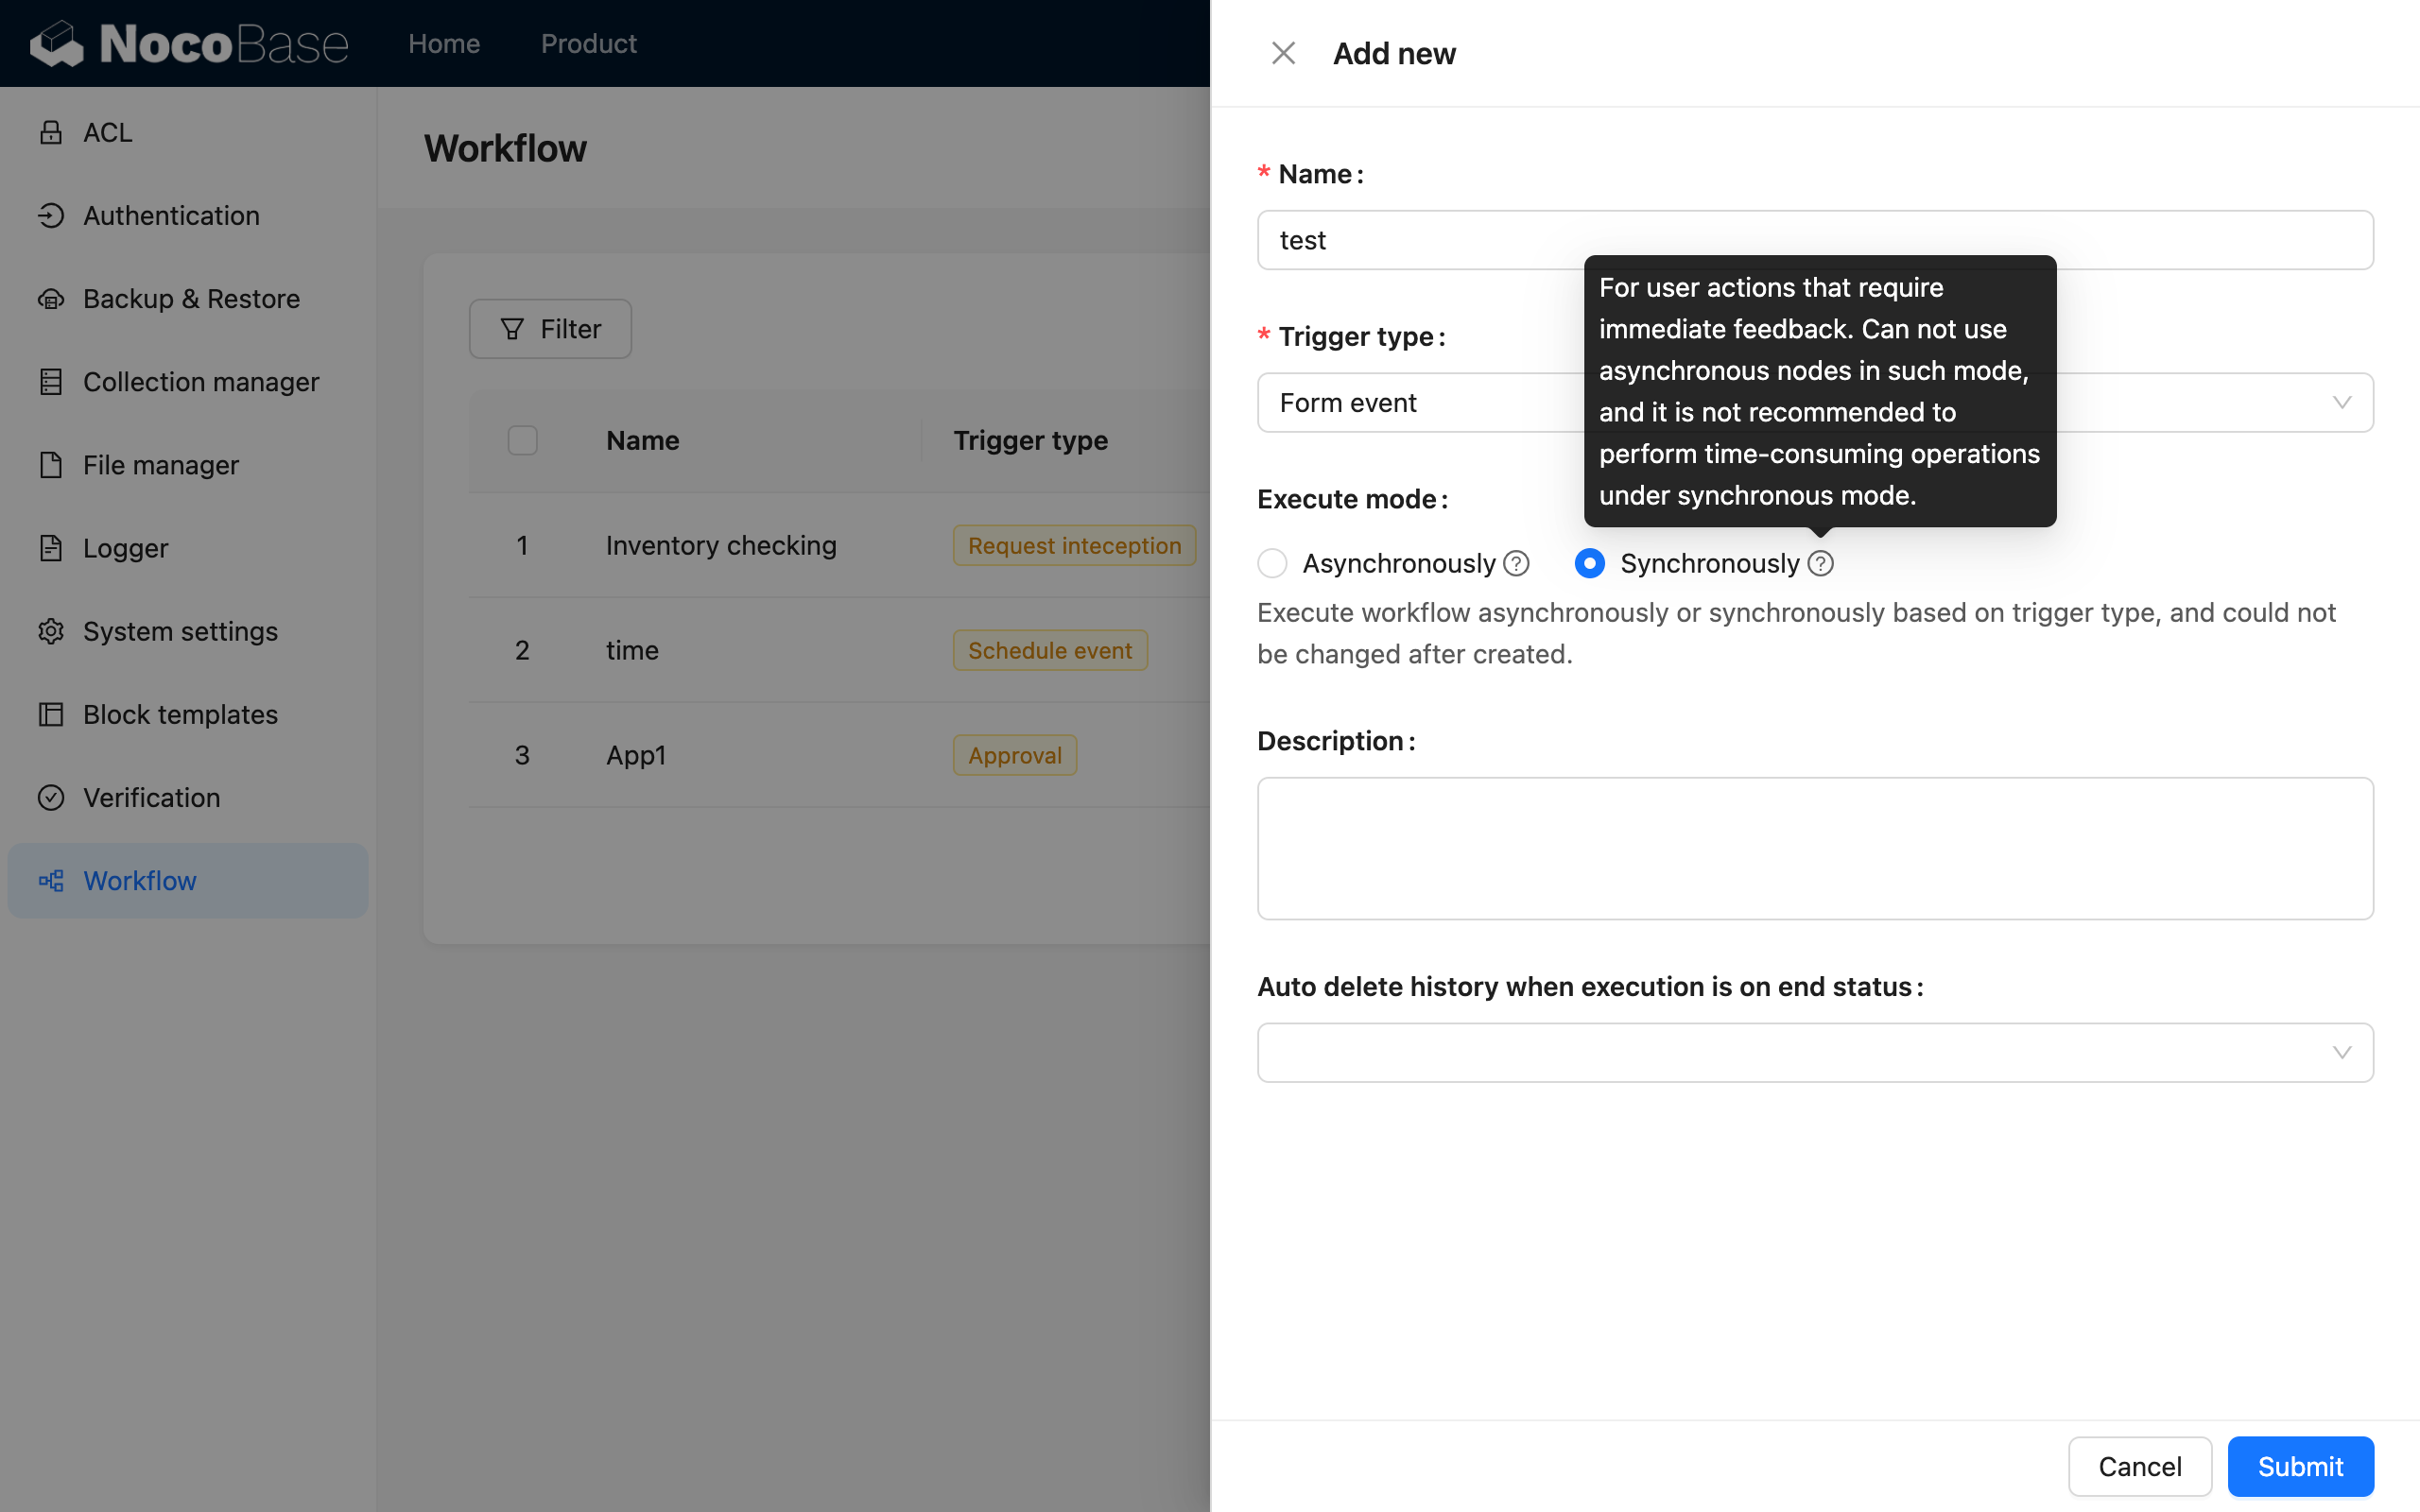
Due to their nature, synchronous workflows cannot use nodes that produce a "waiting" state, such as "Manual processing".
Auto-delete Execution History
When a workflow is triggered frequently, you can configure auto-deletion of execution history to reduce clutter and alleviate storage pressure on the database.
You can also configure whether to automatically delete the execution history for a workflow in its creation and editing dialogs:
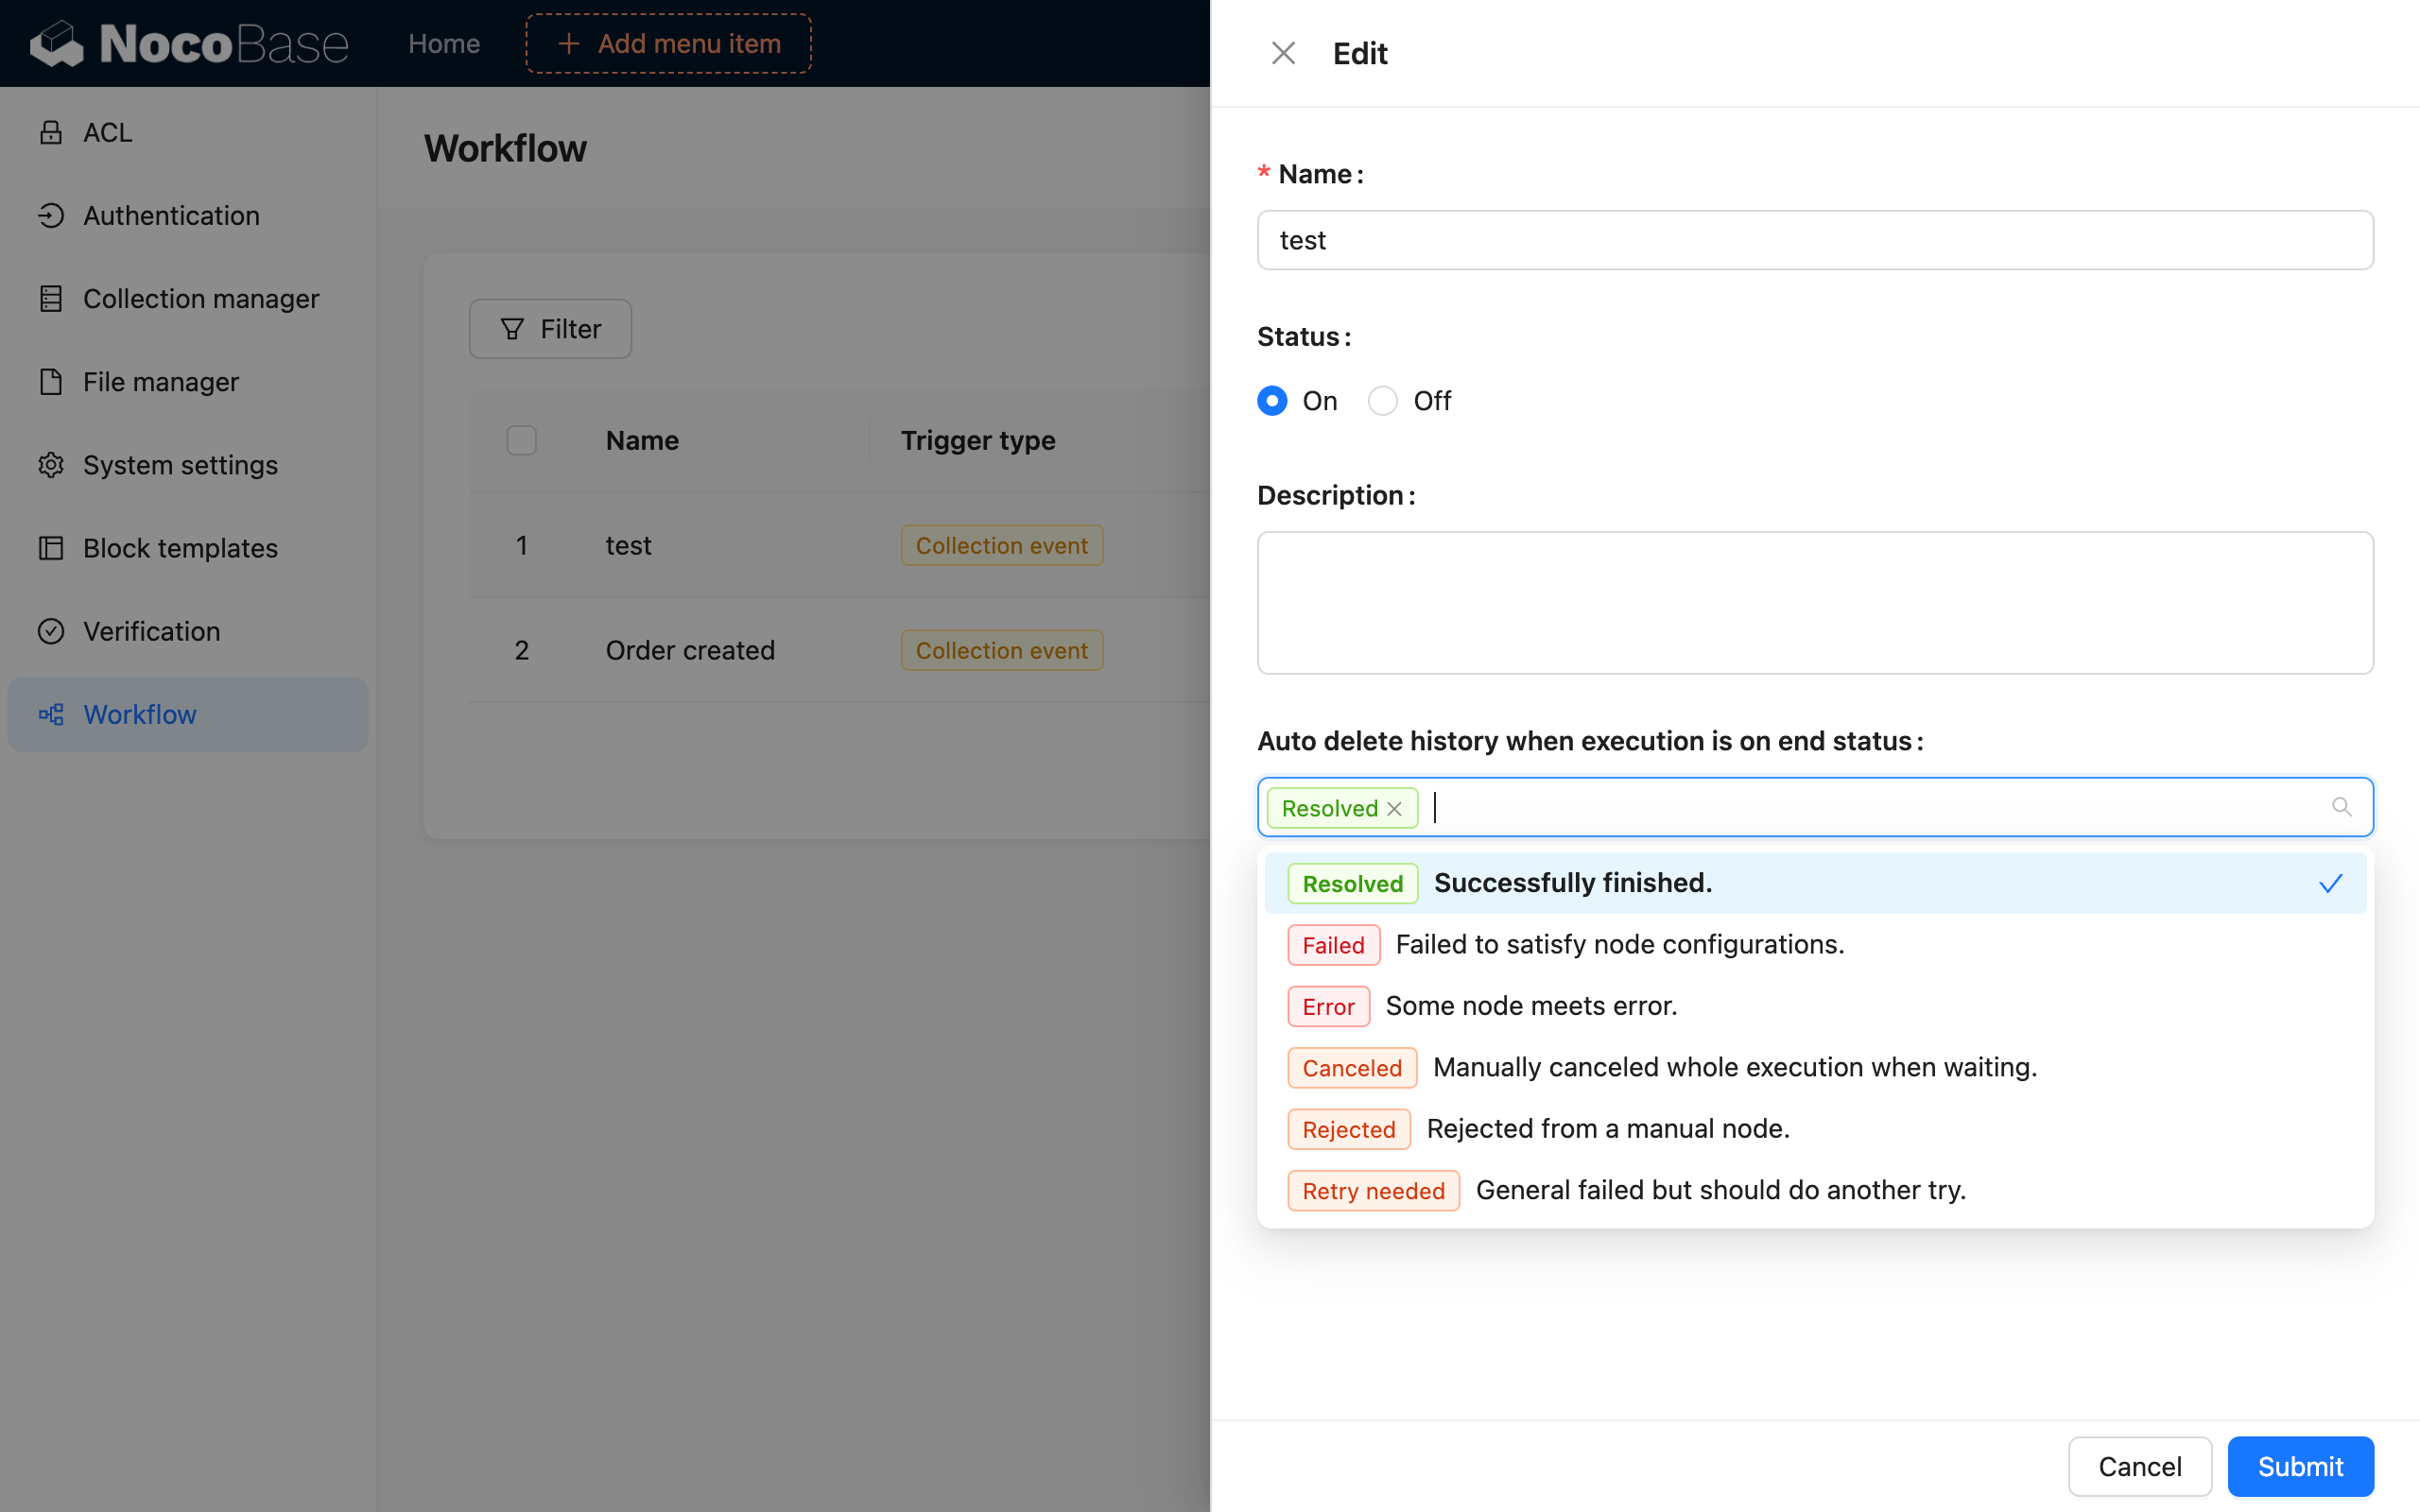
Auto-deletion can be configured based on the execution result status. In most cases, it is recommended to only check the "Completed" status to preserve records of failed executions for future troubleshooting.
It is recommended not to enable auto-deletion of execution history when debugging a workflow, so you can use the history to check if the workflow's execution logic is as expected.
Deleting a workflow's history does not reduce its execution count.