

Approval
Workflow: ApprovalProfessional Edition+Introduction
Approval is a process type specifically designed for human-initiated and human-processed tasks to decide the status of relevant data. It is commonly used for office automation or other manual decision-making processes, such as creating and managing manual workflows for scenarios like "leave requests," "expense reimbursement approvals," and "raw material procurement approvals."
The Approval plugin provides a dedicated workflow type (trigger) "Approval (event)" and a dedicated "Approval" node for this process. Combined with NocoBase's unique custom collections and custom blocks, you can quickly and flexibly create and manage various approval scenarios.
Create a Workflow
When creating a workflow, select the "Approval" type to create an approval workflow:
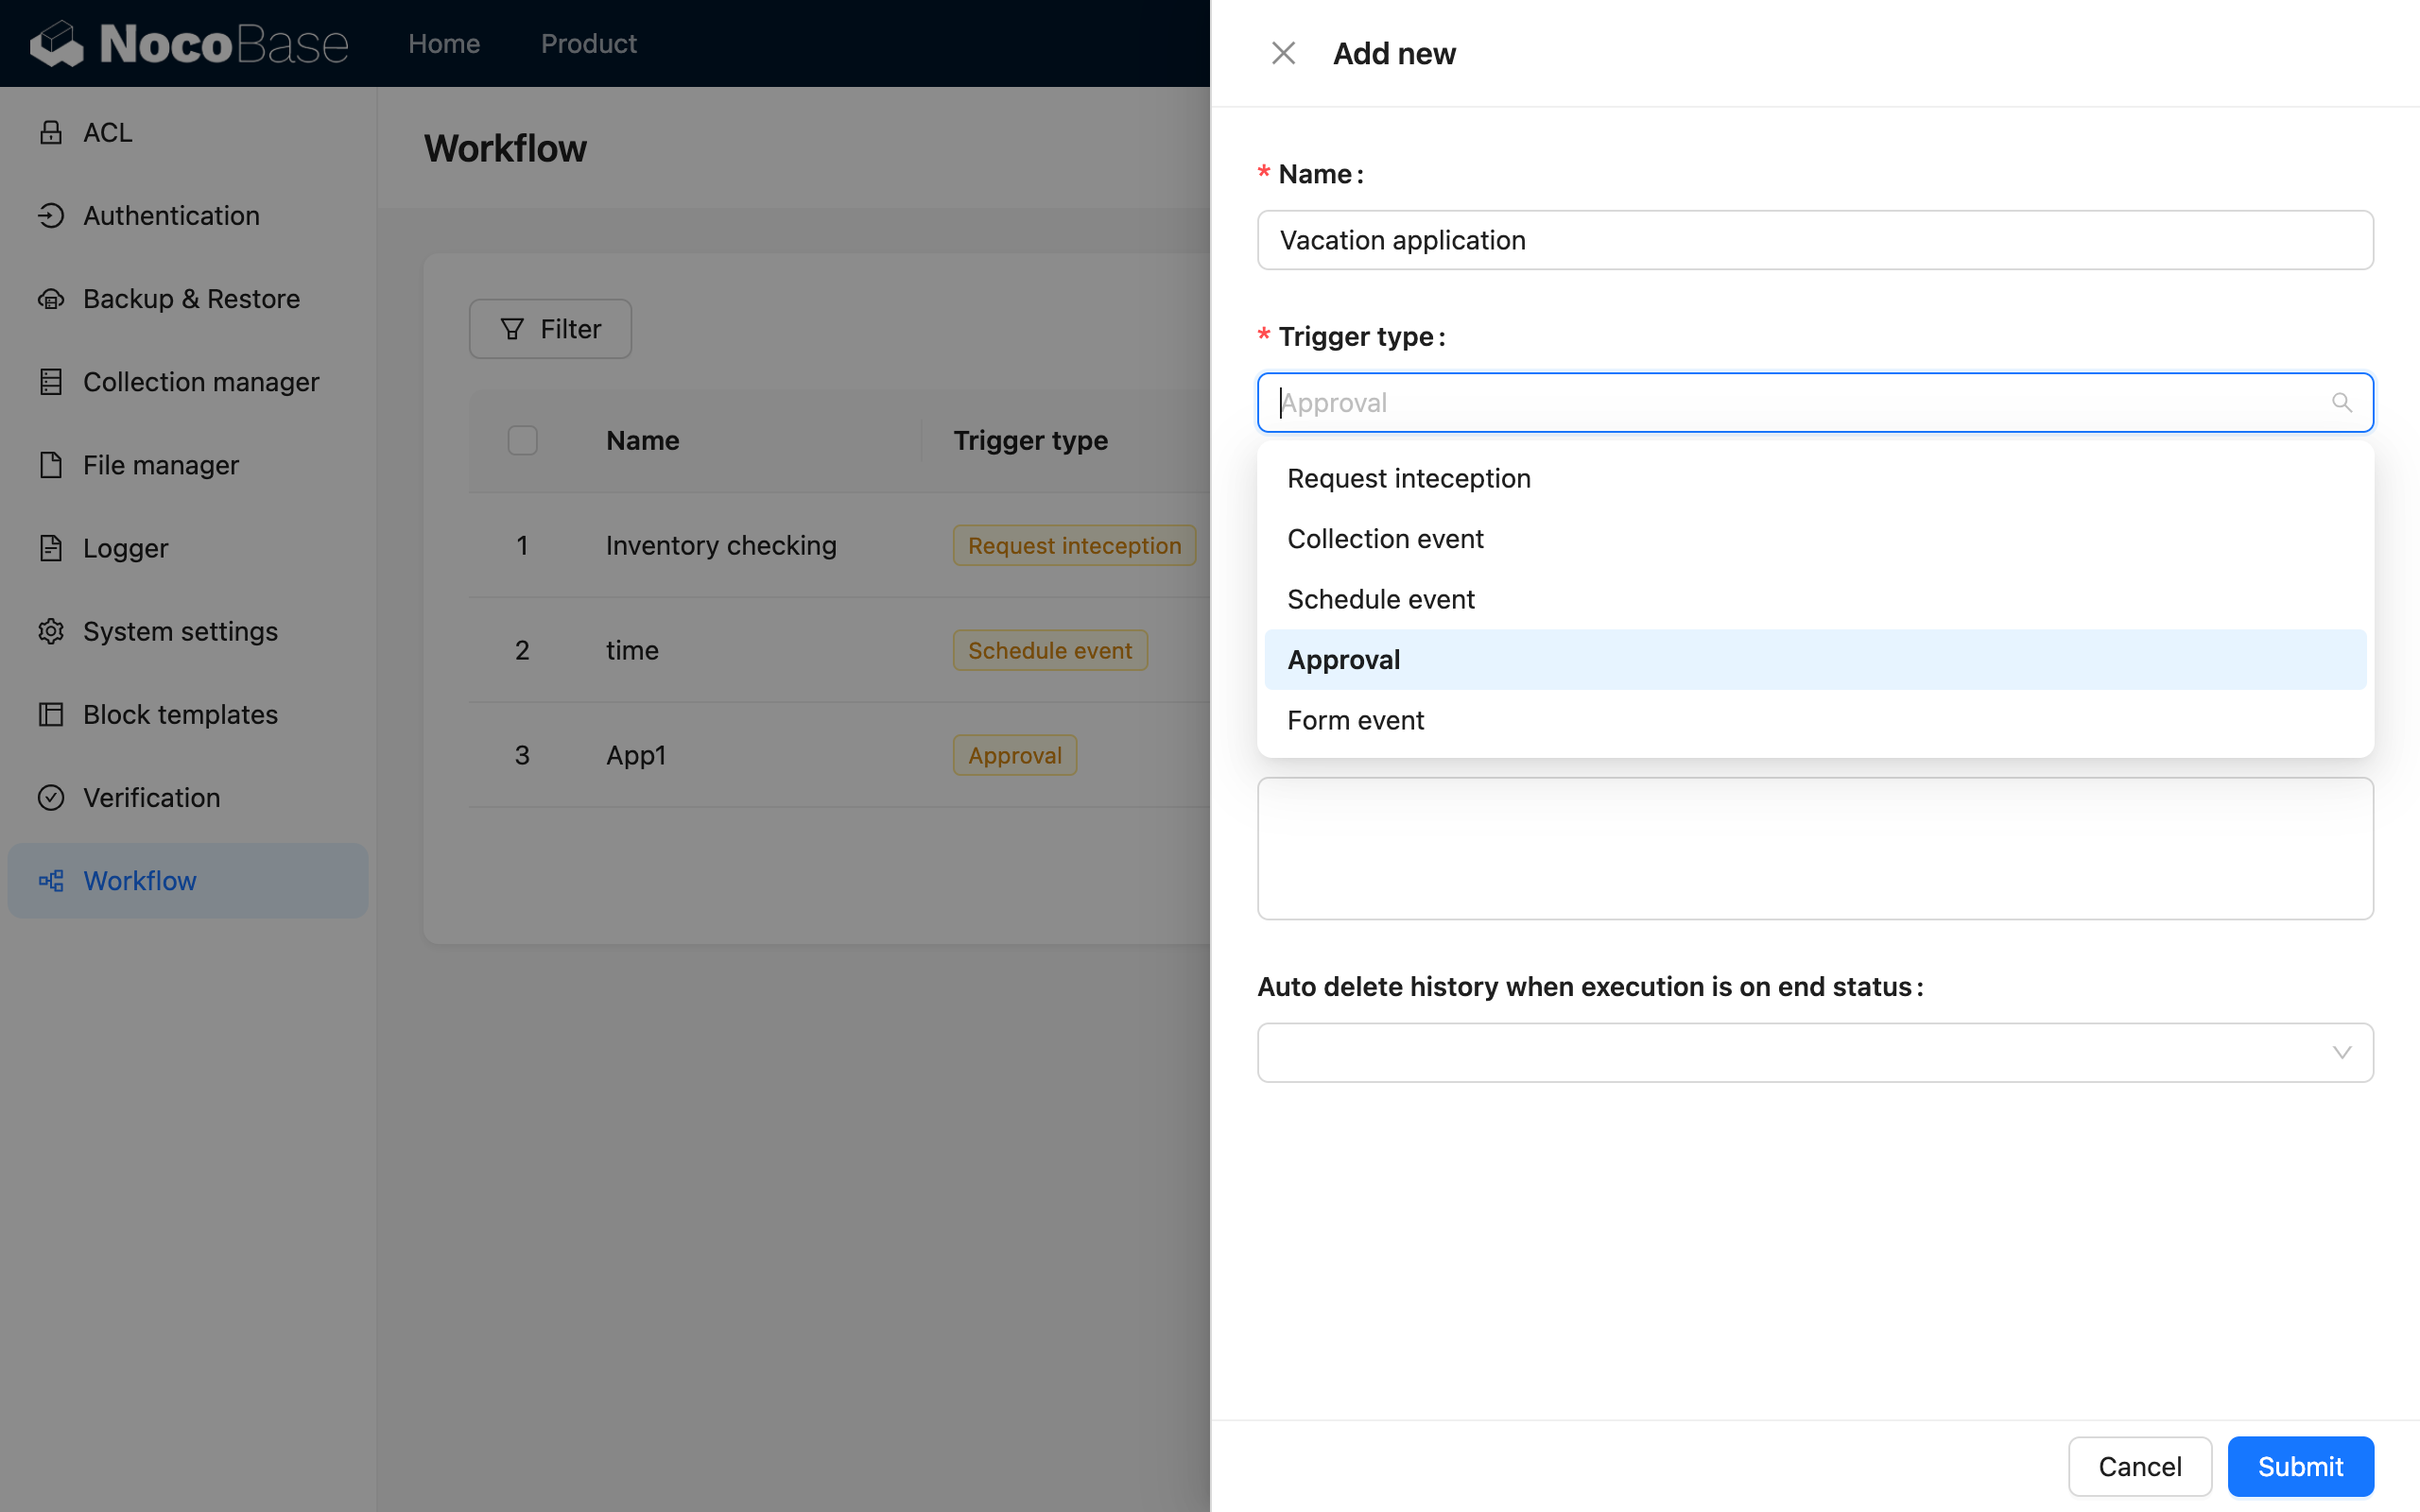
Afterward, in the workflow configuration interface, click the trigger to open a dialog for more configuration.
Trigger Configuration

Bind a Collection
NocoBase's Approval plugin is designed for flexibility and can be used with any custom collection. This means the approval configuration does not need to reconfigure the data model but directly reuses an existing collection. Therefore, after entering the trigger configuration, you first need to select a collection to determine which collection's data the process will be for:

Trigger Method
When initiating an approval for business data, you can choose from the following two trigger methods:
-
Before data is saved
Initiate the approval before the submitted data is saved. This is suitable for scenarios where data should only be saved after approval is granted. In this mode, the data at the time of initiation is temporary and will only be formally saved to the corresponding collection after approval.
-
After data is saved
Initiate the approval after the submitted data is saved. This is suitable for scenarios where data can be saved first and then approved. In this mode, the data is already saved in the collection when the approval starts, and any modifications made during the approval process will also be saved.
Initiation Location
You can choose where in the system the approval can be initiated:
-
Only in data blocks
You can bind any form block's action for this collection to the workflow to initiate approvals. The process can be handled and tracked in the approval block of a single record. This is typically suitable for business data.
-
In both data blocks and the To-do Center
In addition to data blocks, approvals can also be initiated and handled in the global To-do Center. This is typically suitable for administrative data.
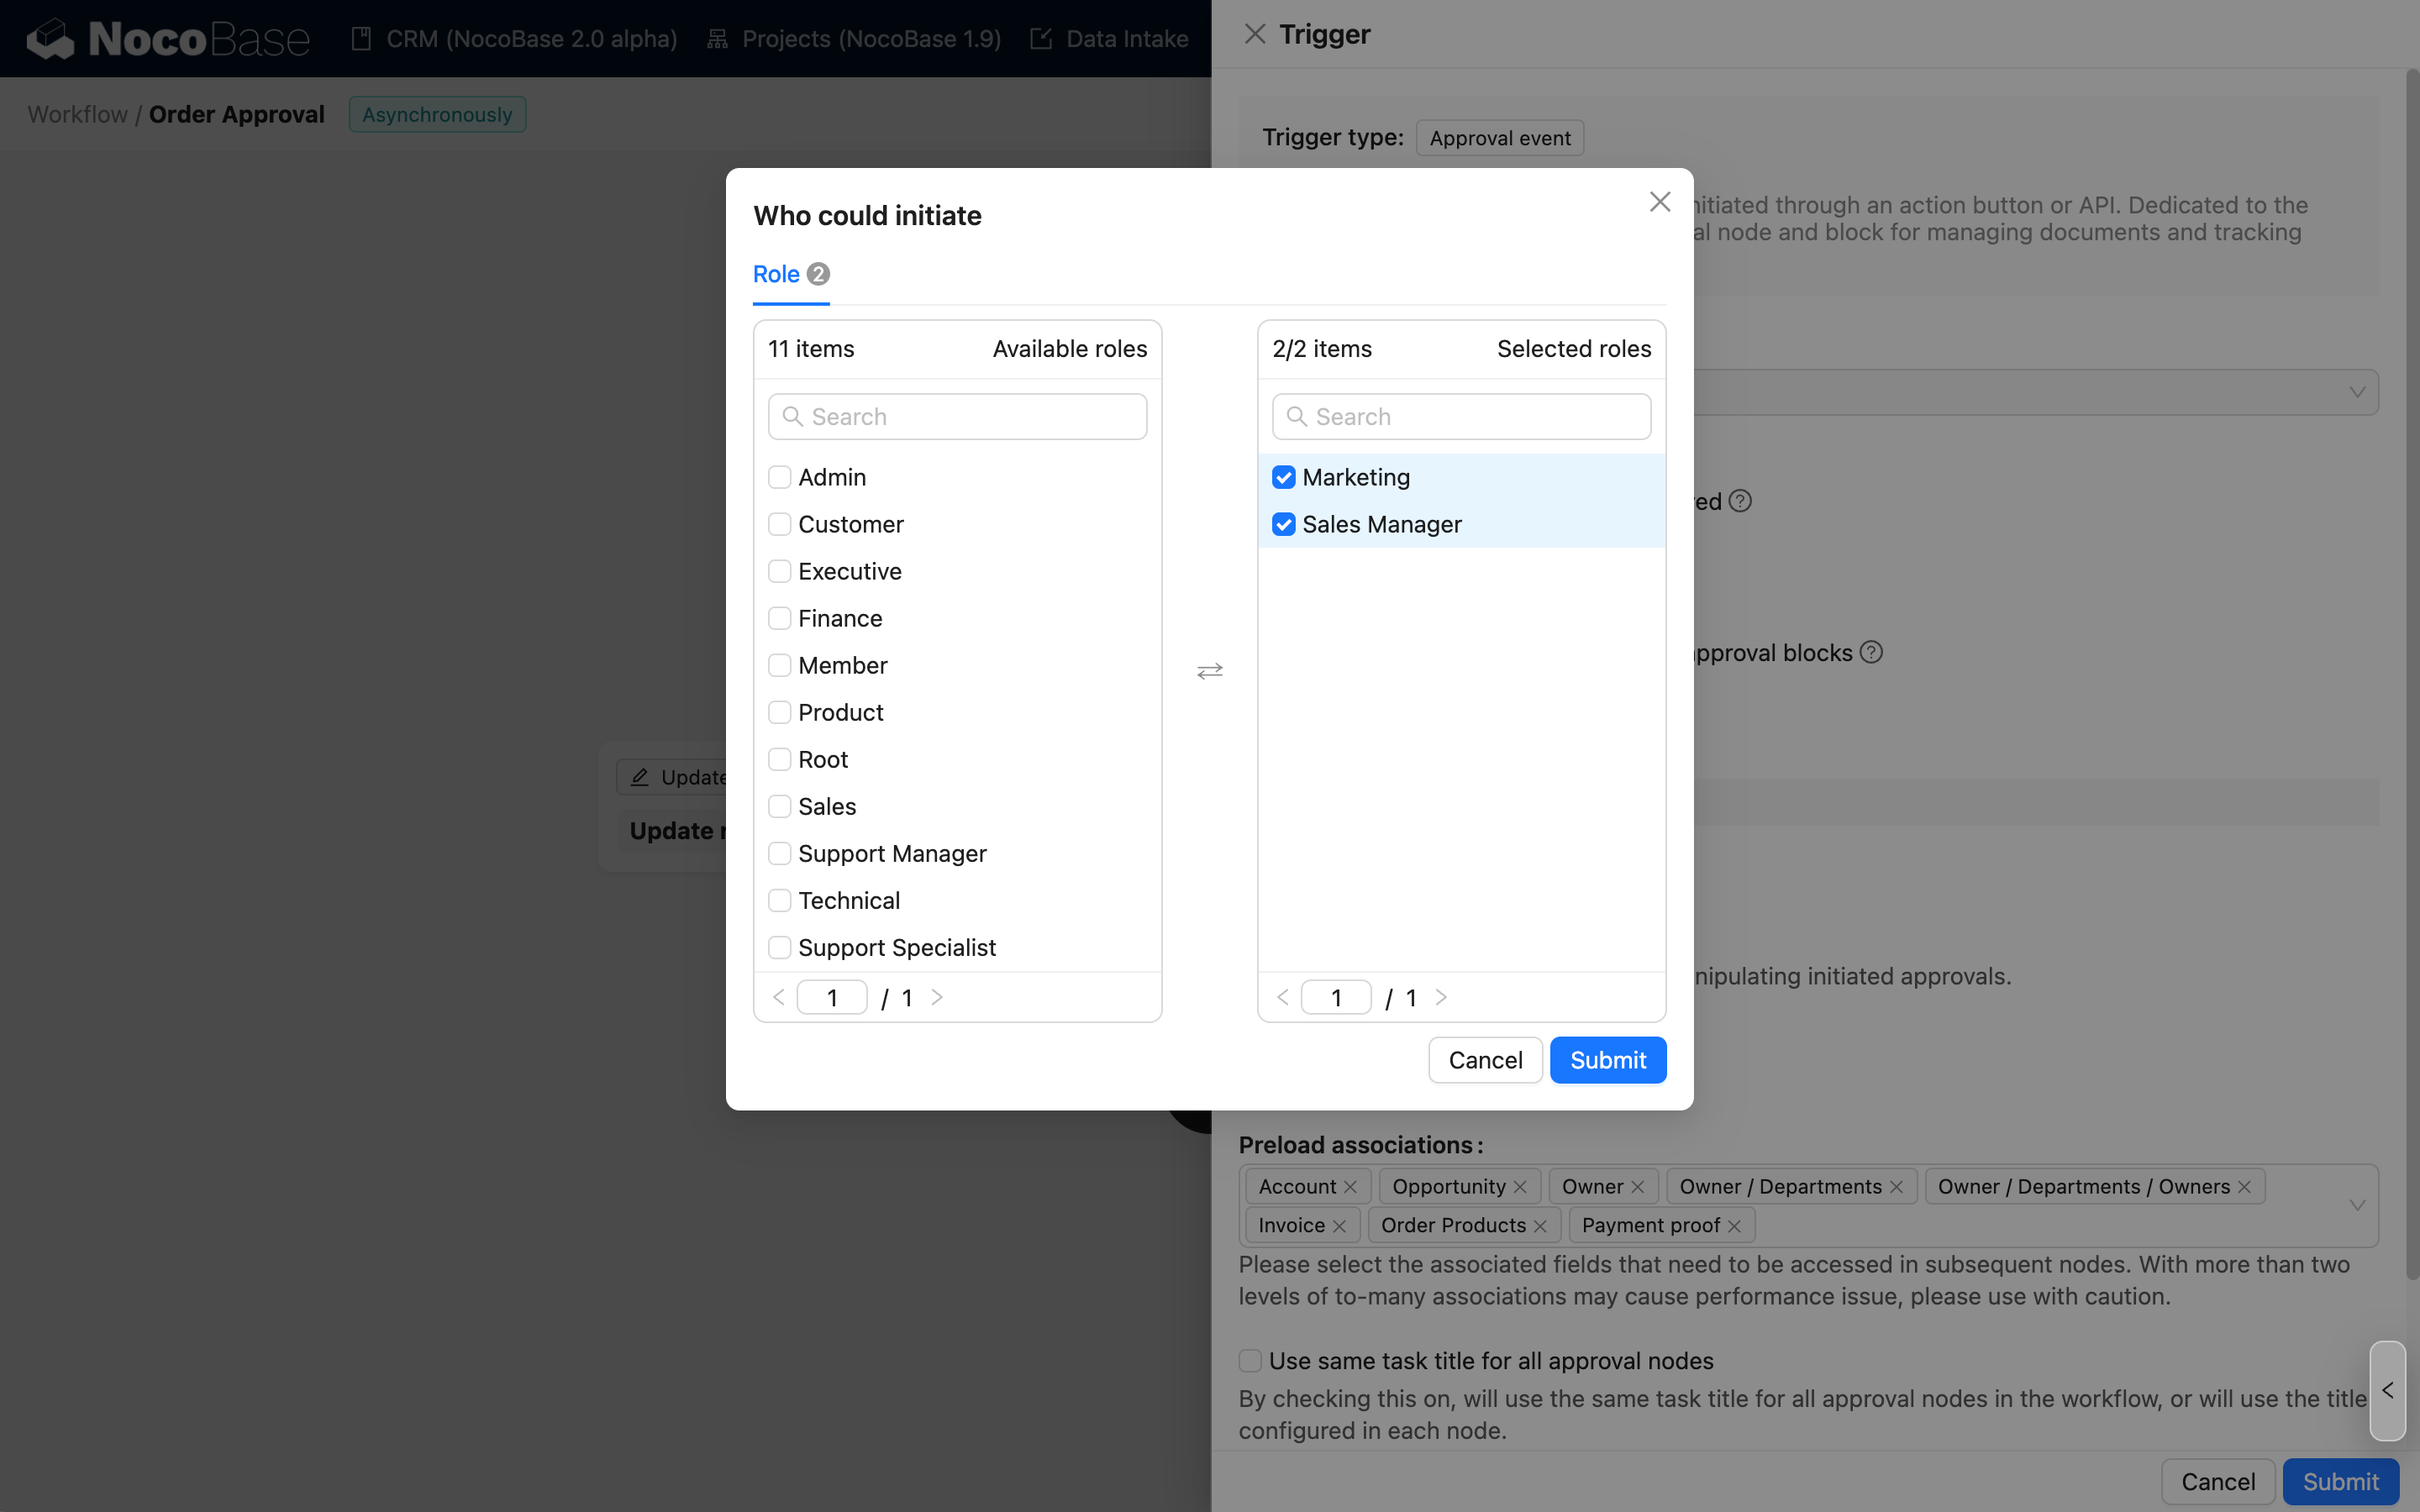
Who can initiate
You can configure permissions based on user scope to determine which users can initiate the approval:
-
All users
All users in the system can initiate the approval.
-
Only selected users
Only users within the specified scope are allowed to initiate the approval. Multiple selections are supported.
Initiator's Form Interface Configuration
Finally, you need to configure the initiator's form interface. This interface will be used for submission actions when initiating from the approval center block and when re-initiating after a withdrawal. Click the configure button to open the dialog:

You can add a form for the initiator's interface based on the bound collection, or add descriptive text (Markdown) for prompts and guidance. Adding a form block is mandatory; otherwise, the initiator will not be able to perform any actions upon entering this interface.
After adding a form block, just like in a regular form configuration interface, you can add field components from the corresponding collection and arrange them as needed to organize the content to be filled:

In addition to the direct submit button, you can also add a "Save Draft" action button to support temporary storage processes:

If an approval workflow allows the initiator to withdraw, you need to enable the "Withdraw" button in the initiator's interface configuration:

Once enabled, an approval initiated by this workflow can be withdrawn by the initiator before any approver processes it. However, after any approver in a subsequent approval node has processed it, it can no longer be withdrawn.
After enabling or deleting the withdraw button, you need to click save and submit in the trigger configuration dialog for the changes to take effect.
"My application" Card 2.0+
Used to configure the task cards in the "My Submissions" list of the To-do Center.

You can freely configure the business fields (except association fields) or approval-related information you want to display on the card.
After the approval request is created, the customized task card will be visible in the To-do Center list:
Record Display Mode in the Flow
-
Snapshot
The record state seen by the applicant and approvers when they enter the process. After submission, they only see the records they modified—they will not see updates made by others later.
-
Latest
The applicant and approvers always see the latest version of the record throughout the process, regardless of the record's state before their action. After the process ends, they will see the final version of the record.
Approval Node
In an approval workflow, you need to use the dedicated "Approval" node to configure the operational logic for approvers to process (approve, reject, or return) the initiated approval. The "Approval" node can only be used in approval workflows. Refer to Approval Node for details.
If an approval workflow does not contain any "Approval" nodes, the workflow will be automatically approved.
Configure Approval Initiation
After configuring and enabling an approval workflow, you can bind it to the submit button of the corresponding collection's form, allowing users to initiate an approval upon submission:

After that, when a user submits this form, the corresponding approval workflow will be triggered. The submitted data is not only saved in the corresponding collection but is also snapshotted into the approval flow for subsequent approvers to review.
Currently, the button to initiate an approval only supports the "Submit" (or "Save") button in a create or update form. It does not support the "Trigger workflow" button (which can only be bound to "Custom action event").
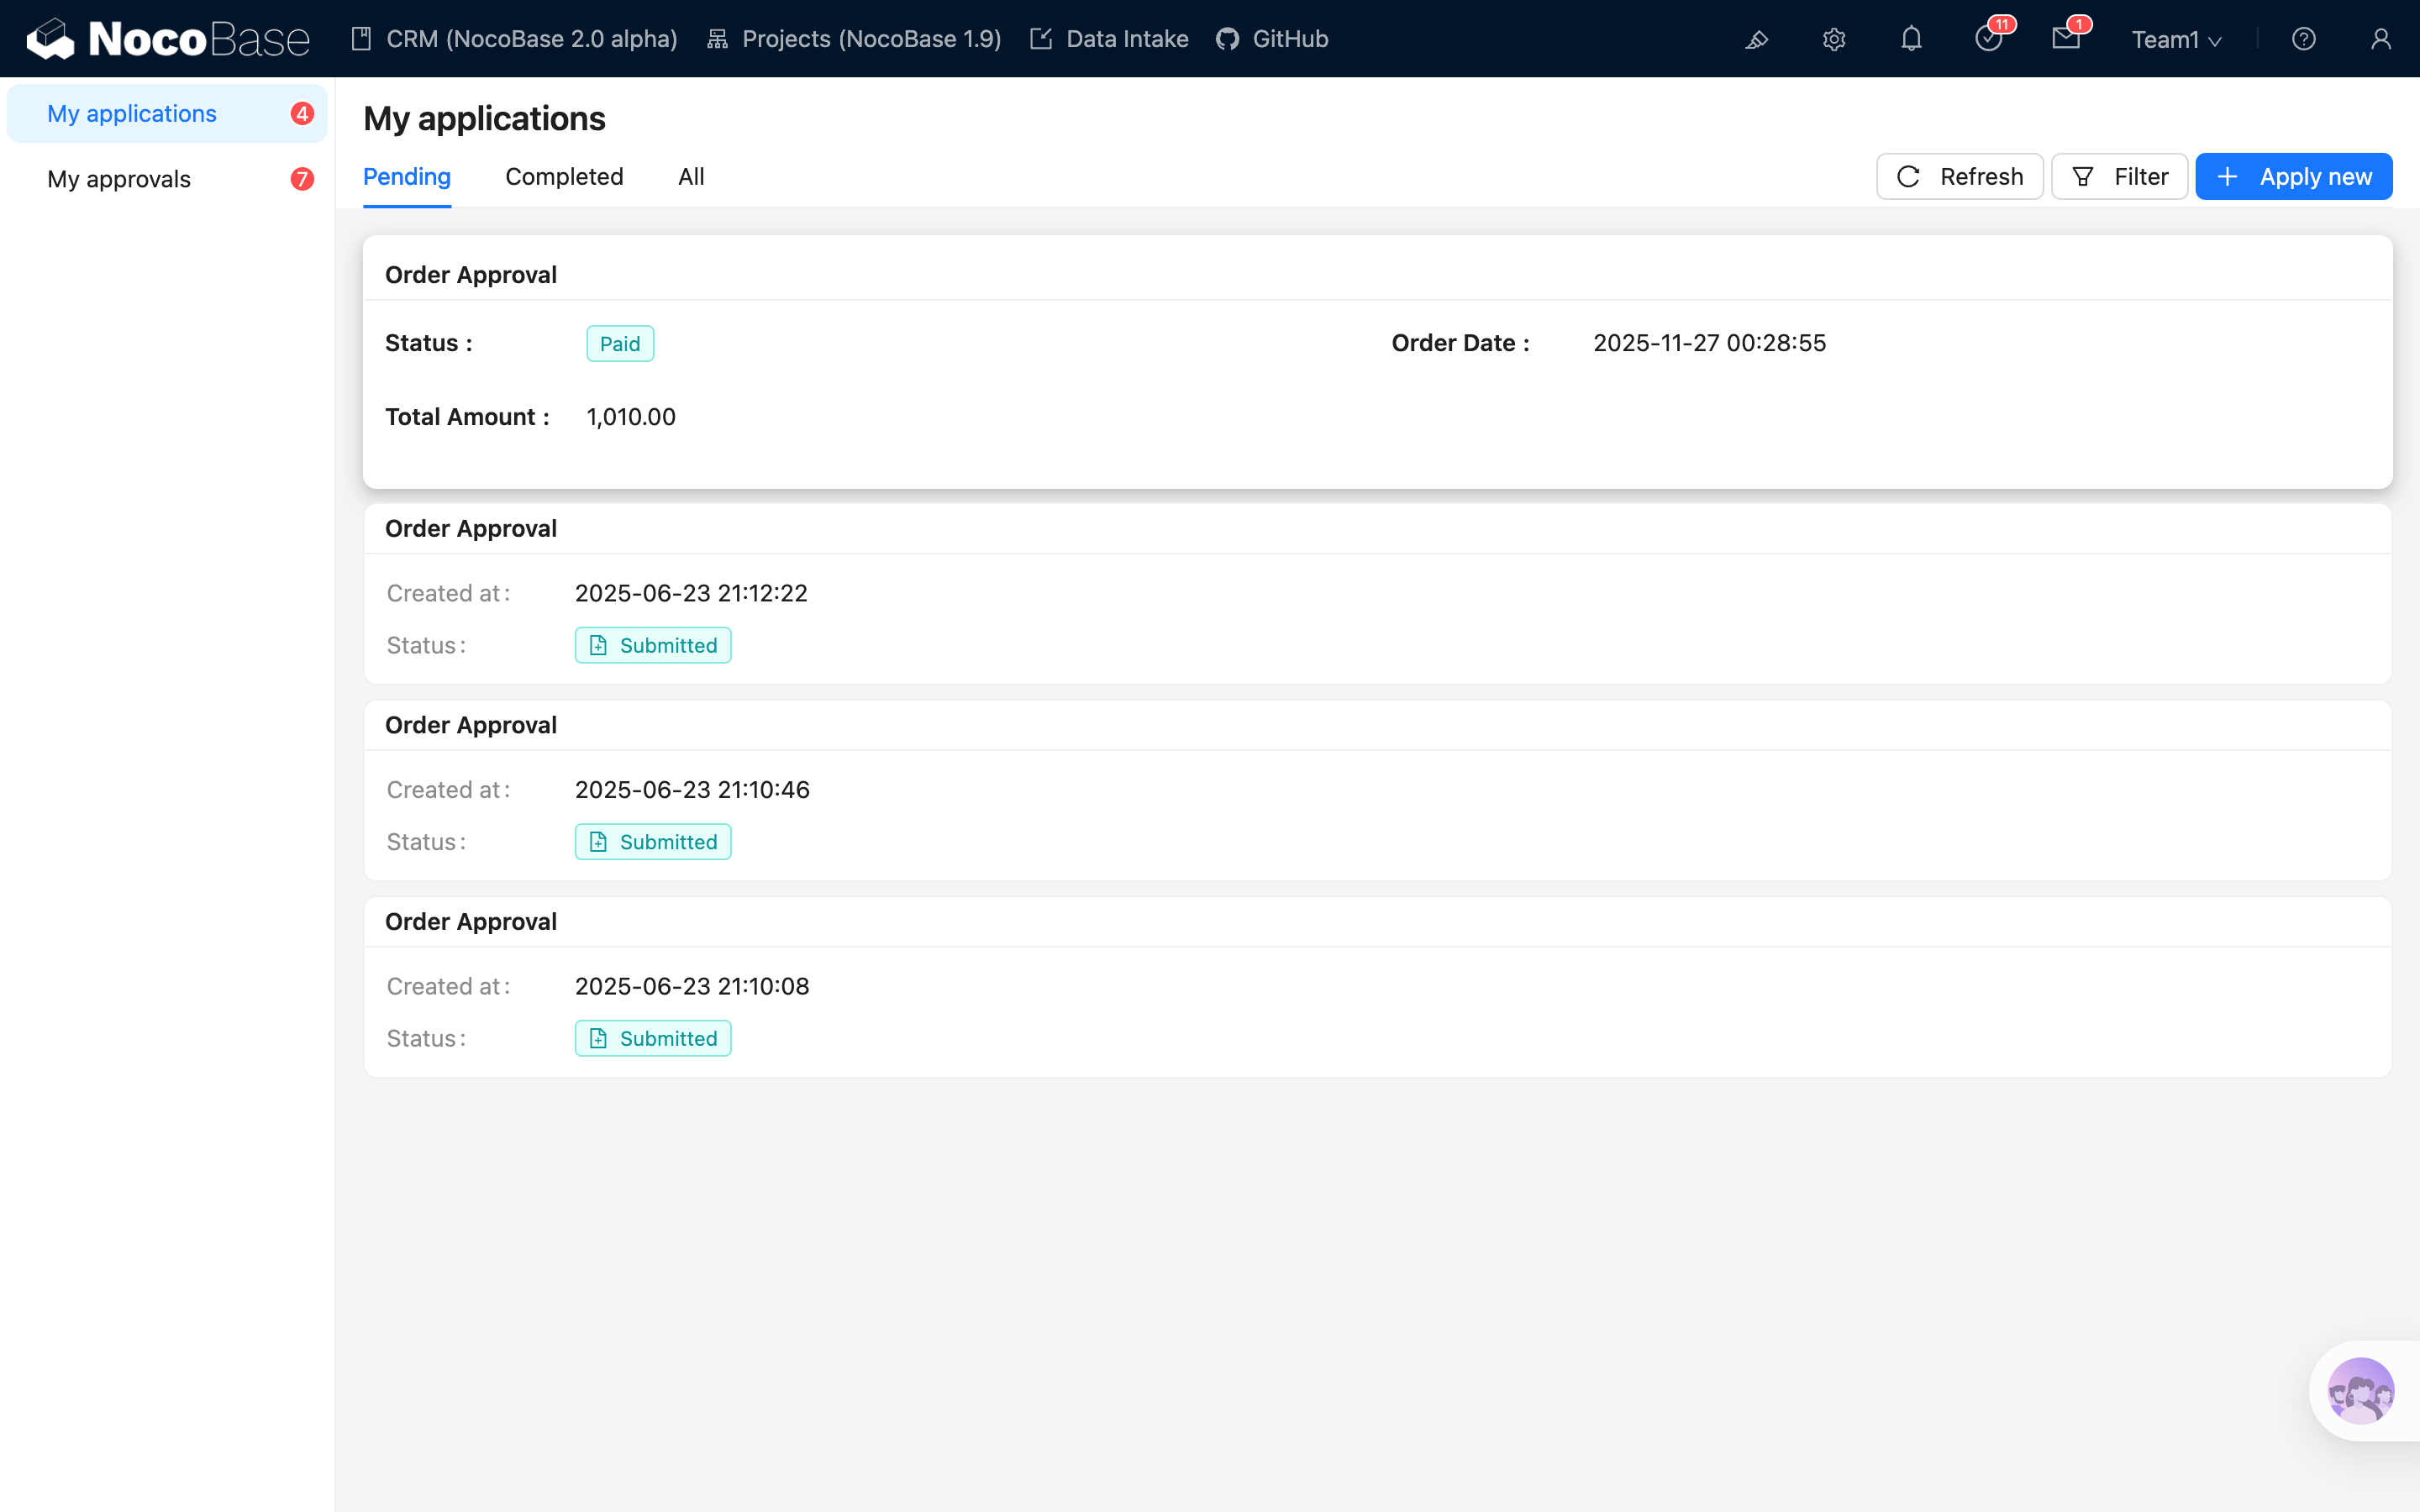
To-do Center
The To-do Center provides a unified entry point for users to view and process tasks. Approvals initiated by the current user and pending tasks can be accessed through the To-do Center in the top toolbar, and different types of tasks can be viewed through the navigation on the left.
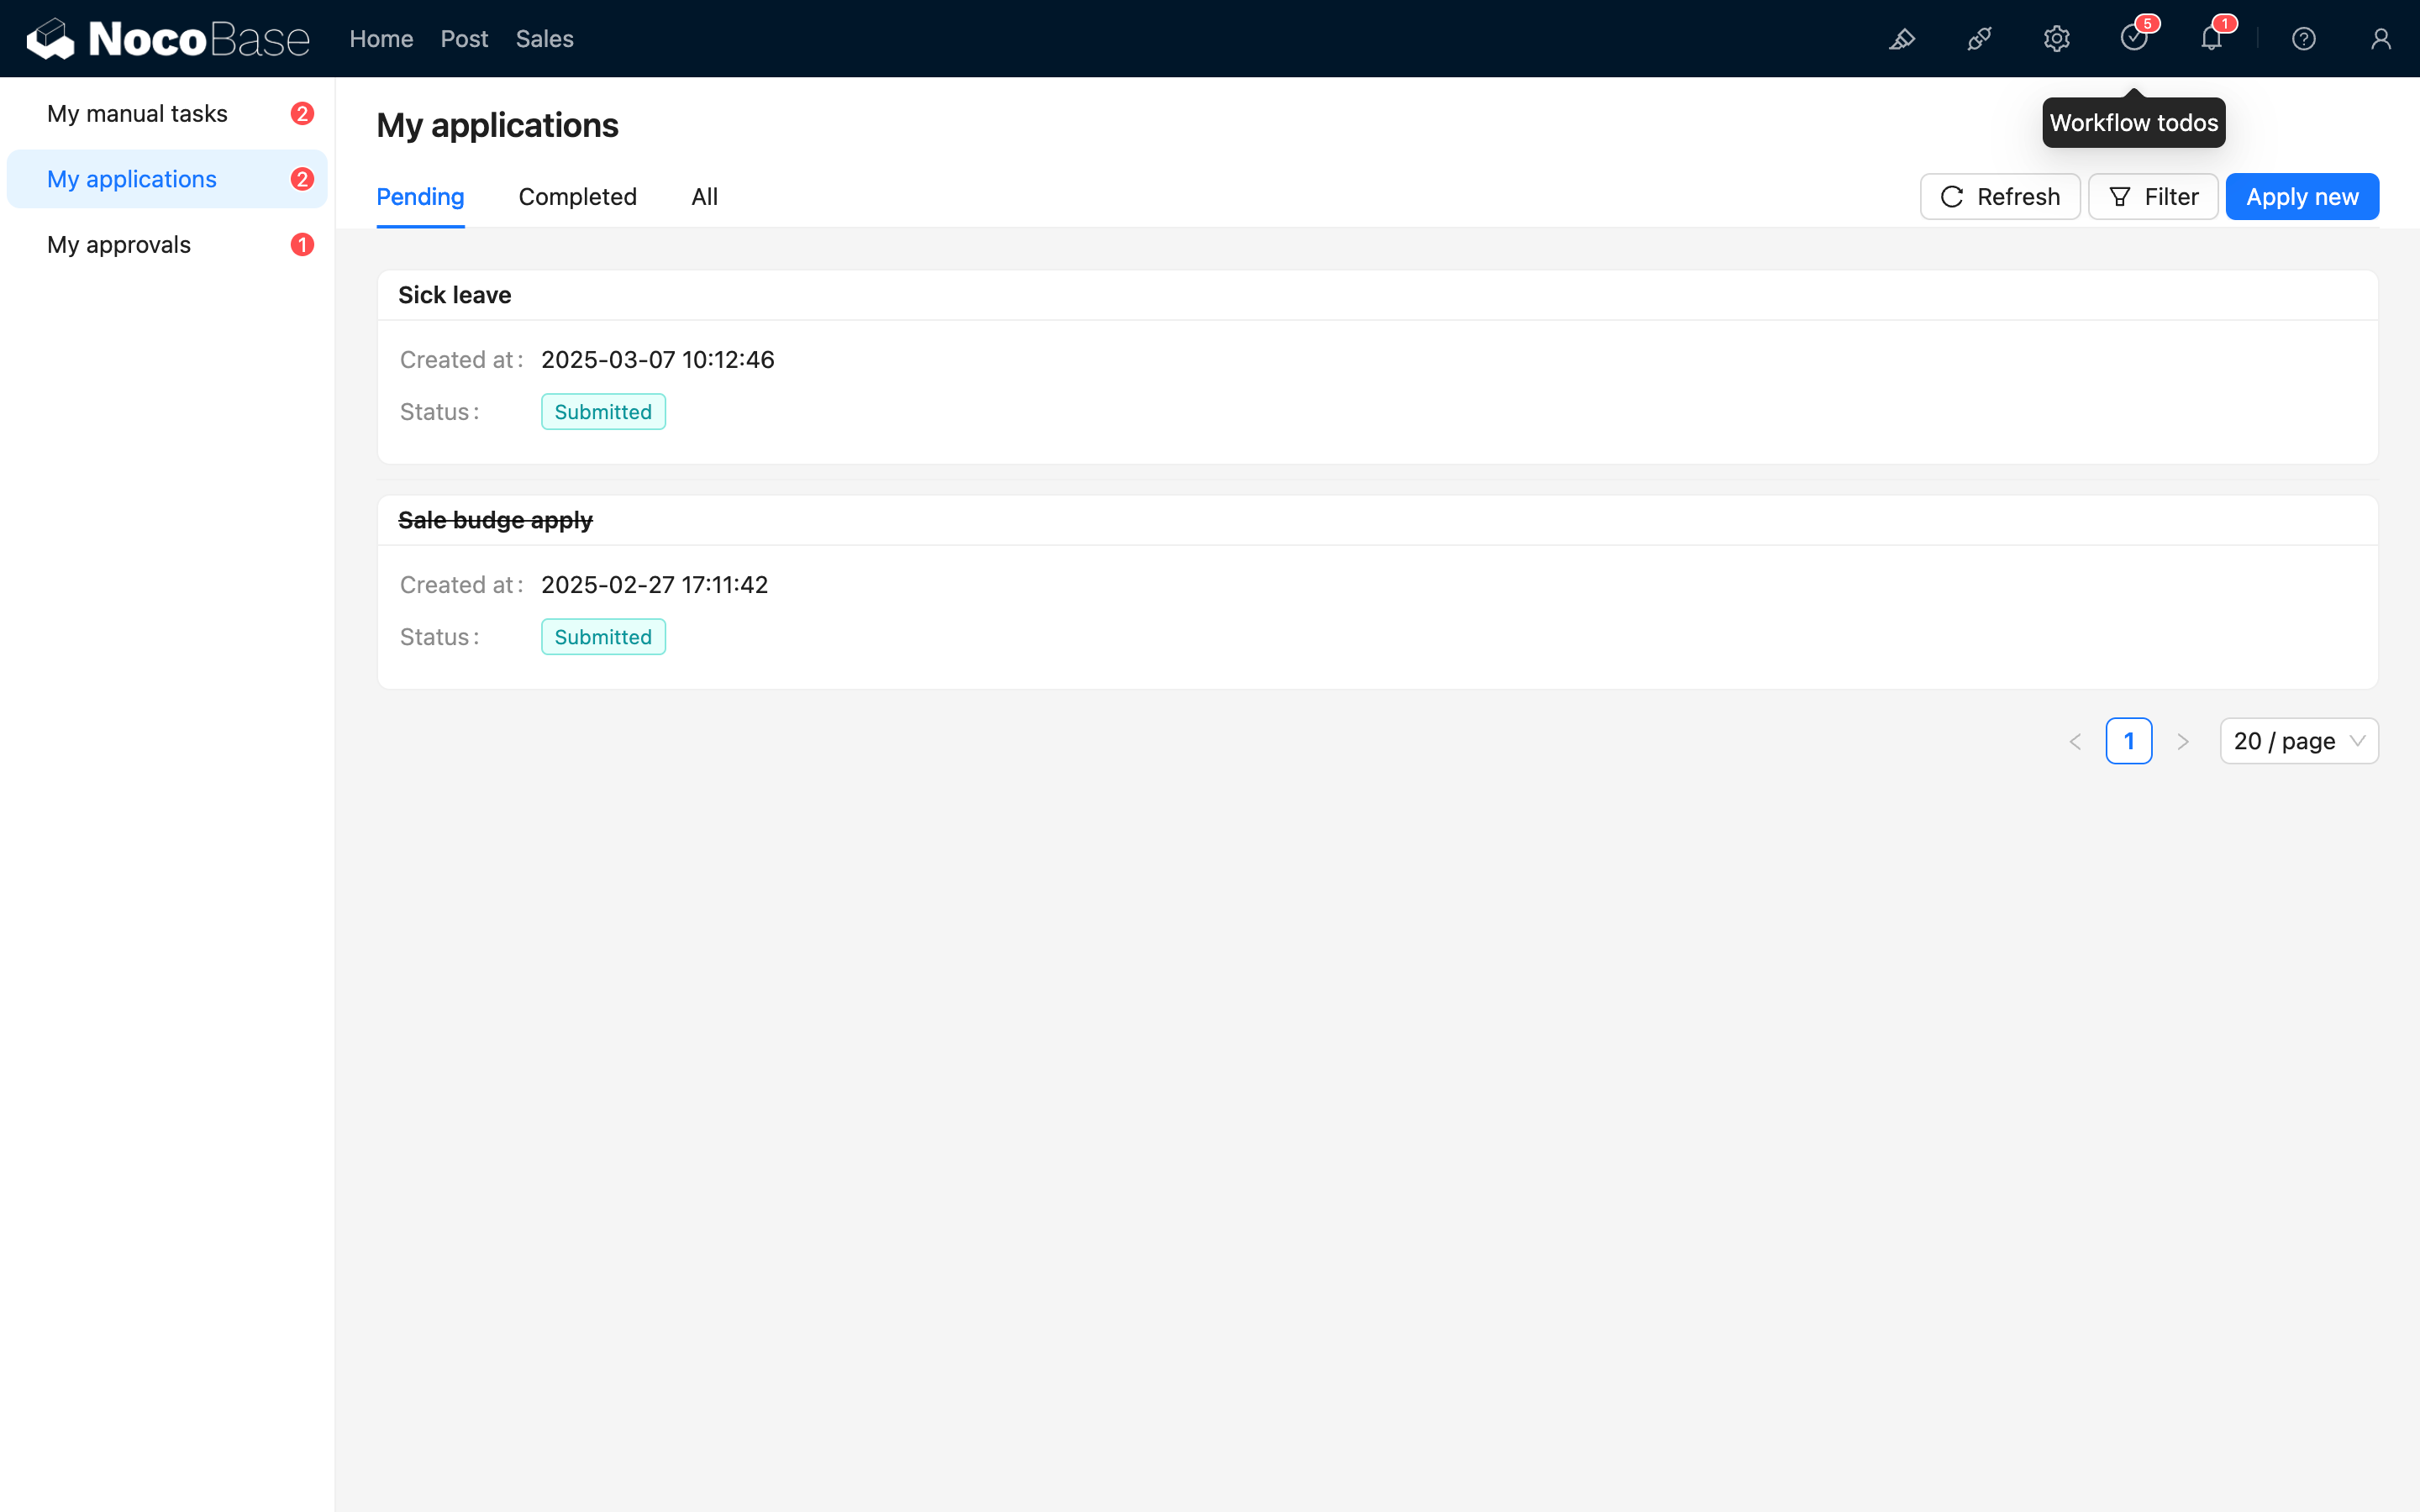
My Submissions
View Submitted Approvals
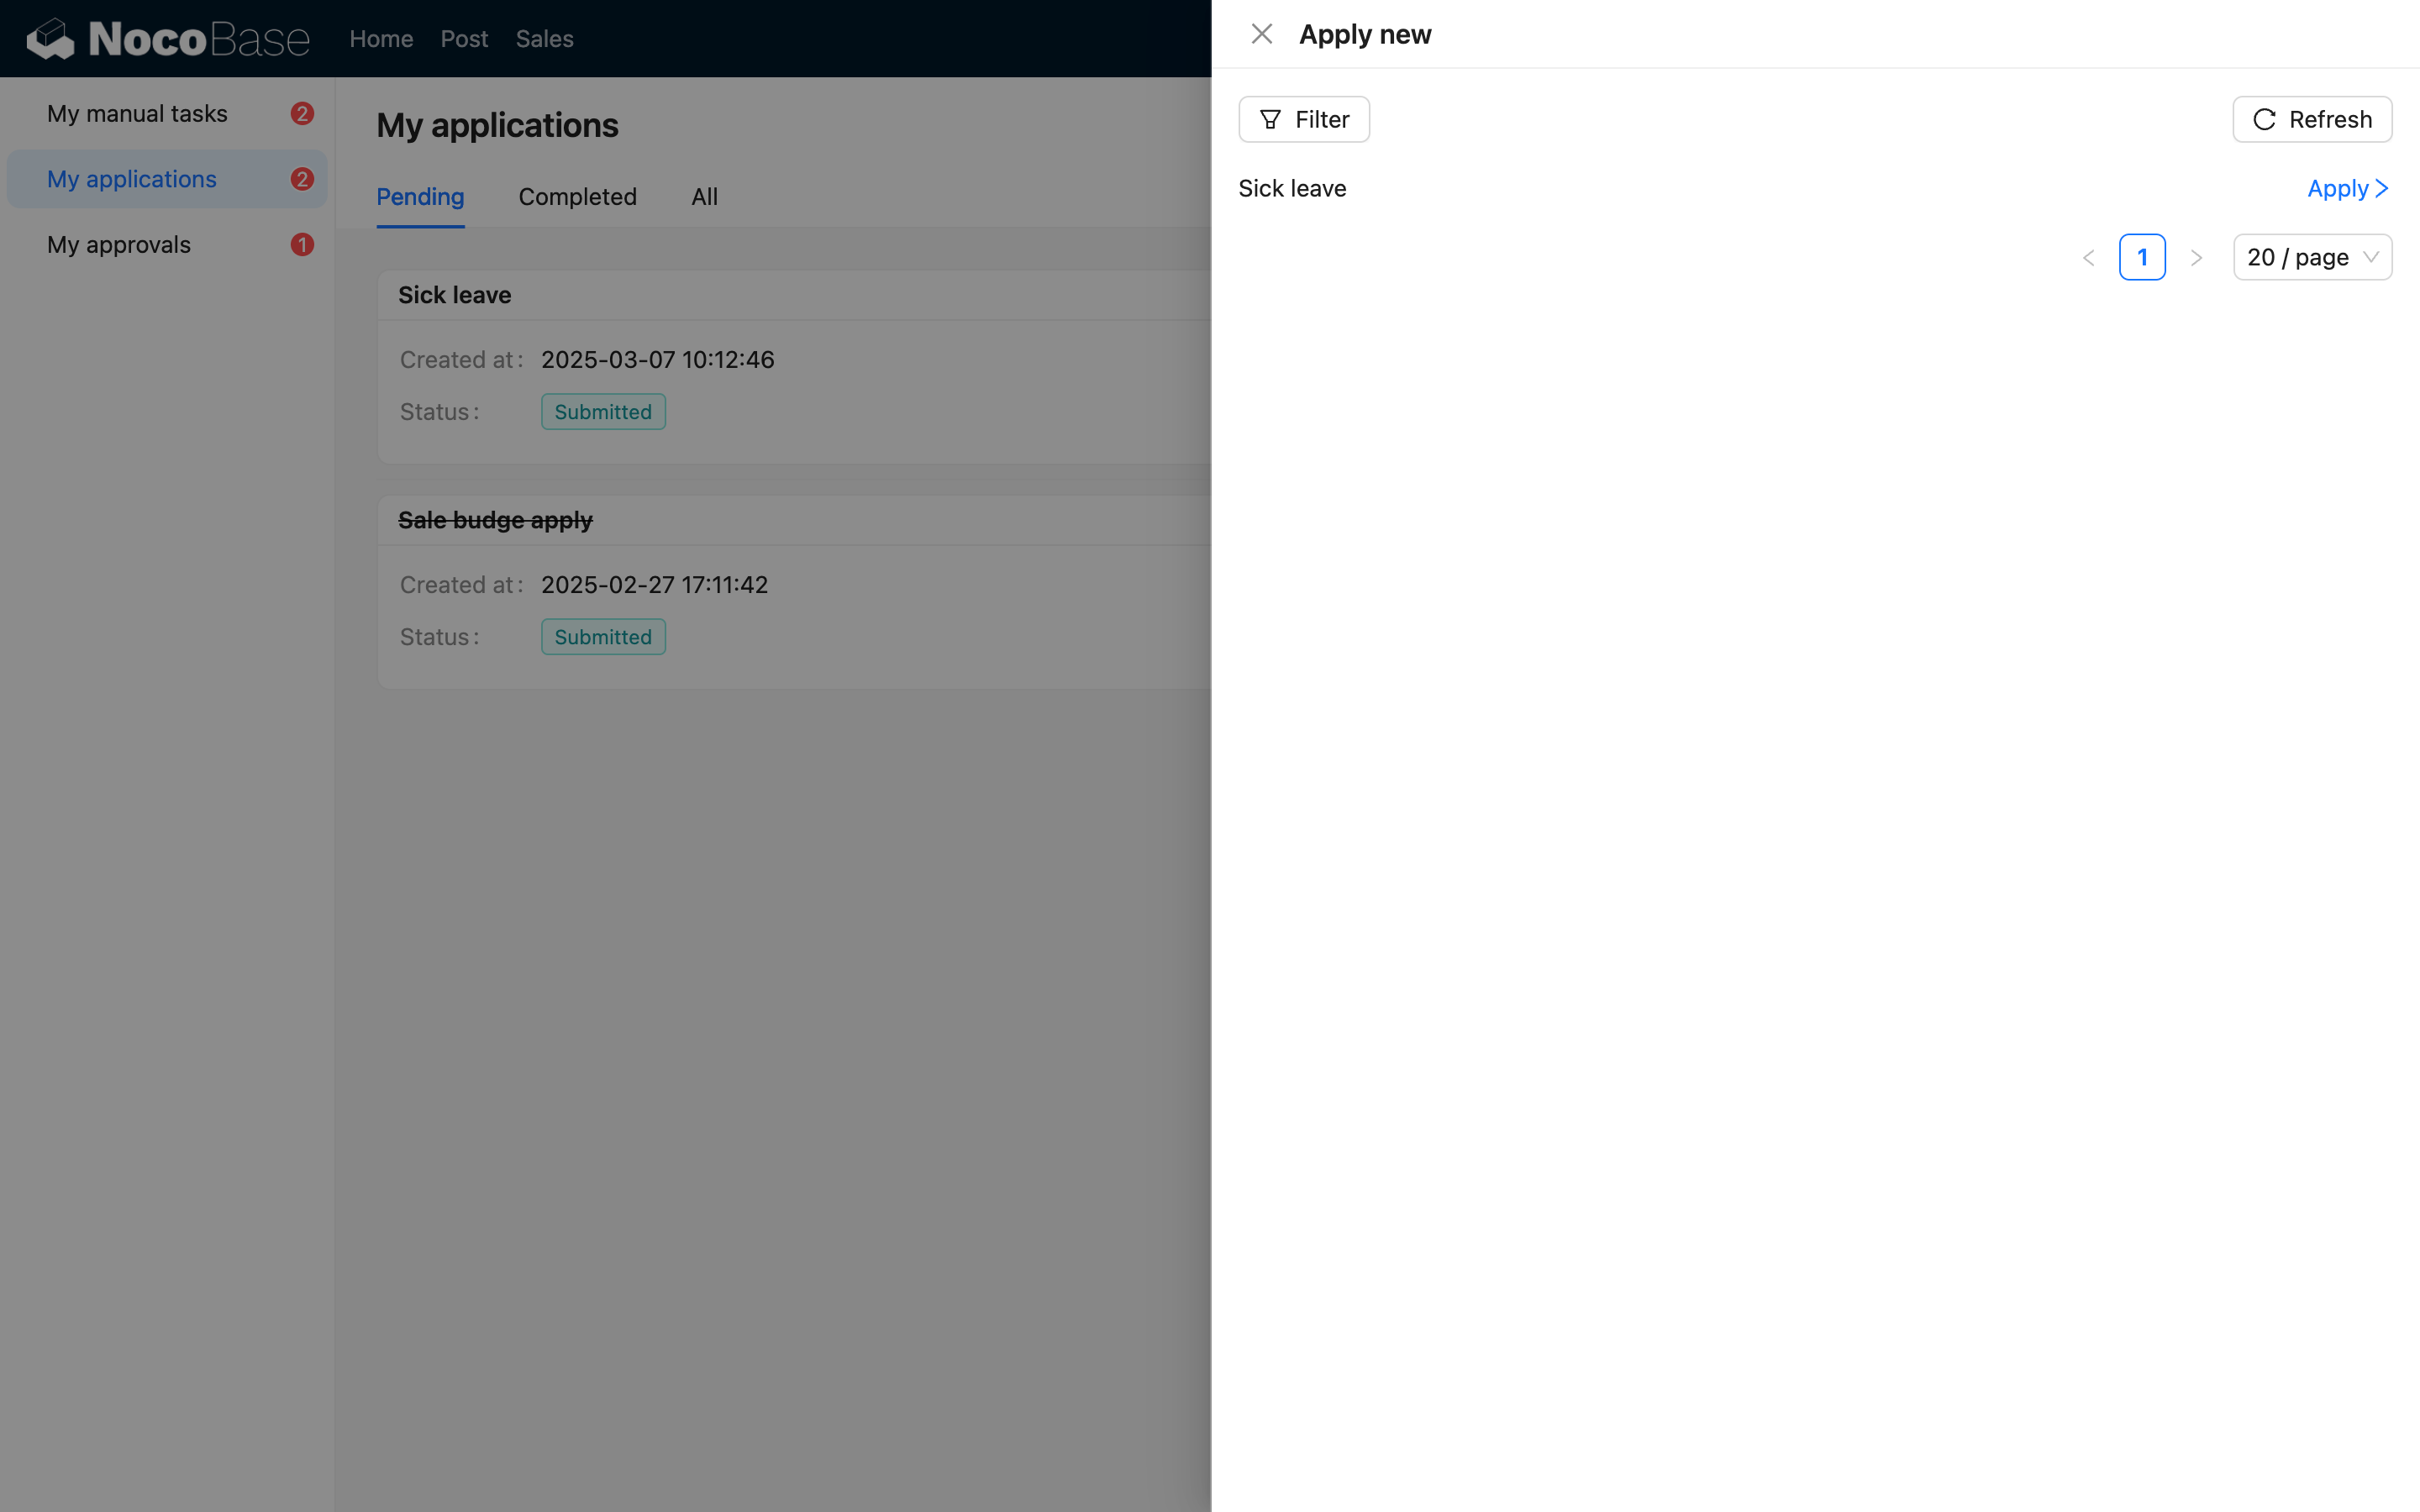
Directly Initiate a New Approval
My To-dos
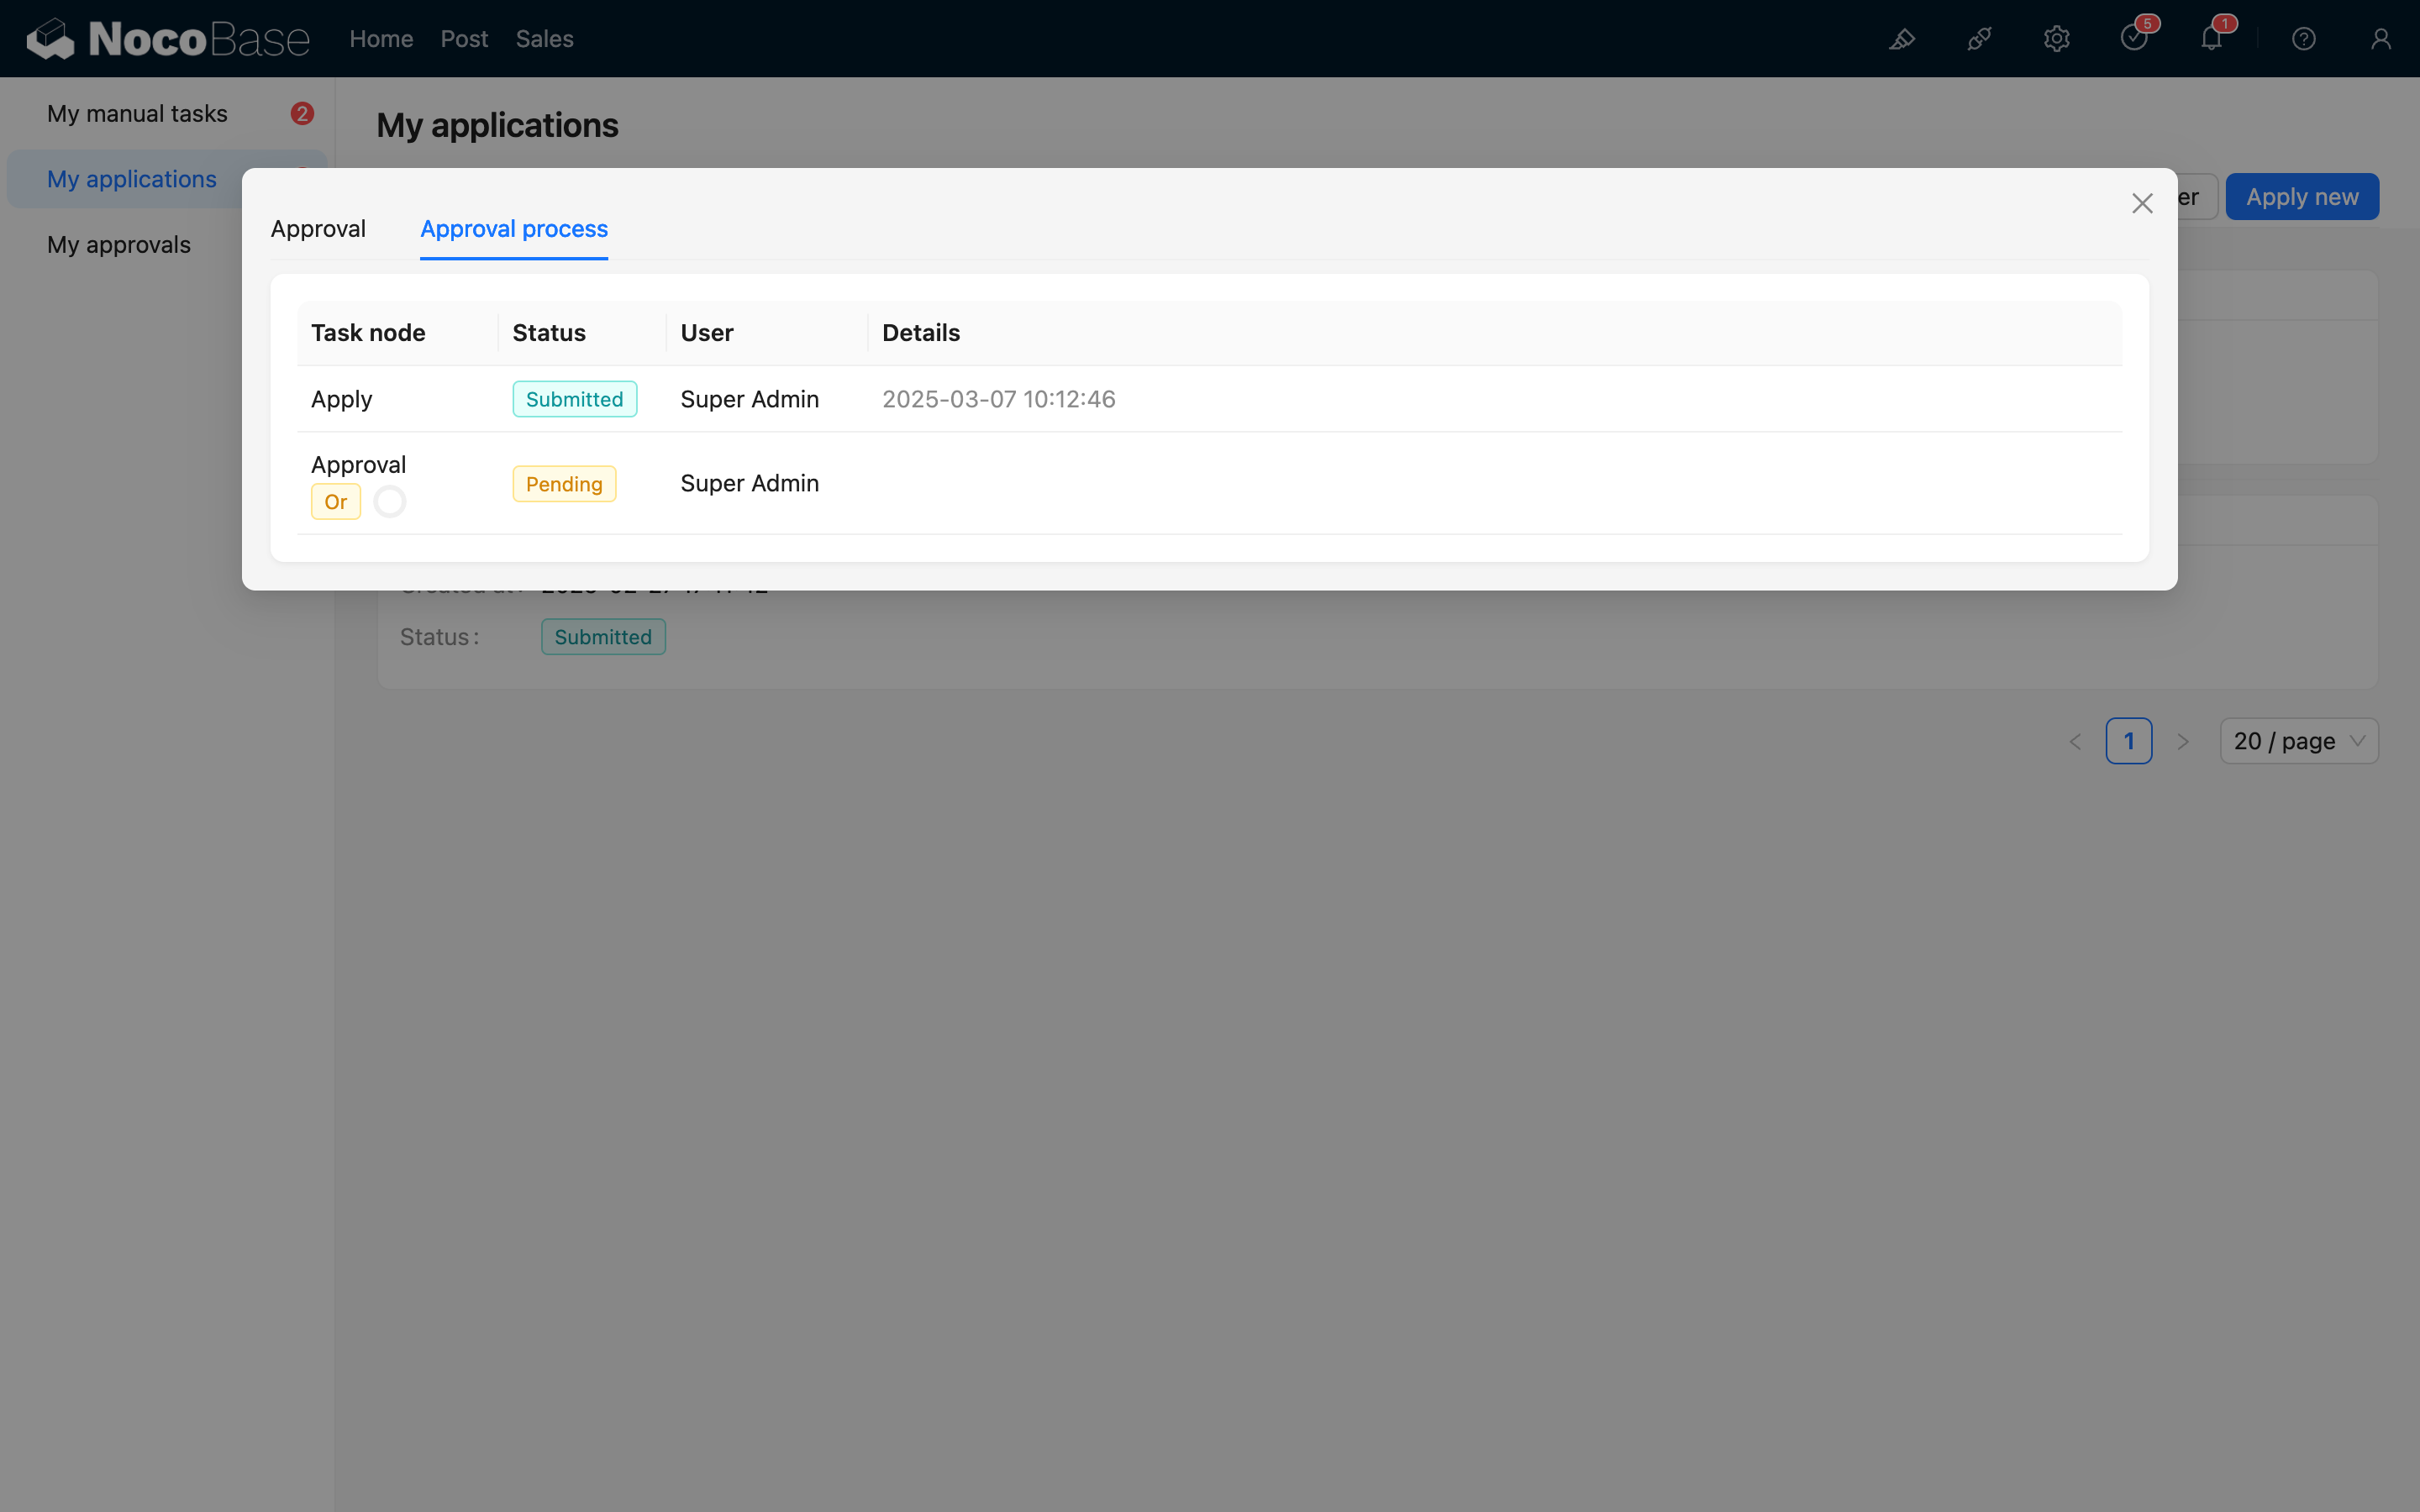
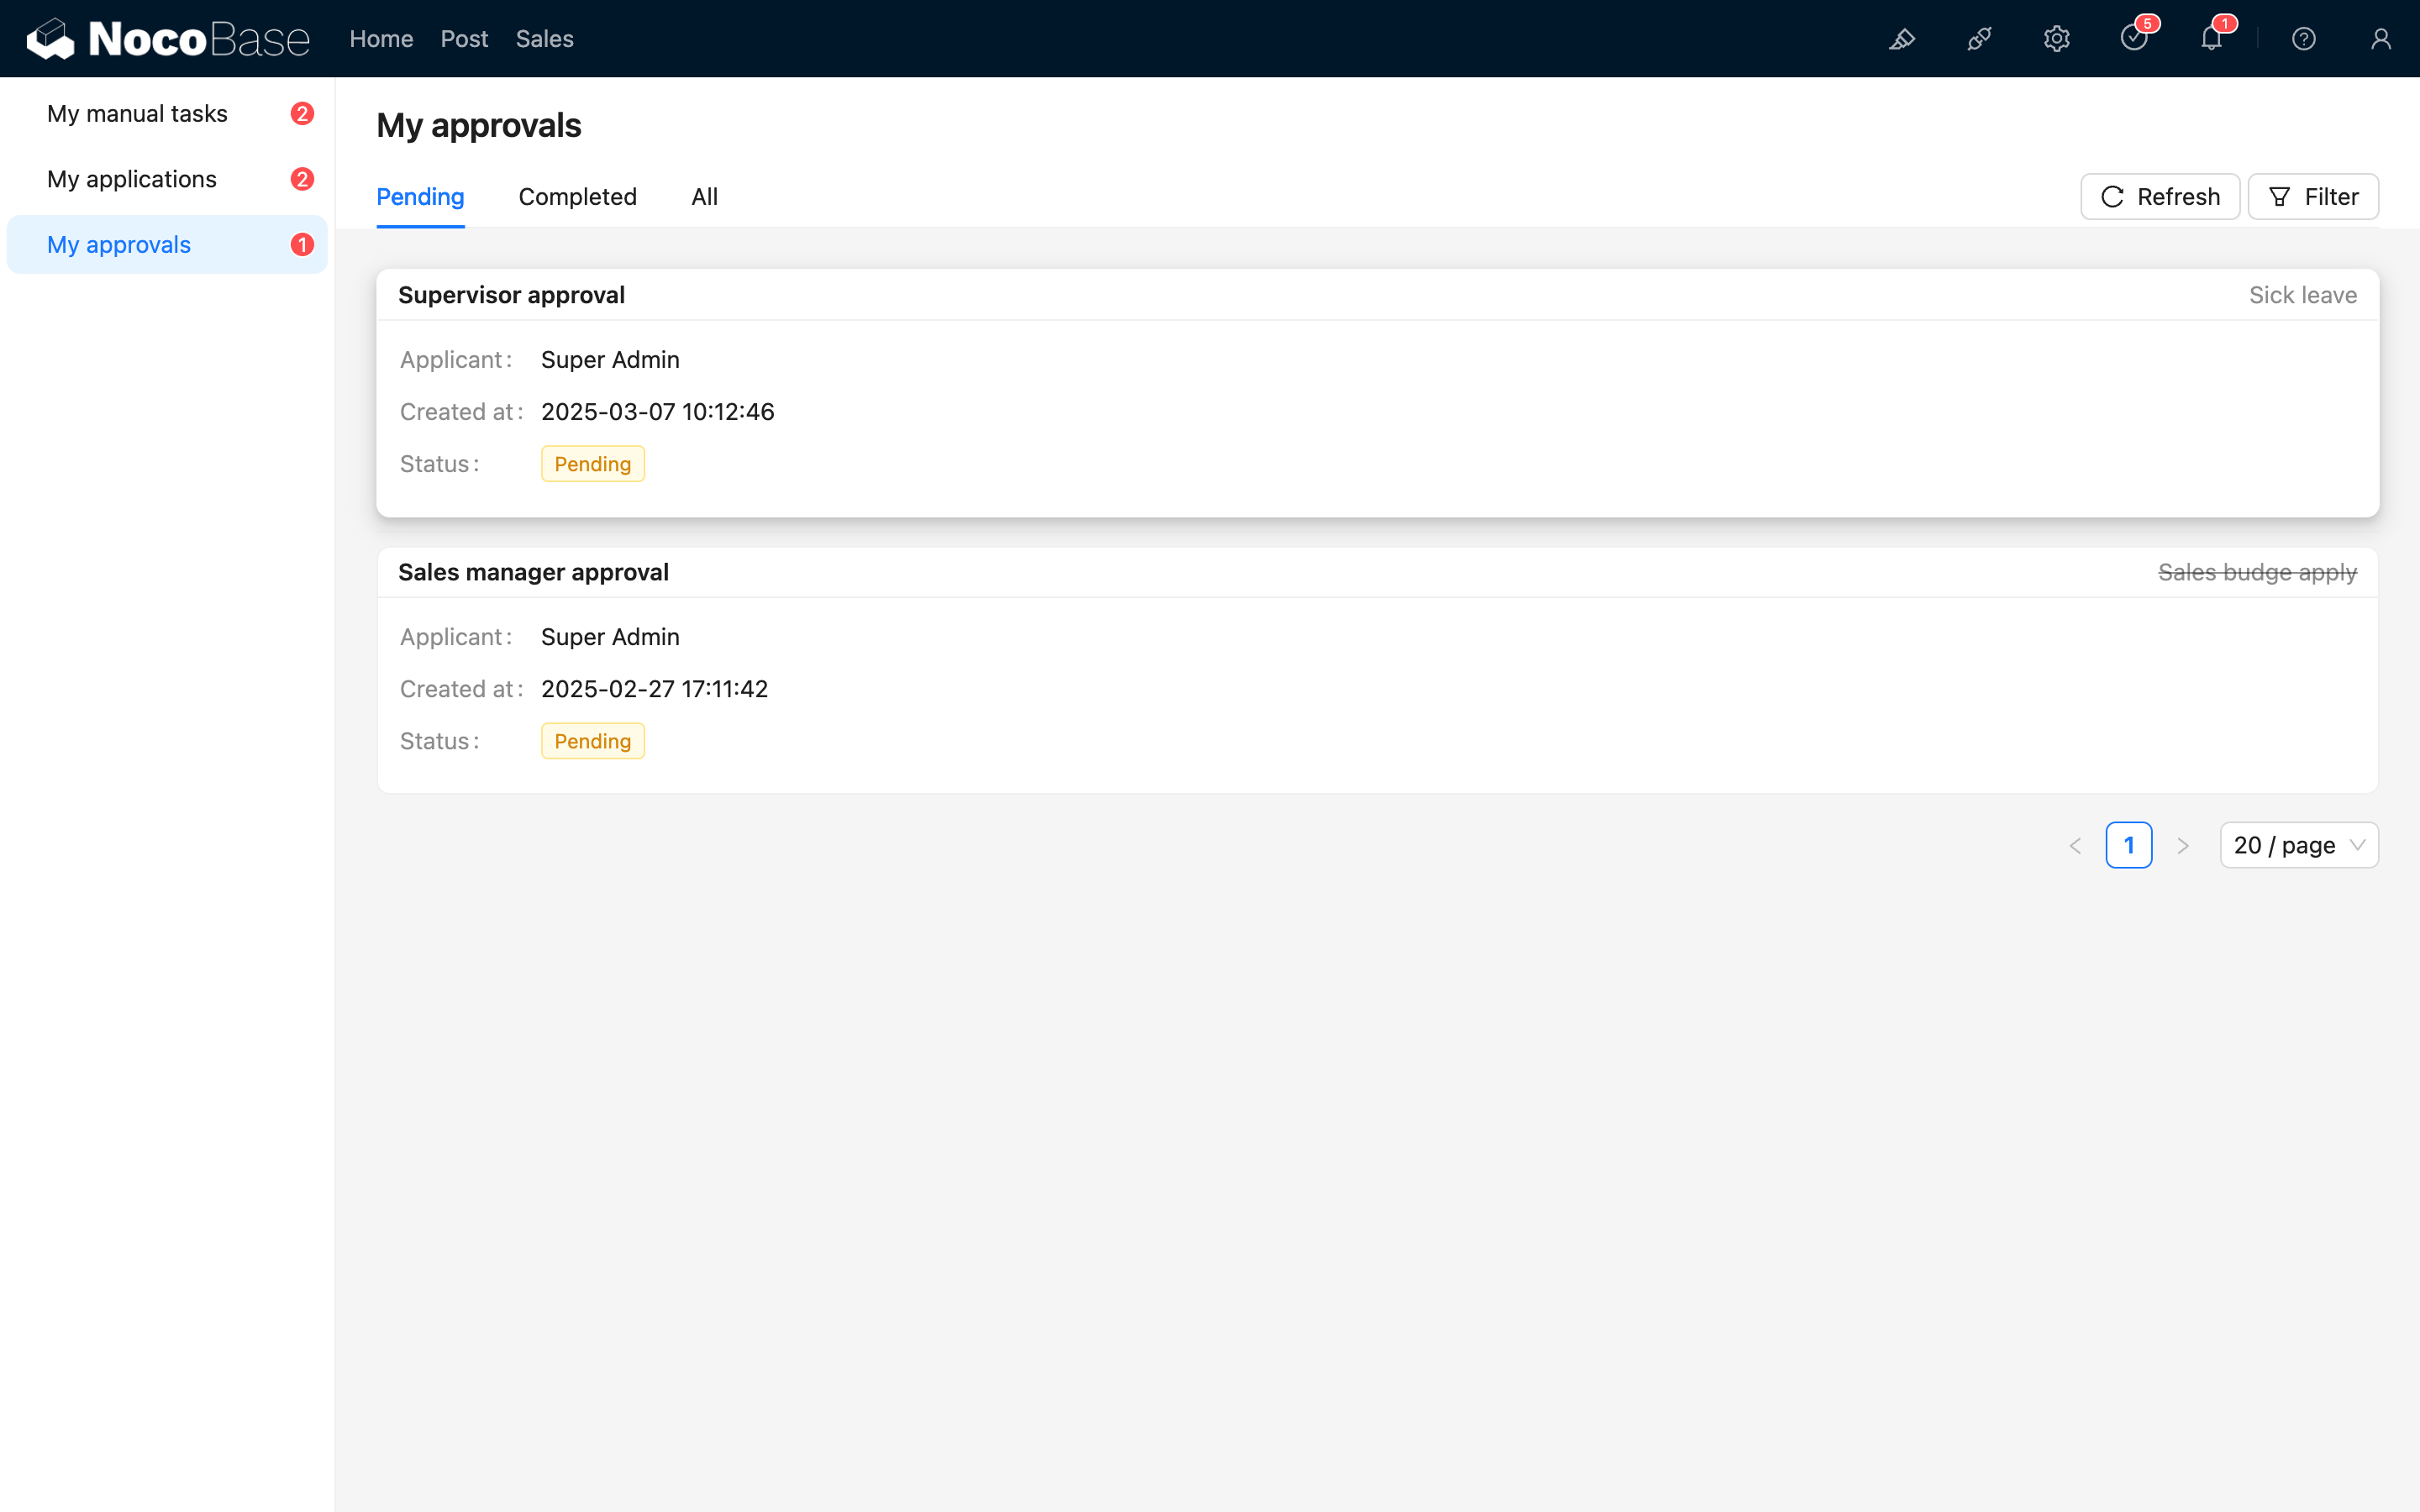
To-do List
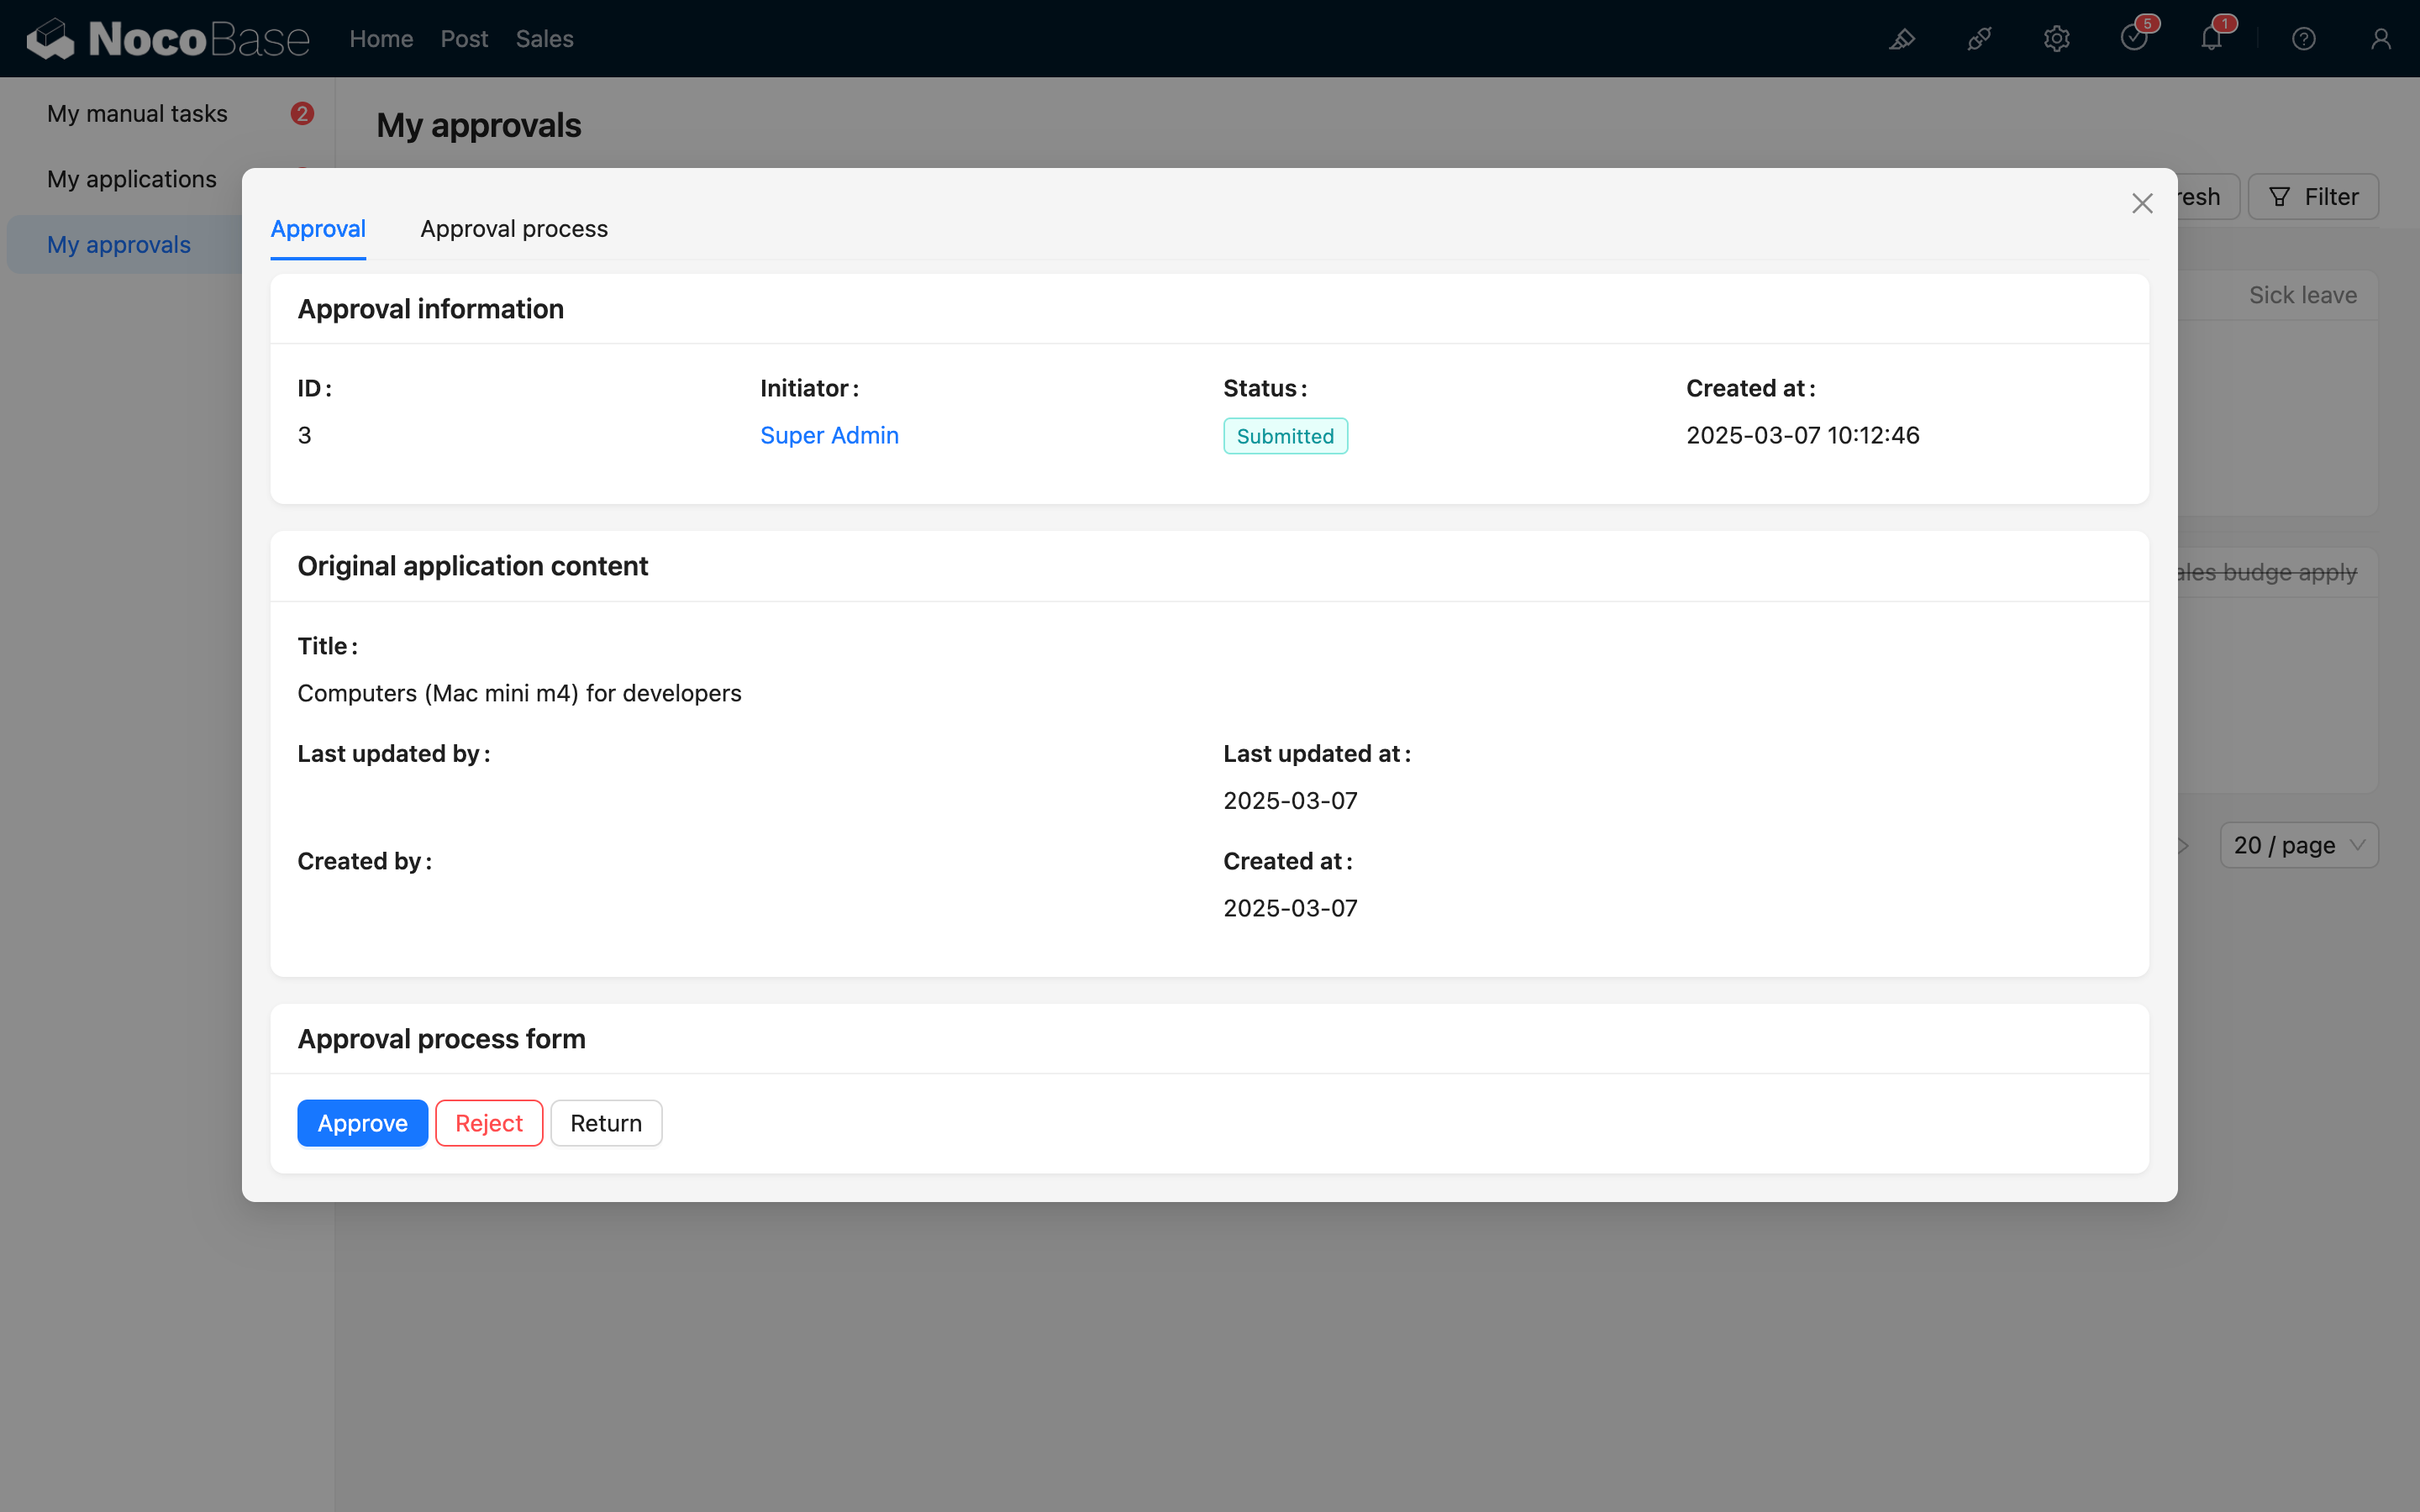
To-do Details
HTTP API
Initiator
Initiate from Collection
To initiate from a data block, you can make a call like this (using the create button of the posts collection as an example):
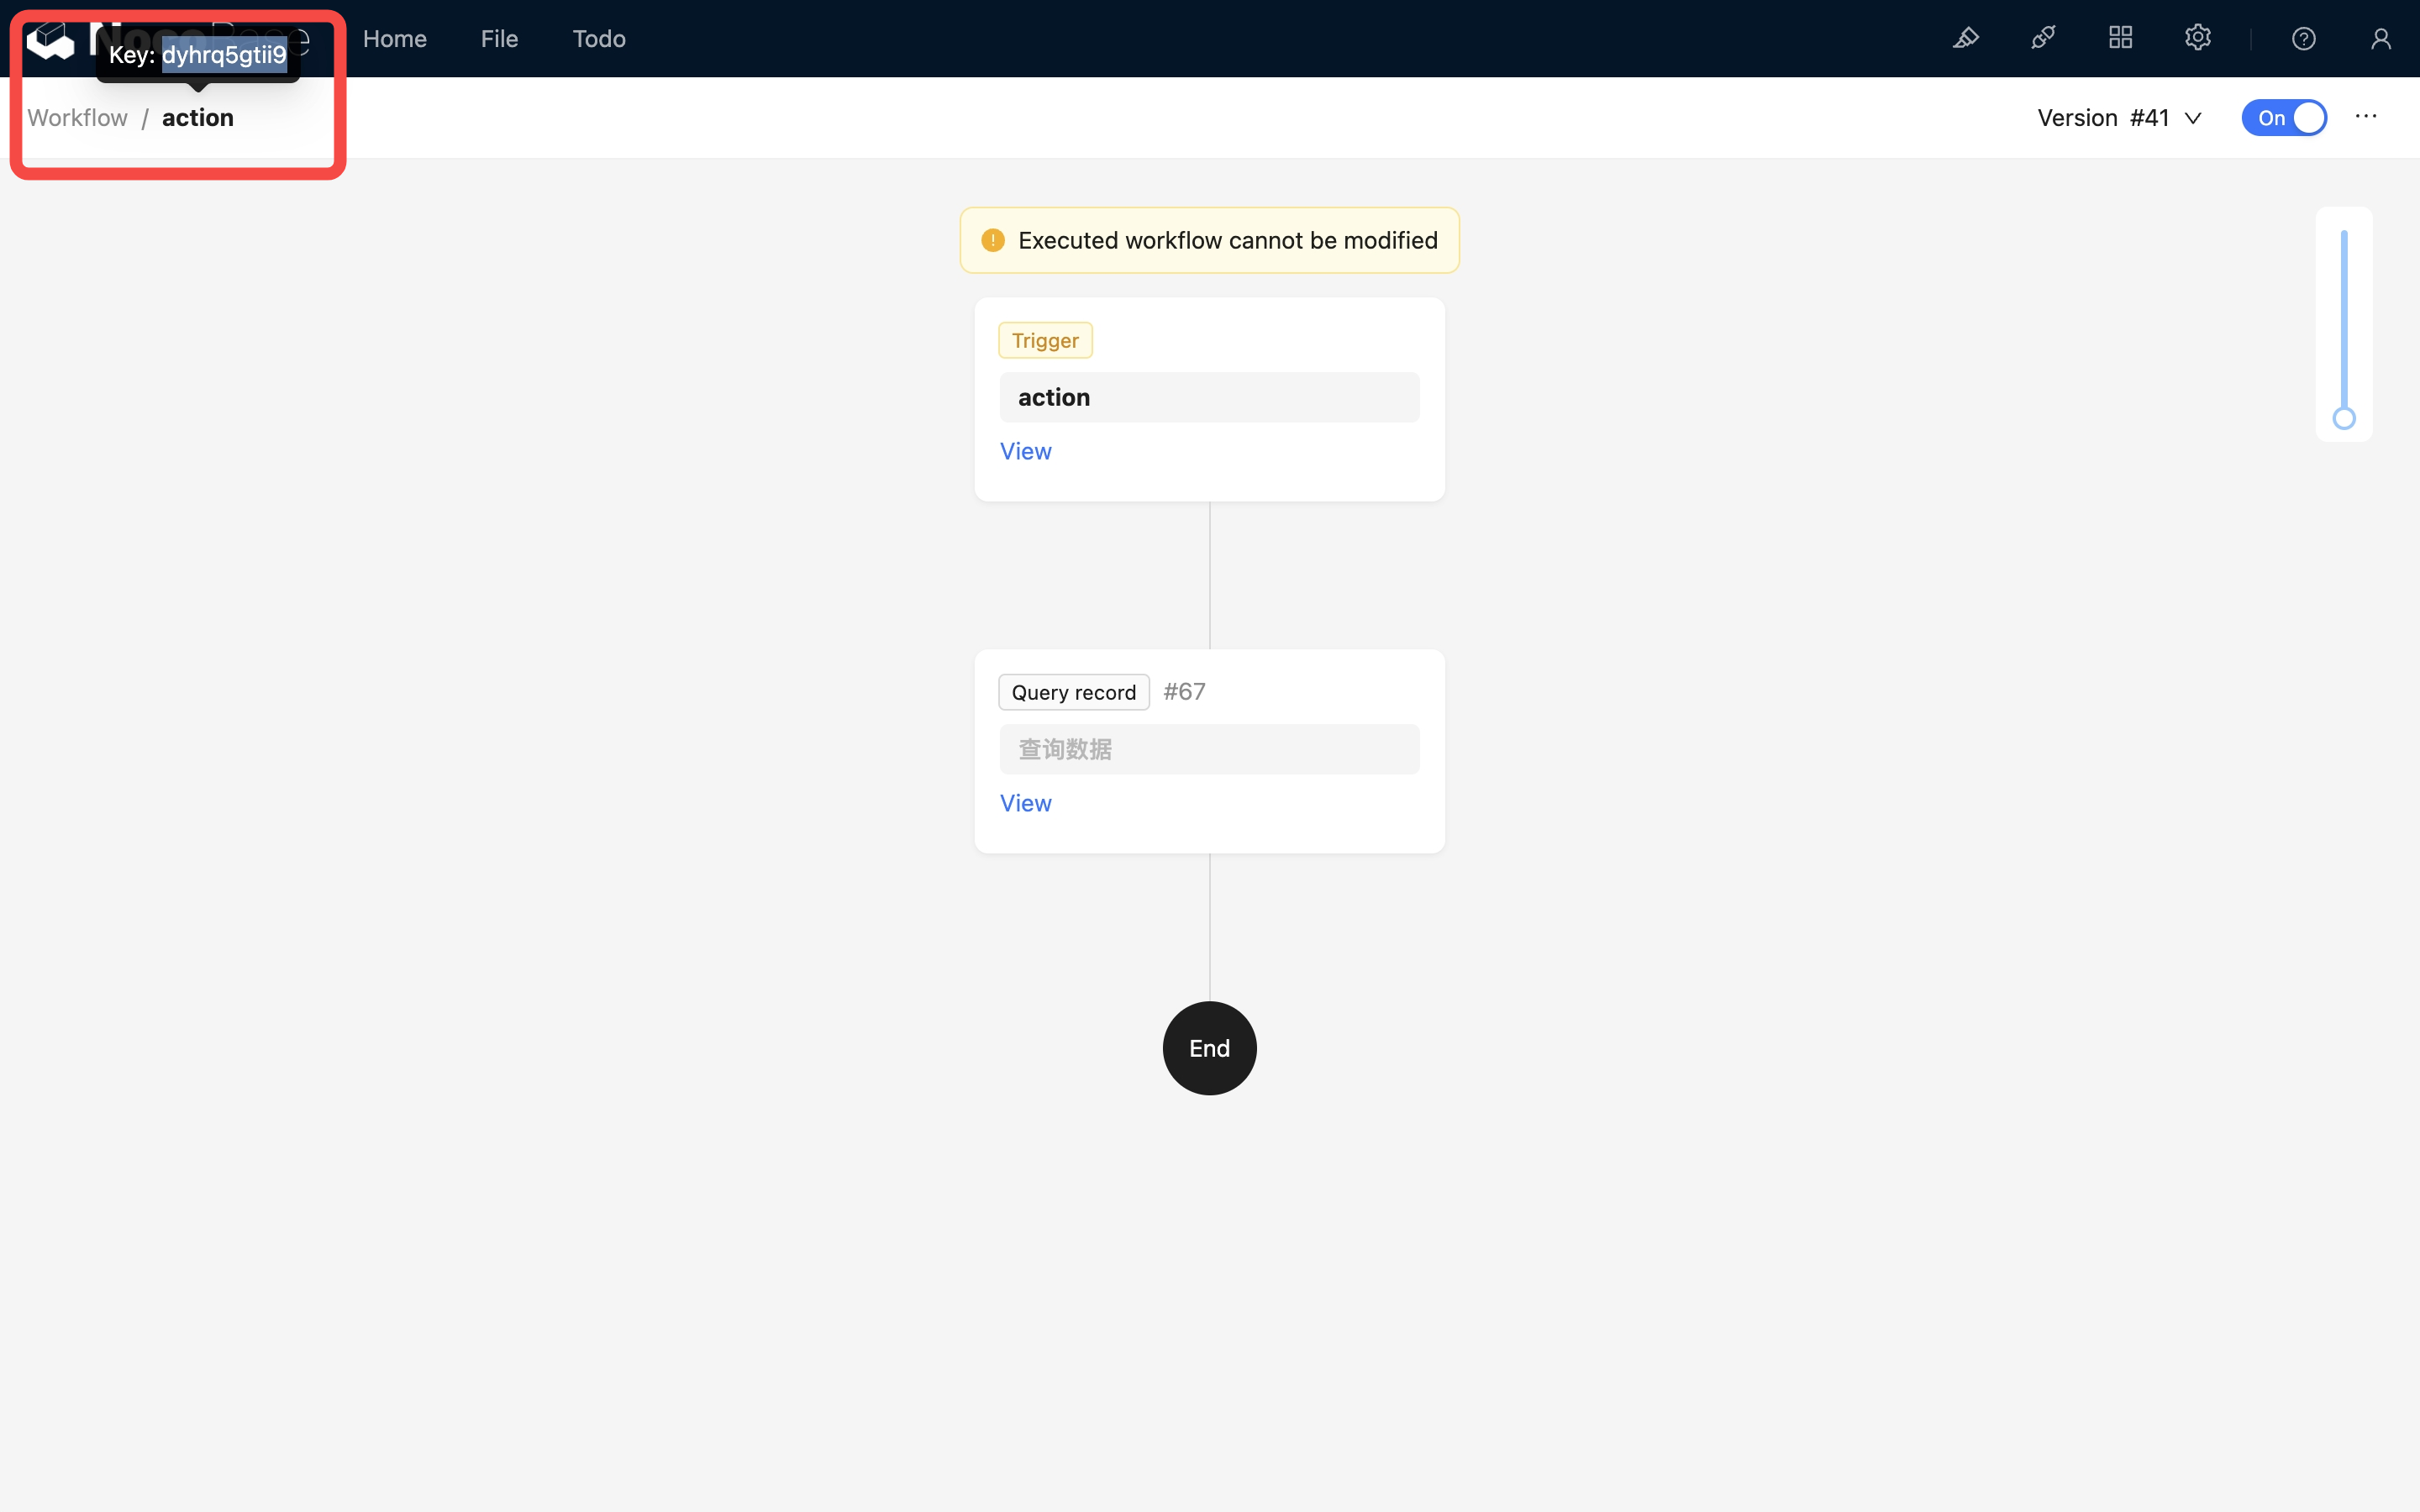
The URL parameter triggerWorkflows is the workflow's key; multiple workflow keys are separated by commas. This key can be obtained by hovering the mouse over the workflow name at the top of the workflow canvas:
Upon a successful call, the approval workflow for the corresponding posts collection will be triggered.
Since external calls also need to be based on user identity, when calling via HTTP API, authentication information must be provided, including the Authorization header or the token parameter (the token obtained upon login), and the X-Role header (the user's current role name).
If you need to trigger an event for one-to-one related data in this action (one-to-many is not yet supported), you can use ! in the parameter to specify the trigger data for the association field:
Upon a successful call, the approval event for the corresponding categories collection will be triggered.
When triggering an after-action event via HTTP API, ensure the workflow is enabled and the collection configuration matches; otherwise, the call may not succeed or may result in an error.
Initiate from Approval Center
Parameters
collectionName: The name of the target collection for initiating the approval. Required.workflowId: The ID of the workflow used to initiate the approval. Required.data: The fields of the collection record created when initiating the approval. Required.status: The status of the record created when initiating the approval. Required. Possible values include:0: Draft, indicates saving without submitting for approval.2: Submit for approval, indicates the initiator submits the approval request, entering the approval process.
Save and Submit
When an initiated (or withdrawn) approval is in a draft state, you can save or submit it again through the following API:
Get List of Submitted Approvals
Withdraw
The initiator can withdraw a record currently in approval through the following API:
Parameters
<approval id>: The ID of the approval record to be withdrawn. Required.
Approver
After the approval workflow enters an approval node, a to-do task is created for the current approver. The approver can complete the approval task through the interface or by calling the HTTP API.
Get Approval Records
To-do tasks are approval records. You can get all of the current user's approval records through the following API:
Here, approvalRecords is a collection resource, so you can use common query conditions such as filter, sort, pageSize, and page.
Get a Single Approval Record
Approve and Reject
Parameters
<record id>: The ID of the record to be processed. Required.status: The status of the approval process.2for "Approve",-1for "Reject". Required.comment: Remarks for the approval process. Optional.data: Modifications to the collection record at the current approval node after approval. Optional (only effective upon approval).
Return v1.9.0+
Before v1.9.0, returning used the same API as "Approve" and "Reject," with "status": 1 representing a return.
Starting from v1.9.0, returning has a separate API:
Parameters
<record id>: The ID of the record to be processed. Required.returnToNodeKey: The key of the target node to return to. Optional. When a range of returnable nodes is configured in the node, this parameter can be used to specify which node to return to. If not configured, this parameter does not need to be passed, and it will default to returning to the starting point for the initiator to resubmit.
Delegate
Parameters
<record id>: The ID of the record to be processed. Required.assignee: The ID of the user to delegate to. Required.
Add Signer
Parameters
<record id>: The ID of the record to be processed. Required.assignees: A list of user IDs to add as signers. Required.order: The order of the added signer.-1means before "me",1means after "me".