

Extending Trigger Types
Every workflow must be configured with a specific trigger, which serves as the entry point for starting the process execution.
A trigger type usually represents a specific system environment event. During the application's runtime lifecycle, any part that provides subscribable events can be used to define a trigger type. For example, receiving requests, collection operations, scheduled tasks, etc.
Trigger types are registered in the plugin's trigger table based on a string identifier. The Workflow plugin has several built-in triggers:
'collection': Triggered by collection operations;'schedule': Triggered by scheduled tasks;'action': Triggered by after-action events;
Extended trigger types need to ensure their identifiers are unique. The implementation for subscribing/unsubscribing the trigger is registered on the server-side, and the implementation for the configuration interface is registered on the client-side.
Server-side
Any trigger needs to inherit from the Trigger base class and implement the on/off methods, which are used for subscribing to and unsubscribing from specific environment events, respectively. In the on method, you need to call this.workflow.trigger() within the specific event callback function to ultimately trigger the event. In the off method, you need to perform the relevant cleanup work for unsubscribing.
this.workflow is the workflow plugin instance passed into the Trigger base class's constructor.
Then, in the plugin that extends the workflow, register the trigger instance with the workflow engine:
After the server starts and loads, the 'interval' type trigger can be added and executed.
Client-side
The client-side part mainly provides a configuration interface based on the configuration items required by the trigger type. Each trigger type also needs to register its corresponding type configuration with the Workflow plugin.
The trigger's configuration interface is defined through a Loader (lazy-loading function), which points to a plain React component that builds the form using antd's Form.Item.
The Simplest Trigger
For example, for the interval timer trigger described above, define the interval time configuration item (interval) needed in the configuration interface form:
Here, FieldsetLoader is a function that returns Promise<{ default: ComponentType }>, implementing lazy loading via dynamic import(). The component it points to is a standard React function component:
Note that the form field's name uses the nested array format ['config', 'fieldName'], which is the standard antd Form convention.
Multiple Configuration Interfaces
A trigger can provide multiple configuration interfaces for different scenarios:
-
PresetFieldsetLoader— Preset form when creating a workflow (usually contains only required fields)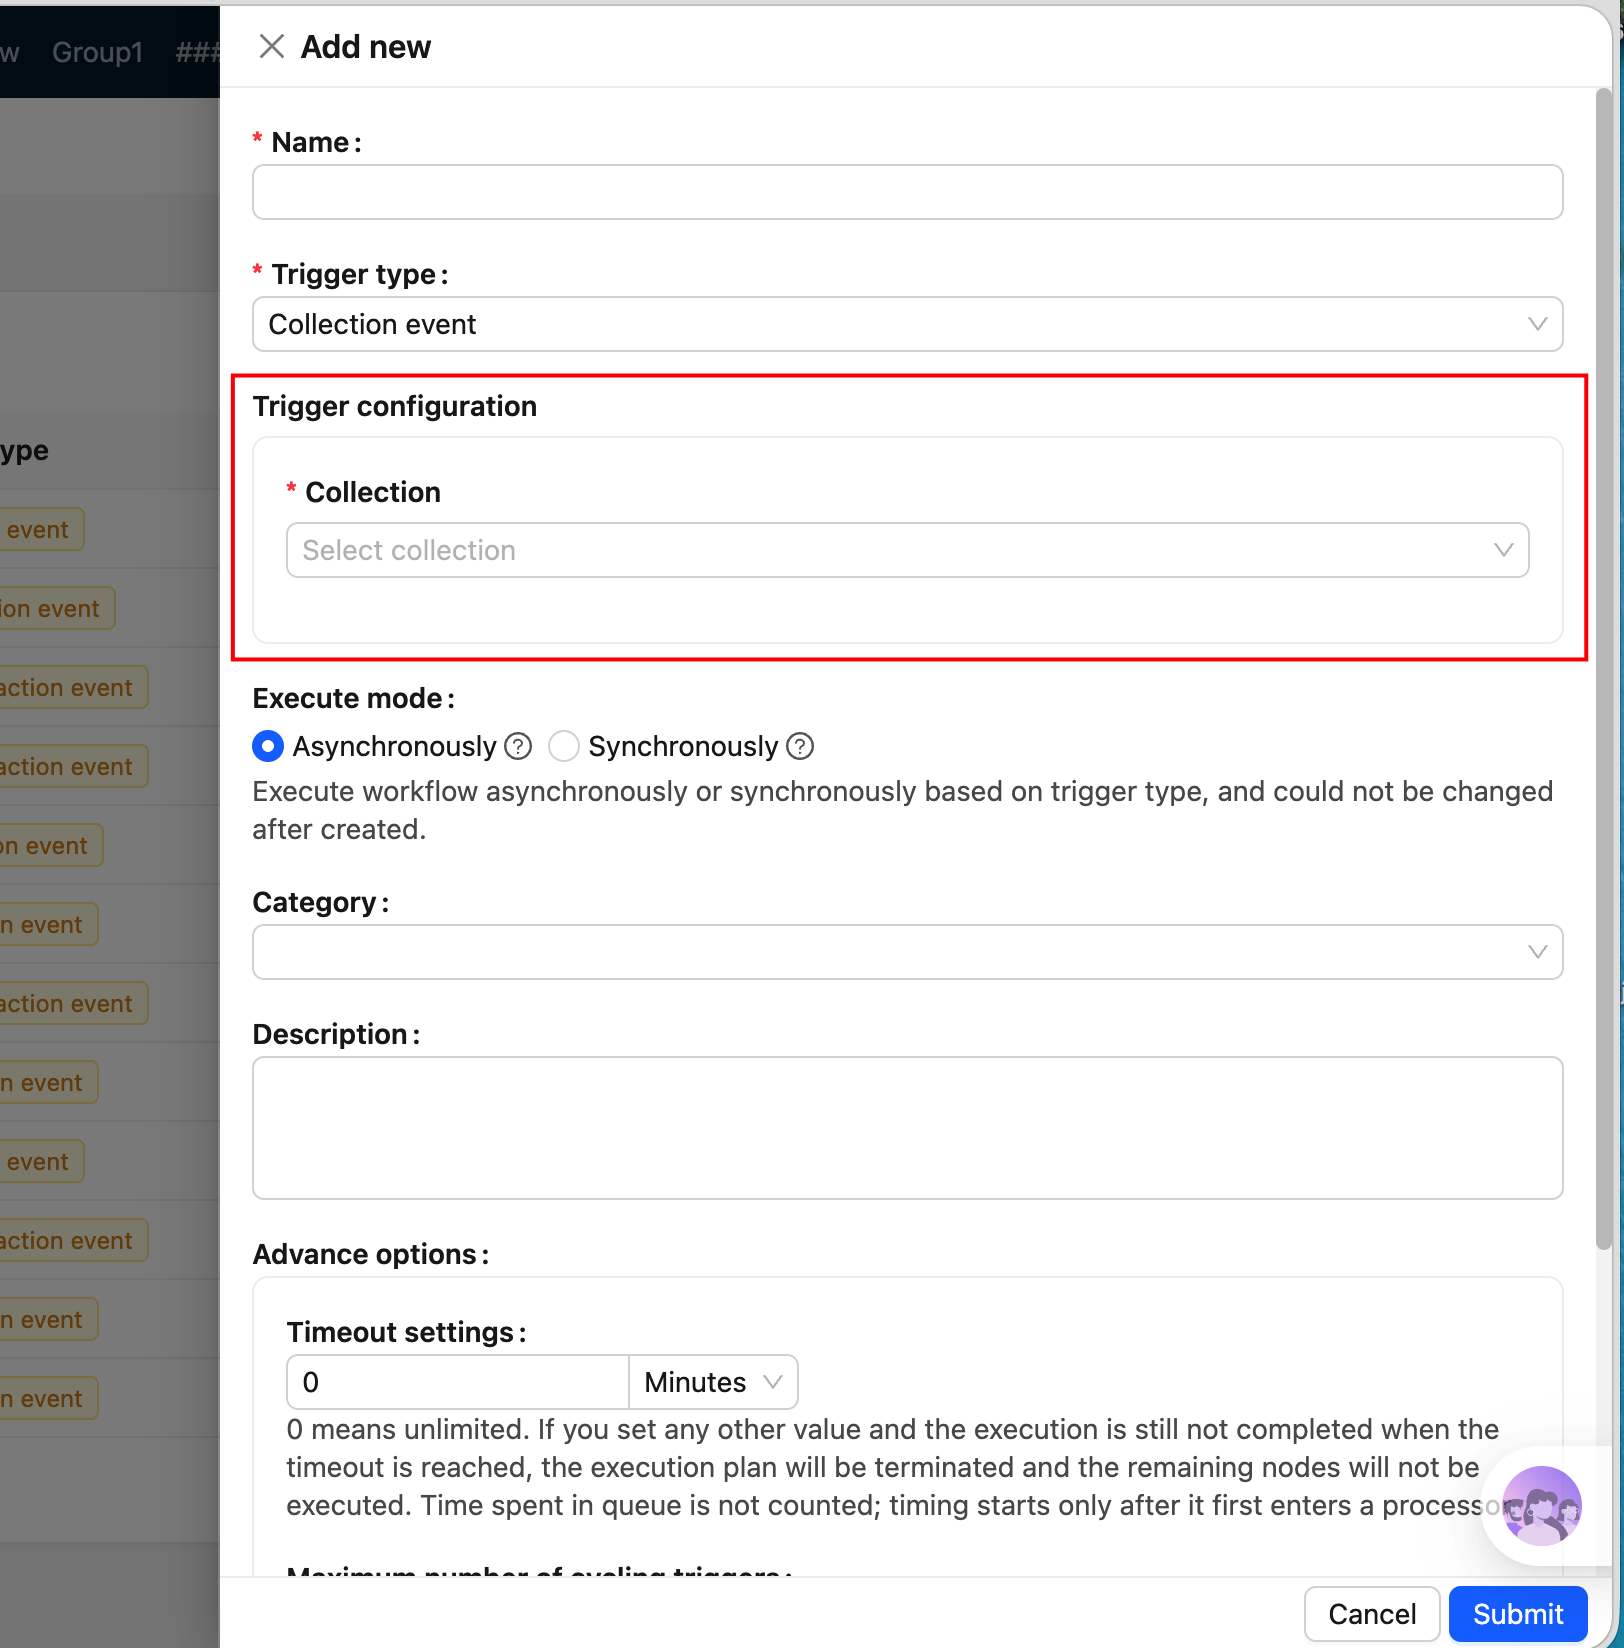
-
FieldsetLoader— Full trigger configuration form (displayed in the configuration drawer)
-
TriggerFieldsetLoader— Input form for manual execution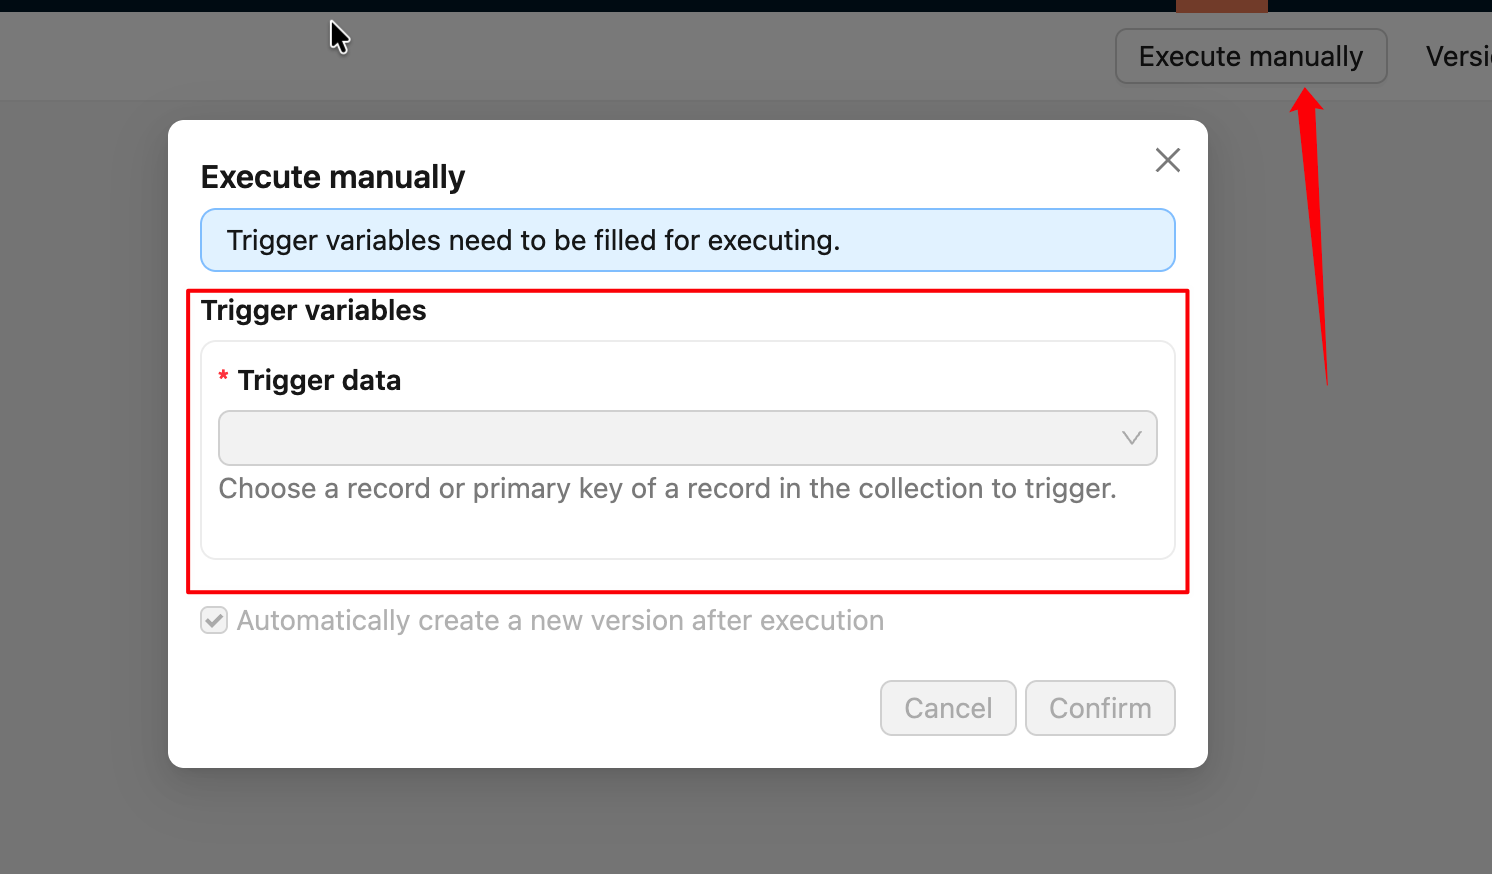
When a Loader needs to point to a named export (rather than the default export) in a file, use .then() to remap:
Register the Trigger
Register the trigger type with the workflow plugin instance within the extended plugin:
After that, the new trigger type will be visible in the workflow configuration interface.
The identifier of the trigger type registered on the client-side must be consistent with the one on the server-side, otherwise it will cause errors.
For a complete real-world example, refer to: CollectionTrigger source code
For other details on defining trigger types, please refer to the Workflow API Reference section.
If you were previously using the legacy (v1) client-side code and want to migrate to the new v2 version, refer to the v1 to v2 Migration Guide.