

Install NocoBase App
Prerequisites
- Node.js >= 22
- Yarn 1.x
- If you plan to install with Docker, make sure Docker is already running
Step 1: Install CLI
Install NocoBase CLI globally first:
If you often work with multiple terminals or want to operate in parallel with AI Agents, we also recommend running nb session setup once. This lets each session keep its own current env, so they are less likely to affect one another.
Step 2: Initialize the app
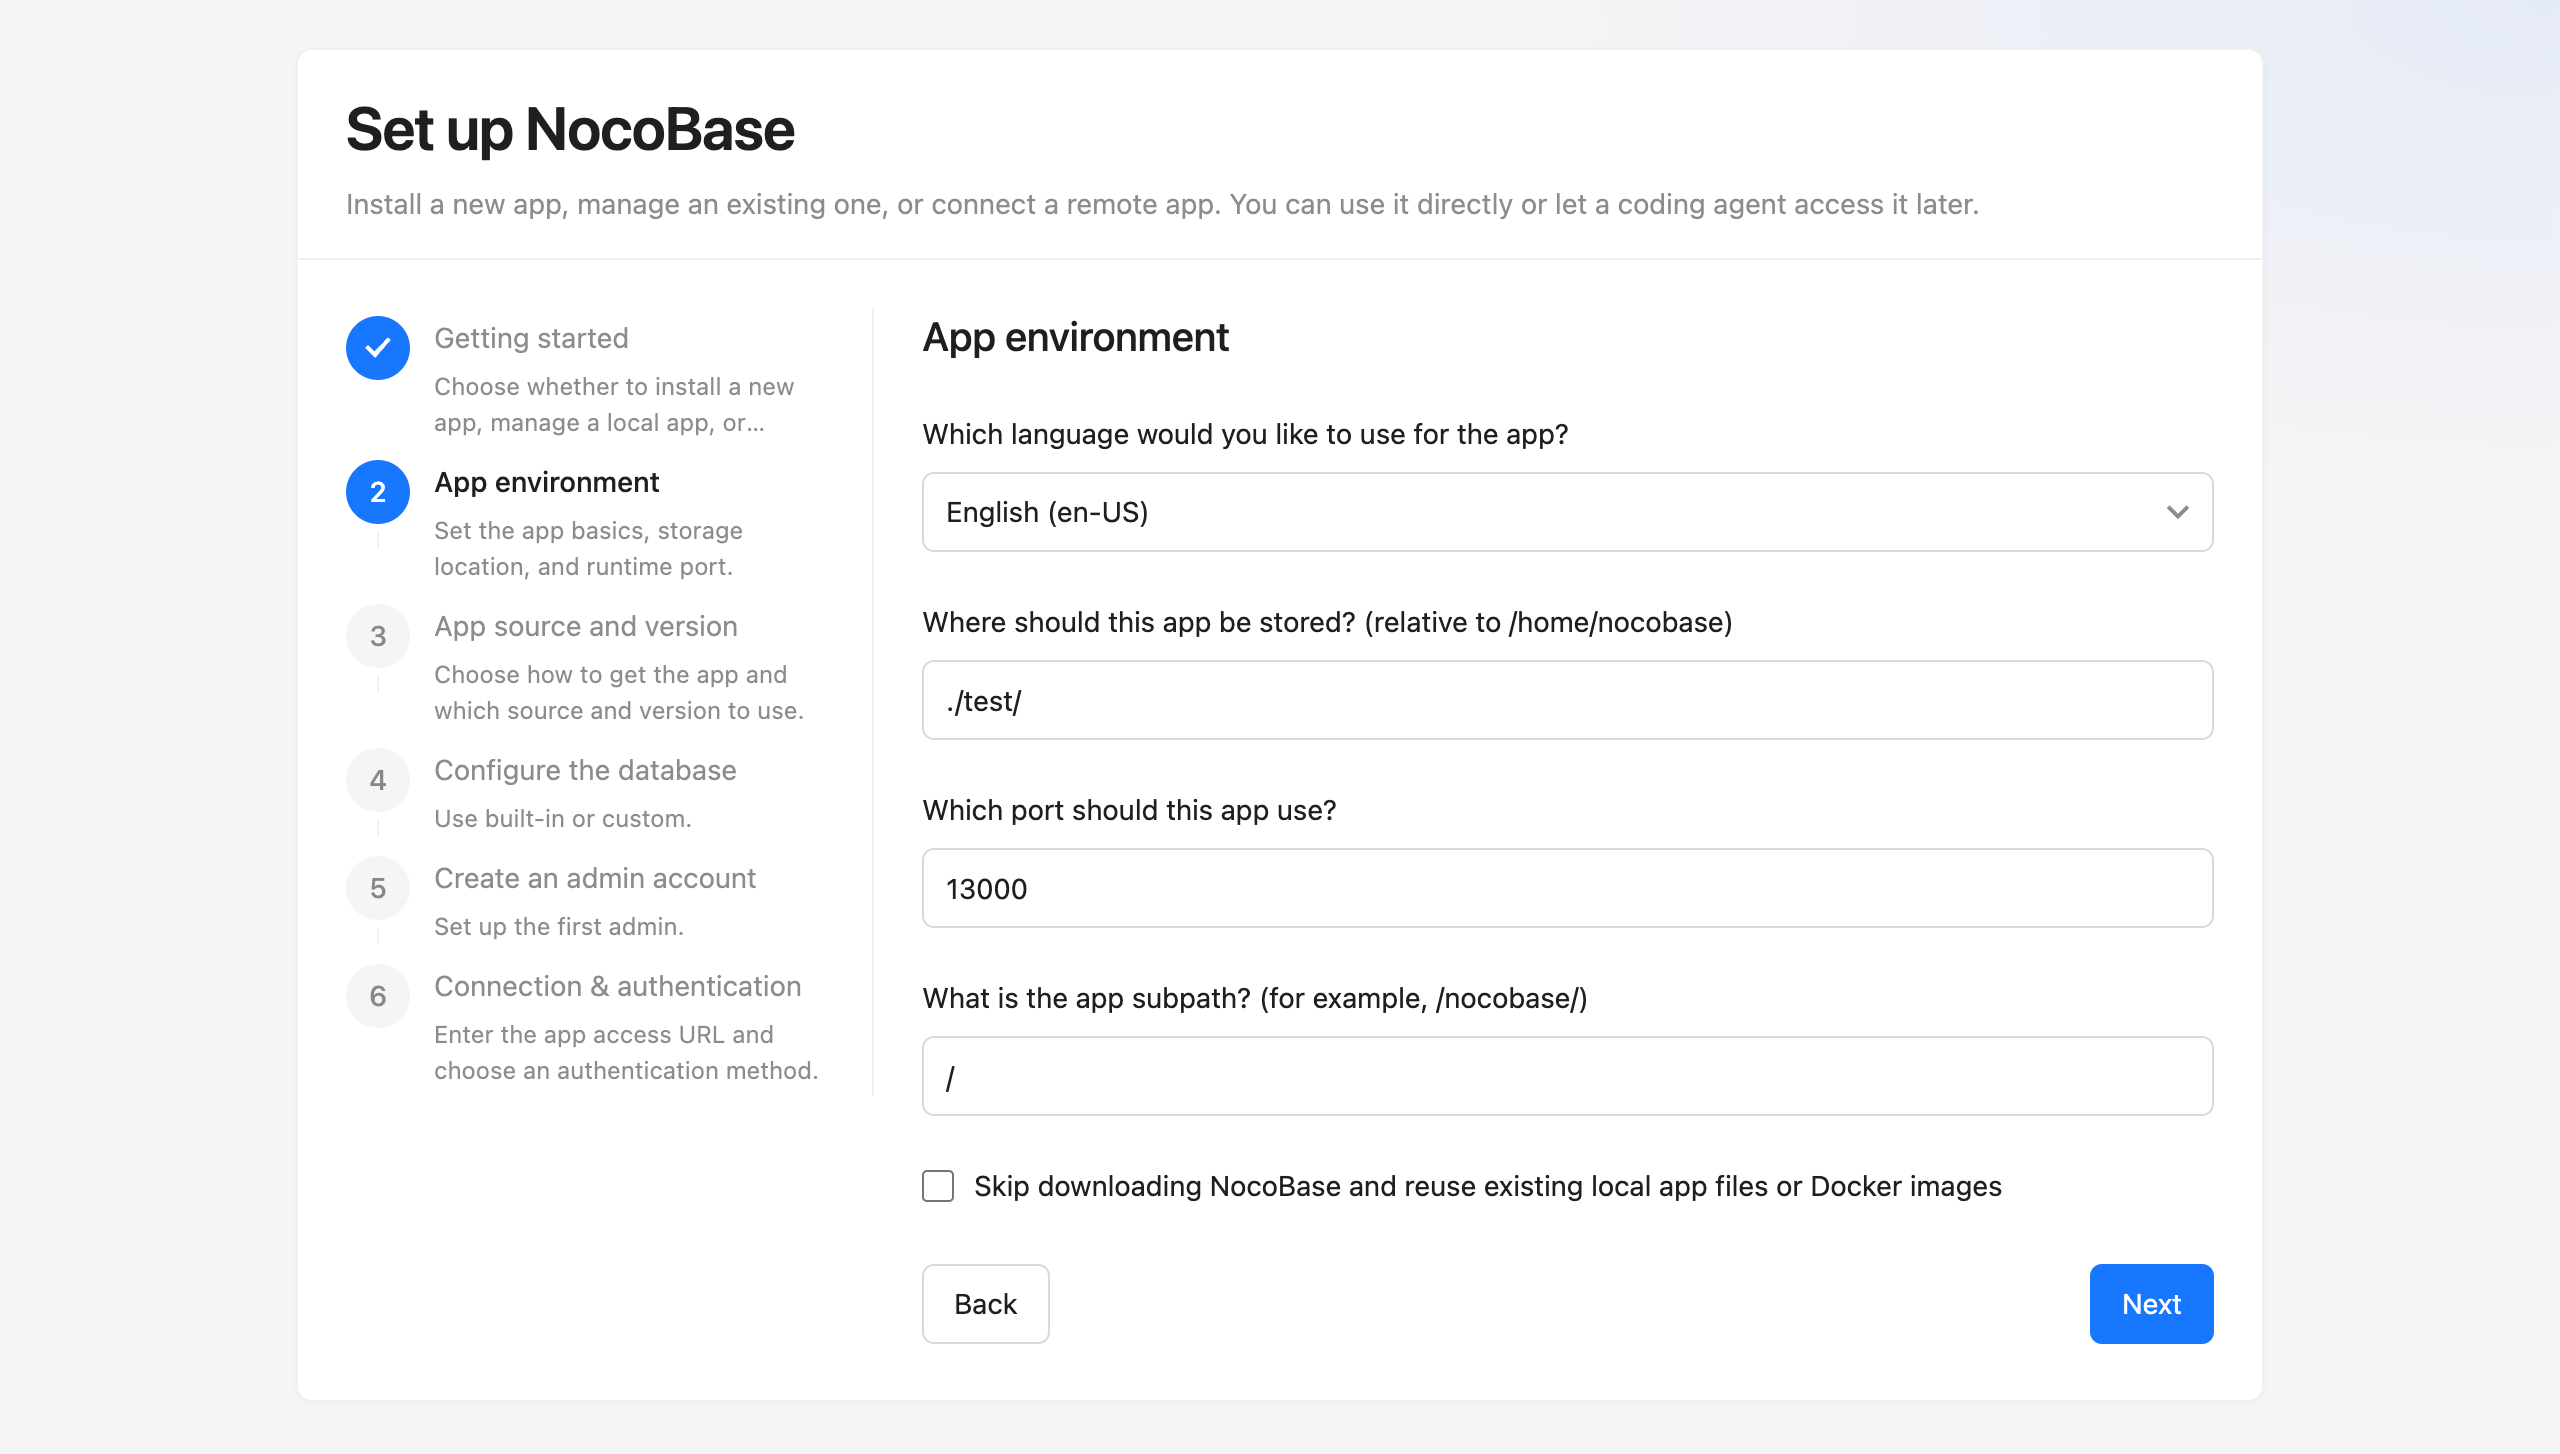
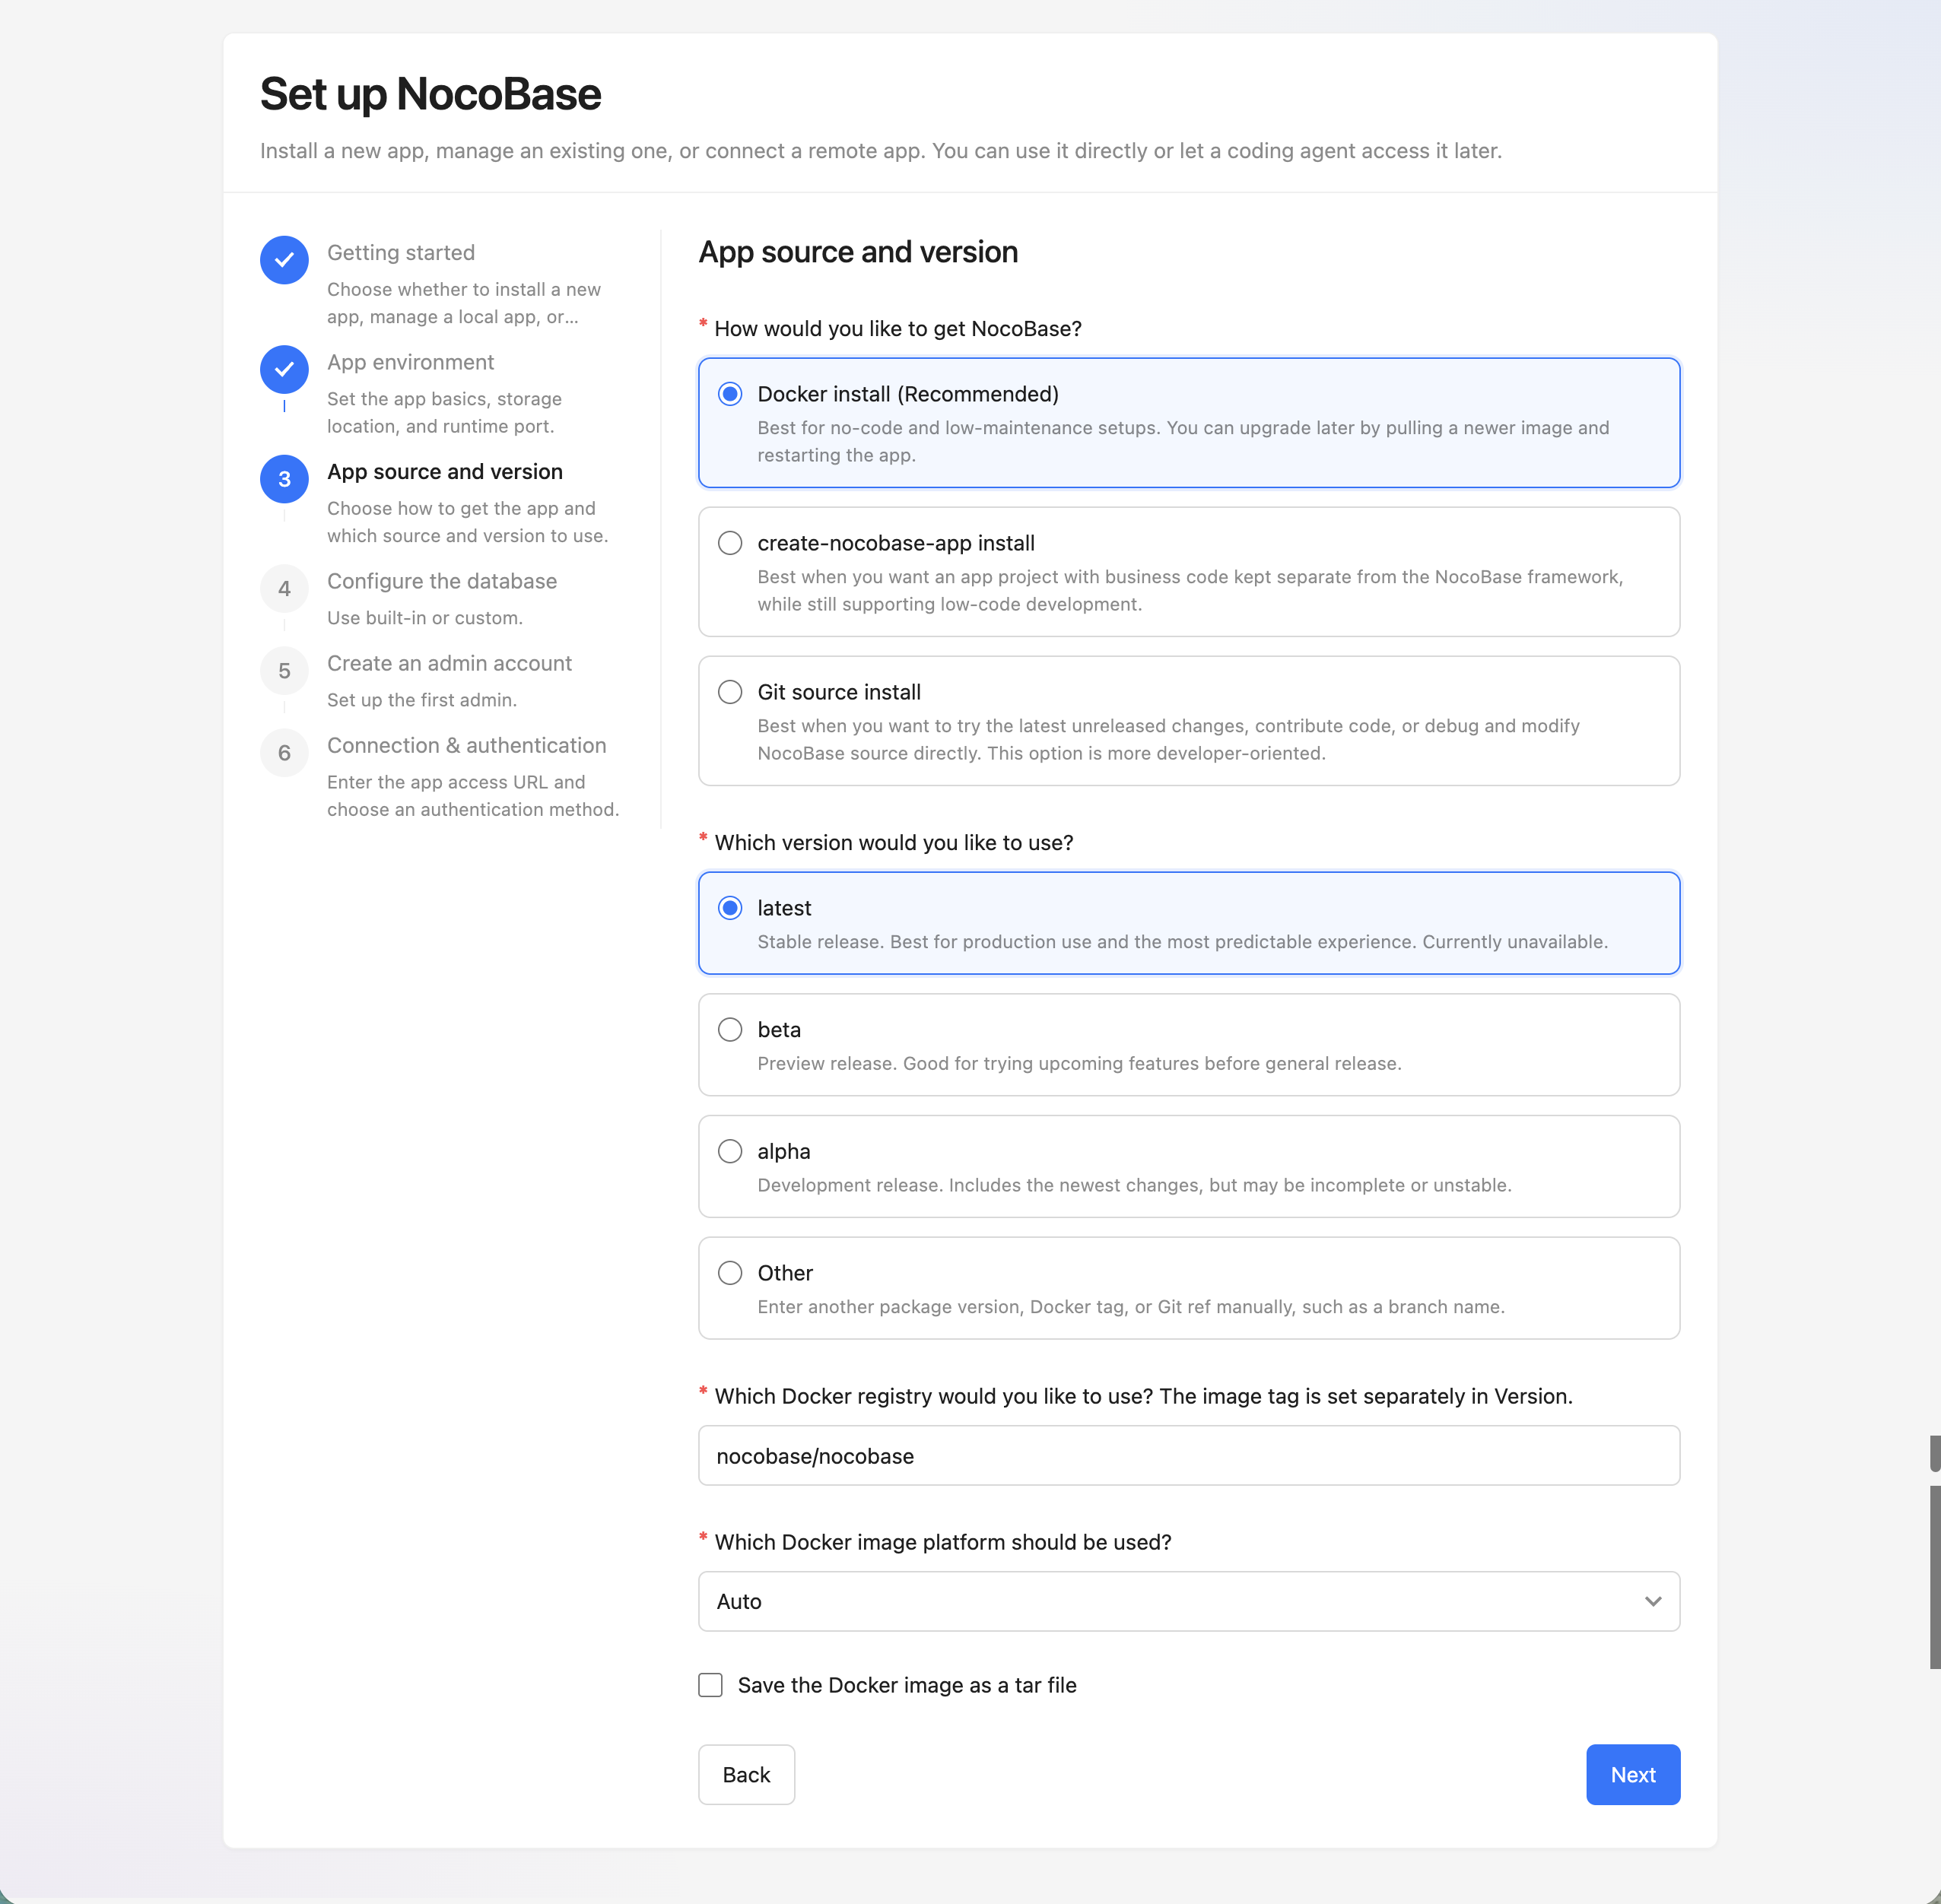
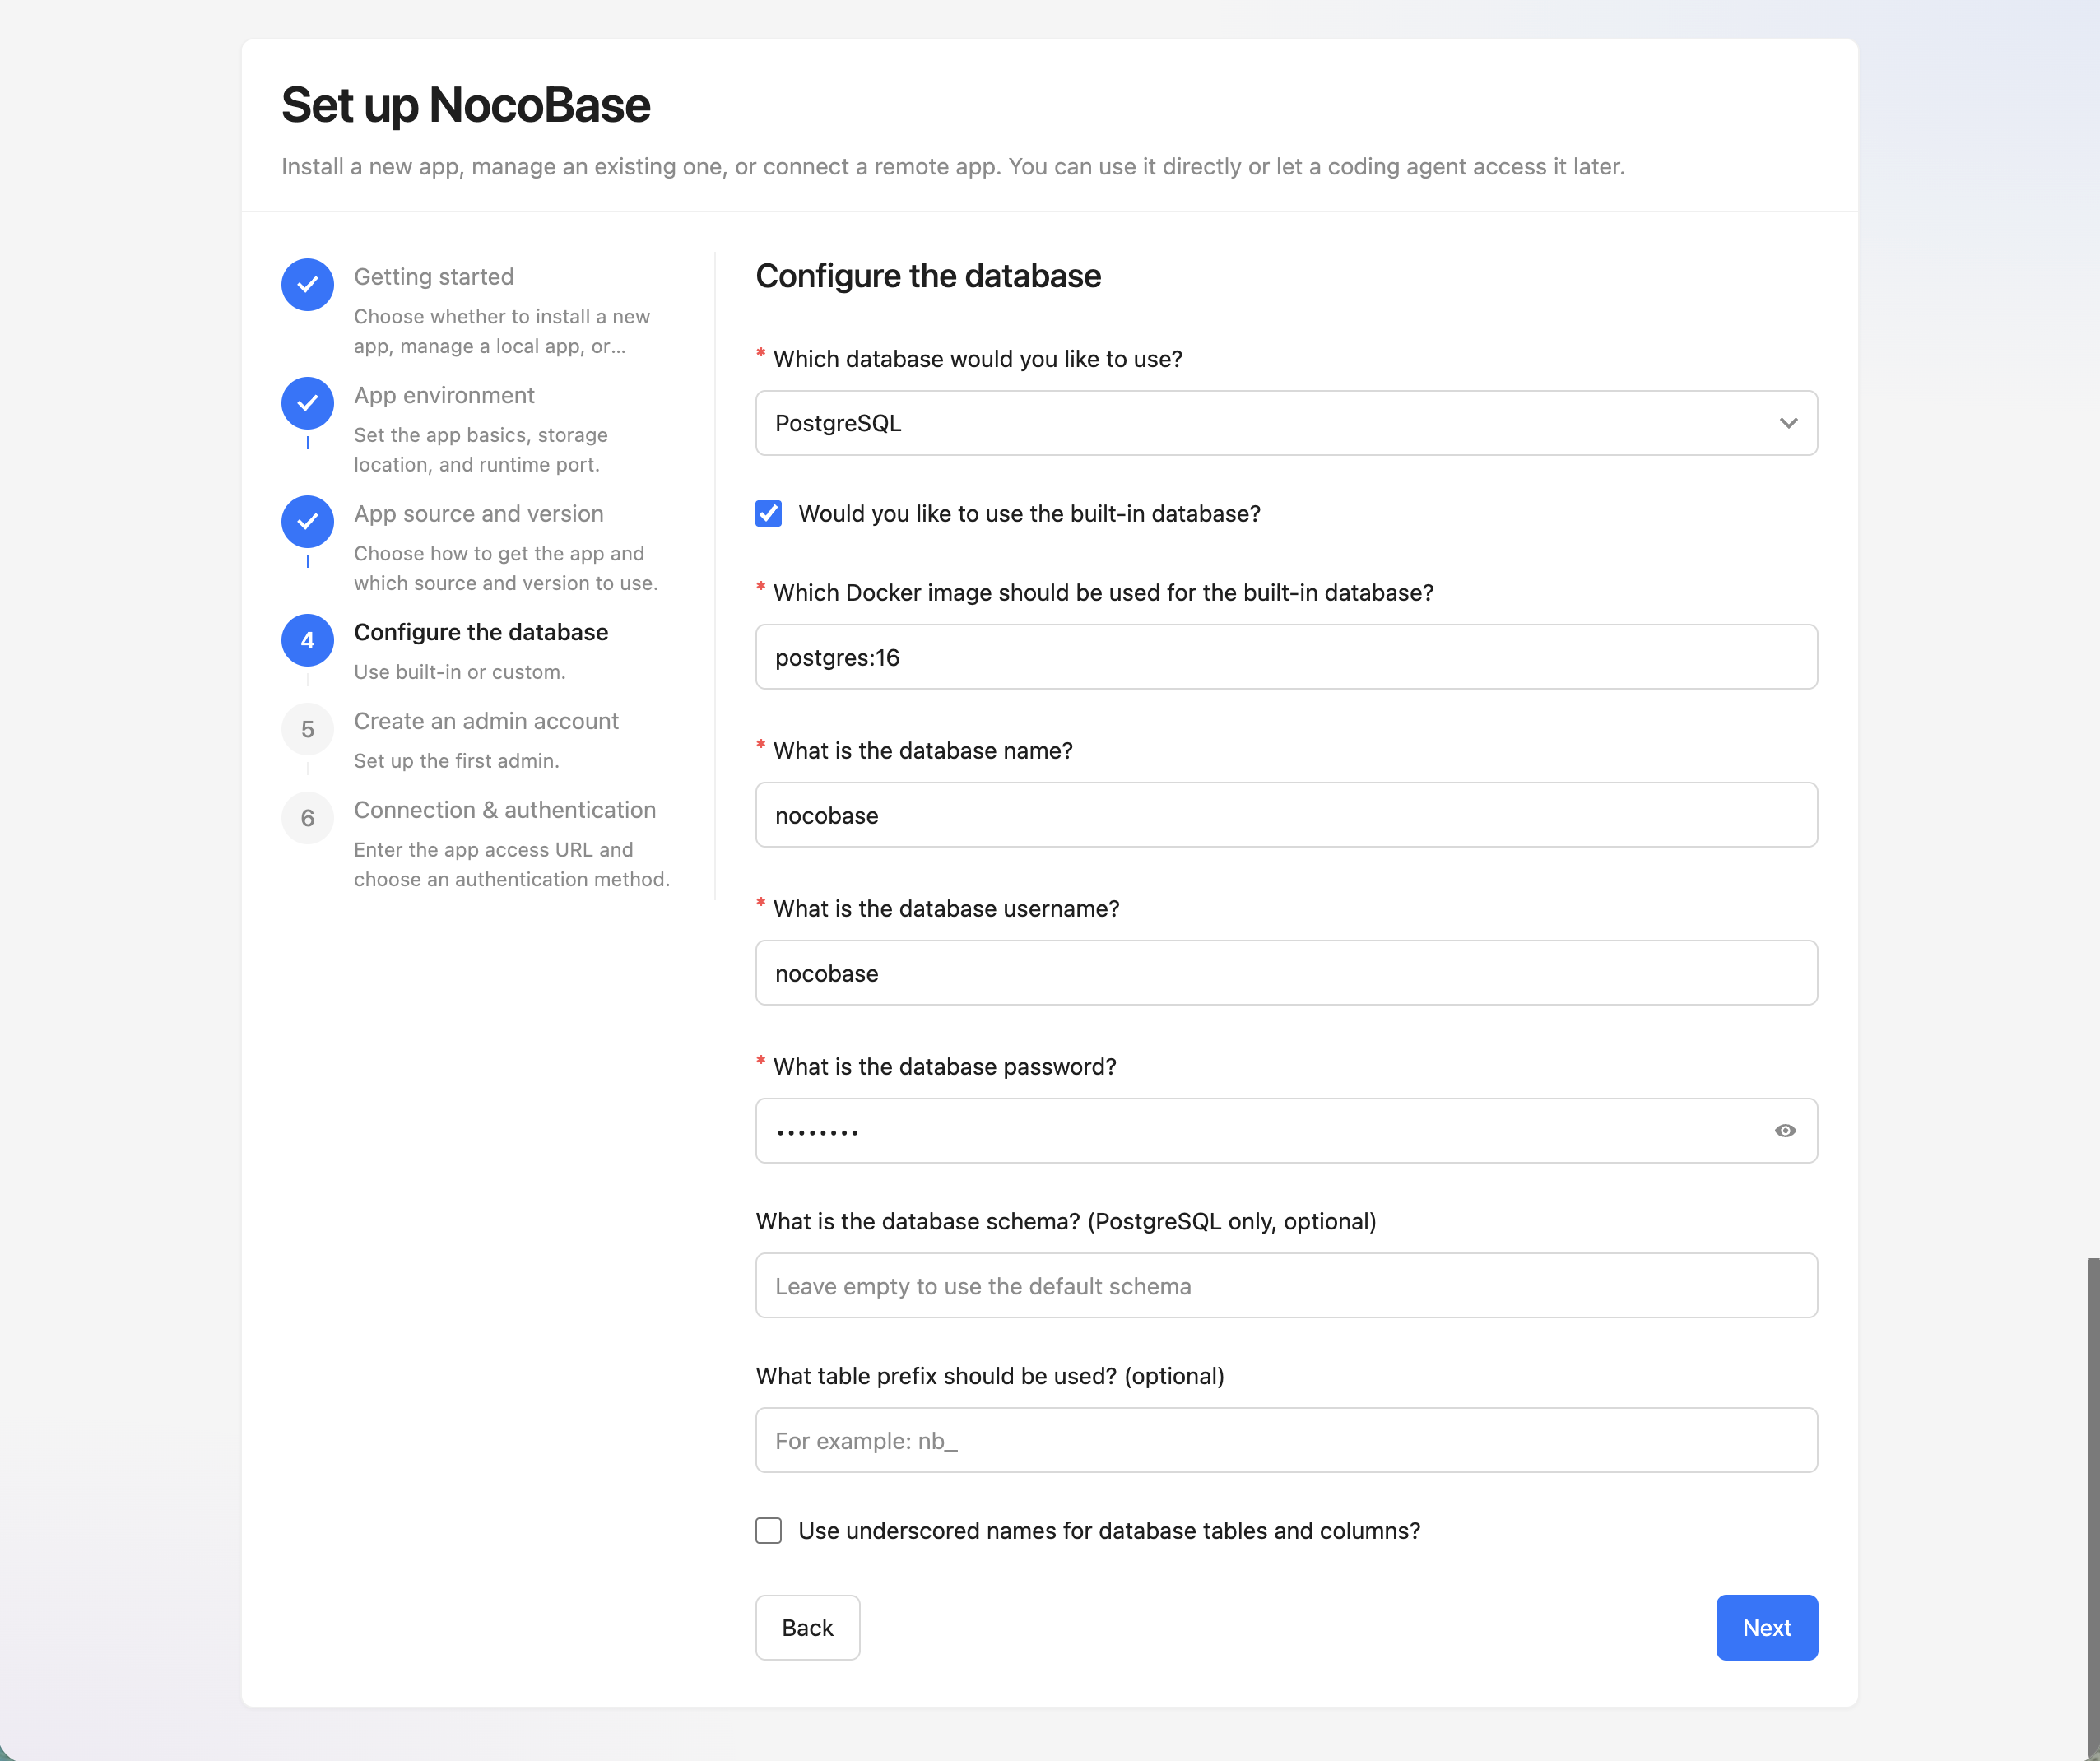
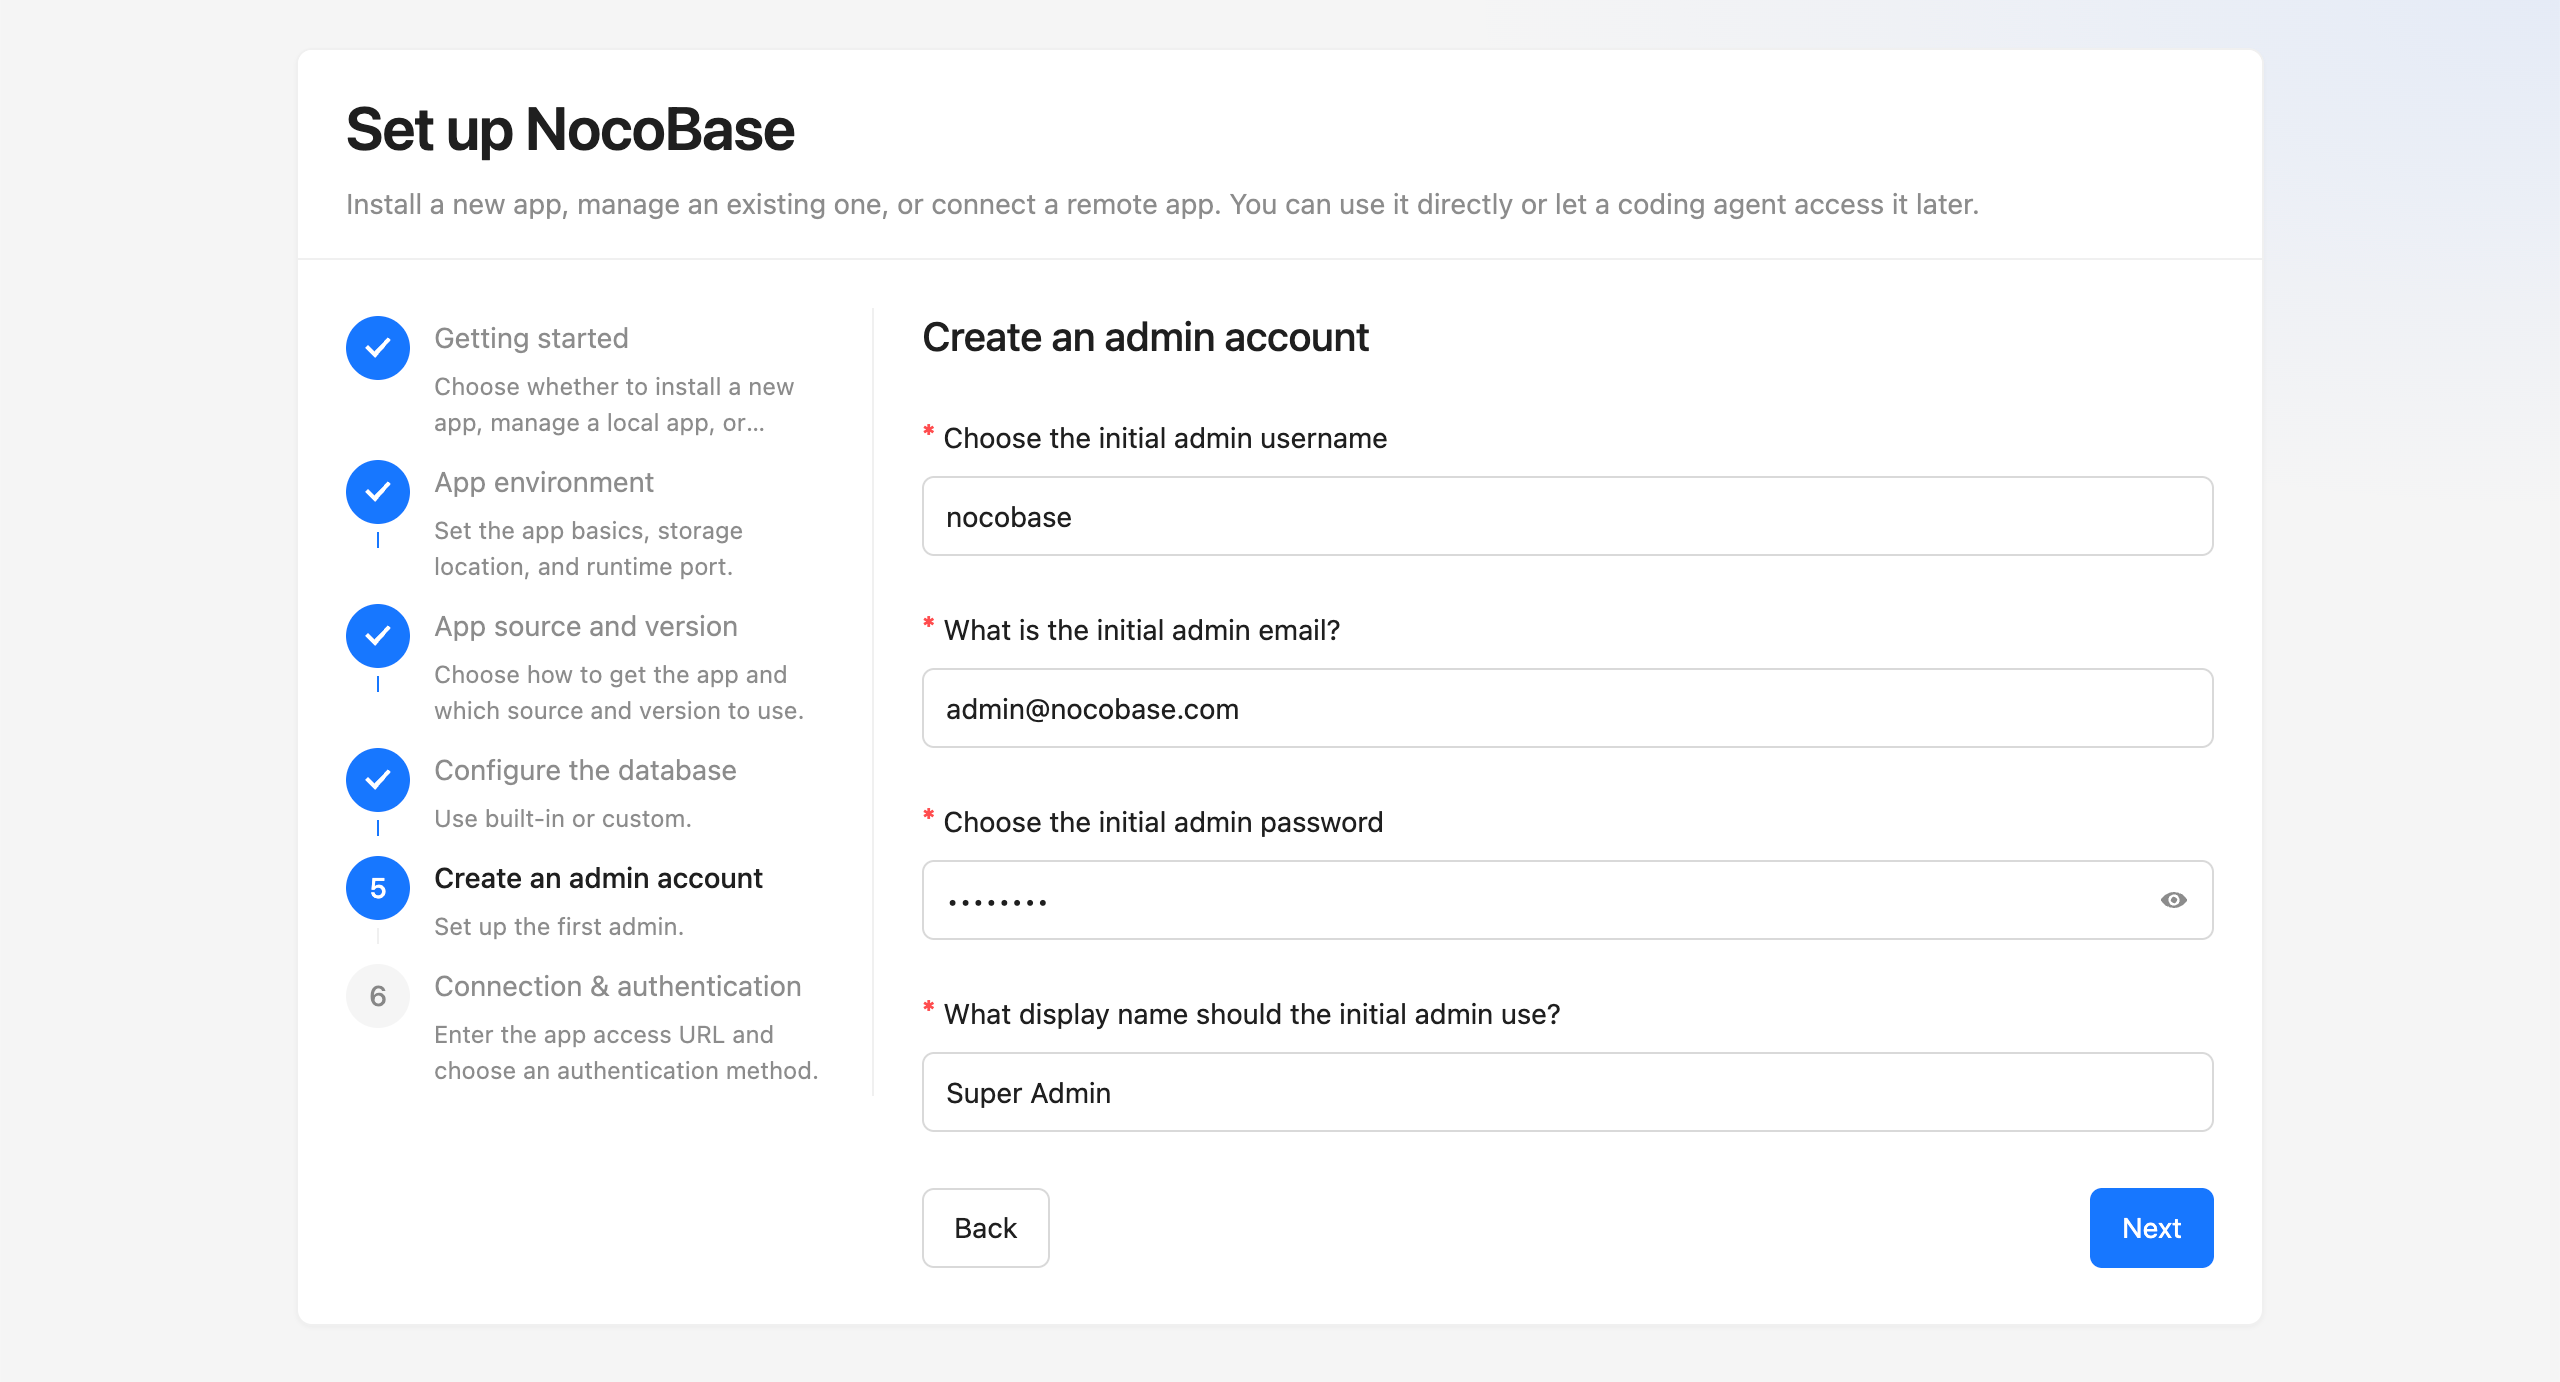
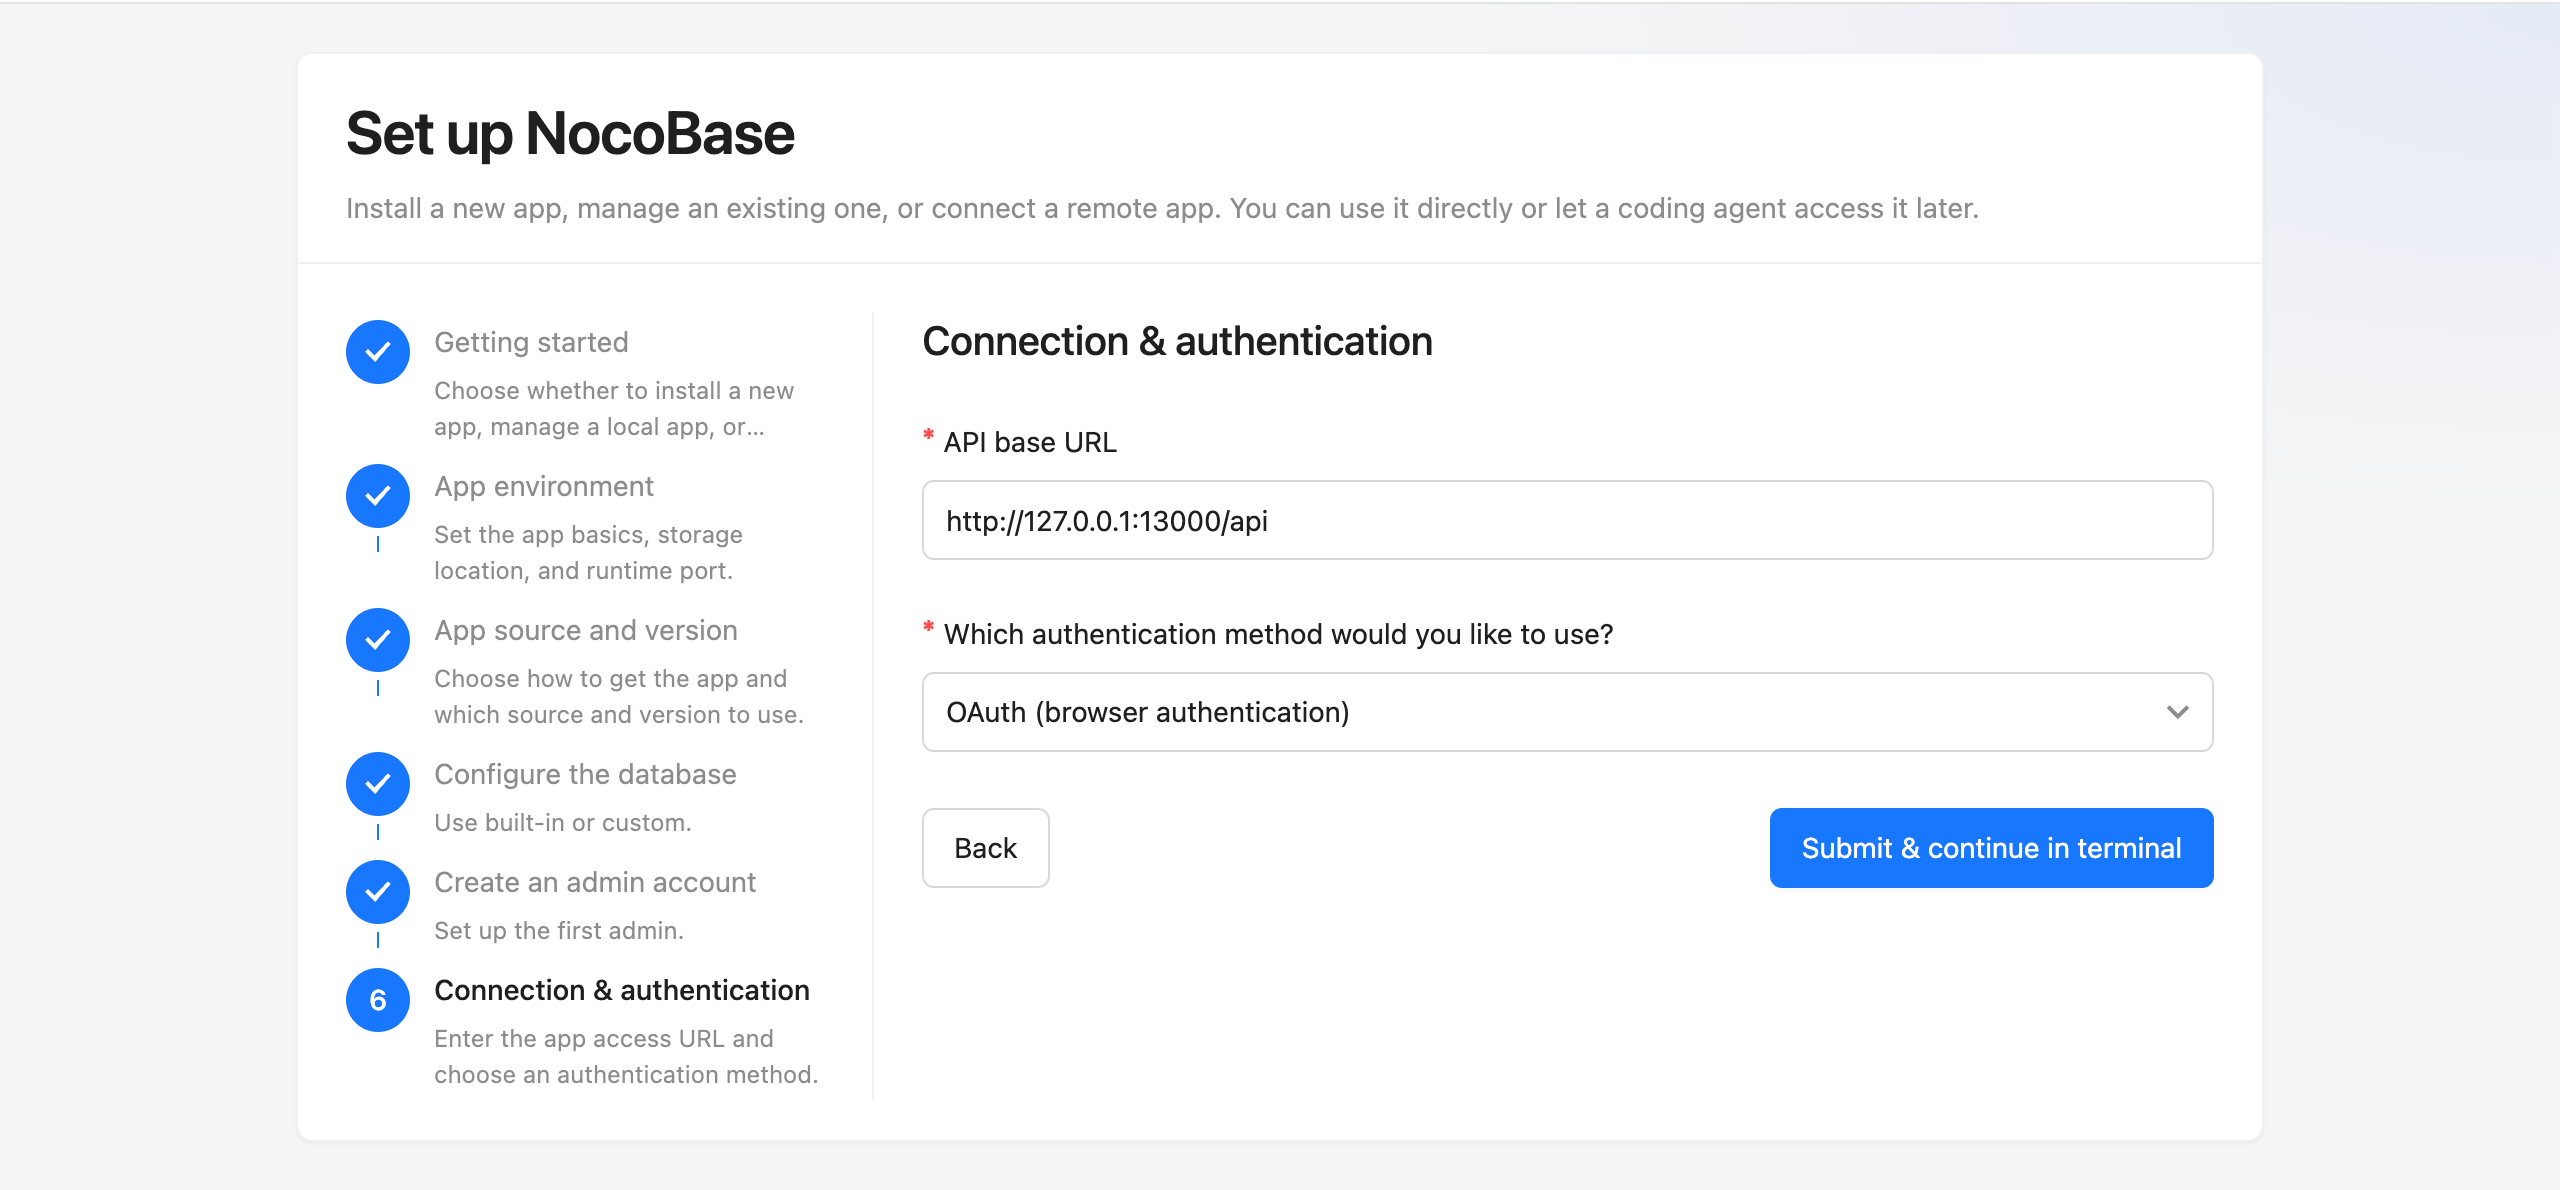
We recommend installing through the UI wizard:
Getting started- set the--envidentifier and chooseInstall a new app

App environment- set the app basics, storage location, and runtime port
App source and version- choose how to get the app and which source and version to use
Configure the database- choose the built-in database or a custom database
Create an admin account- set up the first admin account
Connection & authentication- enter the app access URL and choose an authentication method
If you prefer terminal interaction, you can also run:
If you need to initialize in scripts or CI, use non-interactive mode:
If you run nb init --ui on a server, we recommend changing the default host to that server's IP first. That way, you can open the wizard from your local browser.
Step 3: Confirm the app is ready
After installation, it is usually worth confirming these three things first:
- The env has been saved successfully
- The app has started normally
- You can sign in with the administrator account
Common commands:
For a local default installation, you can usually open http://localhost:13000 in your browser directly. After signing in, start a new AI Agent session or restart the current one, and the AI can begin working with this NocoBase app.
CLI configuration is stored in ~/.nocobase/ by default, so AI Agents can usually access it from any working directory.
If this app will be exposed to real users later, we do not recommend using IP + port for the long term. The next step is usually to put it behind a reverse proxy and enable HTTPS.
Next Steps
- If you already have a running NocoBase app, see AI Agent Integration Guide
- If you want to manage app startup, shutdown, logs, and upgrades, see Manage apps
- If you want to continue with production deployment, see Install apps with CLI and Production deployment overview
- If you want AI to start building apps, see AI Builder
Related Links
- Installation and Version Comparison — Compare installation methods and version channels first, then decide how to install
- AI Agent Integration Guide — Connect an existing NocoBase app and let your AI Agent start working
nb initcommand reference — Initialize a new app, take over an existing local app, or connect a remote appnb env infocommand reference — View the connection details and runtime configuration of the current env- NocoBase CLI — Full reference for all
nbcommands - Manage apps — Start, stop, restart, view logs, and upgrade apps
- Multiple environment management — Common operations when you maintain multiple envs at the same time