
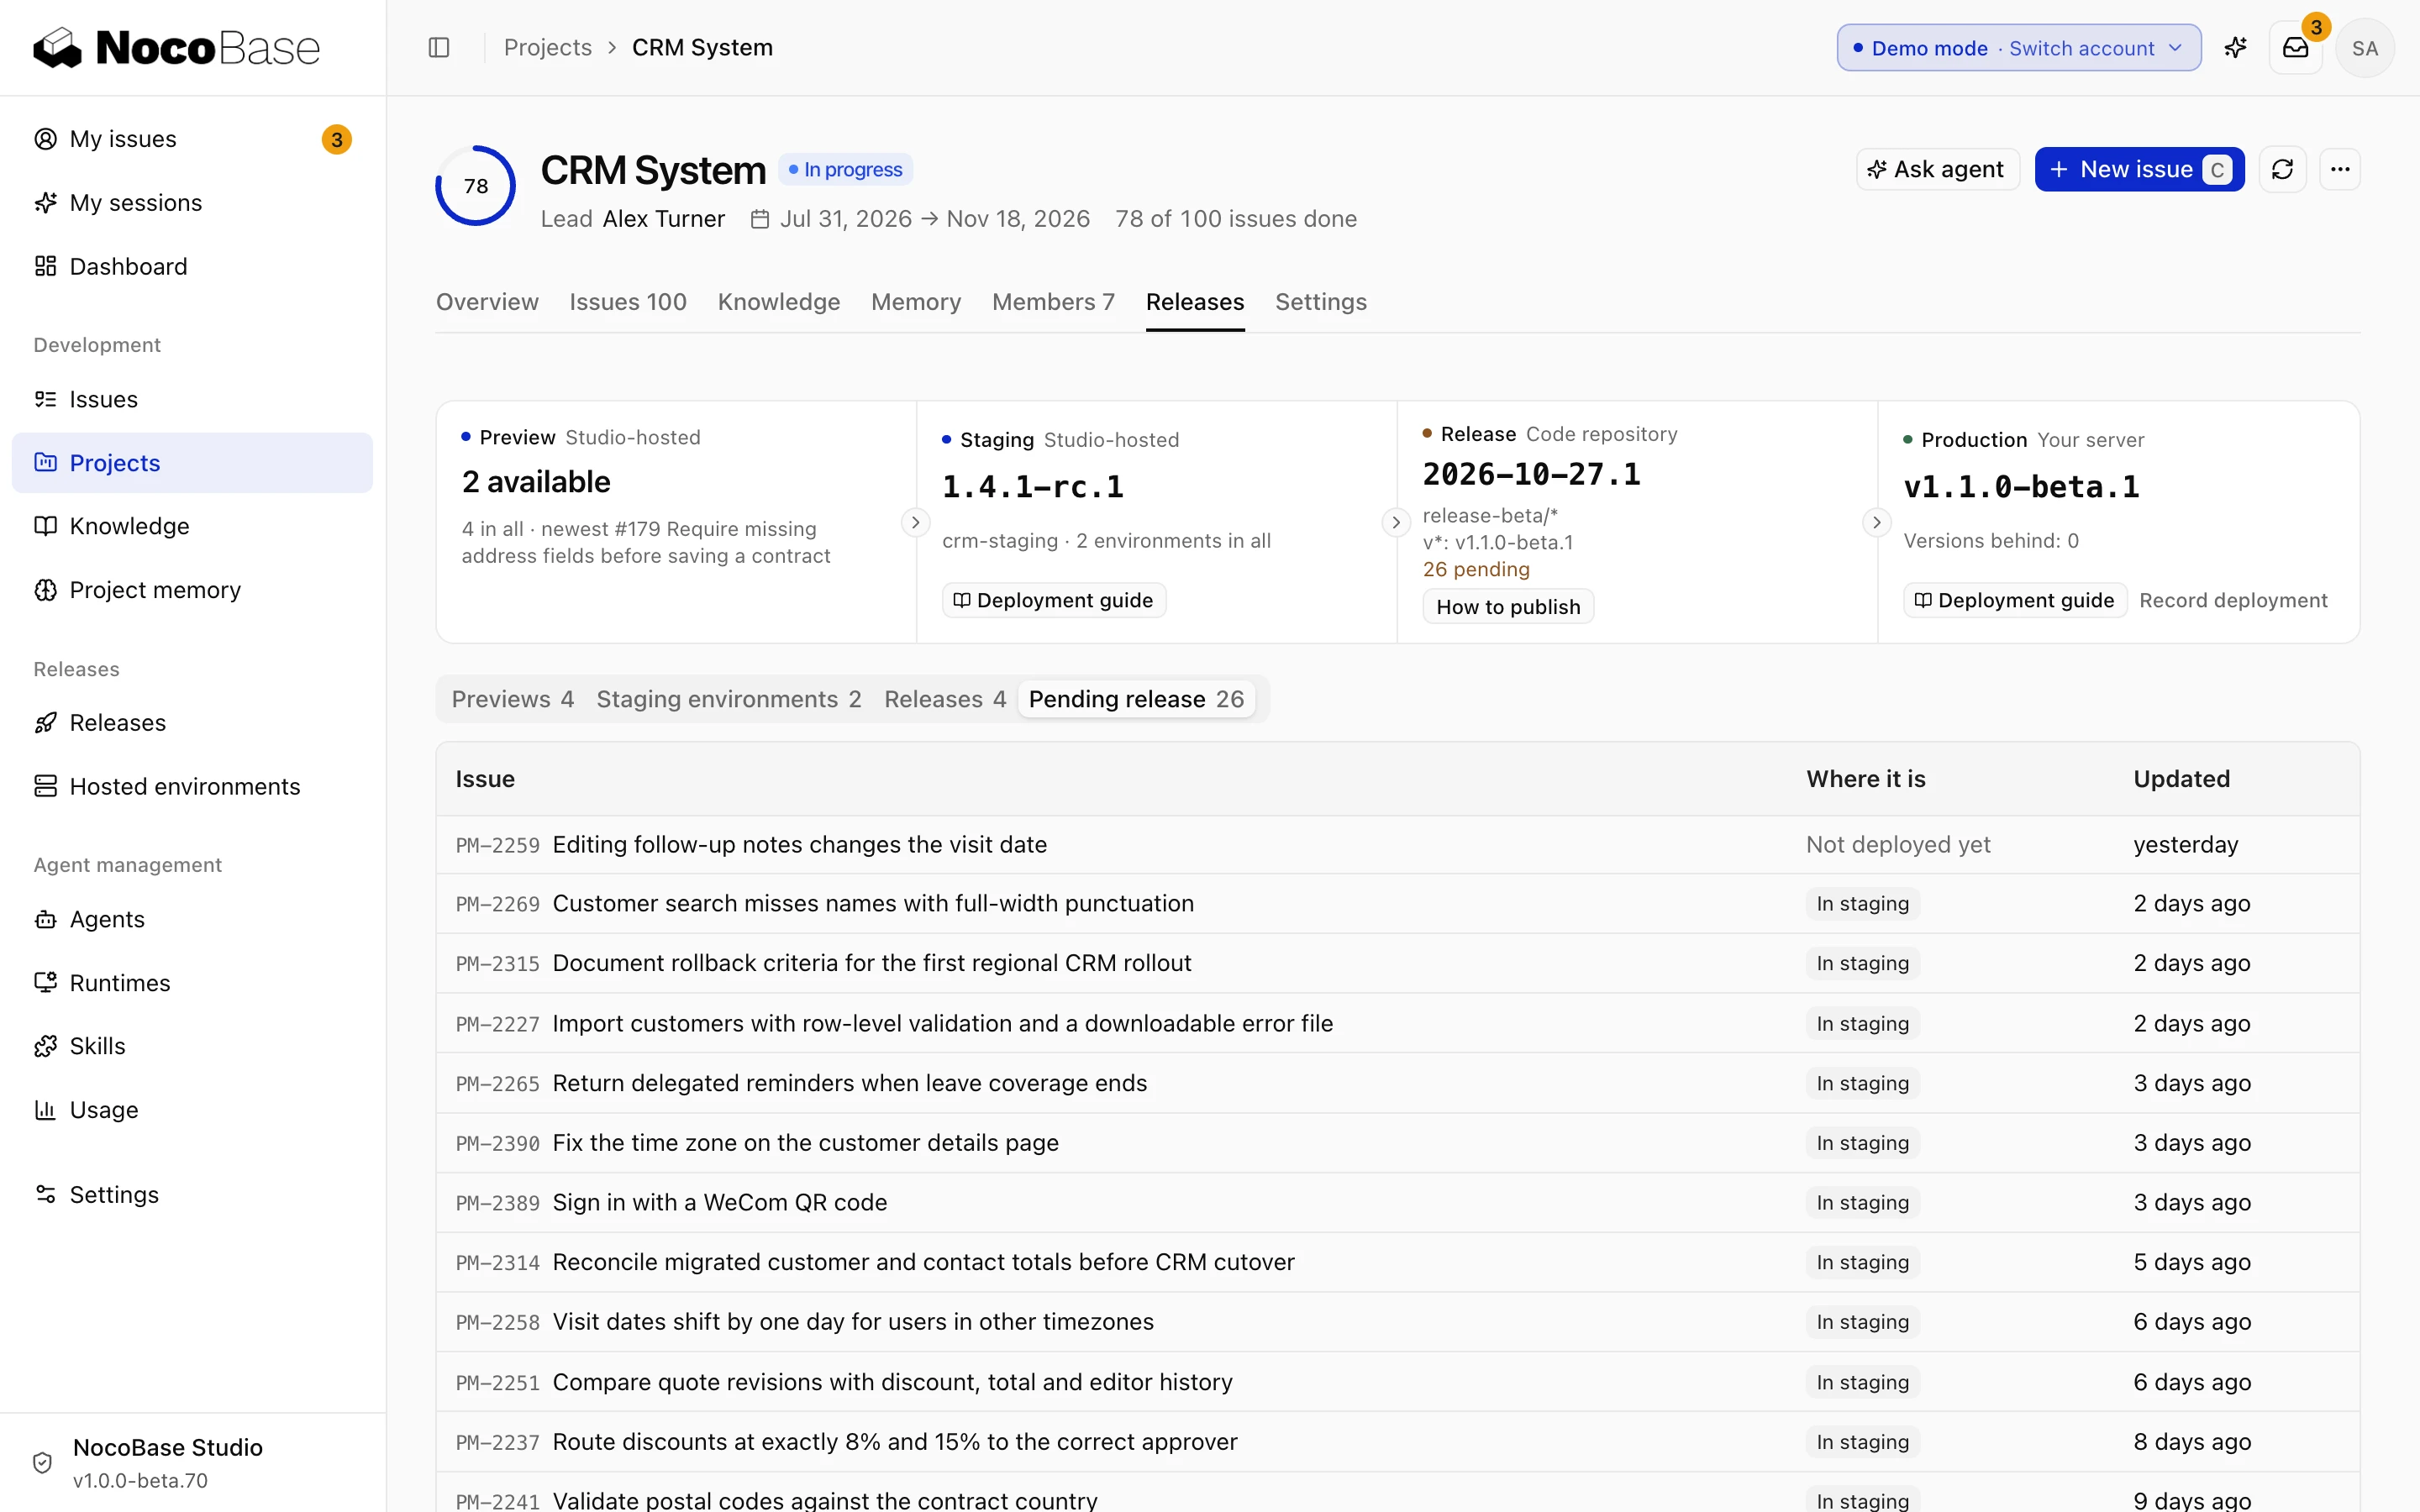
Now that the project is in Studio, every step of going live shows on the project's Releases page: which environment a change is in, which issues this release includes, and which version production runs.
Studio hosts only the preview and staging environments. Production runs on your own server. Studio doesn't connect to it; it only gives a deployment guide and records the version production runs.
| Stage | Where it runs | When it updates |
|---|---|---|
| Preview | Hosted by Studio | Every PR, already set up in Bring the project into Studio |
| Staging | Hosted by Studio | After every merge, built and deployed by CI |
| Release | The code repository | When you create a tag in the repository that matches a release line |
| Production | Your server | Deploy with the deployment guide, then record the version in Studio |
1. Deploy to staging after merging
Staging is where the team tries things before they go live. An admin adds hosted environments in Hosted environments. See Deploy environments.
Open the itam-lite project's Releases page and click Deployment guide in the Staging column. Enter itam-lite-staging as the app ID, choose the staging environment, then click Connect CI in the Connect CI row. From then on, the repository's CI builds and uploads an artifact after every merge and deploys it to staging.
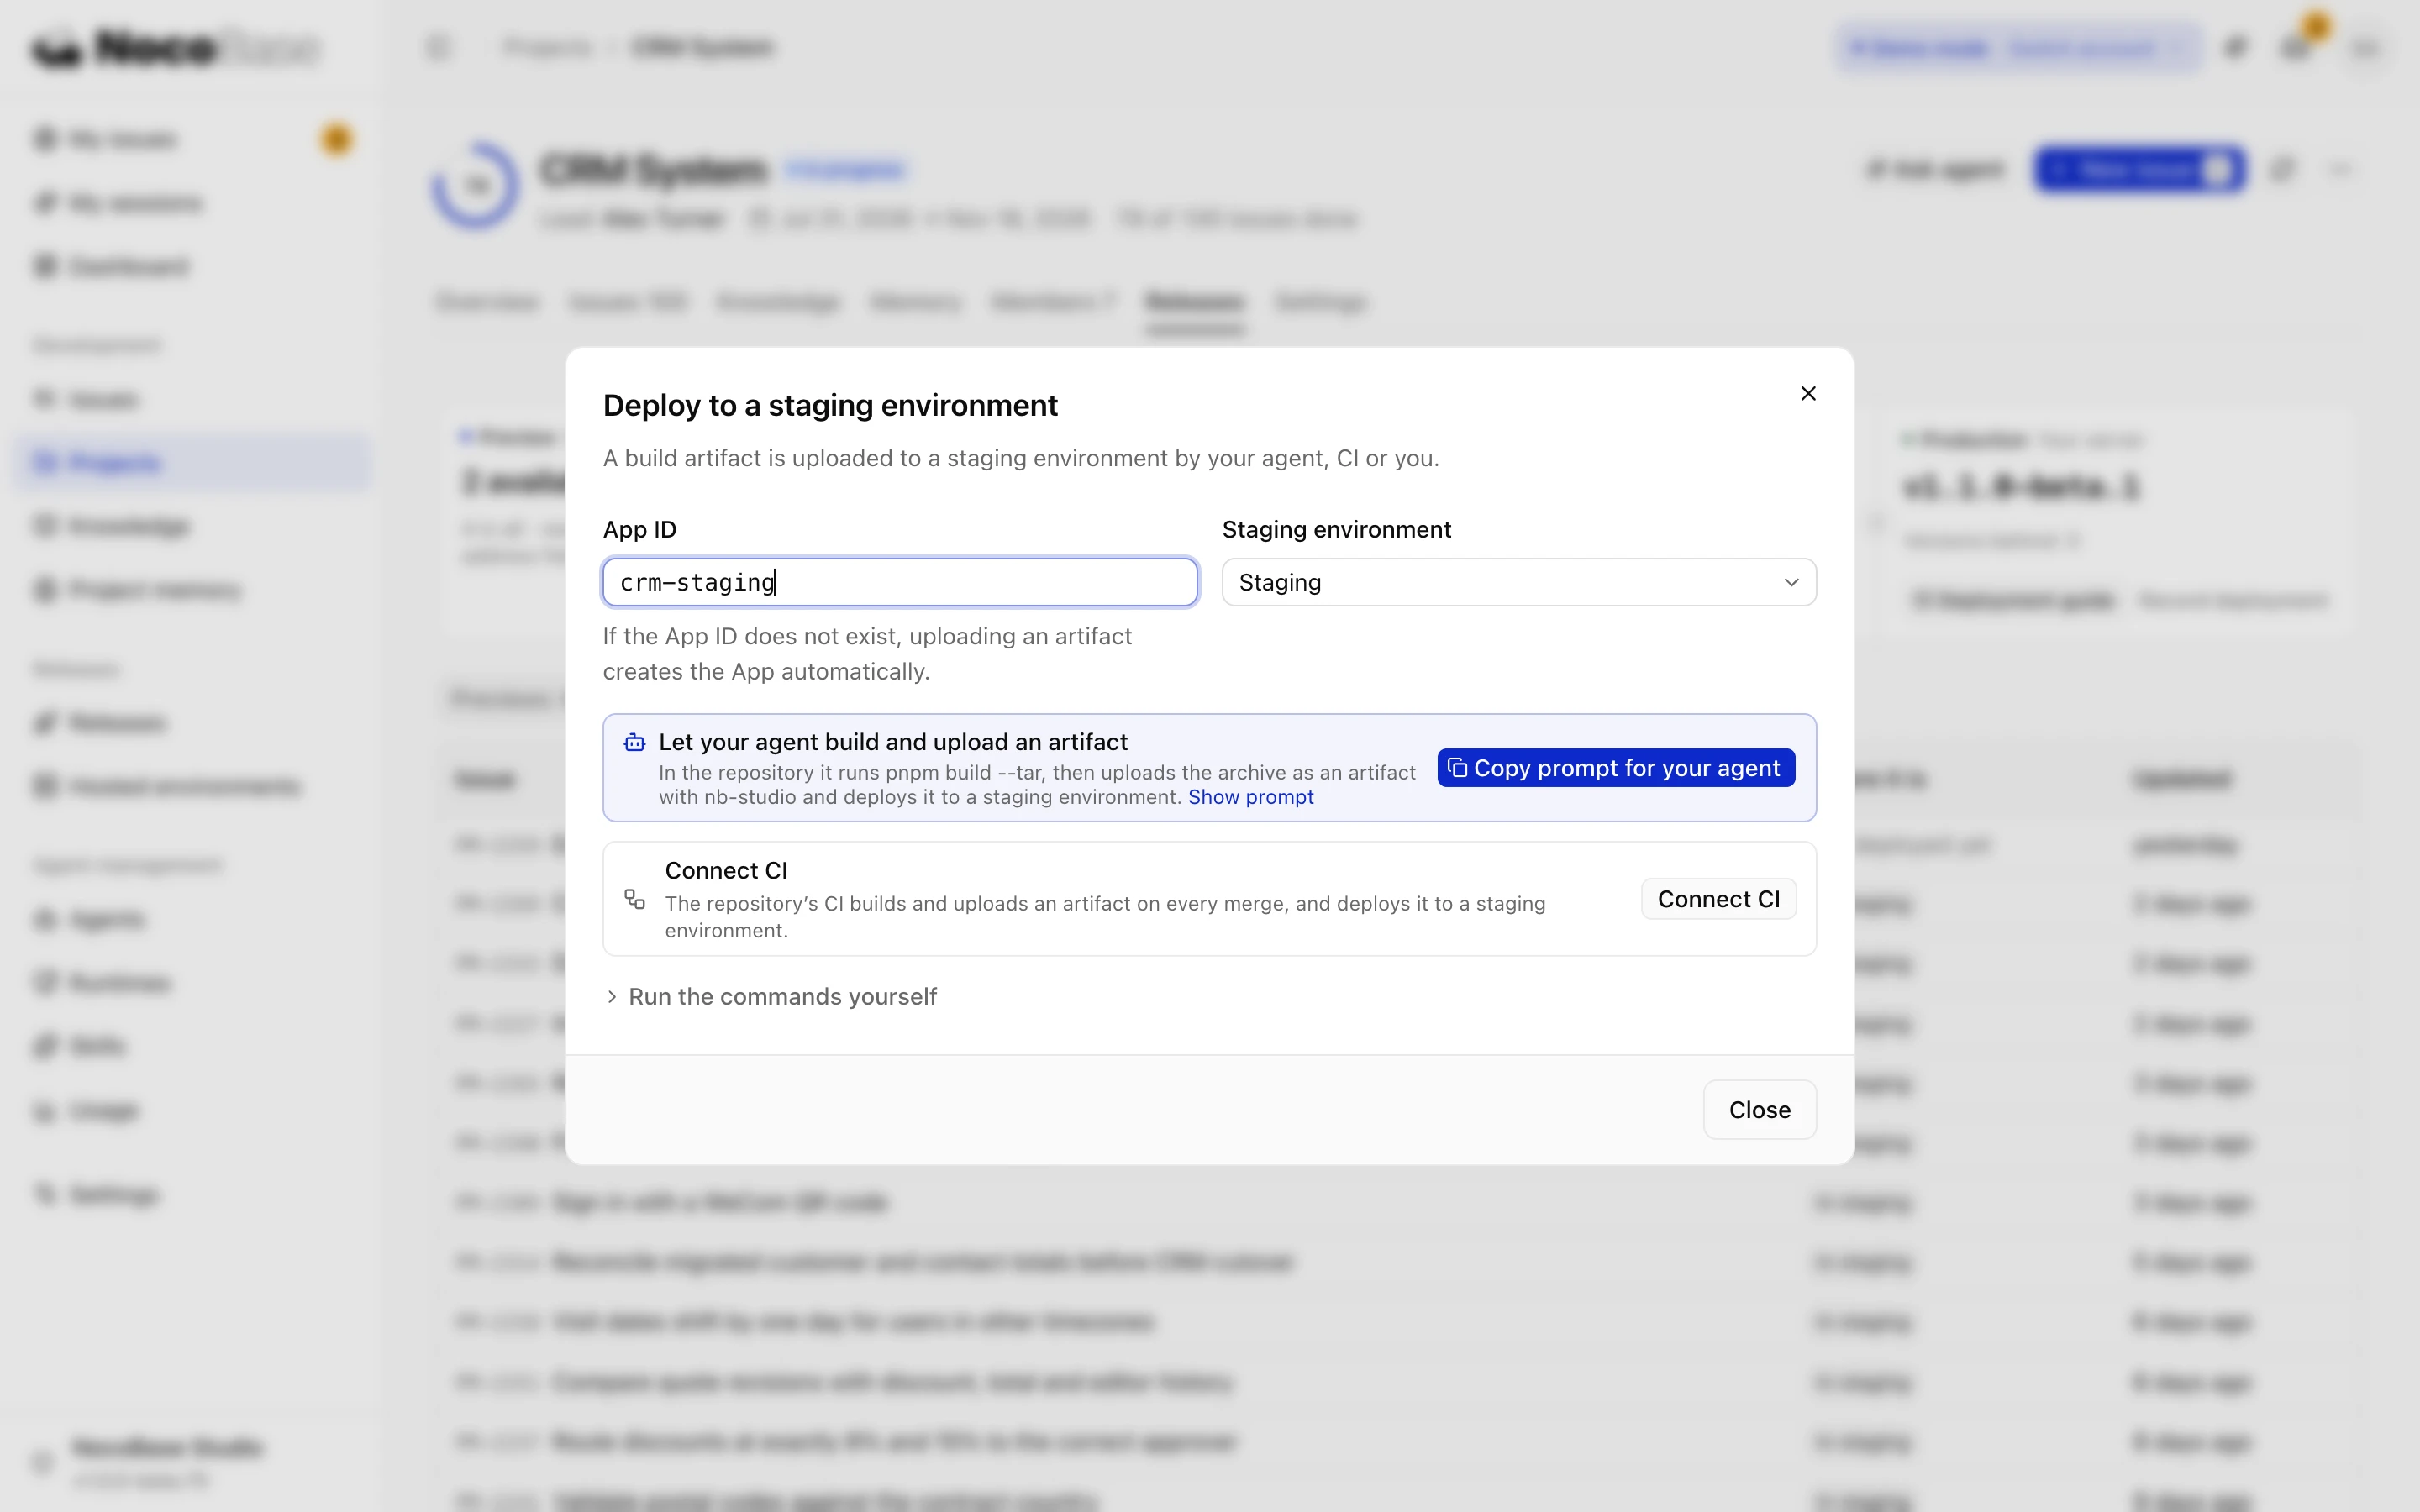
Once it's connected, merge another PR and staging updates. Ask Xu Ning (the business colleague) to go through the real process on staging: start a stocktake for one location, have someone from IT support check a few devices, end the stocktake, and look at the result and the list of discrepancies. If something is wrong, raise a new issue in Studio.
Done whenthe Staging column on the Releases page shows the version running on staging, and Xu Ning has completed one stocktake on staging.
2. Look at the issues pending release
Pending release at the bottom of the Releases page lists issues that are done but not yet released, and the Where it is column says whether each is In staging or Not deployed yet. Before a release, look here to see what will go live. Right now it lists the device stocktake and device retirement issues.
3. Set up a release line
A release line decides which tags count as a release, for example v*. Open the project's Settings › Code repositories, edit Release lines for itam-lite, and enter v*. Without a release line, the Release column asks you to set one up first.
4. Tag and publish the release
In the Release column, click How to publish:
- Choose the itam-lite repository and the release line
v*. - Under Based on staging environment, choose the staging environment you just set up. The target commit is the one running on staging.
- You can change the Suggested tag, for example to
v1.1.0. - Look at Included issues and the issues that aren't included, and confirm that device stocktaking and device retirement are both in.
- Click Copy commands and run them in the itam-lite repository.
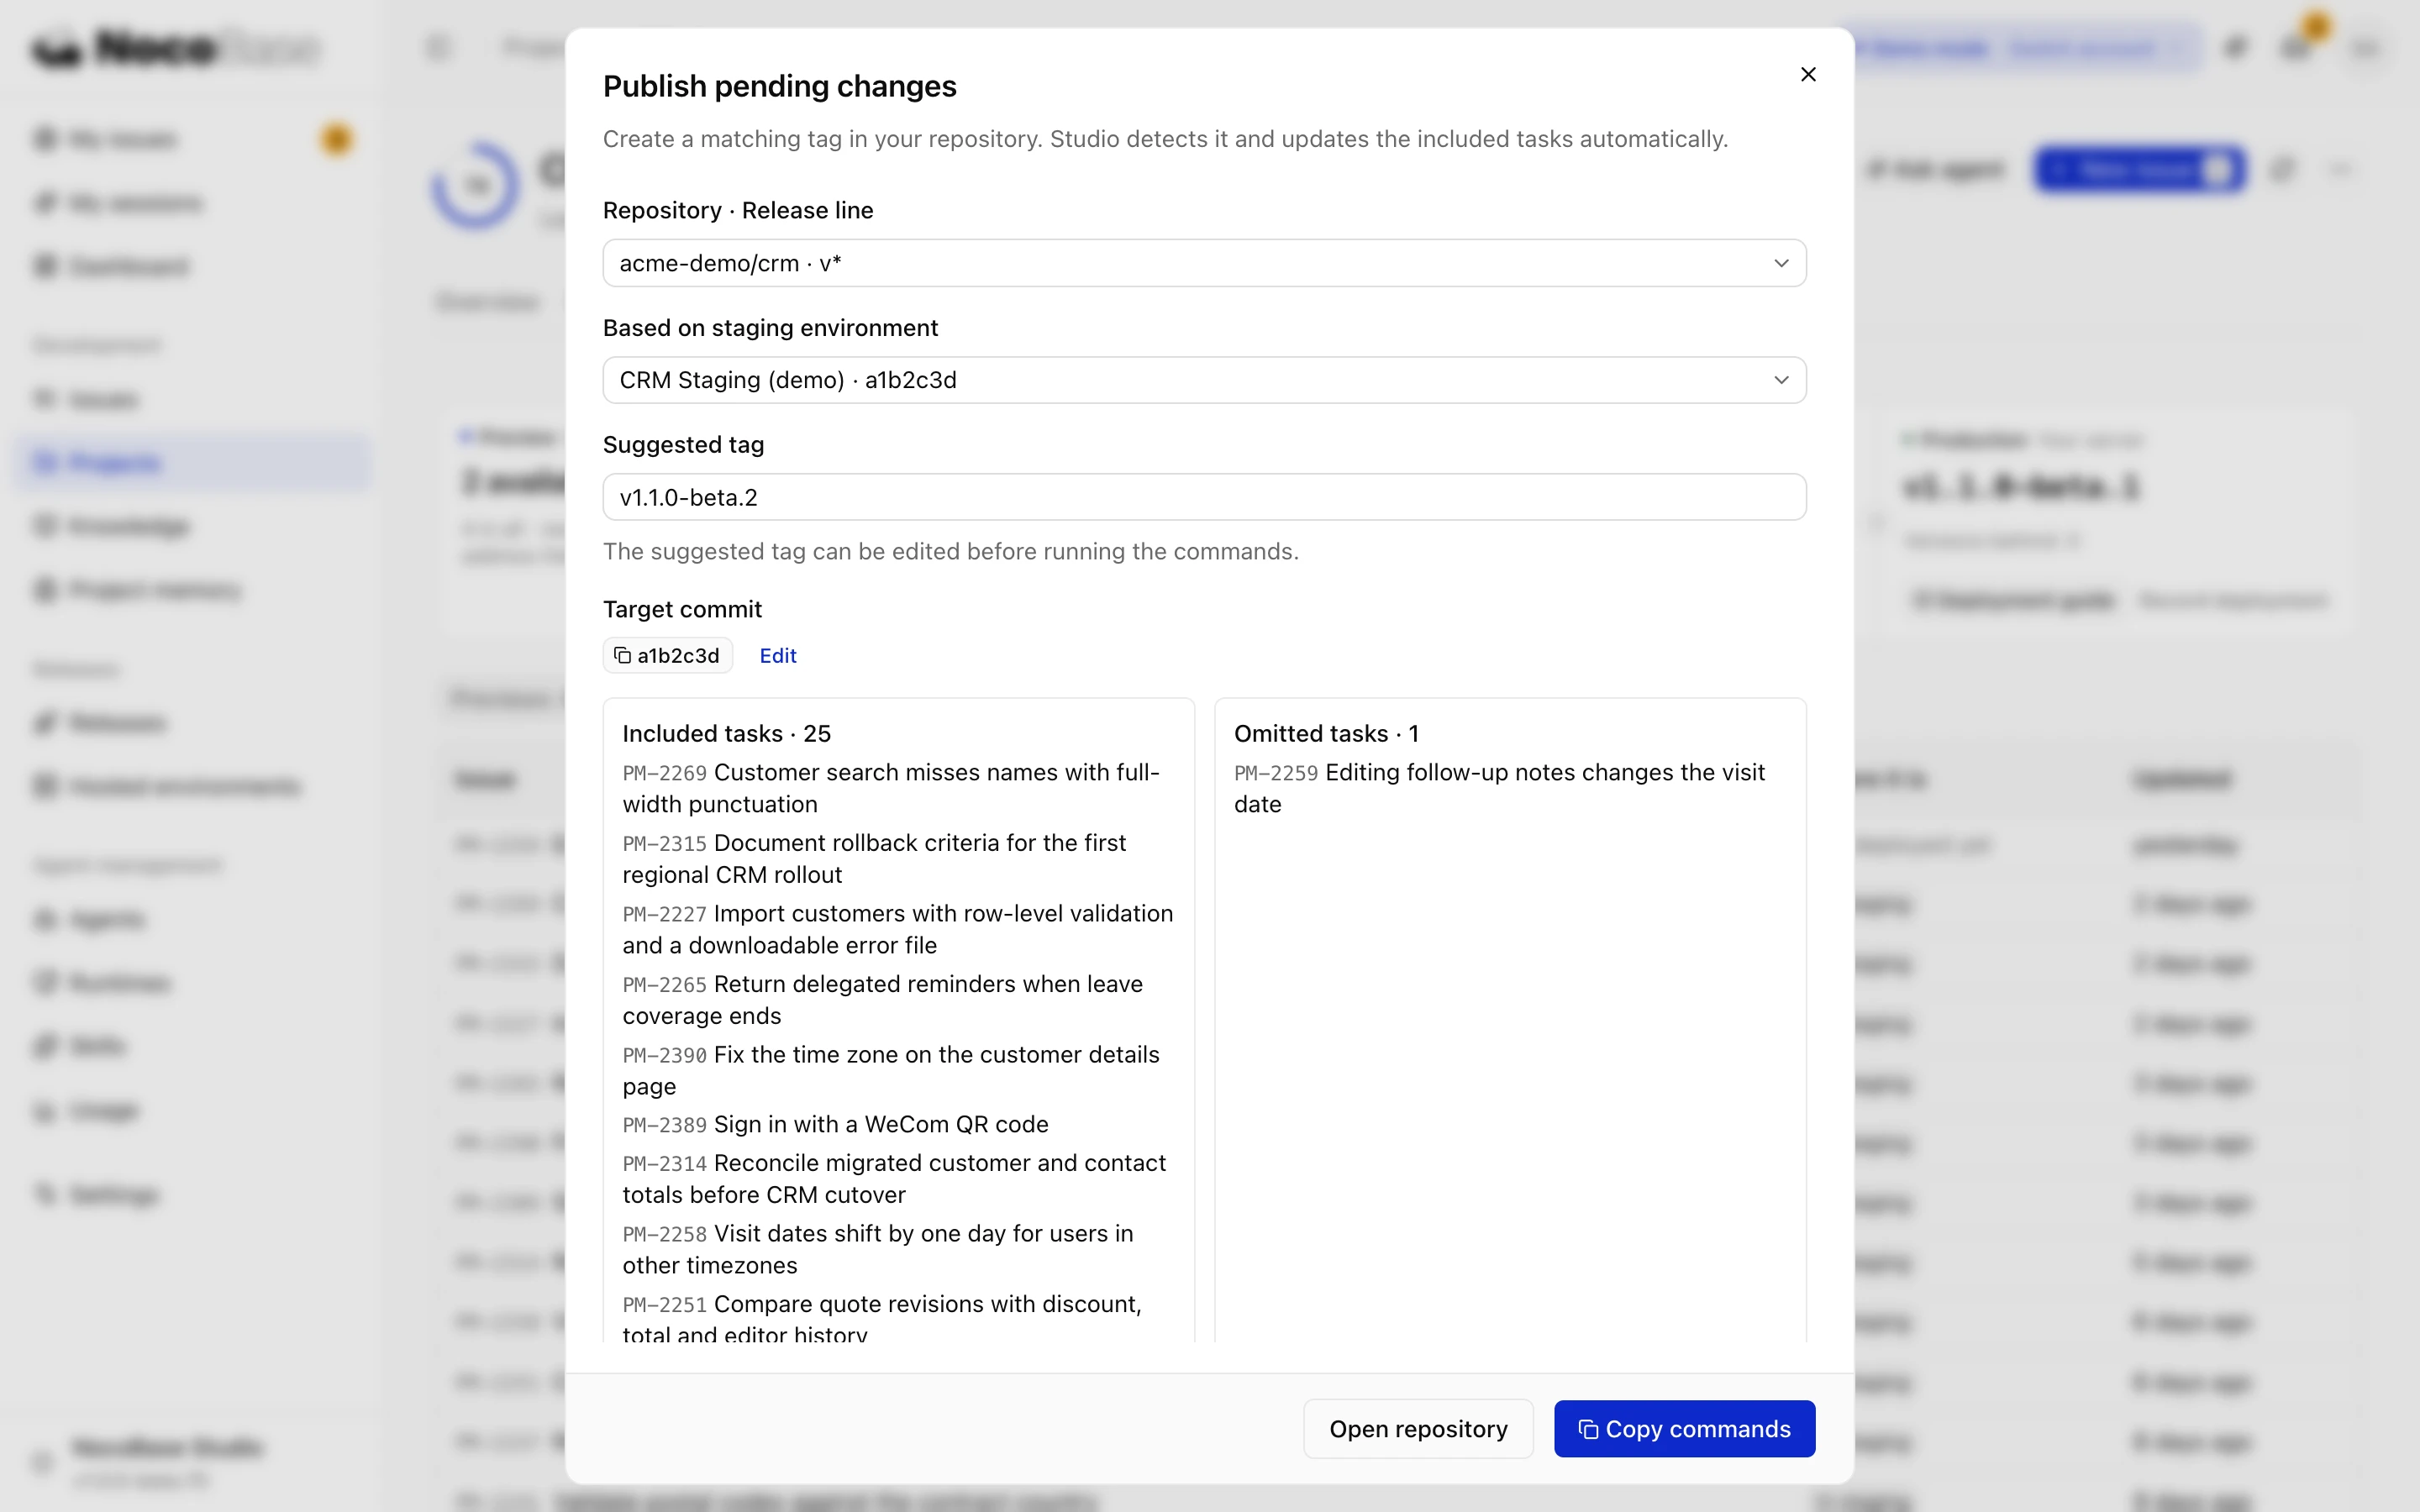
Once the tag is pushed, Studio picks it up and updates the included issues.
Done whenthe repository has the tag v1.1.0, the Release column shows this version, and device stocktaking and device retirement are no longer listed under Pending release.
5. Deploy to your server
In the Production column, click Deployment guide, choose the version v1.1.0, and choose Docker or Installer to suit your server. Part 1 used Docker, so choose Docker.
We recommend Let your agent deploy it: copy the prompt to your coding agent. It needs SSH access to the server. It downloads the artifact, builds the image, generates the configuration, backs up the database before upgrading, and finally checks that the app is reachable.
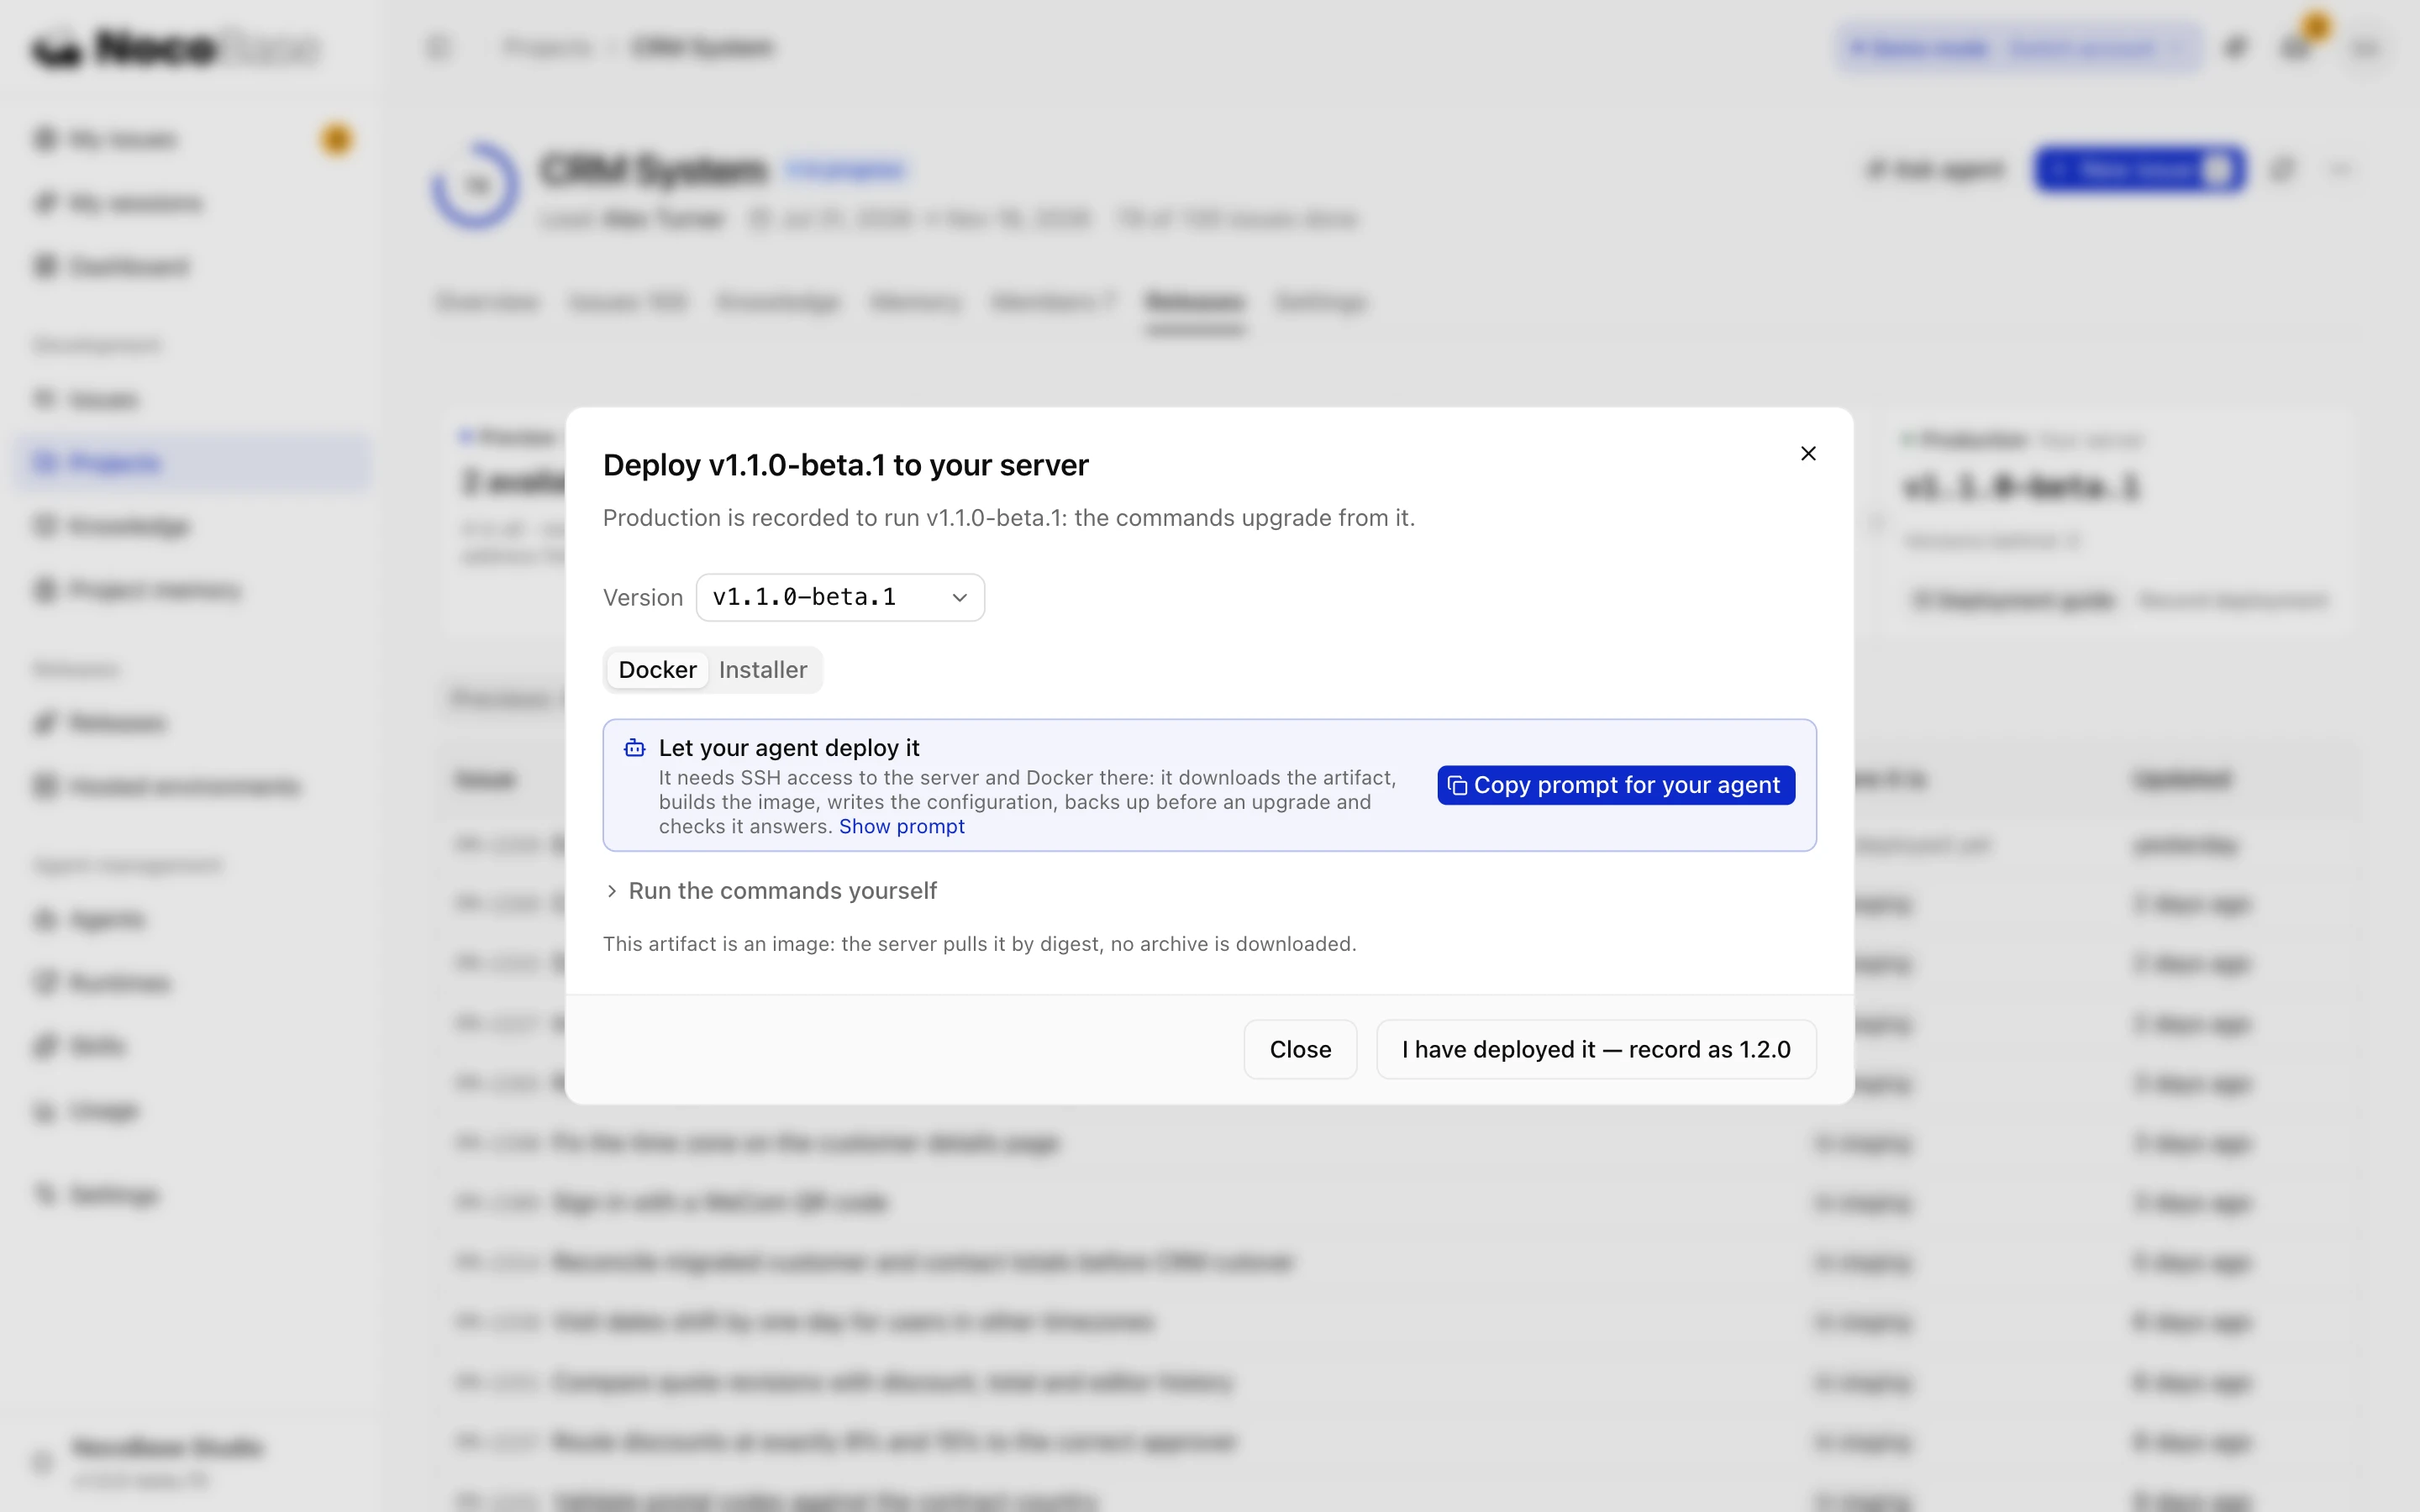
When the deployment is done, click I have deployed it — record as v1.1.0. The Production column shows the version production runs and how many versions it's behind the latest.
While production has no recorded version, the deployment guide gives the commands for a first install. itam-lite was already deployed in Part 1, so when you give the prompt to your coding agent, add: itam-lite is already running on the server, so treat this as an upgrade, back up the database first, and keep the existing configuration and data.
Only the project lead can view the deployment guide and record the deployed version.
Done whenitam-lite's production runs v1.1.0, the Production column records the same version, and the asset manager can start the first quarterly stocktake in production.