
Once a system has a first version, it enters a phase of continuous iteration:
- Features already built need to be improved and their bugs fixed.
- New feature modules need to be added to the system.
If one person works on several issues in parallel, they have to jump between several agent sessions, and the faster agents produce output, the more it demands of that person. If several people develop together, requirement context, business material and project experience can end up scattered everywhere. When a different person or agent takes over, much of that context is likely lost. To address this, NocoBase built NocoBase Studio, made for governing development where people and agents work together.
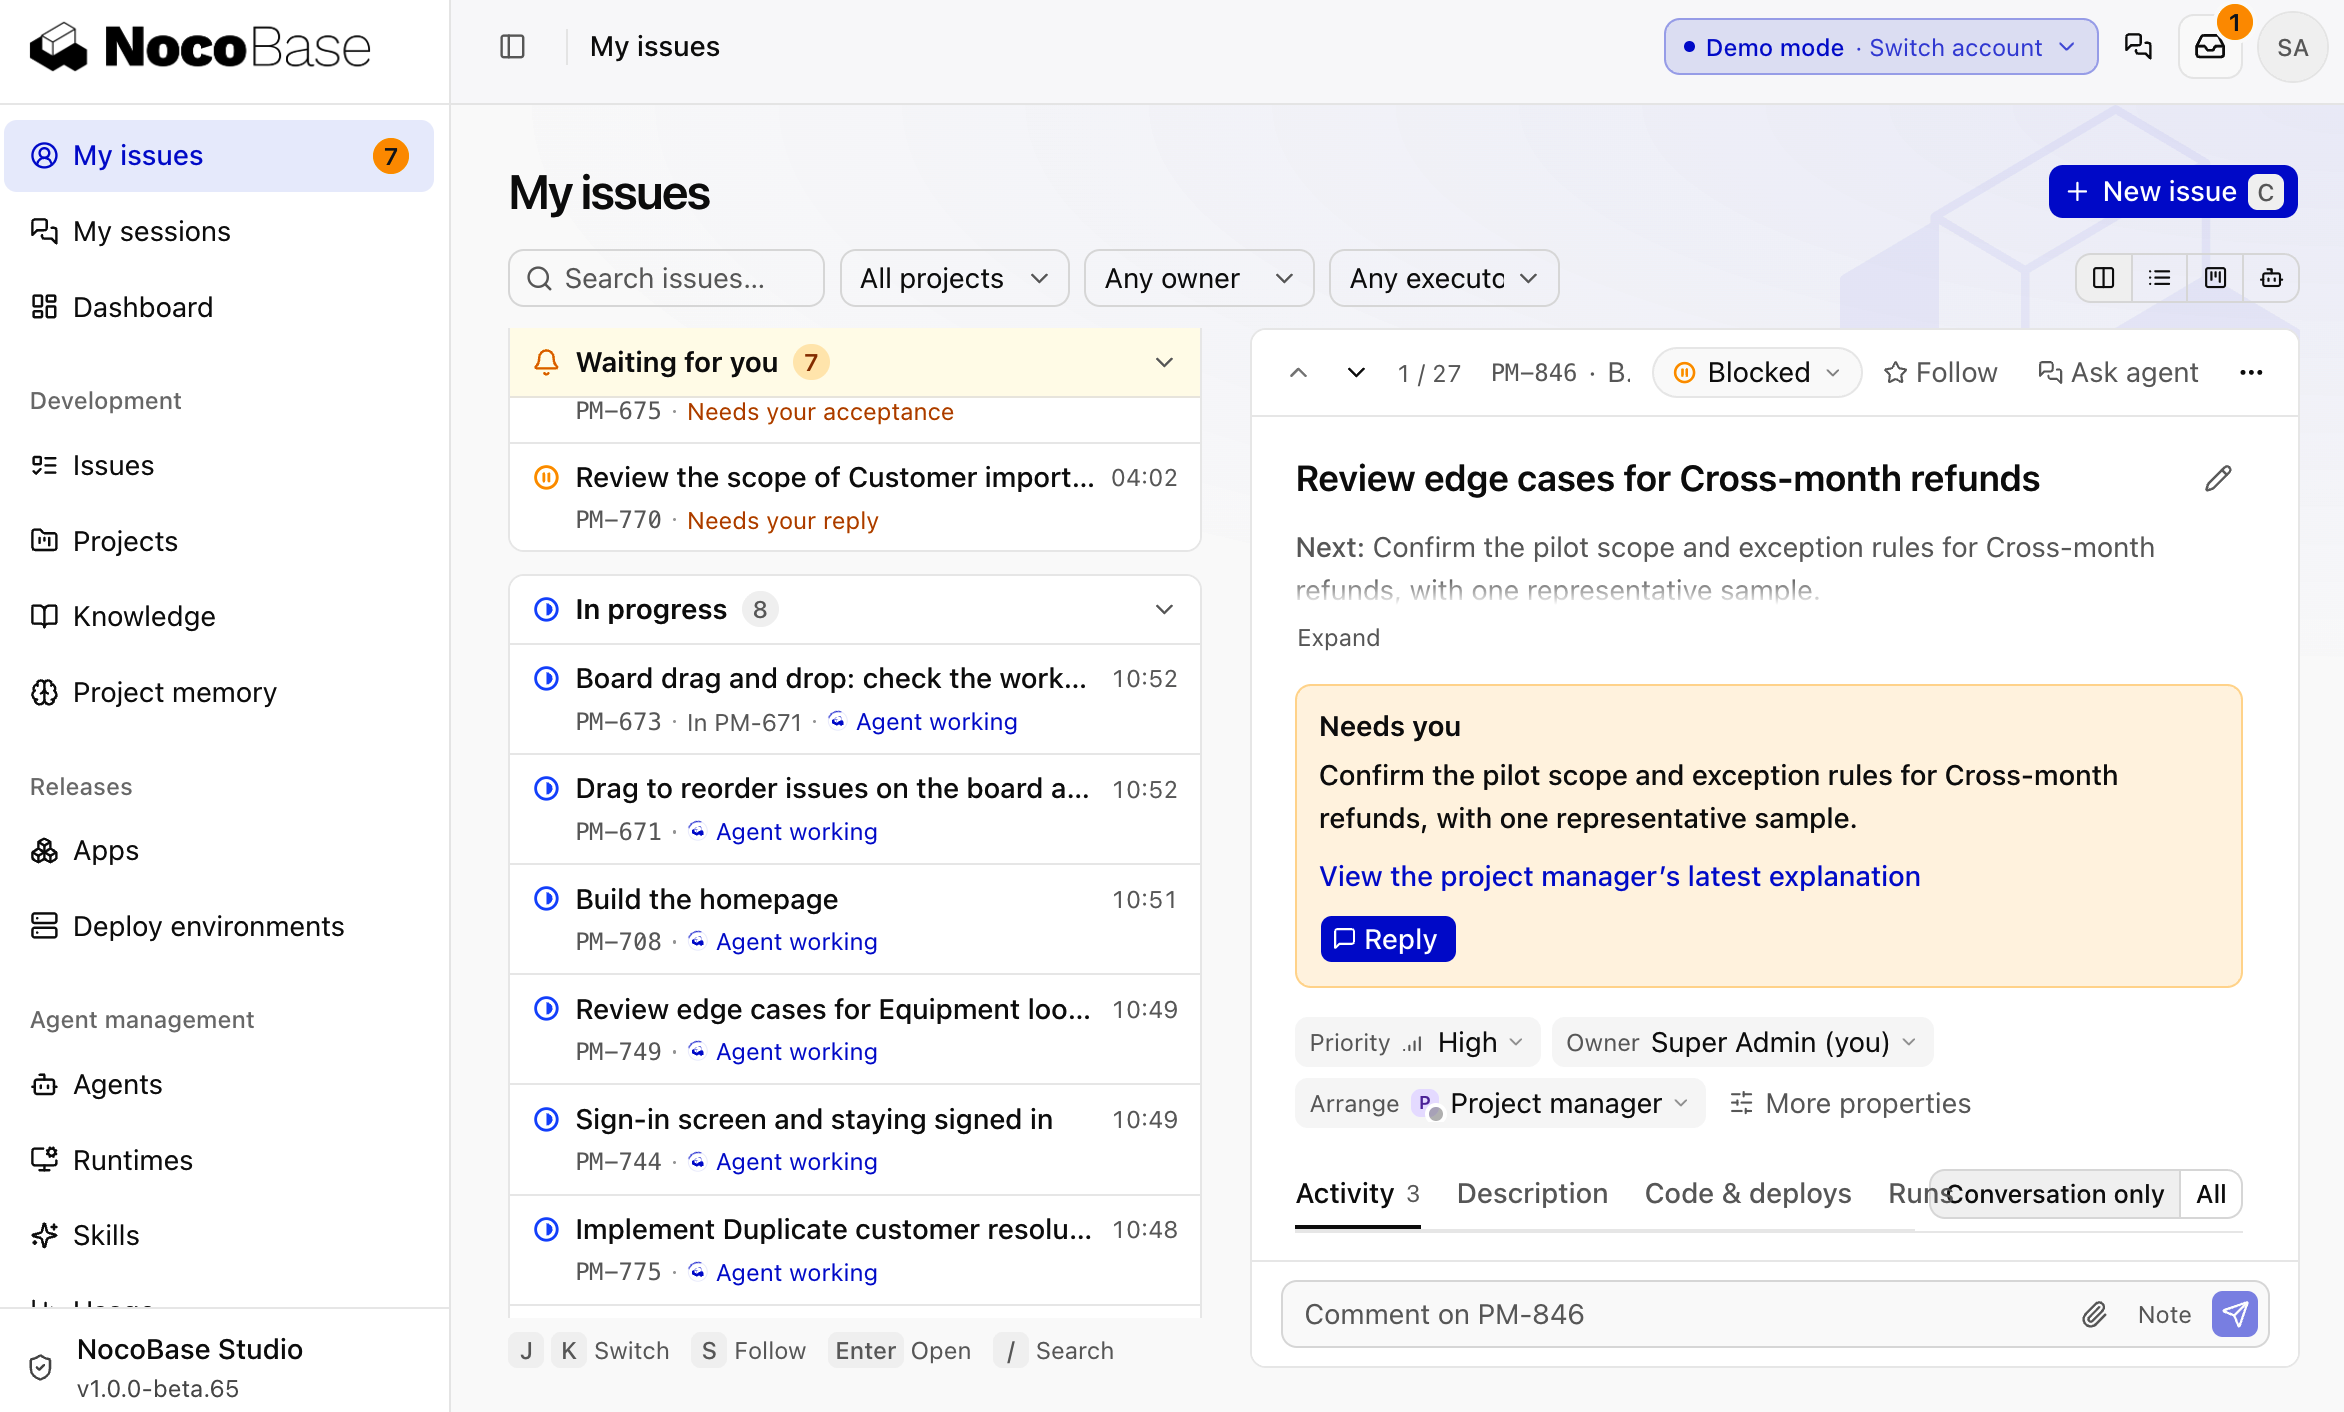
See Pricing. Installing it requires a NocoBase Pro token.
1. Have an agent set up Studio
Use the Installation overview to let your local Coding Agent deploy and configure Studio. You already have the itam-lite repository; connect it in the next step. Follow the Agent’s prompts when sign-in or authorization requires your participation.
Done whenyou can sign in to Studio, the runtime is online, and an Agent is available.
2. Create a project linked to itam-lite
In the itam-lite directory, tell your coding agent:
Use nb-studio to create a project called itam-lite in Studio, linked to the current repository, with no initialization. Tell me the project address when you're done.For the other options, see Create a project.
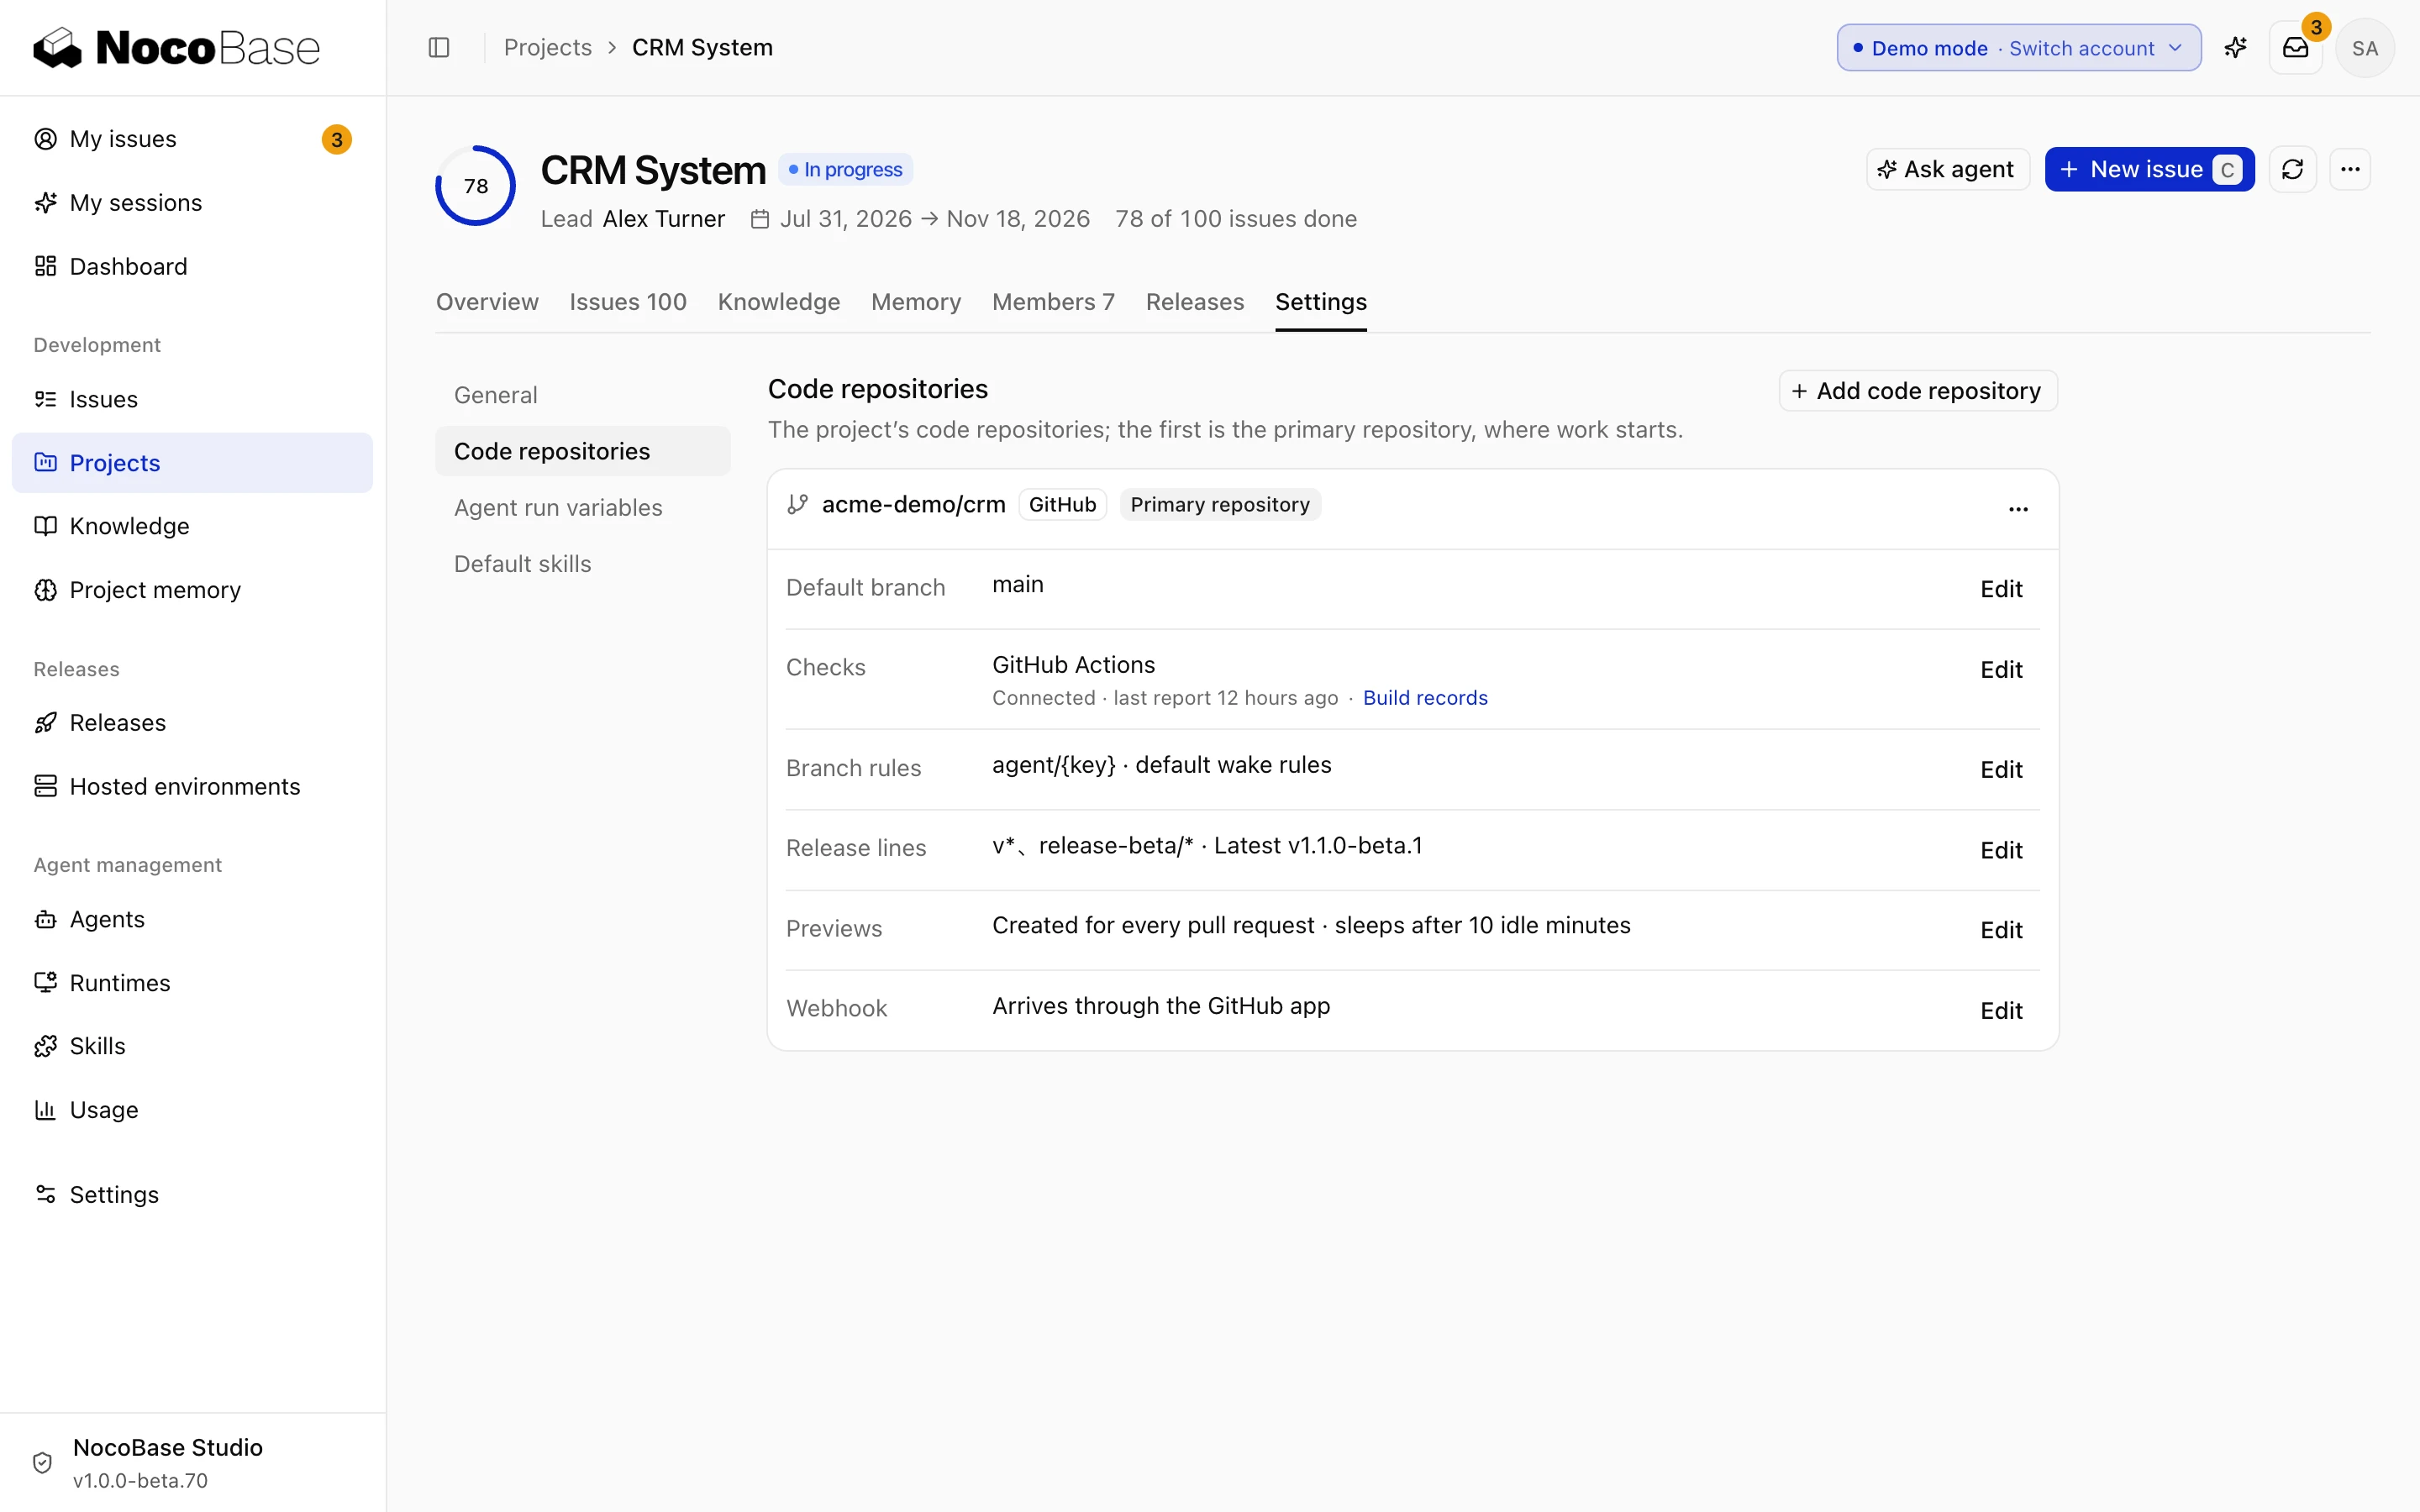
Done whenthe project page opens, and Project settings › Code repositories shows itam-lite.
3. Connect CI for PR previews (optional)
Once connected, every PR is deployed as a preview, and you can open it from the issue page to try it during acceptance.
Open the project's Settings › Code repositories, and in the Checks row for itam-lite, click Edit:
Click Show prompt and copy it to your coding agent. It commits the CI file, saves the secret and opens a PR. For details, see Connect CI.
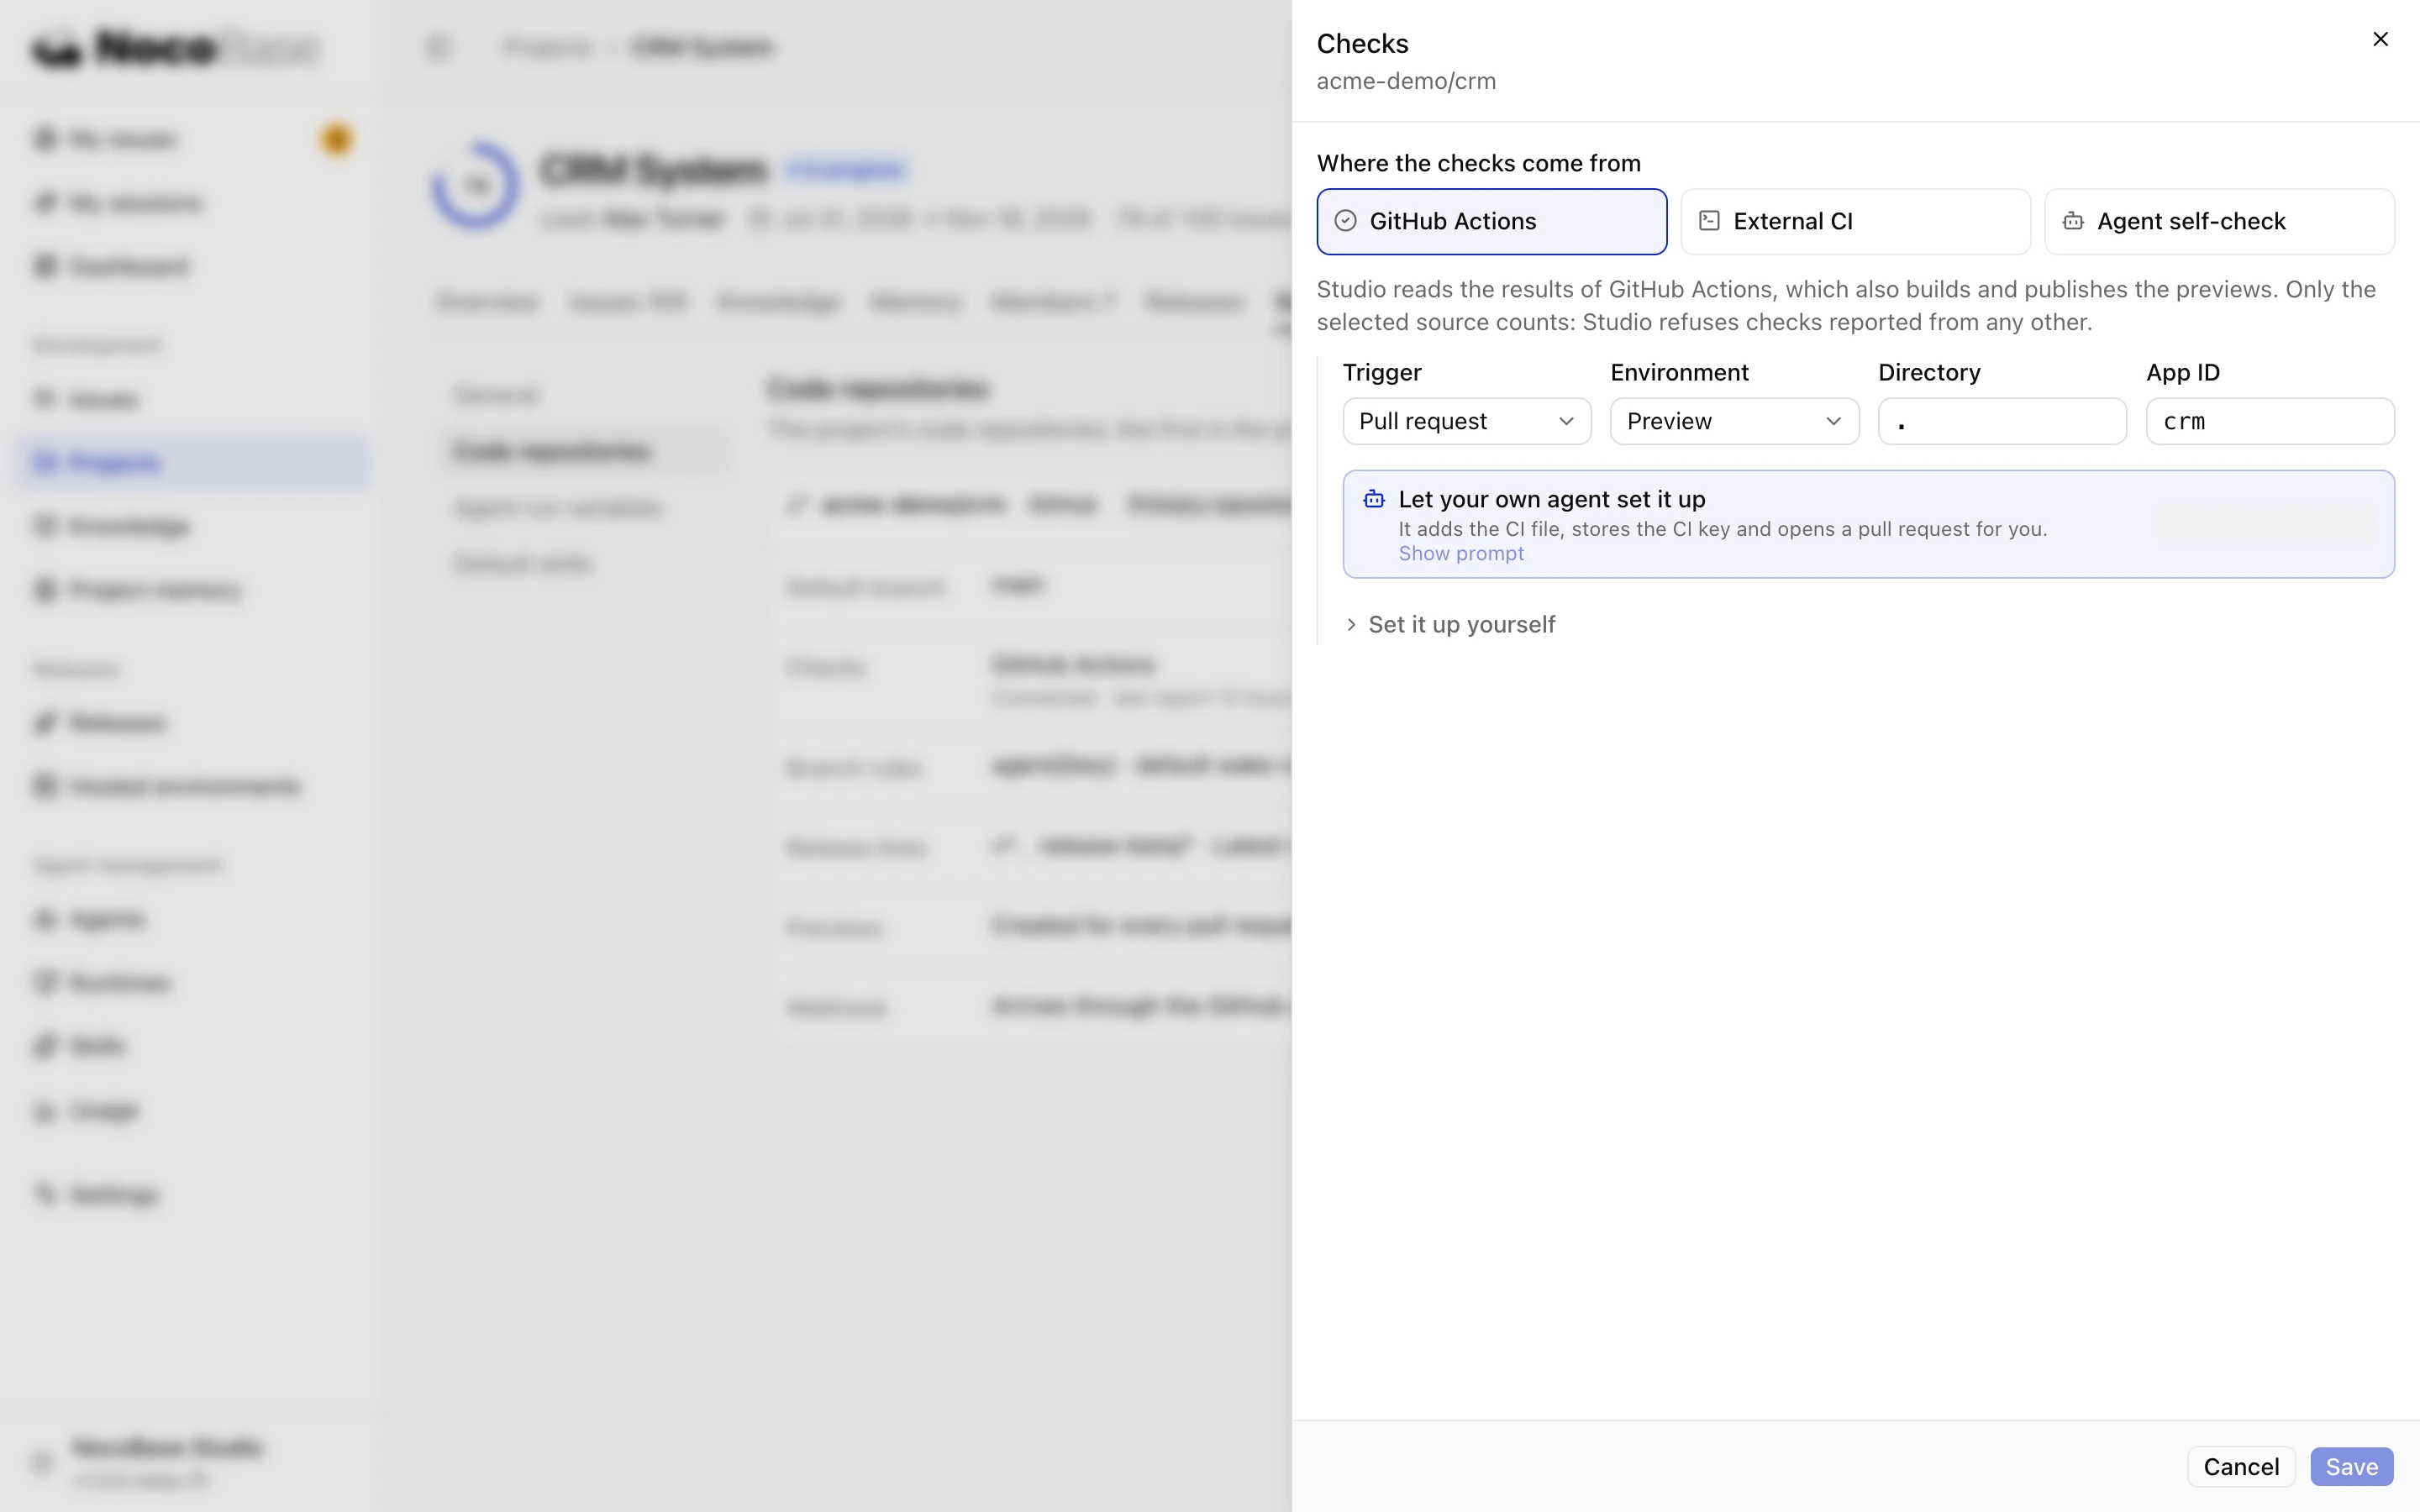
Done whenafter you merge this PR, the Checks row shows as connected, and for any PR opened afterwards, you can open its preview on the issue page.