

Lead Management
A Lead is the starting point of the sales process — every potential customer's first touchpoint begins here. This chapter walks you through the complete lead lifecycle: creation, scoring, filtering, follow-up, and conversion.

Lead Page Overview
Click Sales → Leads in the top menu to open the lead management page.
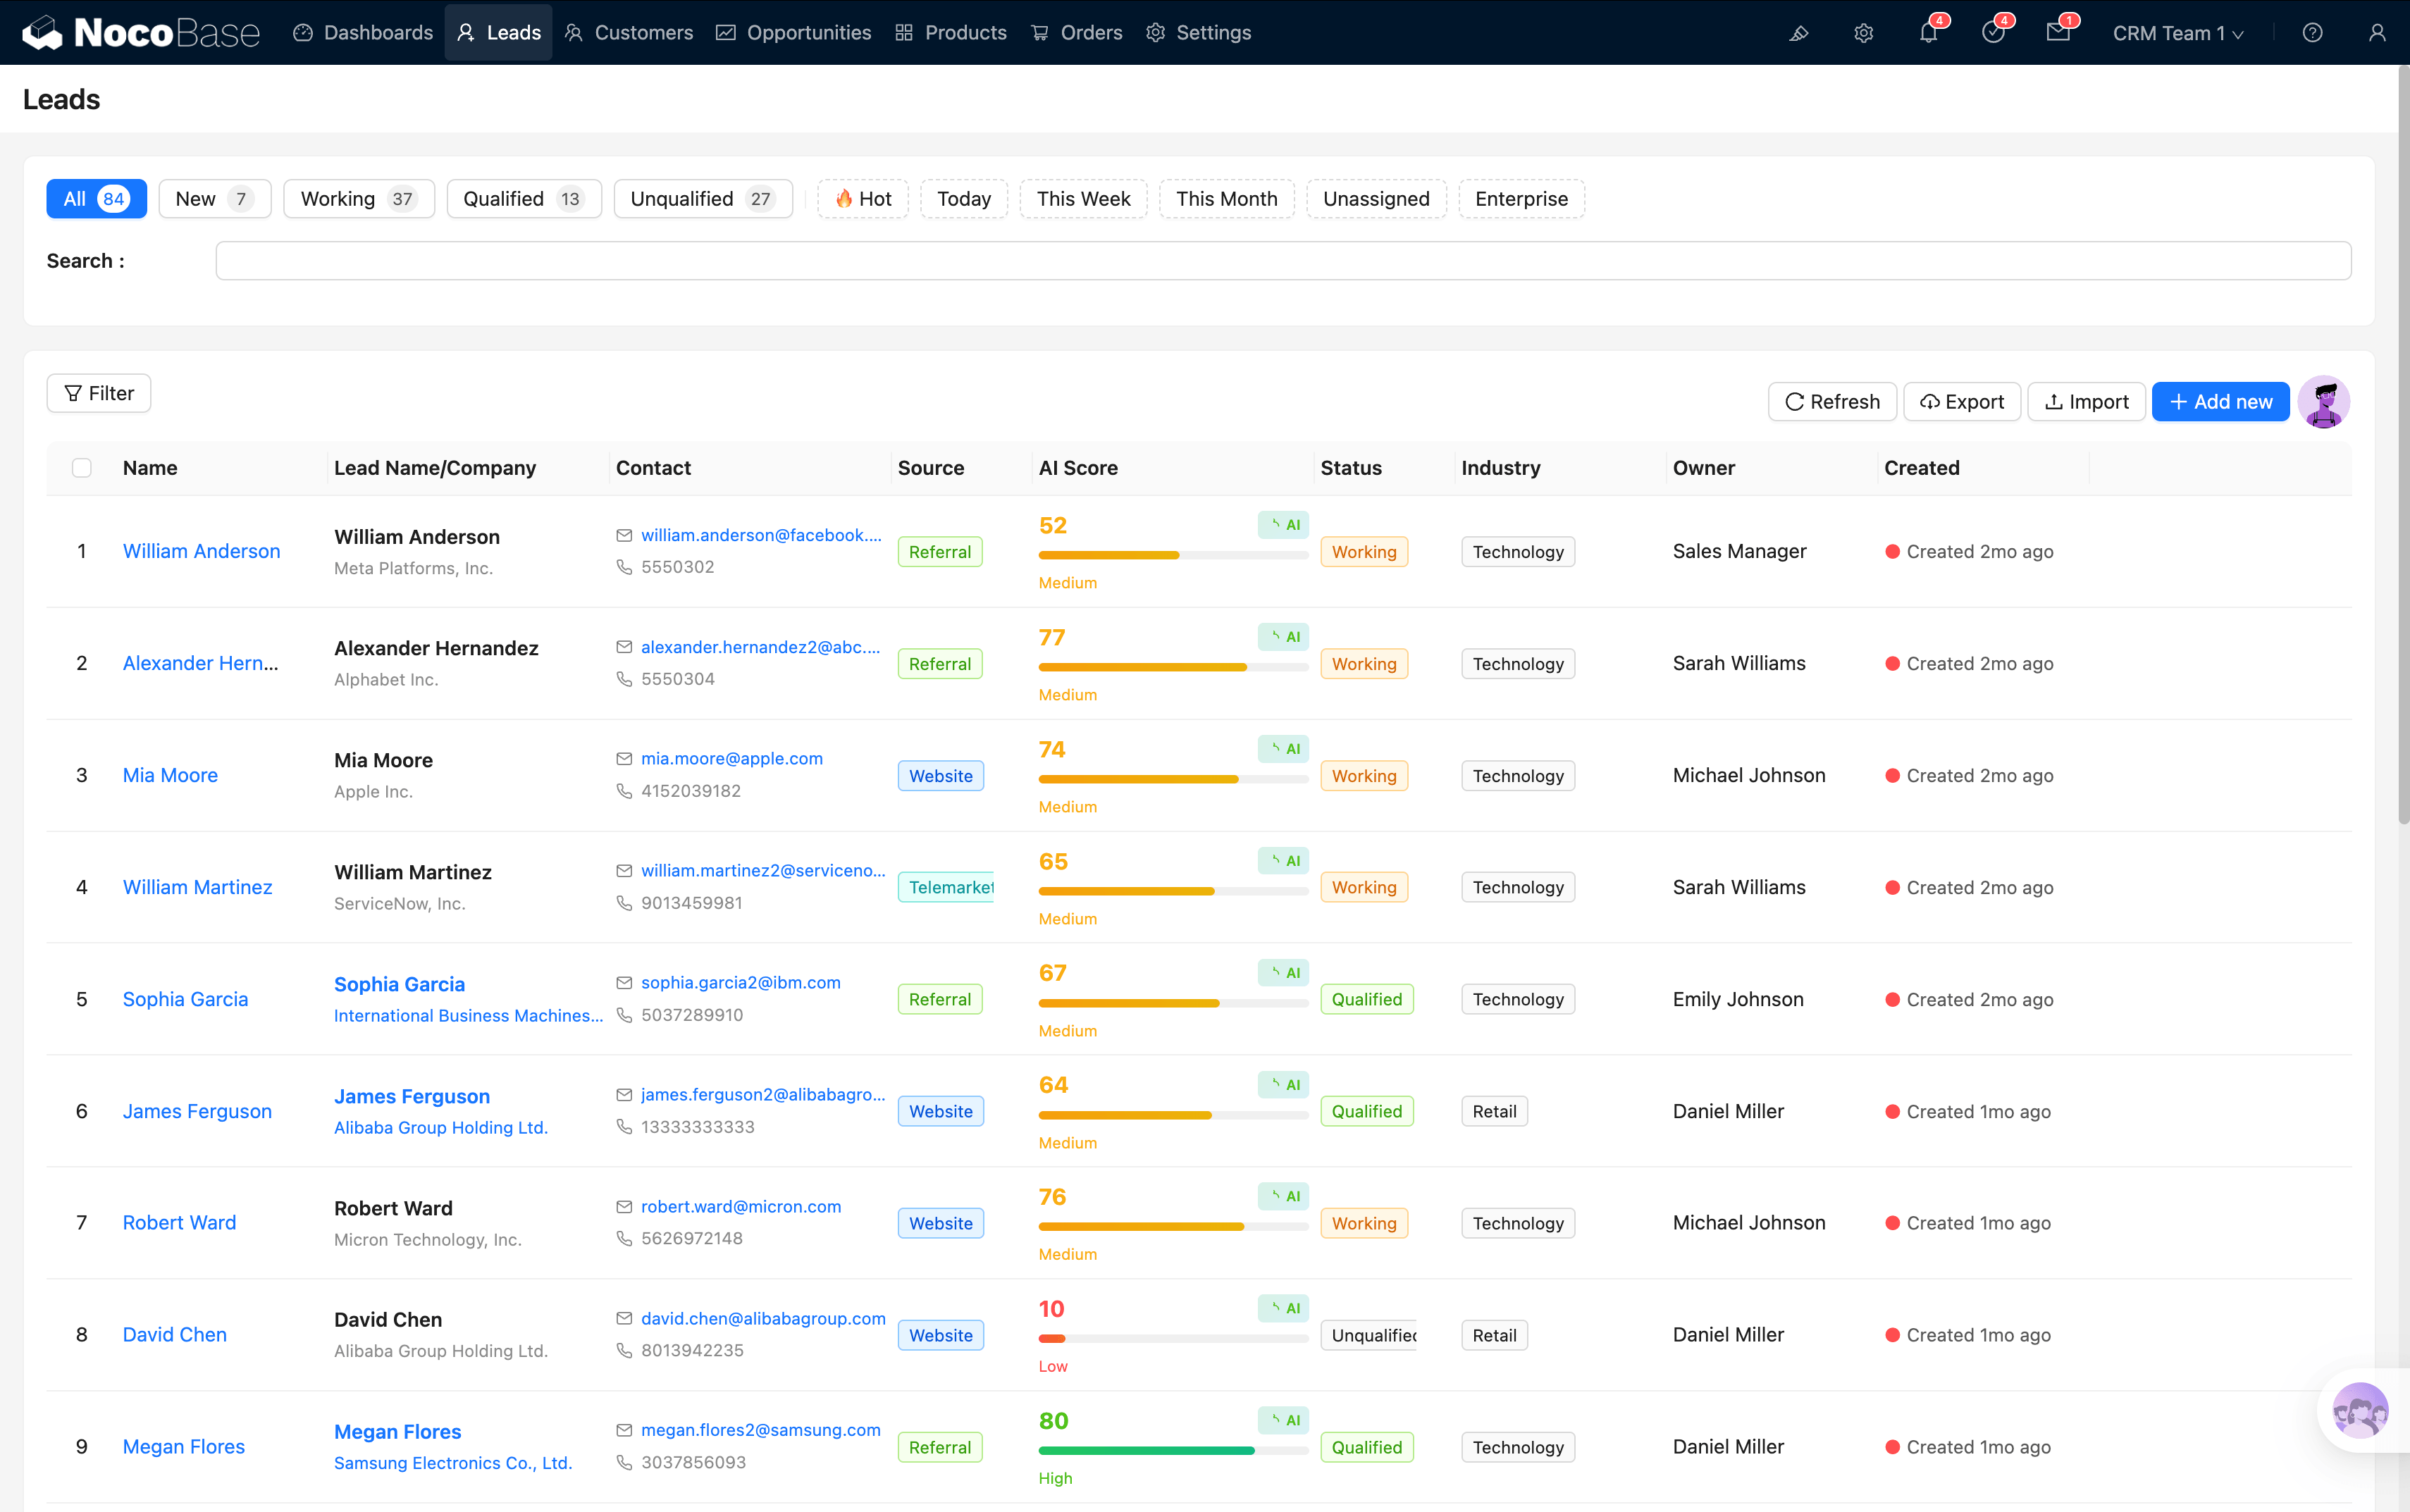
At the top of the page you'll find a row of smart filter buttons for quickly switching views:
First group:
Second group:
The table provides key information at a glance with the following composite columns:
- AI Score Gauge: A circular gauge from 0–100, colored red (low) → yellow (medium) → green (high), giving an intuitive view of lead quality
- Name + Company Column: Name and company displayed together to save space
- Email + Phone Column: Contact details visible at a glance
- Relative Time Column: Shows "3 hours ago", "2 days ago", etc. Overdue leads are highlighted in red to remind you to follow up promptly
Creating a Lead
Click the Add new button above the table to open the new lead form.
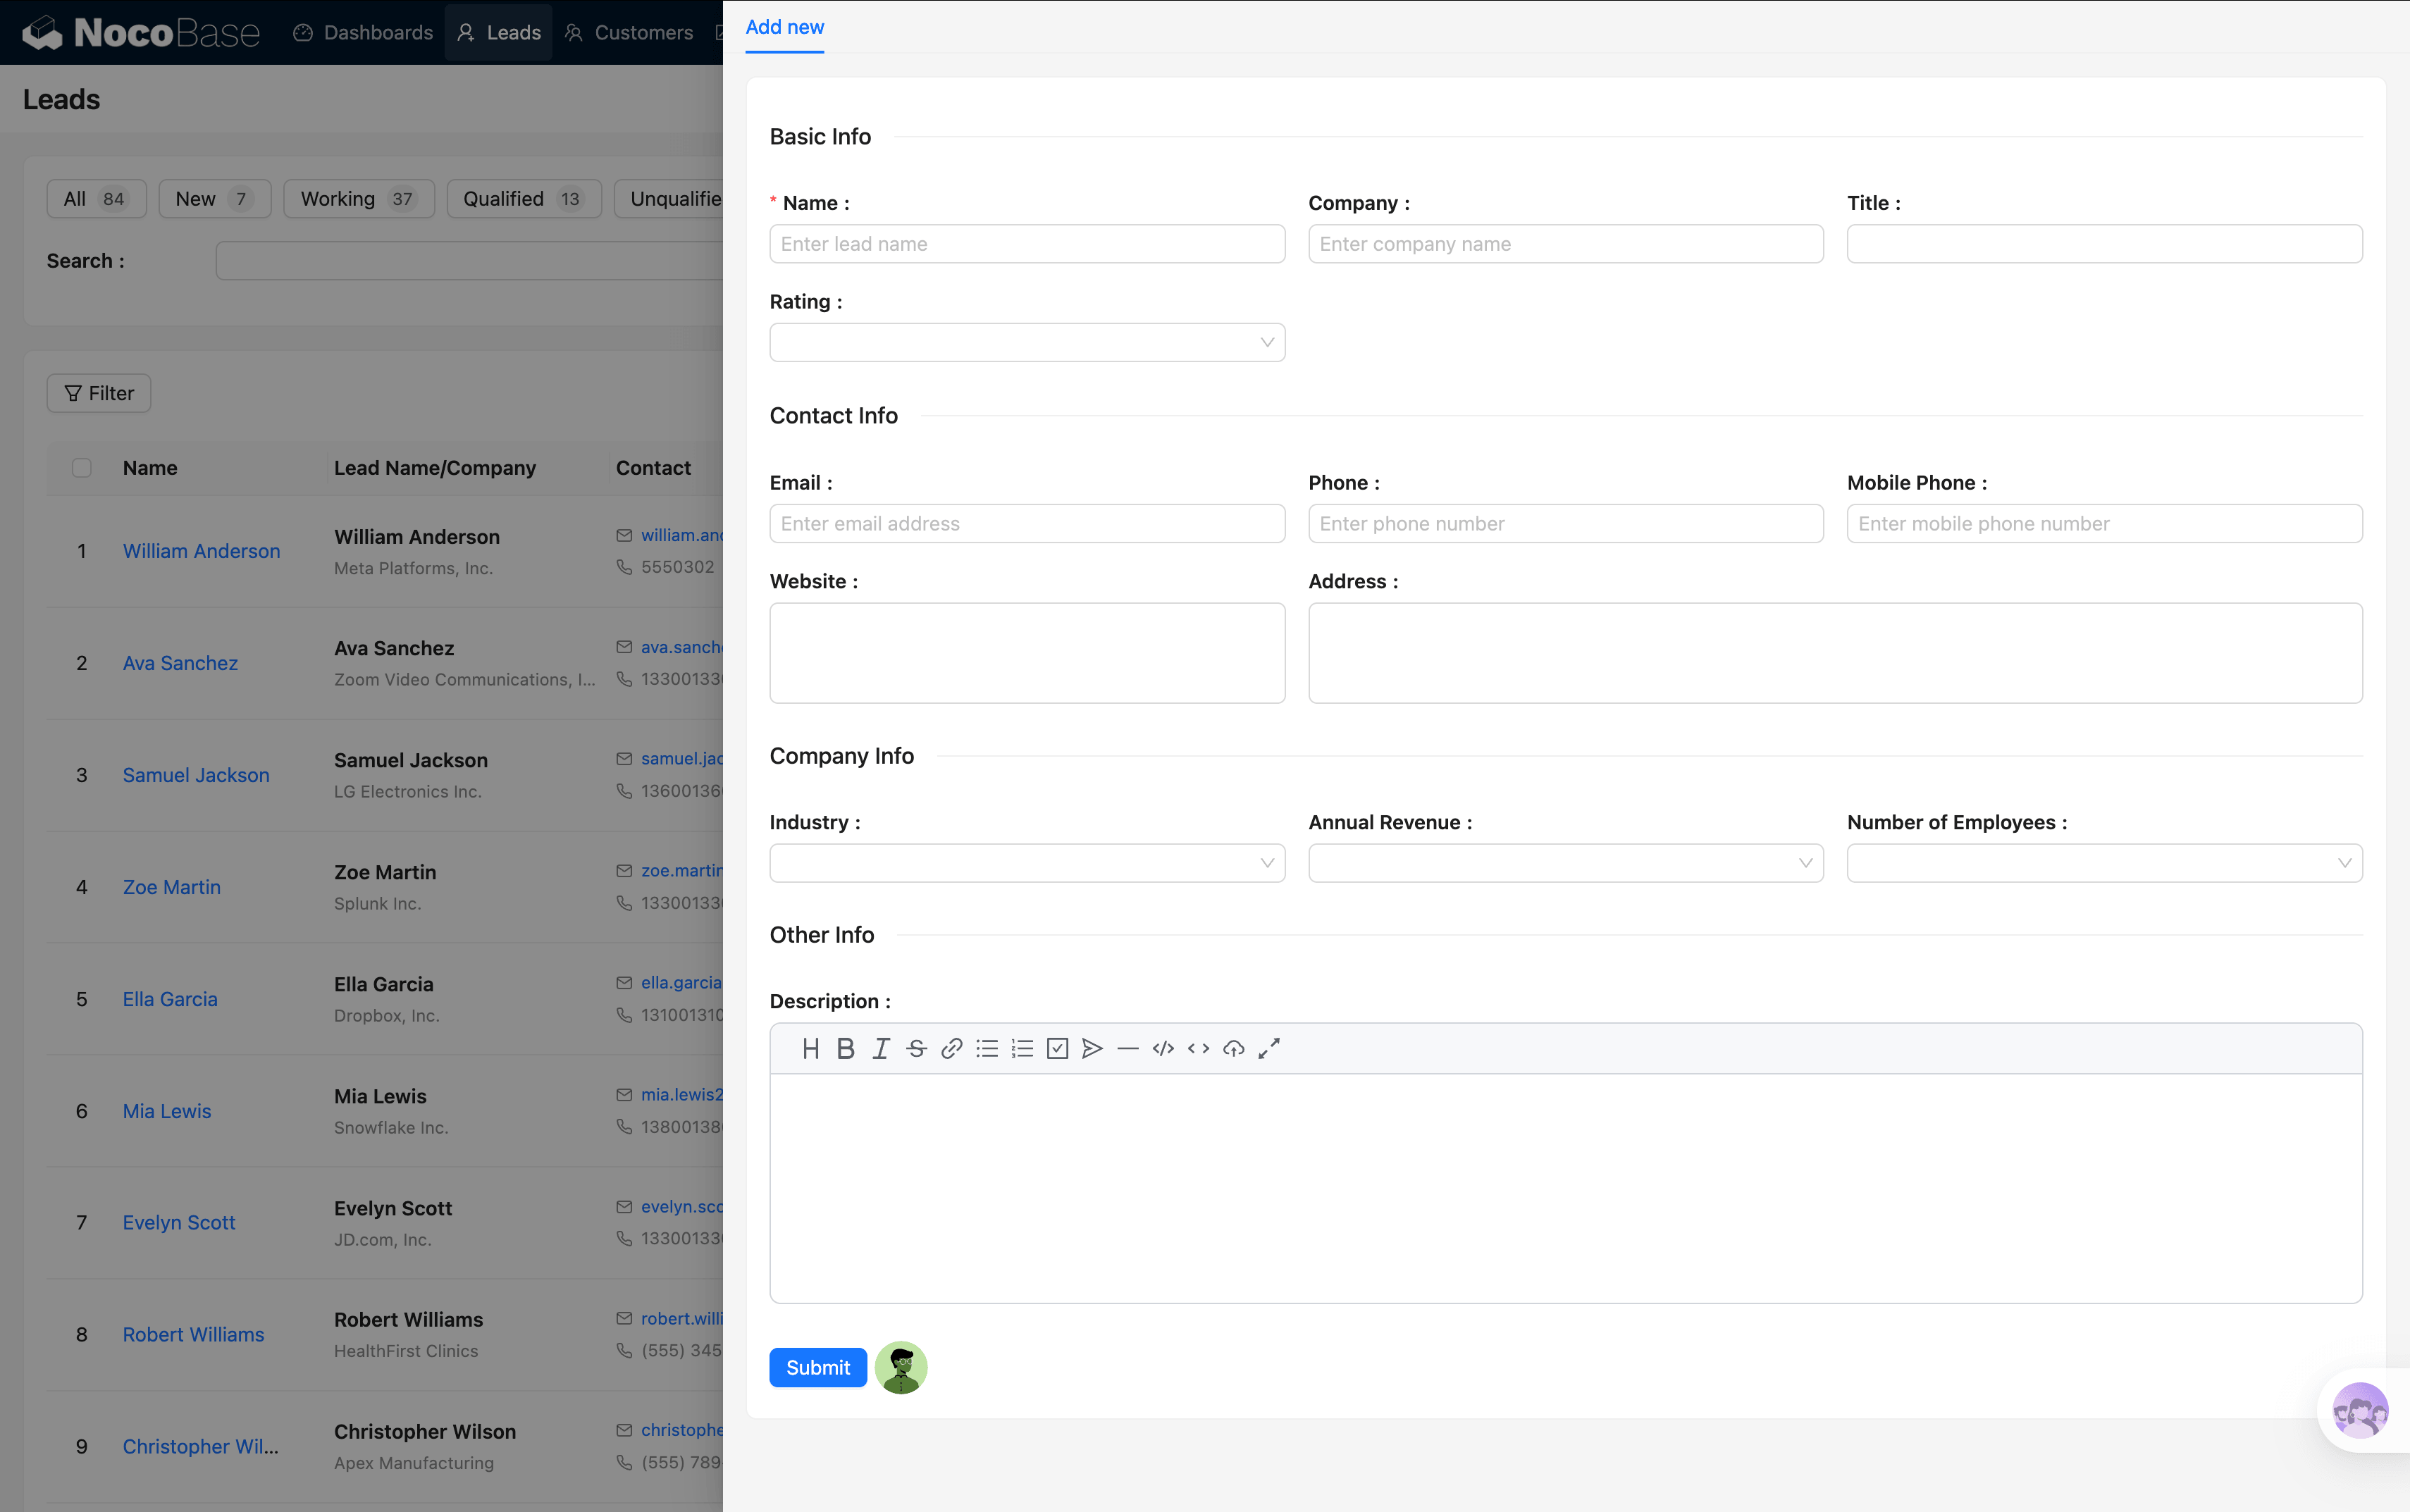
Fill in the following fields:
Real-Time Duplicate Check
As you fill out the form, the system performs real-time duplicate checks on the Name, Company, Email, Phone, and Mobile fields. If a matching record is found while you type:
- Yellow warning: A similar record was found — you should verify
- Red warning: An exact duplicate was found — strongly recommended to check the existing record first
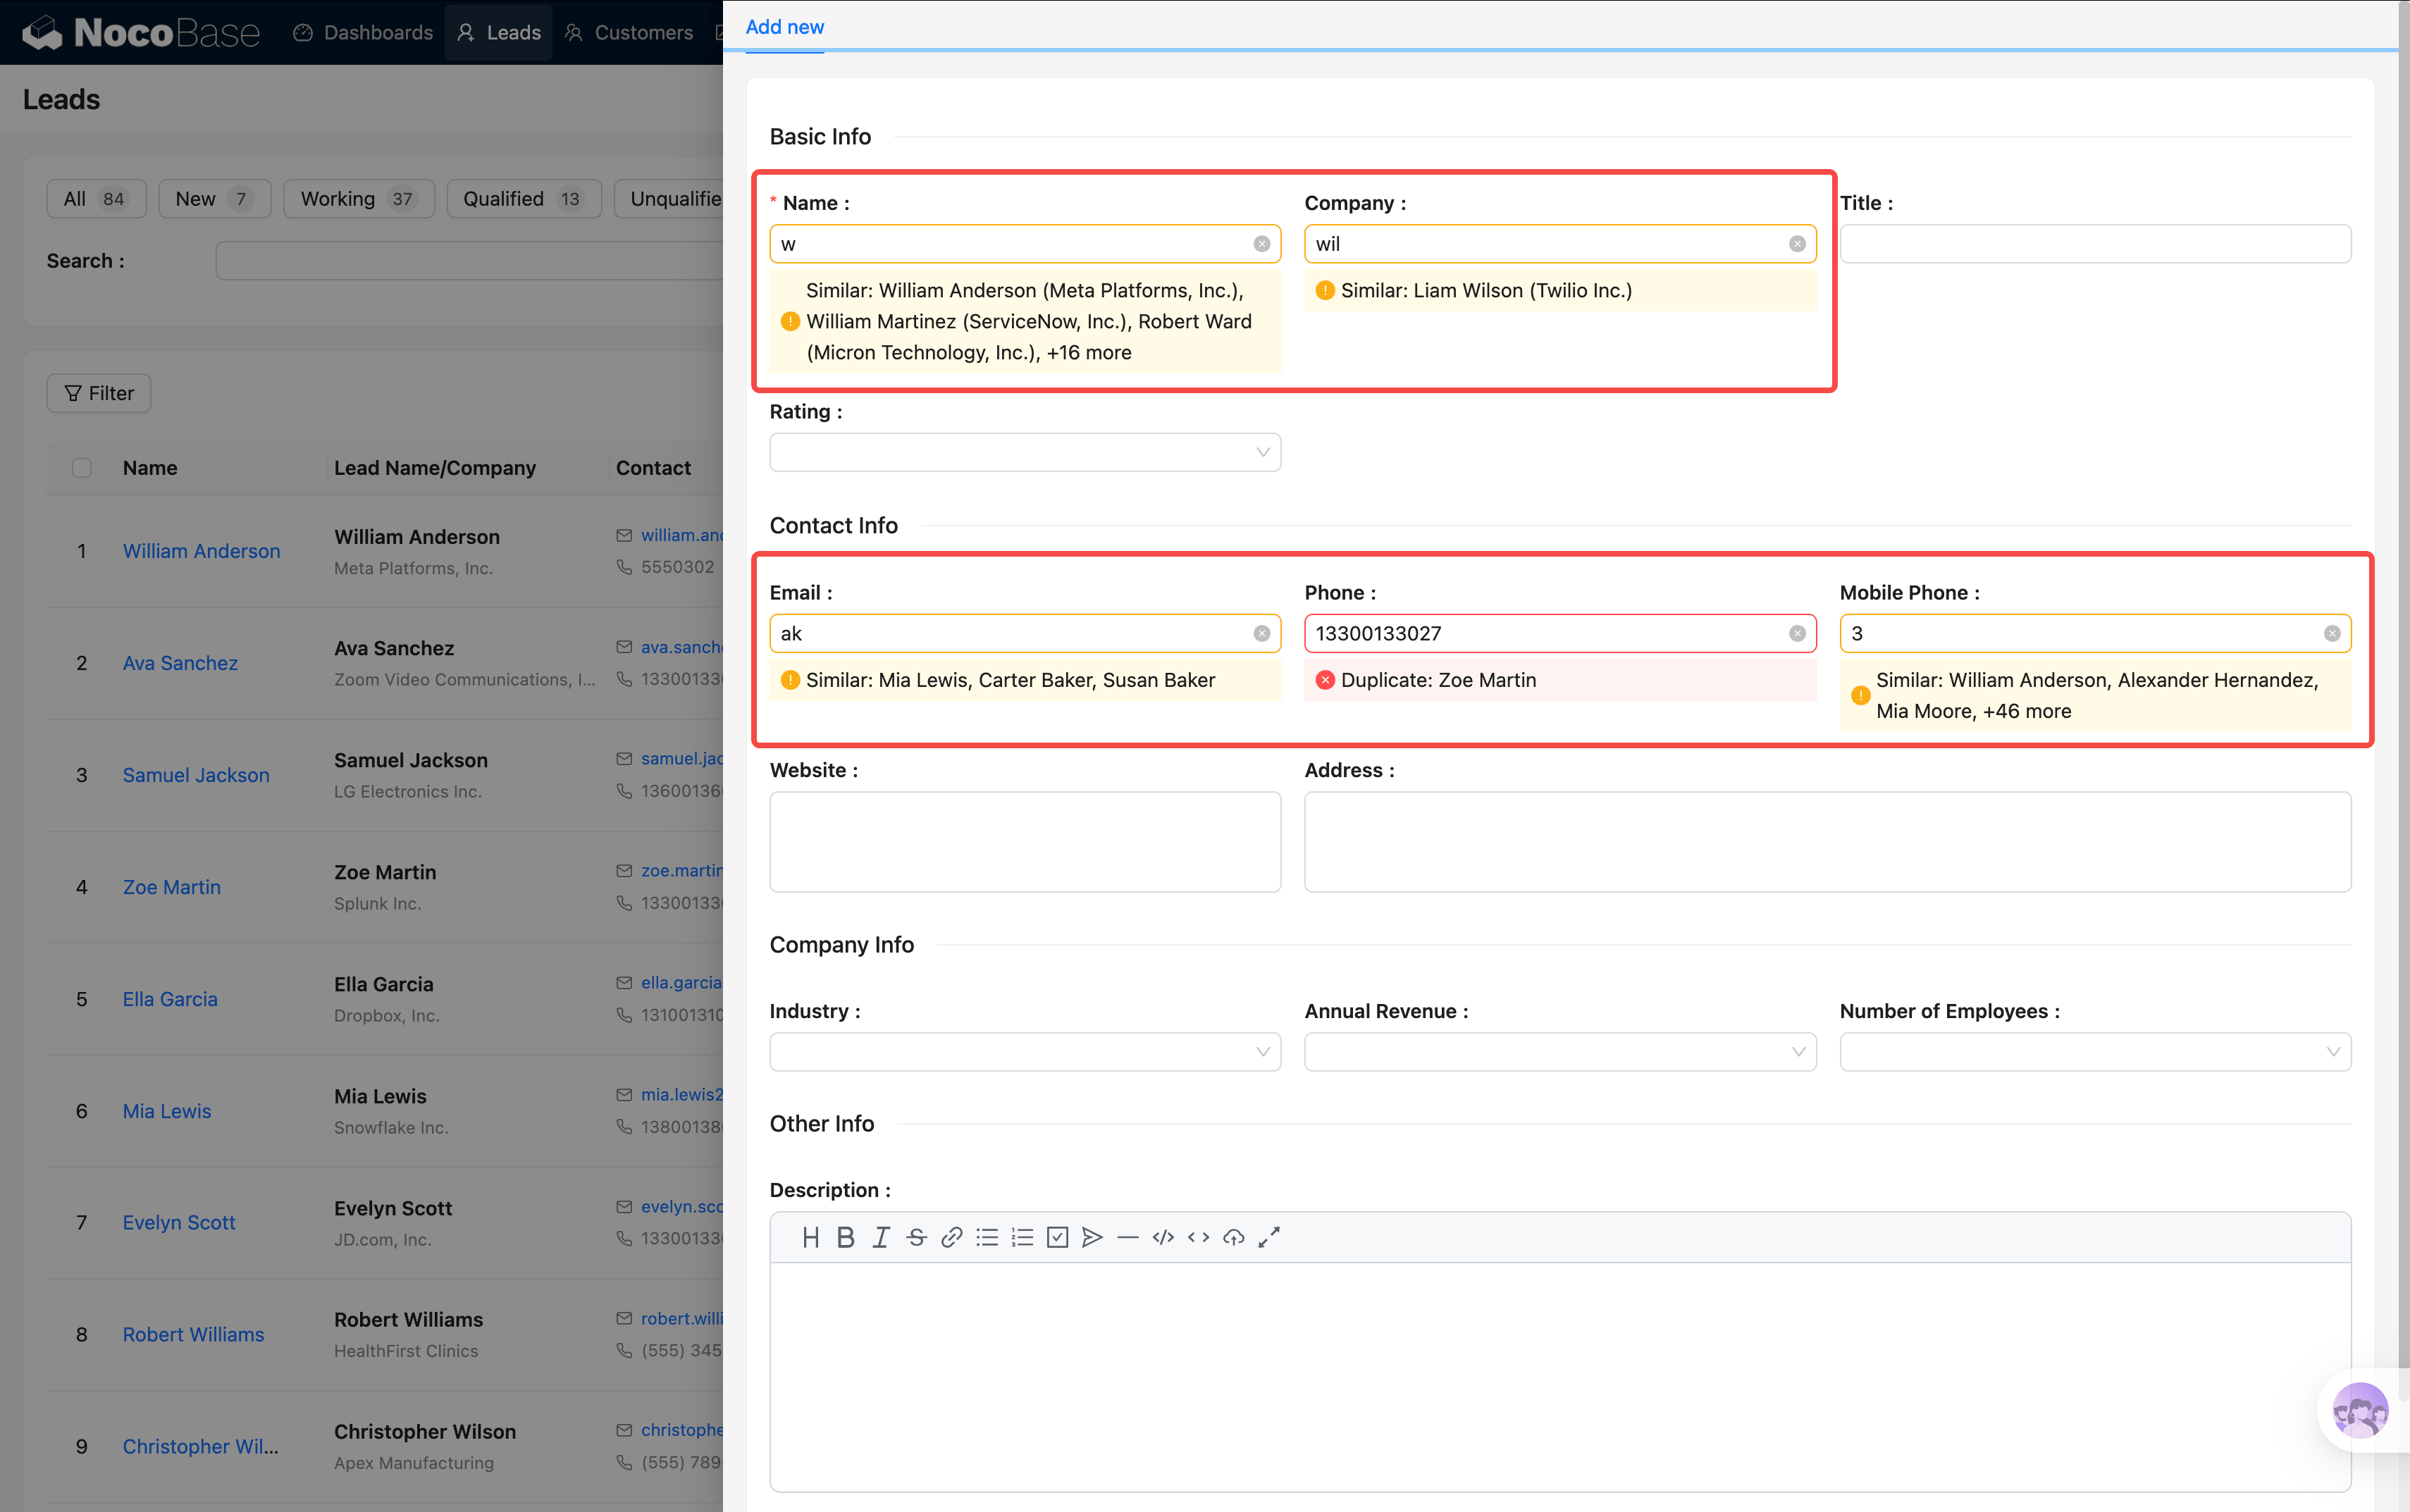
This effectively prevents the same person from being entered multiple times.
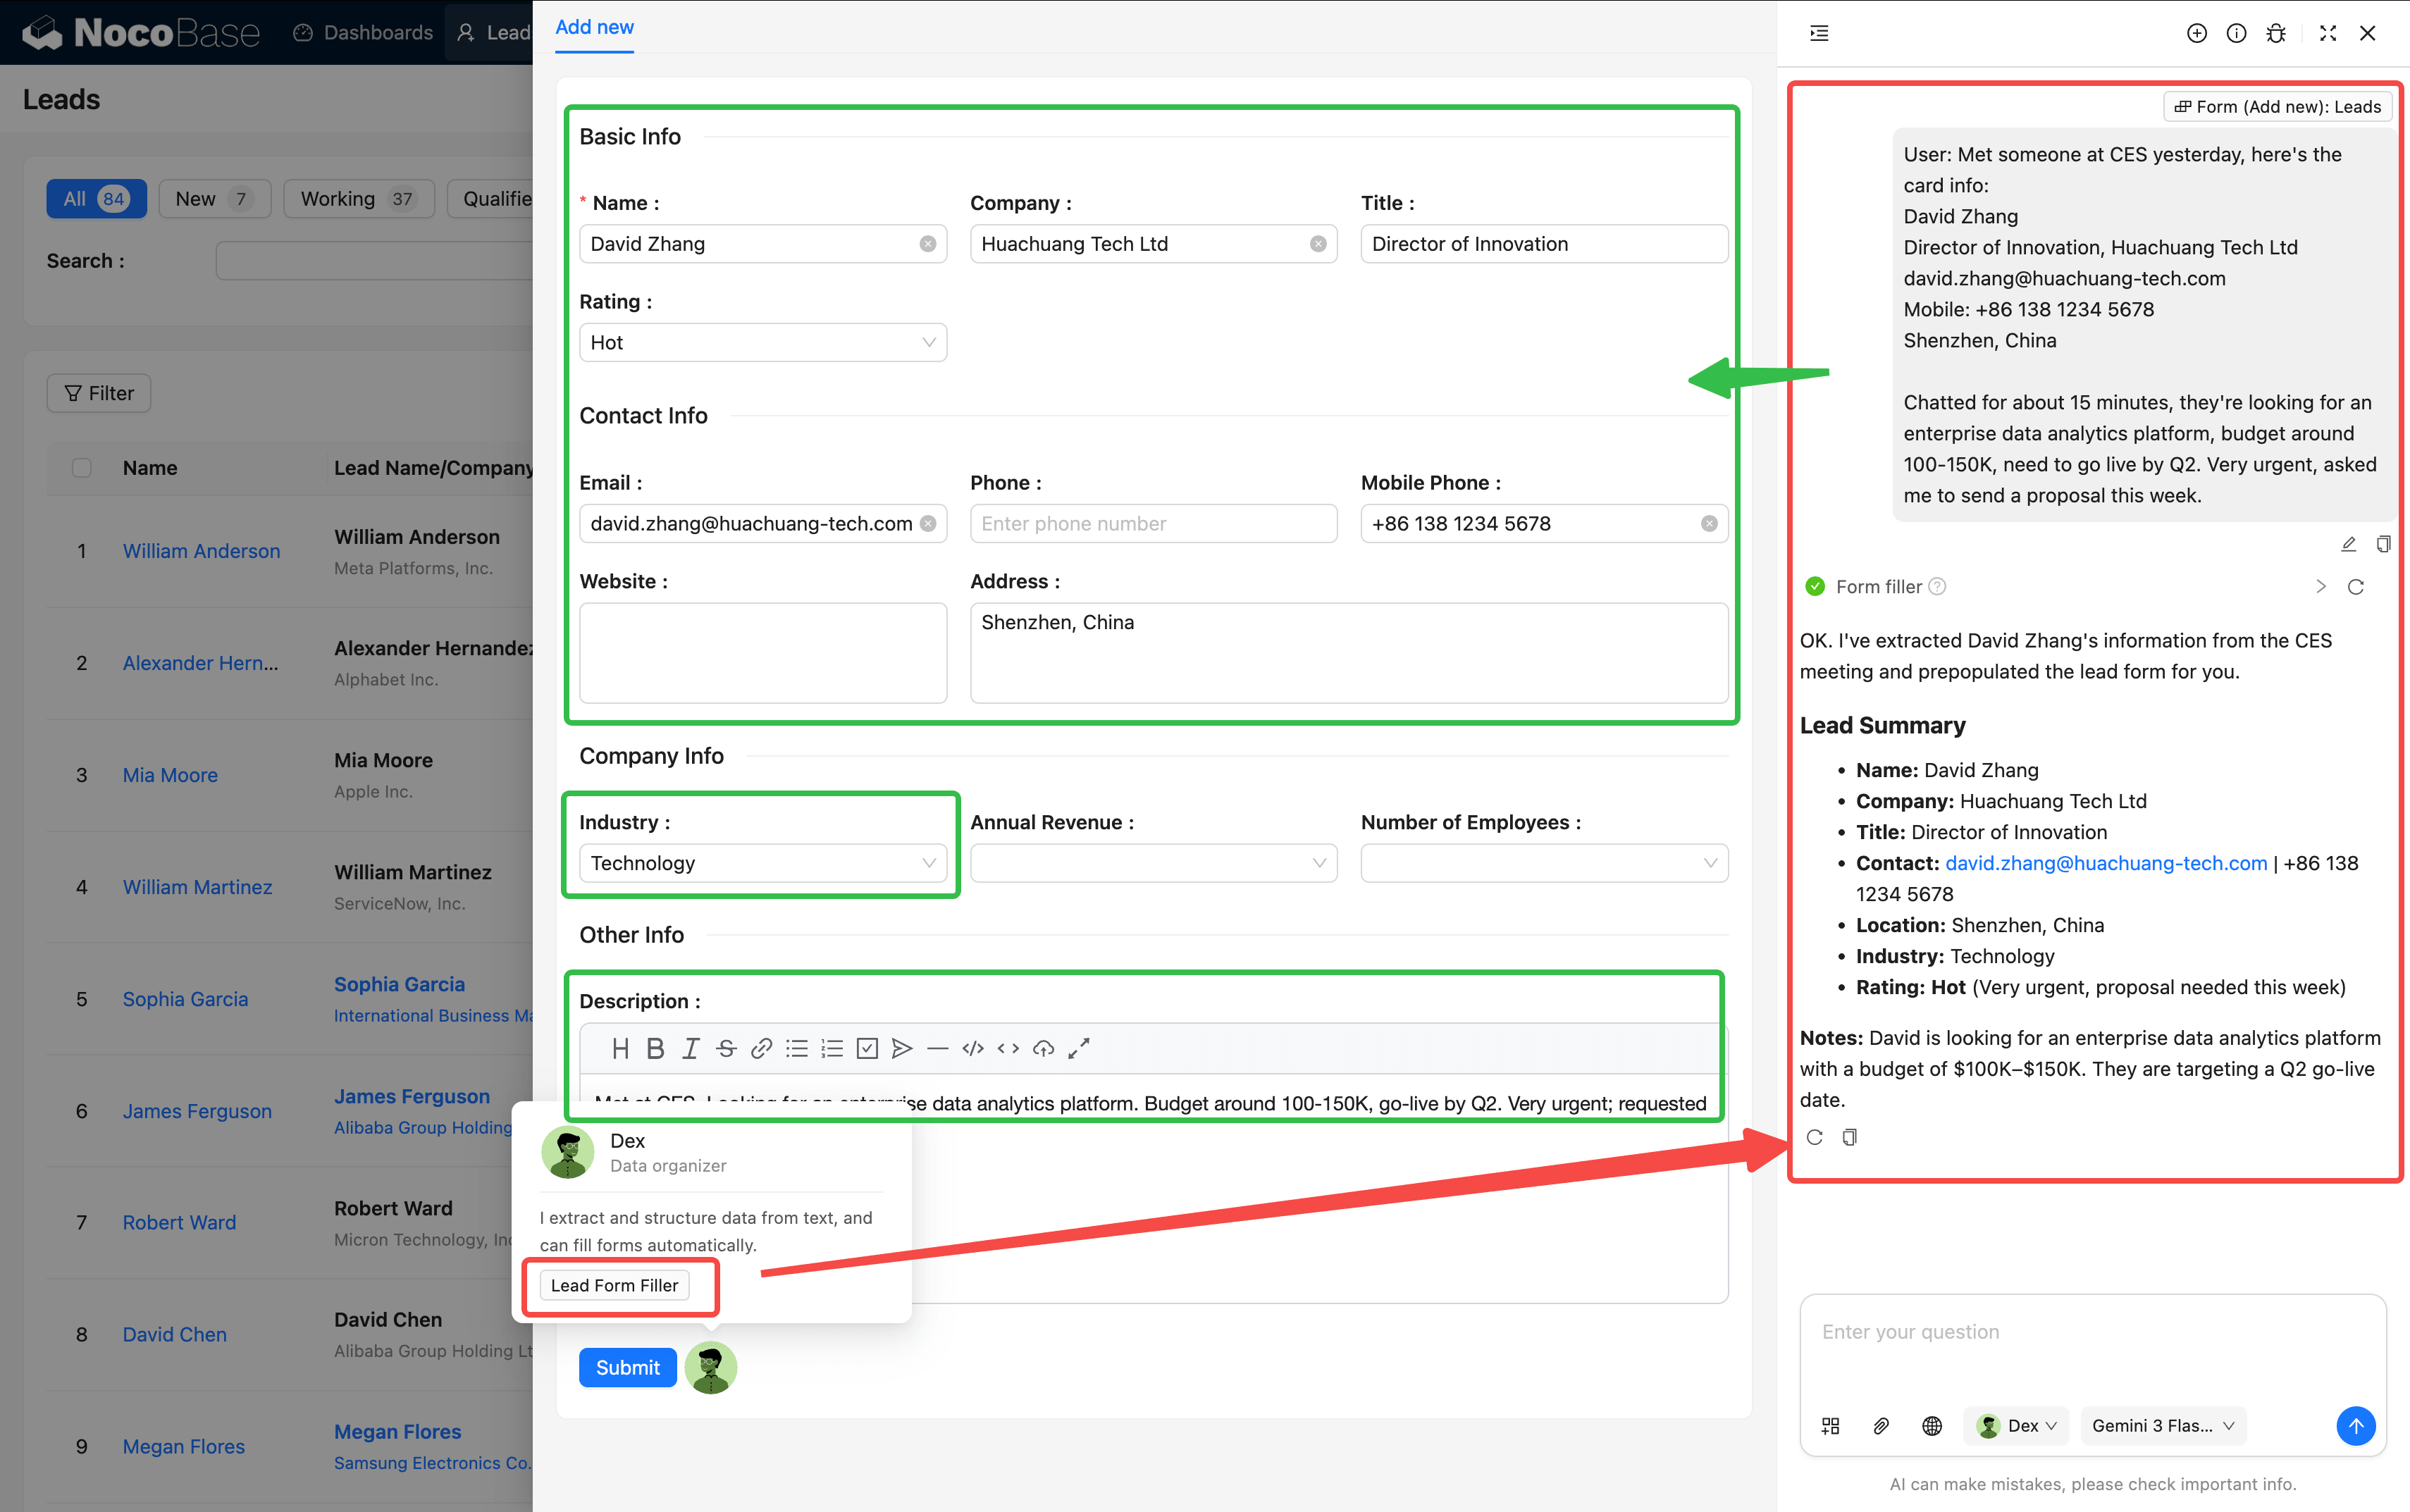
AI Form Filling
If you have a business card text or conversation transcript, there's no need to fill in each field manually. Click the AI button, select "Form Fill", paste the text, and the AI will automatically extract the name, company, email, phone, and other details, populating the form in one click.
Click Submit to save when you're done.
AI Auto-Scoring
After saving, the system automatically triggers the AI Scoring workflow. The AI analyzes the lead's information and produces the following results:
💡 Tip: The higher the AI score, the better the lead quality. Prioritize following up on Hot (≥ 75) leads to focus your energy on prospects most likely to close.
Filtering and Searching
The smart filter buttons at the top support real-time filtering — click and the results update instantly, no page refresh needed.
A few common scenarios:
- Starting your day: Click "Today" to see today's new leads, then click "Hot" to check if any high-scoring leads need immediate attention
- Assigning leads: Click "Unassigned" to find leads without an Owner and assign them to sales reps one by one
- Reviewing: Click "Unqualified" to review leads marked as unqualified and check for any misjudgments
💡 Tip: The system supports filtering via URL parameters. For example, navigating to the leads page with
?status=newwill automatically activate the "New" filter button. This is handy when linking from other pages.
Lead Details
Click any lead in the table to open the detail popup. The popup contains 3 tabs:
Details Tab
This is the most information-rich tab, containing from top to bottom:
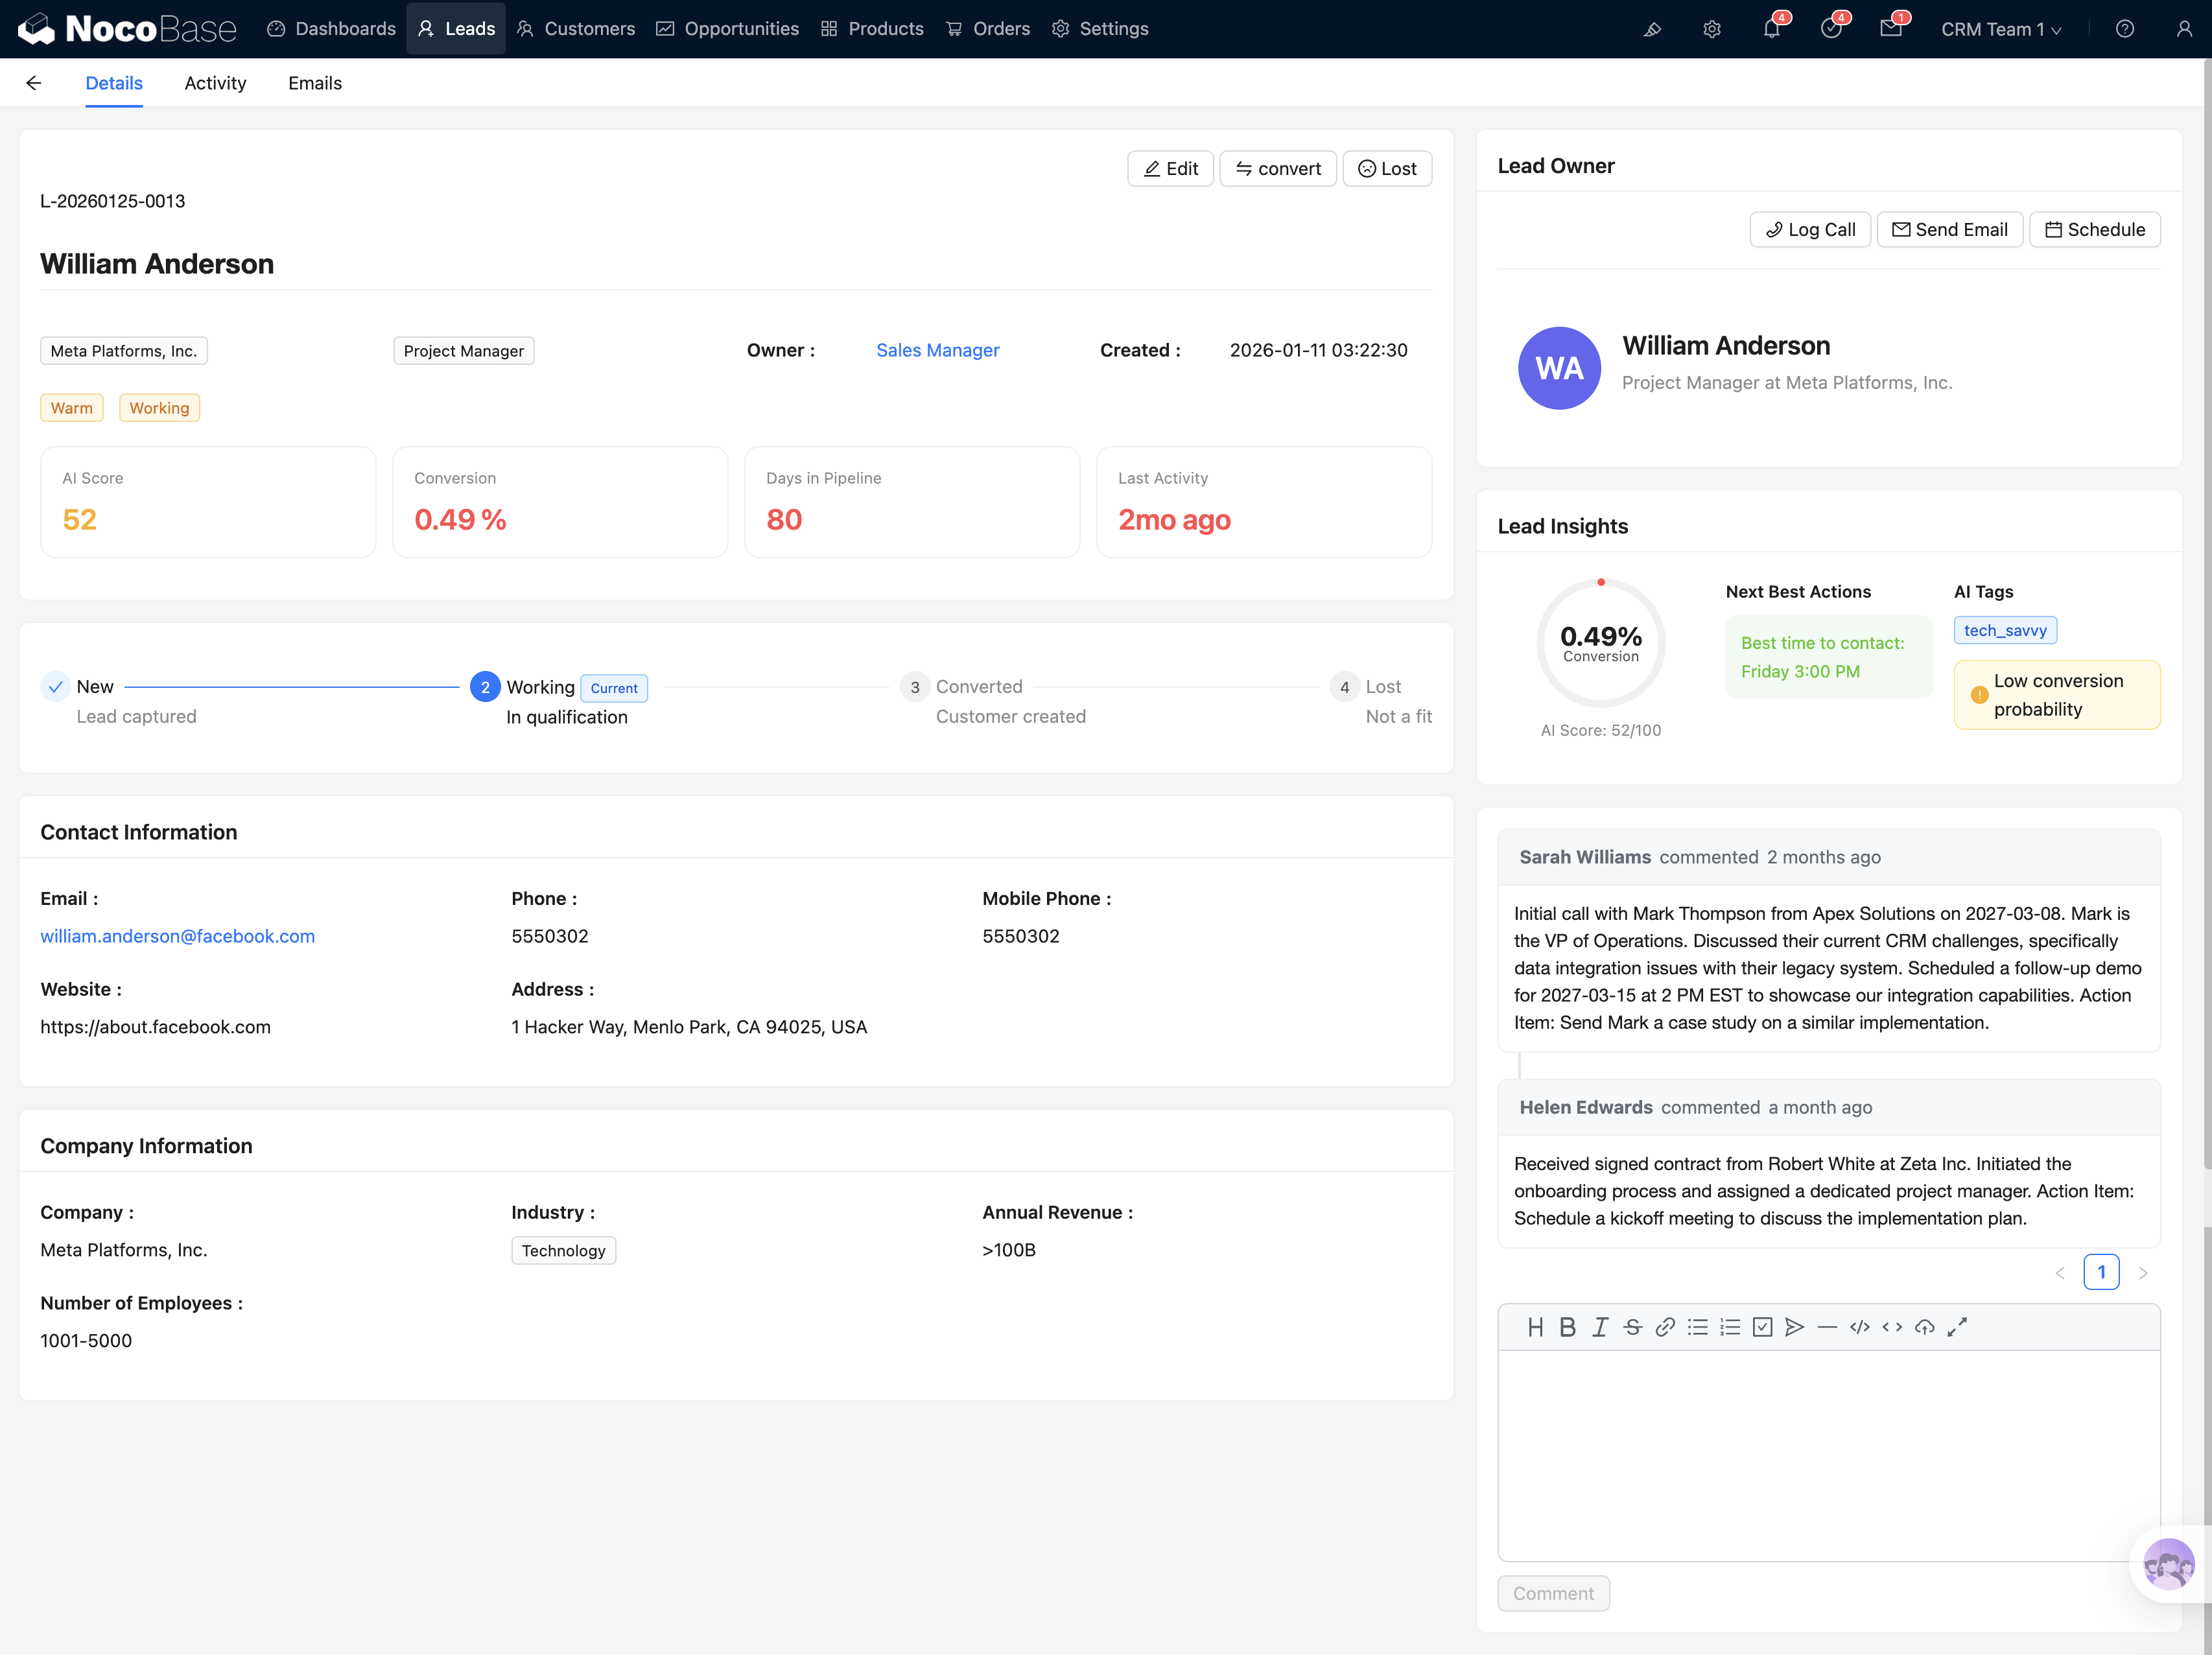
Stage Flow and Action Buttons
The top area contains the stage progress bar and action buttons (Edit / Convert / Lost / Assign). The stage progress bar:
You can click on a stage directly to advance the lead status. For example, click "Working" when you start following up, or click "Converted" to trigger the conversion process once the lead is qualified.
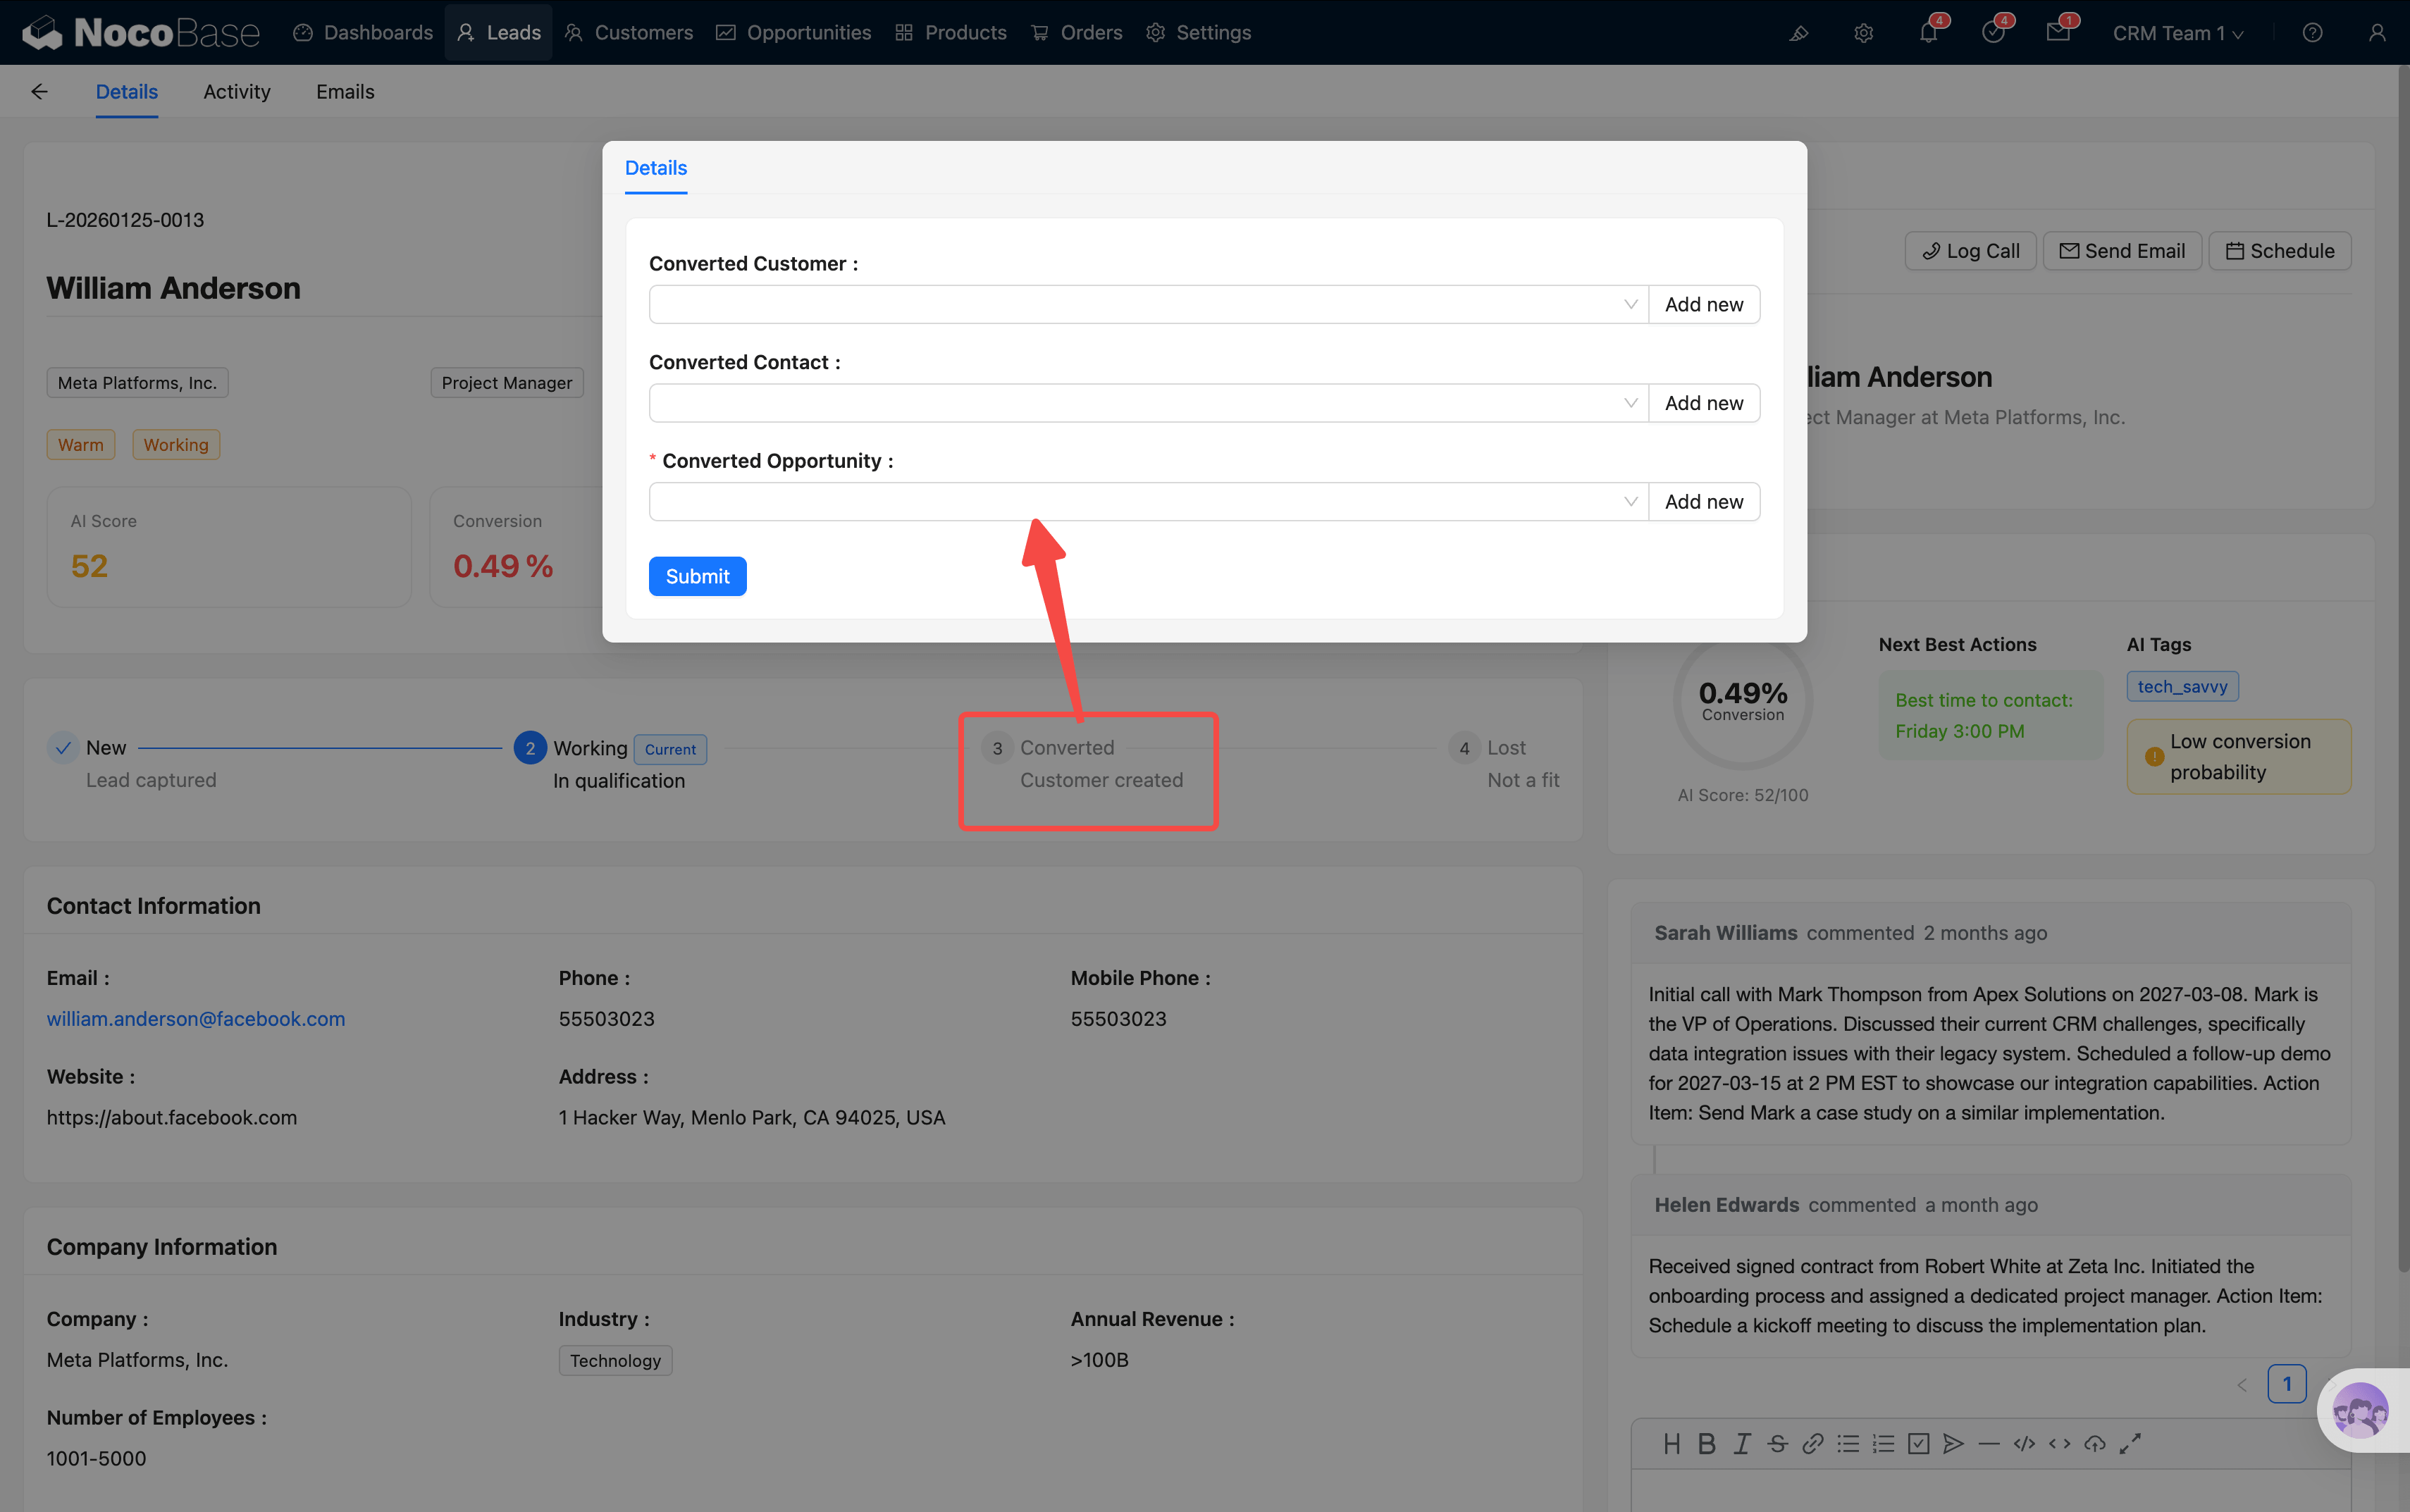
If target records already exist (Customer, Contact, Opportunity), you can search and select them directly. If not, click the create button next to the input field to open a creation popup that auto-fills with the lead's associated data.
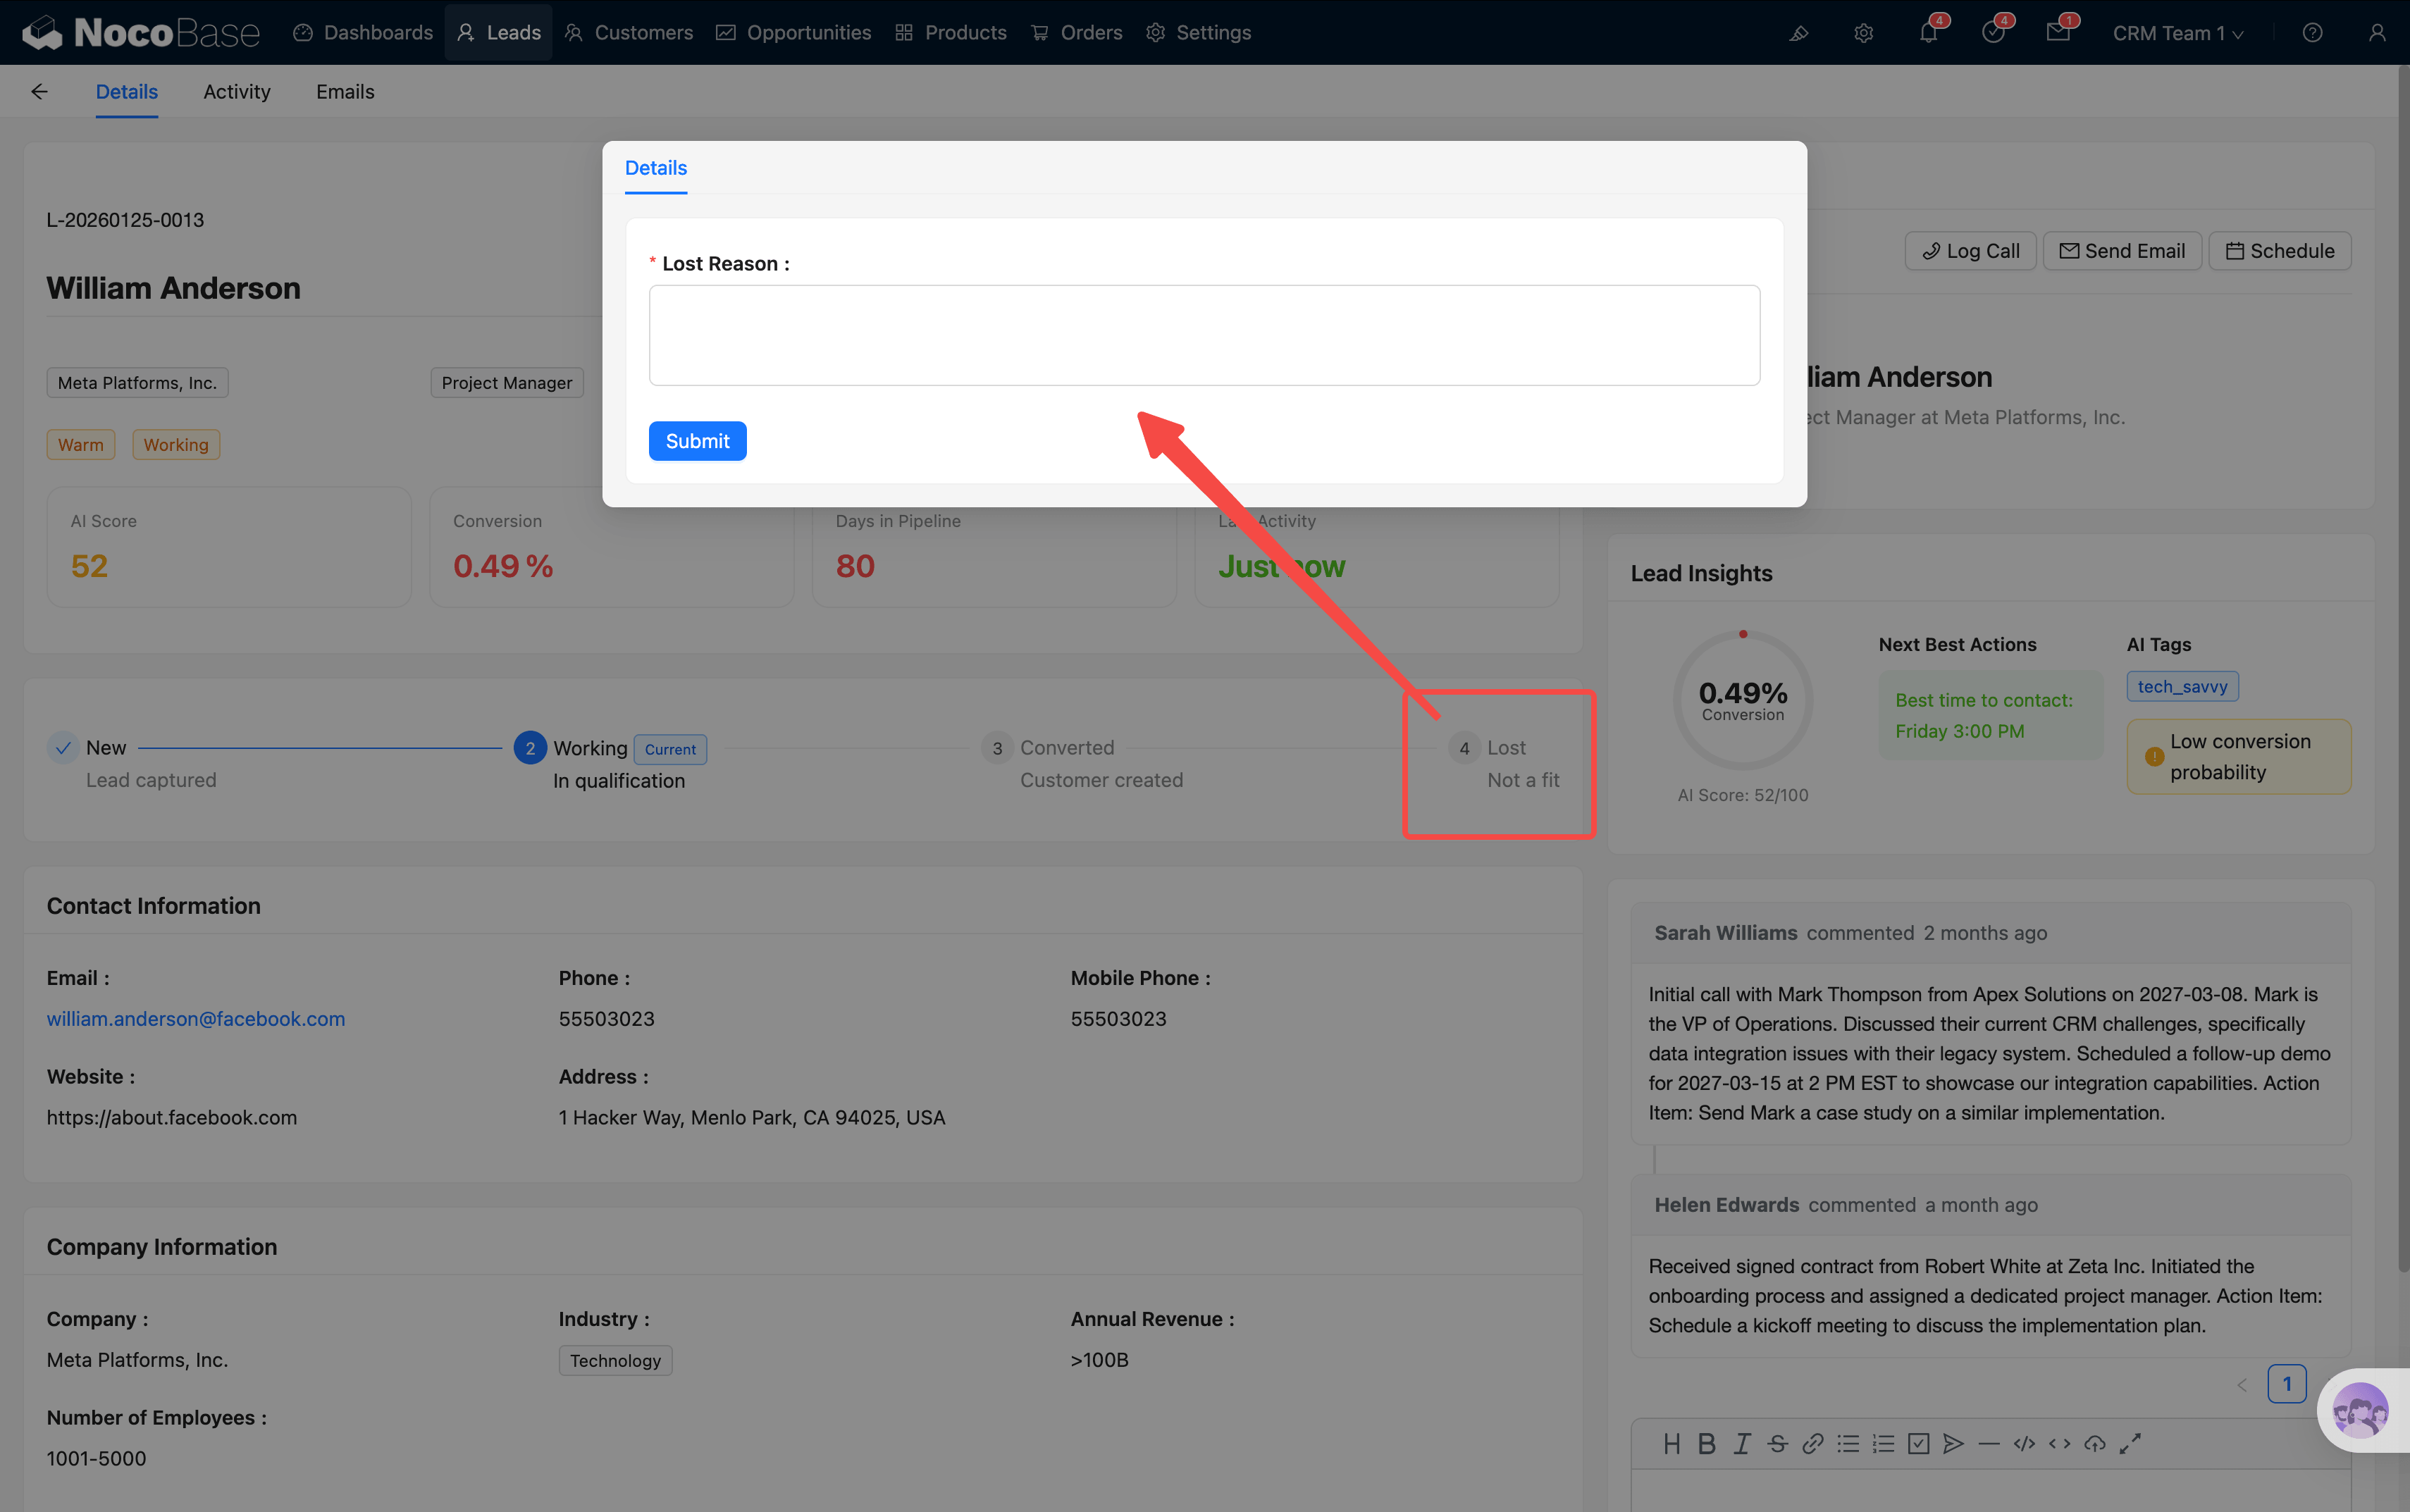
Clicking "Lost" opens a dialog asking you to fill in the loss reason — useful for later review and analysis.
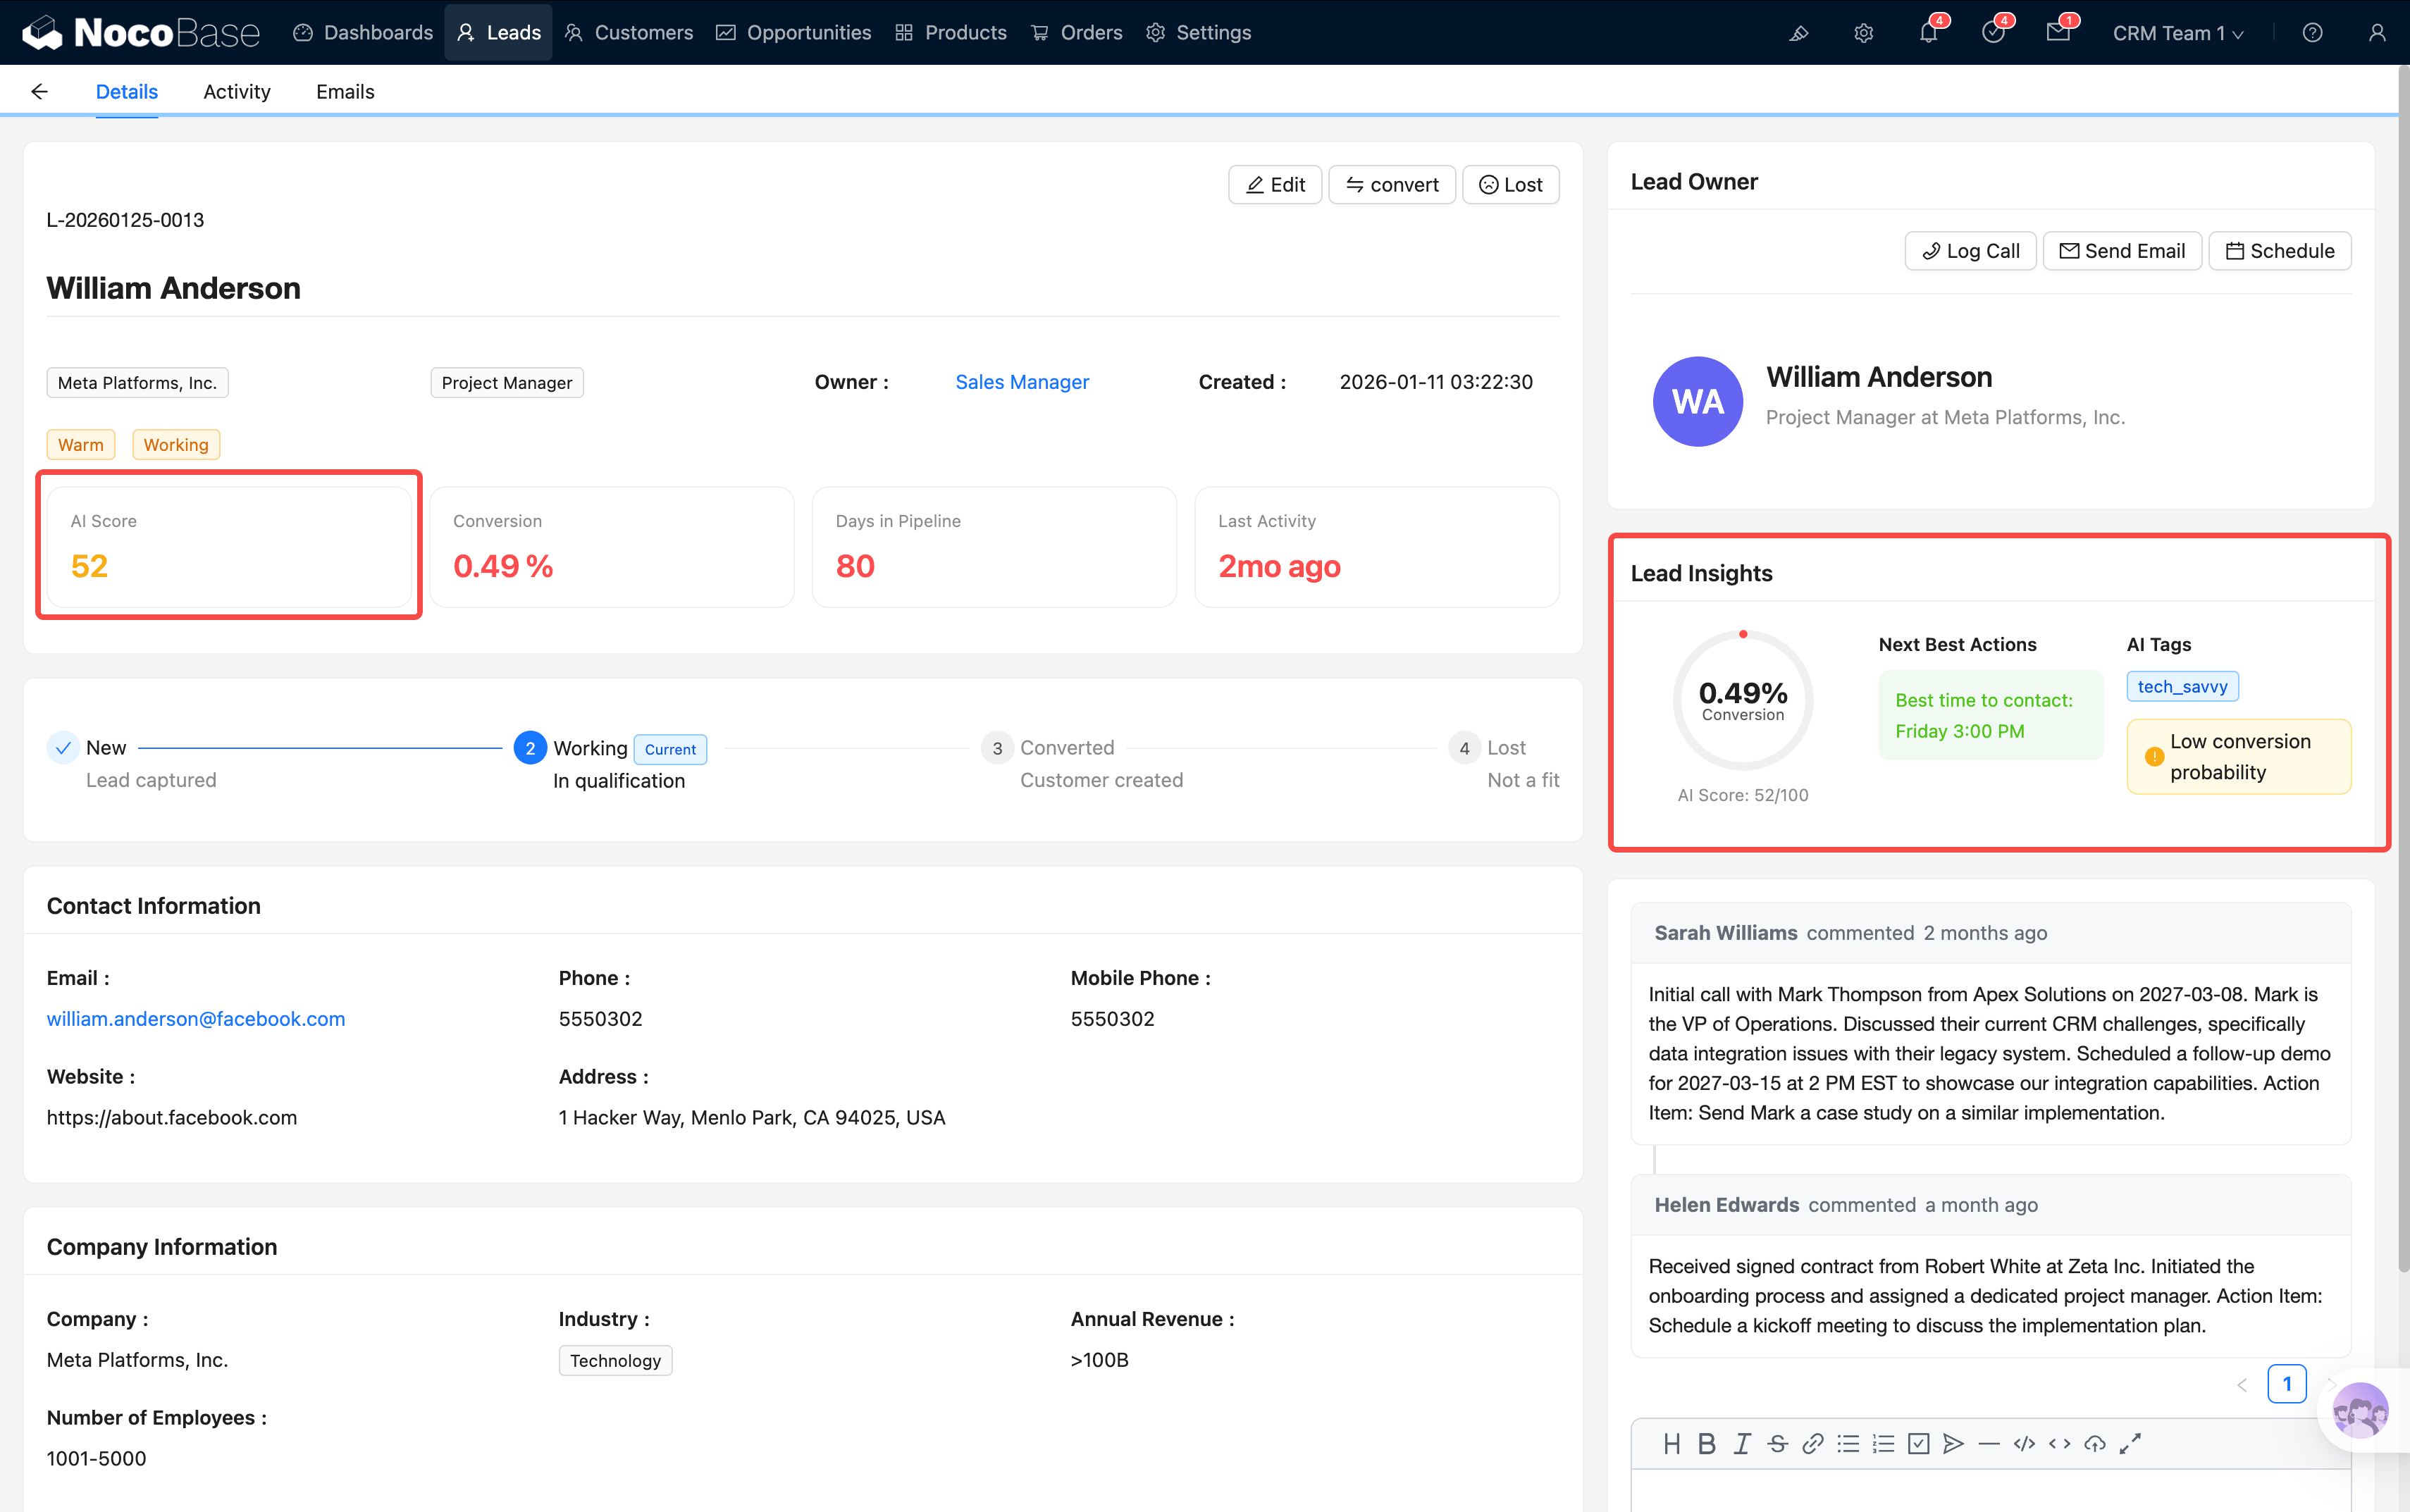
AI Score Card
Displays detailed AI scoring information, including:
- AI Score gauge (0–100)
- Conversion Probability
- Pipeline Days (days in the pipeline)
- NBA (Next Best Action)
Badge Labels
Colorful badges showing key attributes such as Rating, Status, and Source.
Basic Information and Activity Quick Buttons
Company details, contact information, and other basic fields. This area also includes a set of activity quick buttons: Log Call, Send Email, and Schedule. Actions are automatically linked to the current lead.
AI Insights
AI-generated analysis insights and follow-up recommendations.
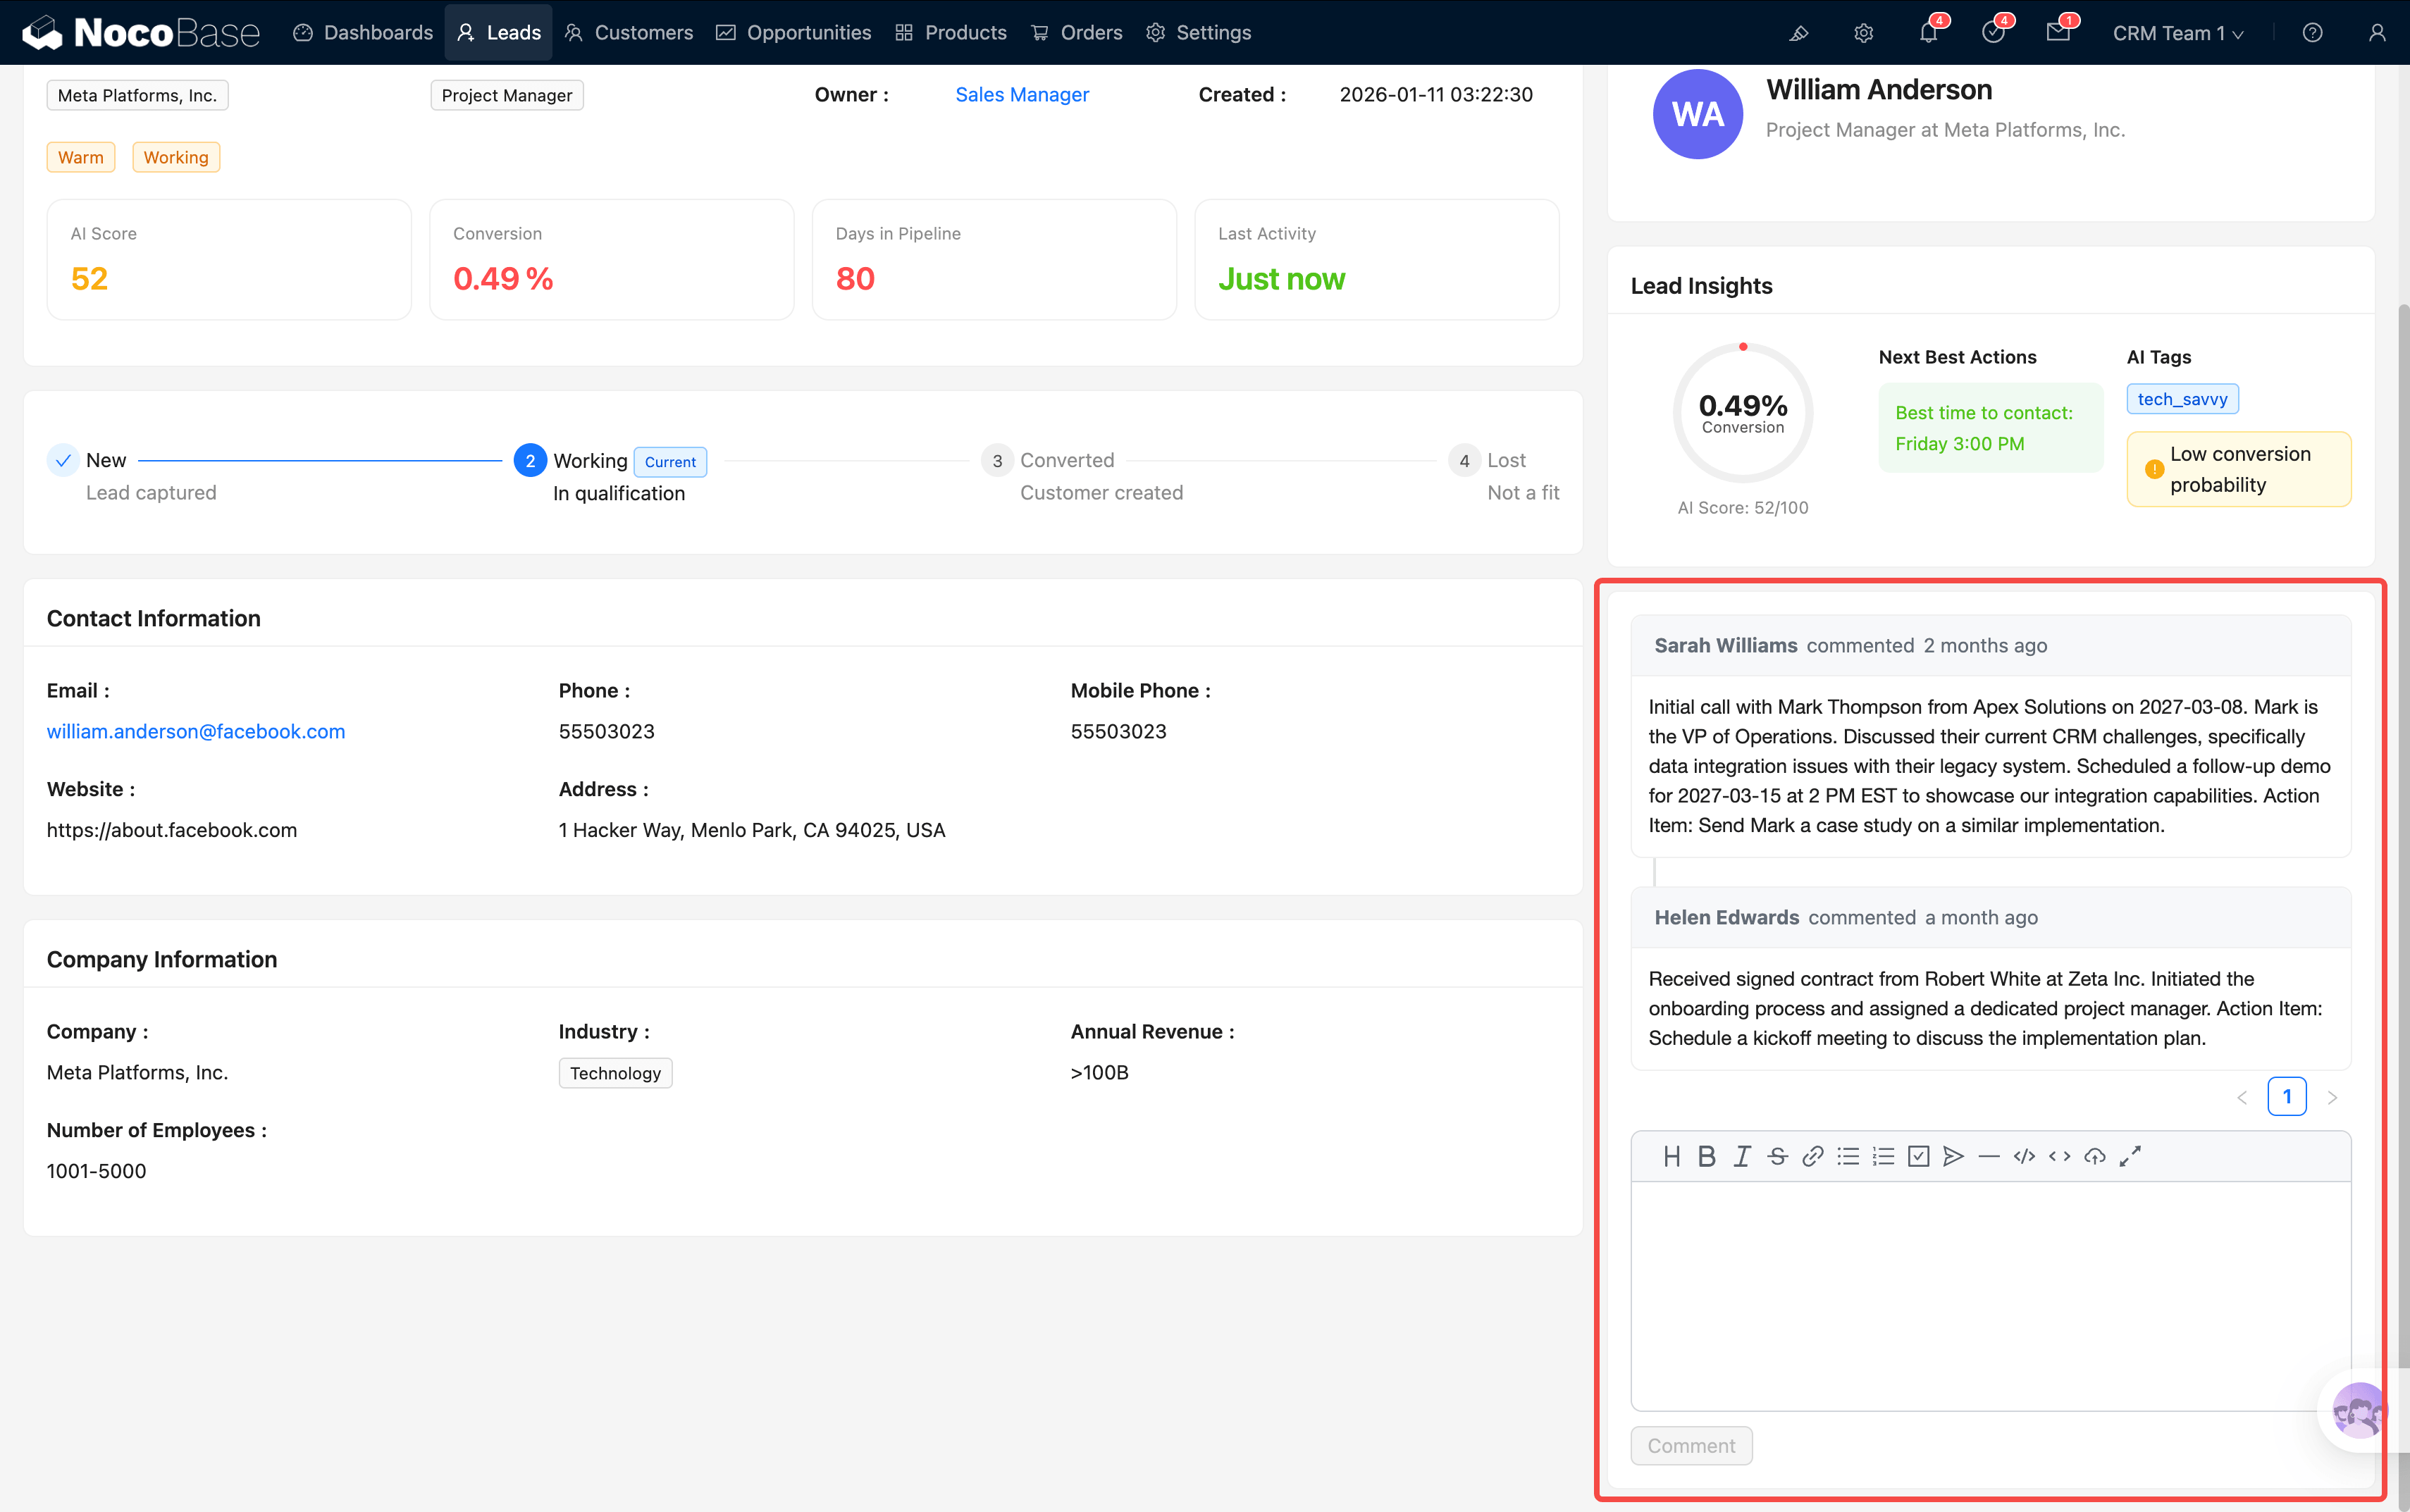
Comments
Team members can leave comments here for discussion. All comments are automatically migrated to the newly created customer record after lead conversion.
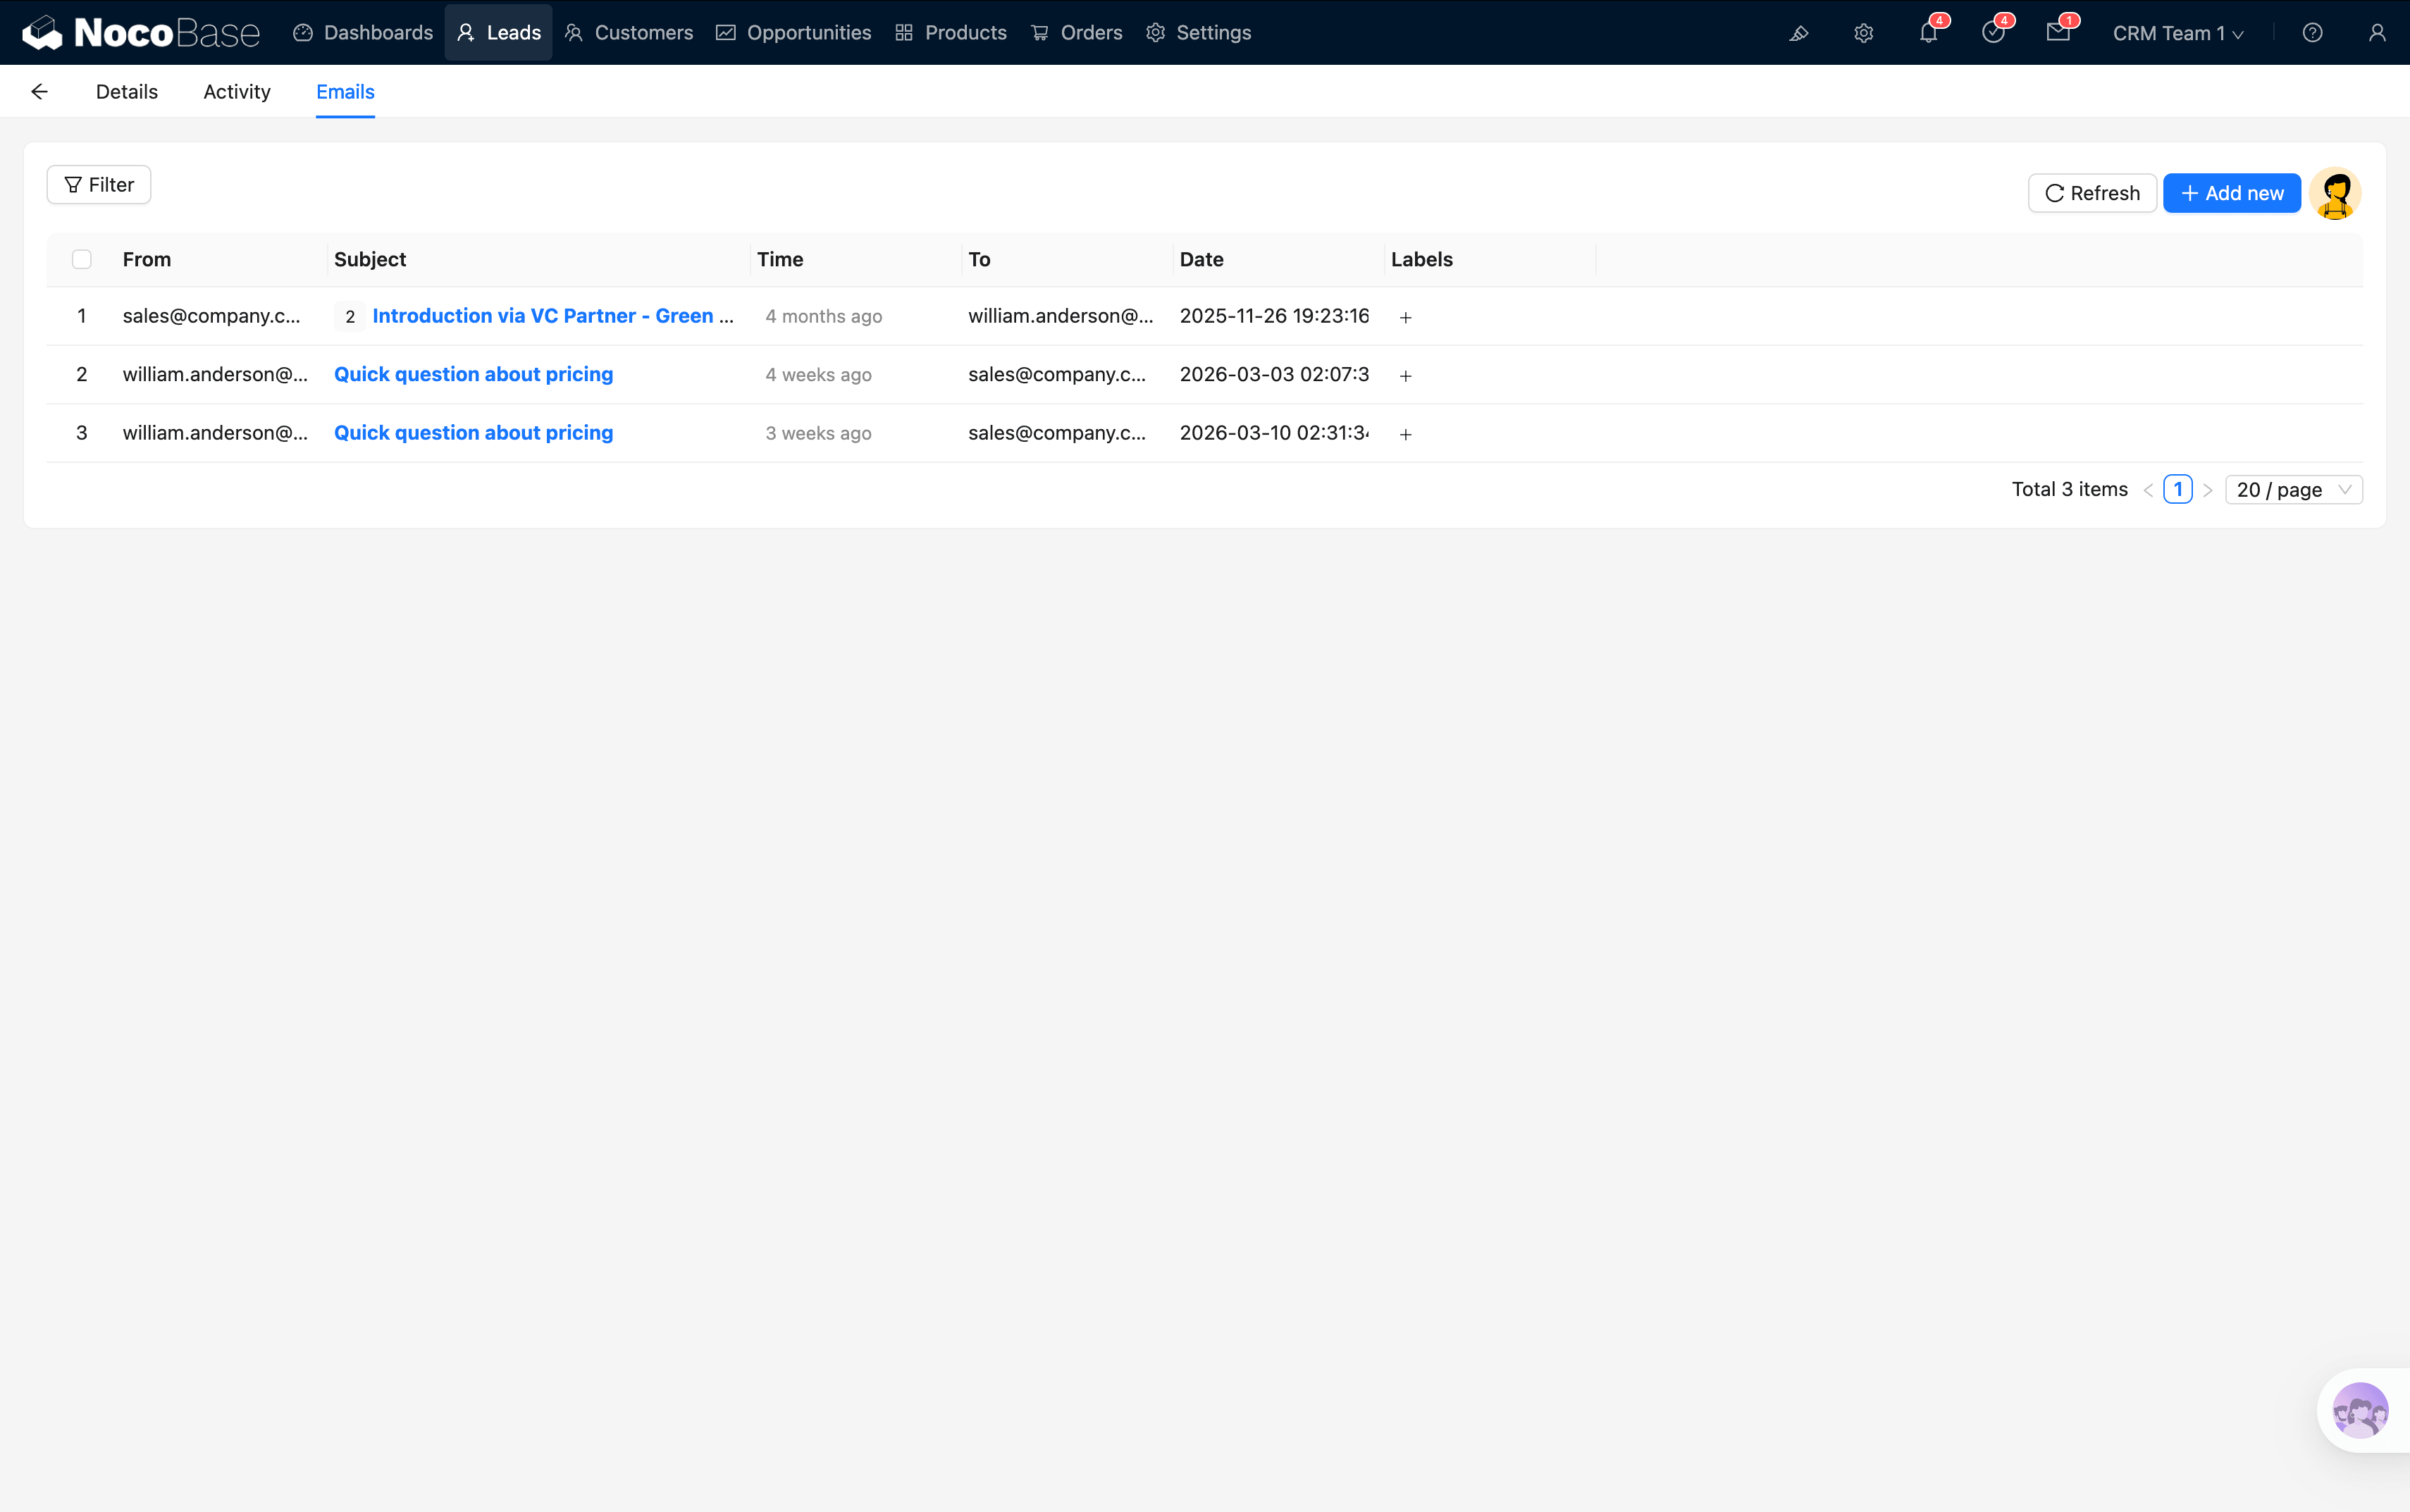
Emails Tab
Displays all email correspondence associated with this lead, making it easy to review communication history. You can send emails directly from this tab, with AI assistance available.
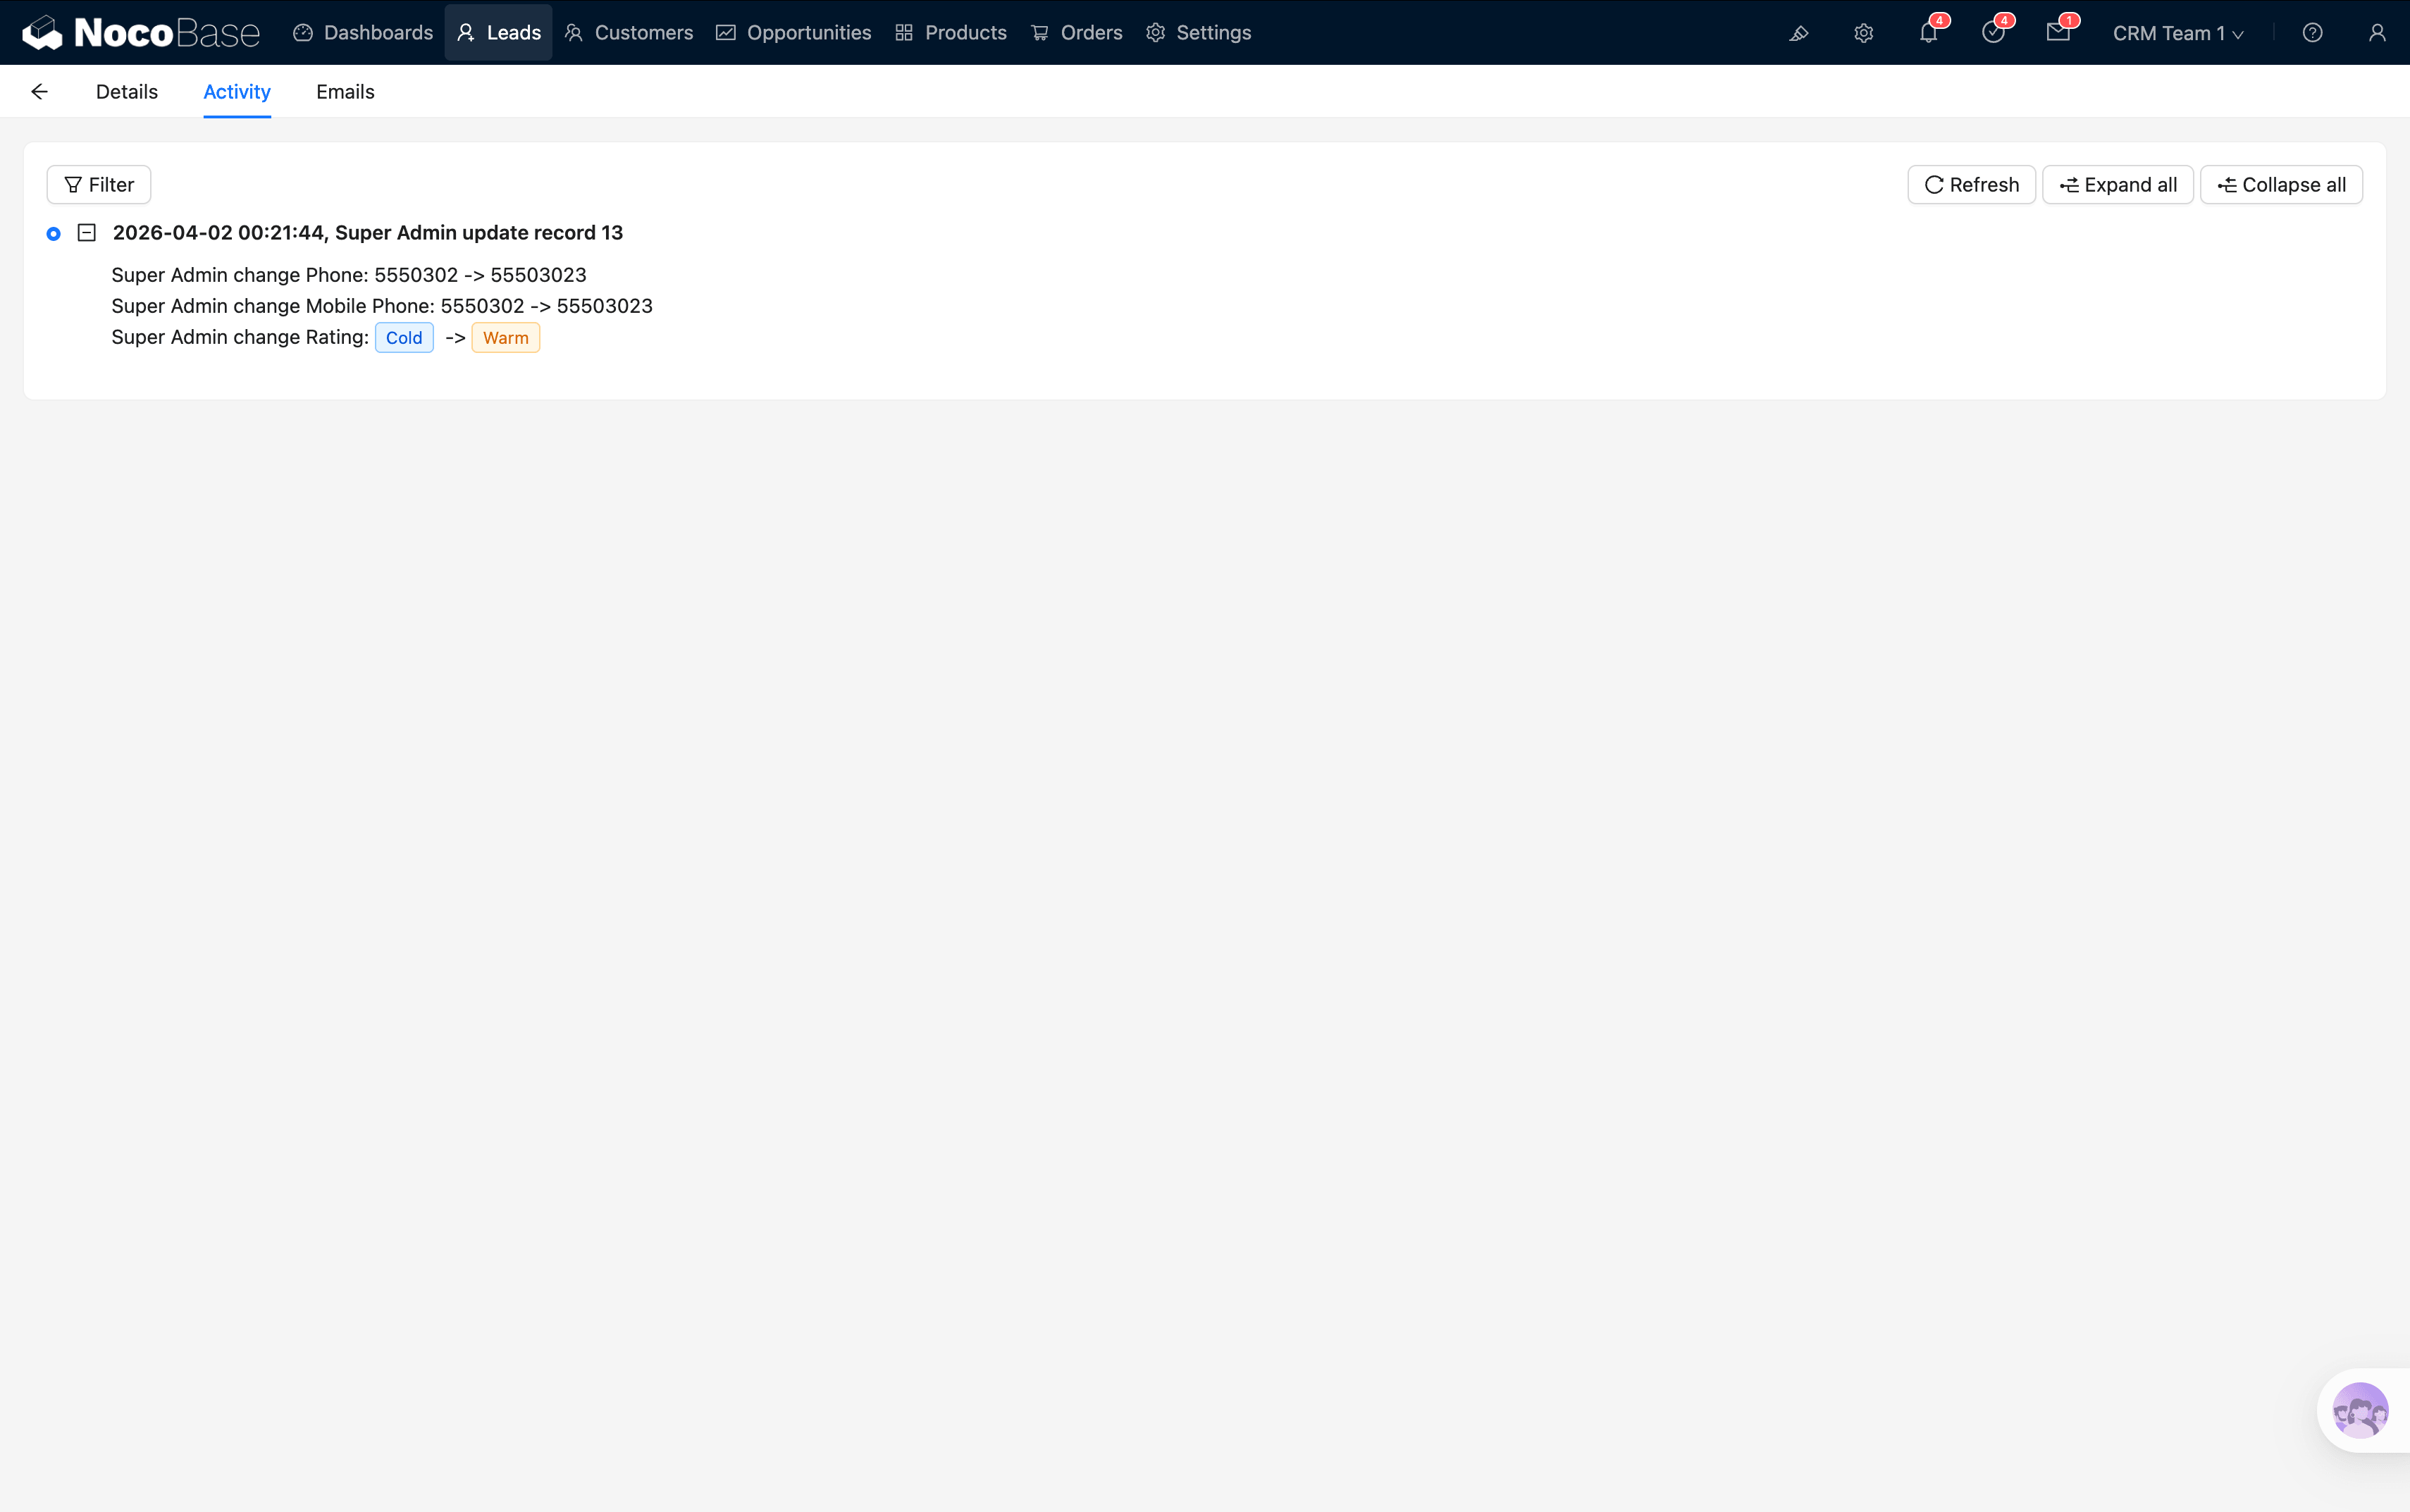
Change History Tab
Records all field changes for this lead, down to "who changed which field from A to B and when." Useful for tracking and reviewing.
Lead Conversion
This is the most critical operation in lead management — converting a qualified lead into a Customer, Contact, and Opportunity in one click.
How to Convert
In the lead detail popup, click the Converted stage on the stage flow component.
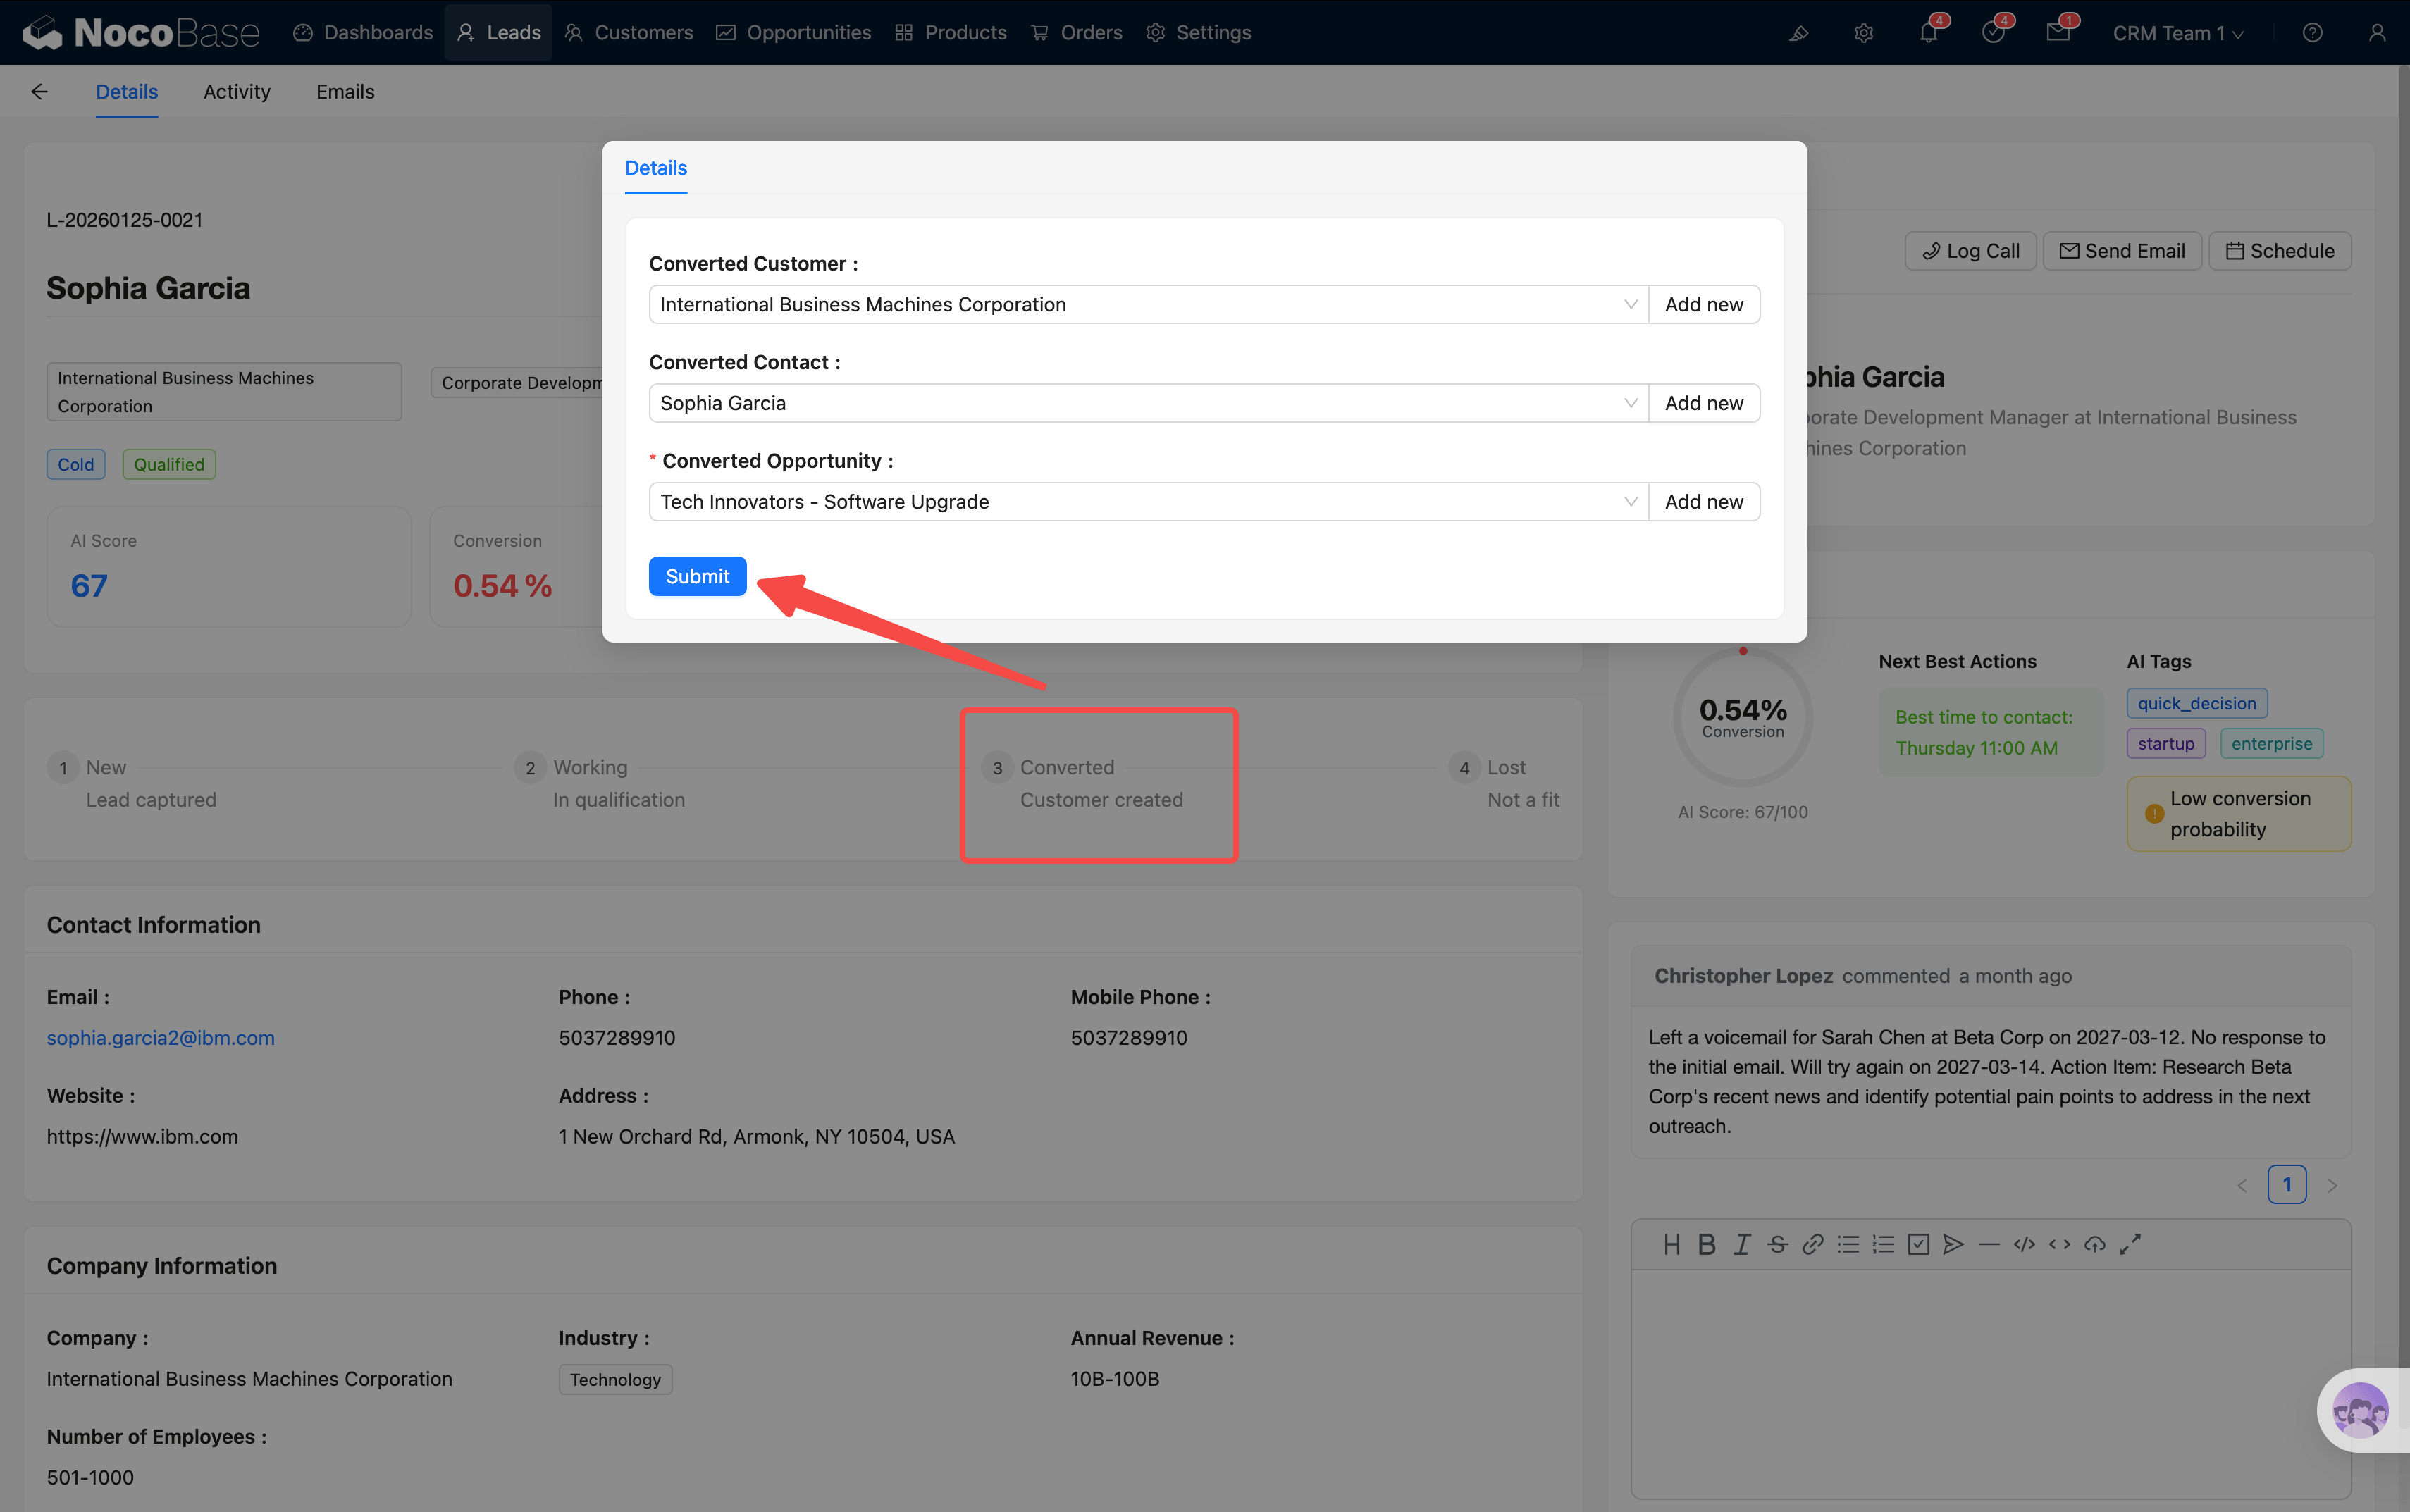
Conversion Process
The system automatically triggers the Lead Conversion workflow, completing the following operations in one step:
- Create Customer — Creates a new customer record using the lead's company name. Name, industry, size, and address are auto-populated from the lead, with duplicate detection
- Create Contact — Creates a contact using the lead's name, email, phone, and title, linked to the customer
- Create Opportunity — Creates a new opportunity record with name, source, amount, and stage auto-populated from the lead, linked to the customer
- Migrate Comments — All comments on the lead are automatically copied to the newly created records
- Update Lead Status — The lead status is set to Qualified
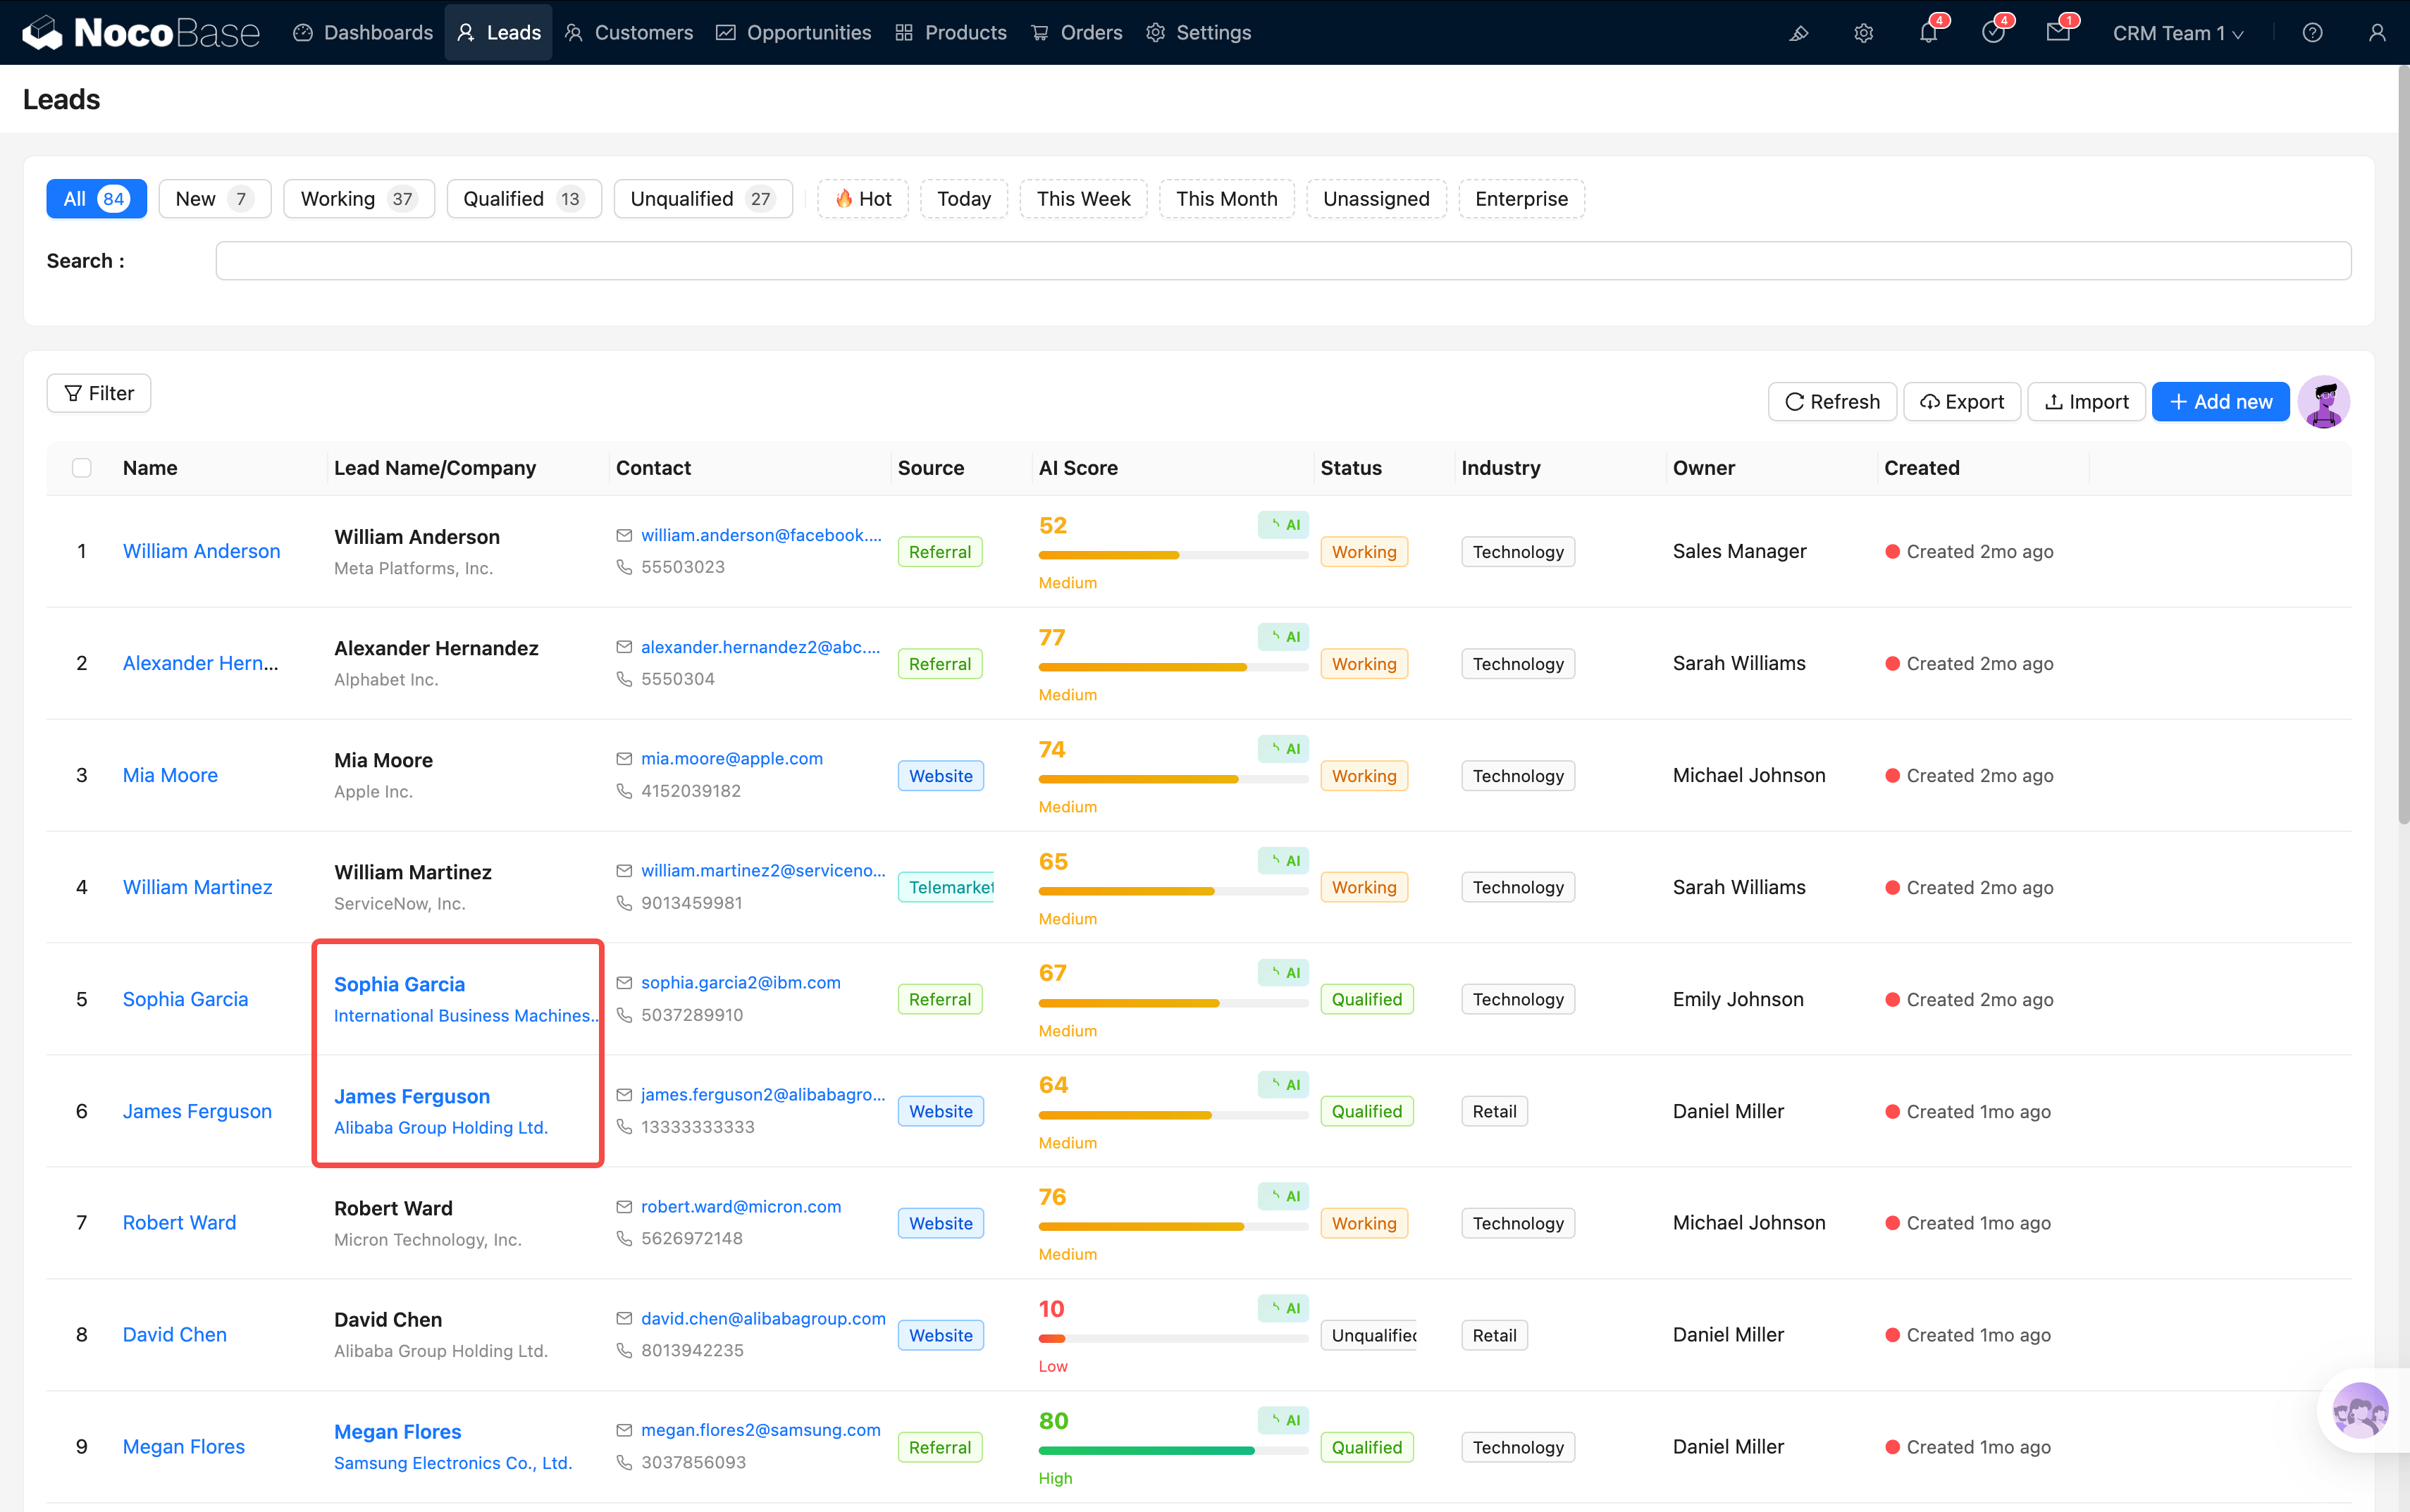
After Conversion
Once conversion is complete, return to the lead list and you'll notice the Name + Company column has become clickable links:
- Click the name → Navigate to the contact detail
- Click the company name → Navigate to the customer detail
💡 Tip: Conversion is irreversible. Before converting, make sure the lead information is accurate and complete — especially the company name and contact details, as these become the initial data for the customer and contact records.
Auto Assignment
When a lead has no Owner assigned, the system automatically triggers the Lead Assignment workflow.
The assignment logic is straightforward: automatically assign to the sales rep currently handling the fewest leads, ensuring balanced workload across the team.
This workflow checks on both lead creation and update — if the Owner field is empty, auto-assignment kicks in.
💡 Tip: If you want to manually assign an Owner, simply edit the Owner field in the detail view. Manual assignment overrides the auto-assignment result.
After lead conversion, your customer and opportunity records are ready. Next, head to Opportunities and Quotations to learn how to advance the sales funnel.