

Installation
The All-in-One Business Suite covers six modules: CRM, Sales Management, Help Desk, Project Management, IT Asset Management, and HR. Use NocoBase's built-in Backup Manager plugin to restore the .nbdata backup file in one click and get the complete dataset.
- A working NocoBase environment. For the main installation, see the official installation docs
- NocoBase v2.1.0-alpha.40 or above (the Backup Manager plugin is open source since this version, available in the Community Edition)
- The backup file downloaded: nocobase_all_in_one_backup_260521.nbdata
- The solution is built on PostgreSQL 16 — your environment must use PostgreSQL 16
DB_UNDERSCOREDmust not betrue— check yourdocker-compose.yml; restore will fail if it is set totrue- Restore overwrites ALL data in the target app — if the target already has data, back up the current app first and run the restore carefully
The current release is deployed via backup restore. Future releases will switch to incremental migration to make integration with existing NocoBase systems easier.
Steps
Step 1: Start the app with the full image
Use the full Docker image. It bundles the database client and other companion tools, so no extra configuration is needed:
Then start NocoBase from this image.
Without the full image, you may need to install the pg_dump client inside the container manually — a tedious and brittle process.
Step 2: Enable the Backup Manager plugin
- Sign in to NocoBase
- Open Plugin Manager
- Find and enable Backup Manager
Step 3: Restore from the local backup file
-
After enabling the plugin, refresh the page
-
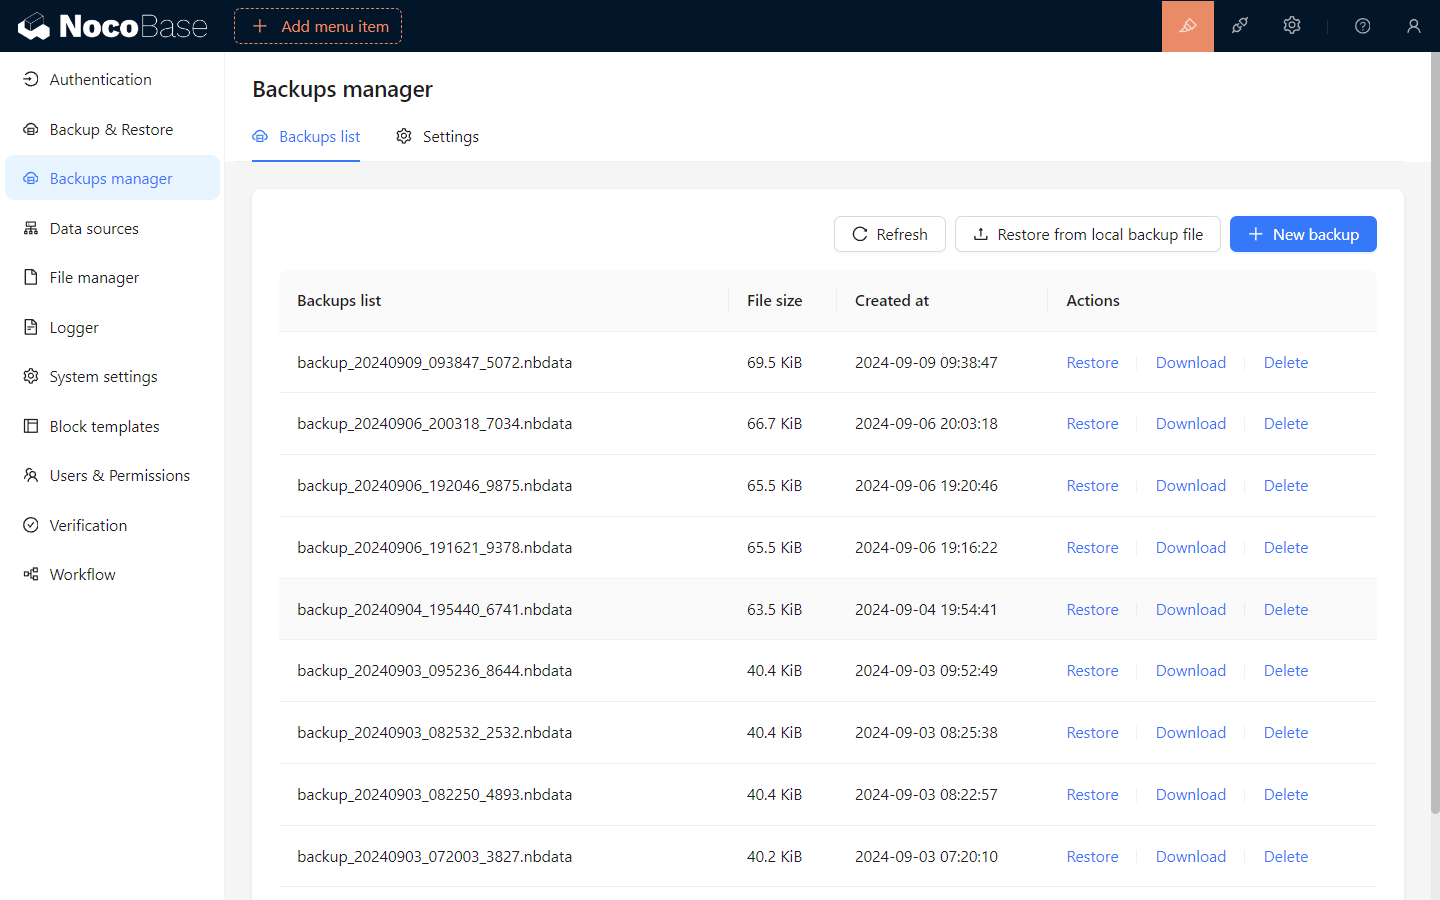
From the left menu, go to System Management / Backup Manager
-
Click Restore from local backup in the top right
-
Drag the downloaded
nocobase_all_in_one_backup_260521.nbdatafile onto the upload area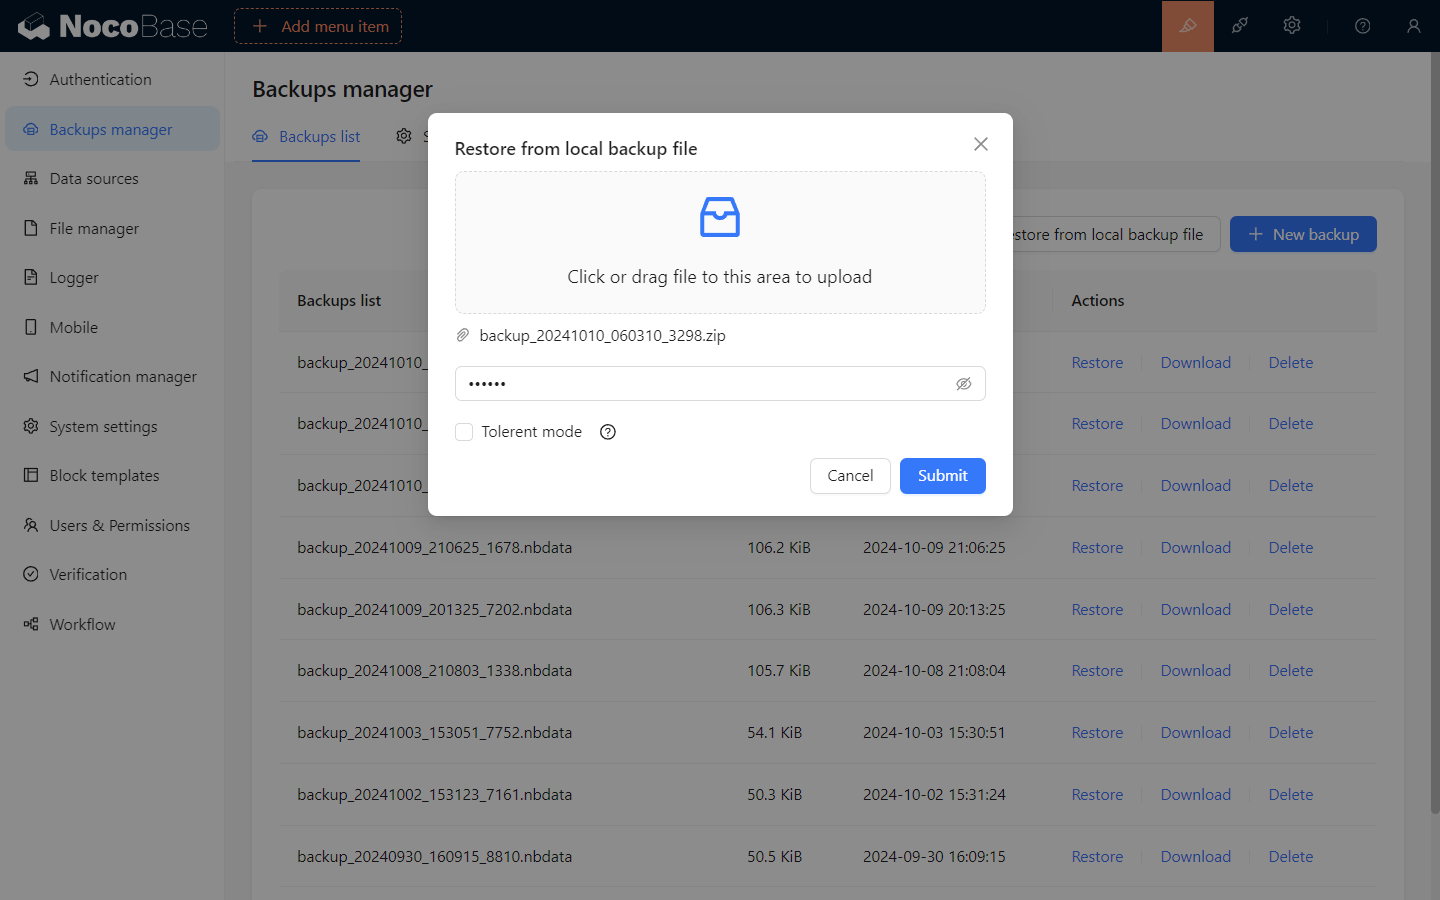
-
Click Submit and wait for the restore to complete — typically tens of seconds to a few minutes
Notes
- Database compatibility — PostgreSQL version, character set, and case sensitivity must match the backup source; the
schemaname in particular must be identical - Commercial plugin match — every commercial plugin used in the backup must be installed and enabled locally first, or the restore will be interrupted. The All-in-One solution uses commercial plugins such as Email Manager, Audit Log, and AI Employees. On the Community Edition, the entry points for missing plugins simply do not appear and the other modules are unaffected
Post-install configuration
The system is usable once the restore finishes, but two settings still point at our demo environment and need to be switched to your own.
1. File storage engine (OSS / local)
The demo backup ships with a storage engine pointing at our Alibaba Cloud OSS. The Access Key is not public, so any attachment field, print template, or AI employee avatar upload will fail.
Local storage is usually enough; switch to your own OSS only when you need CDN acceleration or large-file workloads.
Switching steps:
-
Open Plugin Manager / File Manager (or go to
/admin/settings/file-manager) -
Option A — use local storage (simplest, suited for self-hosted deployments):
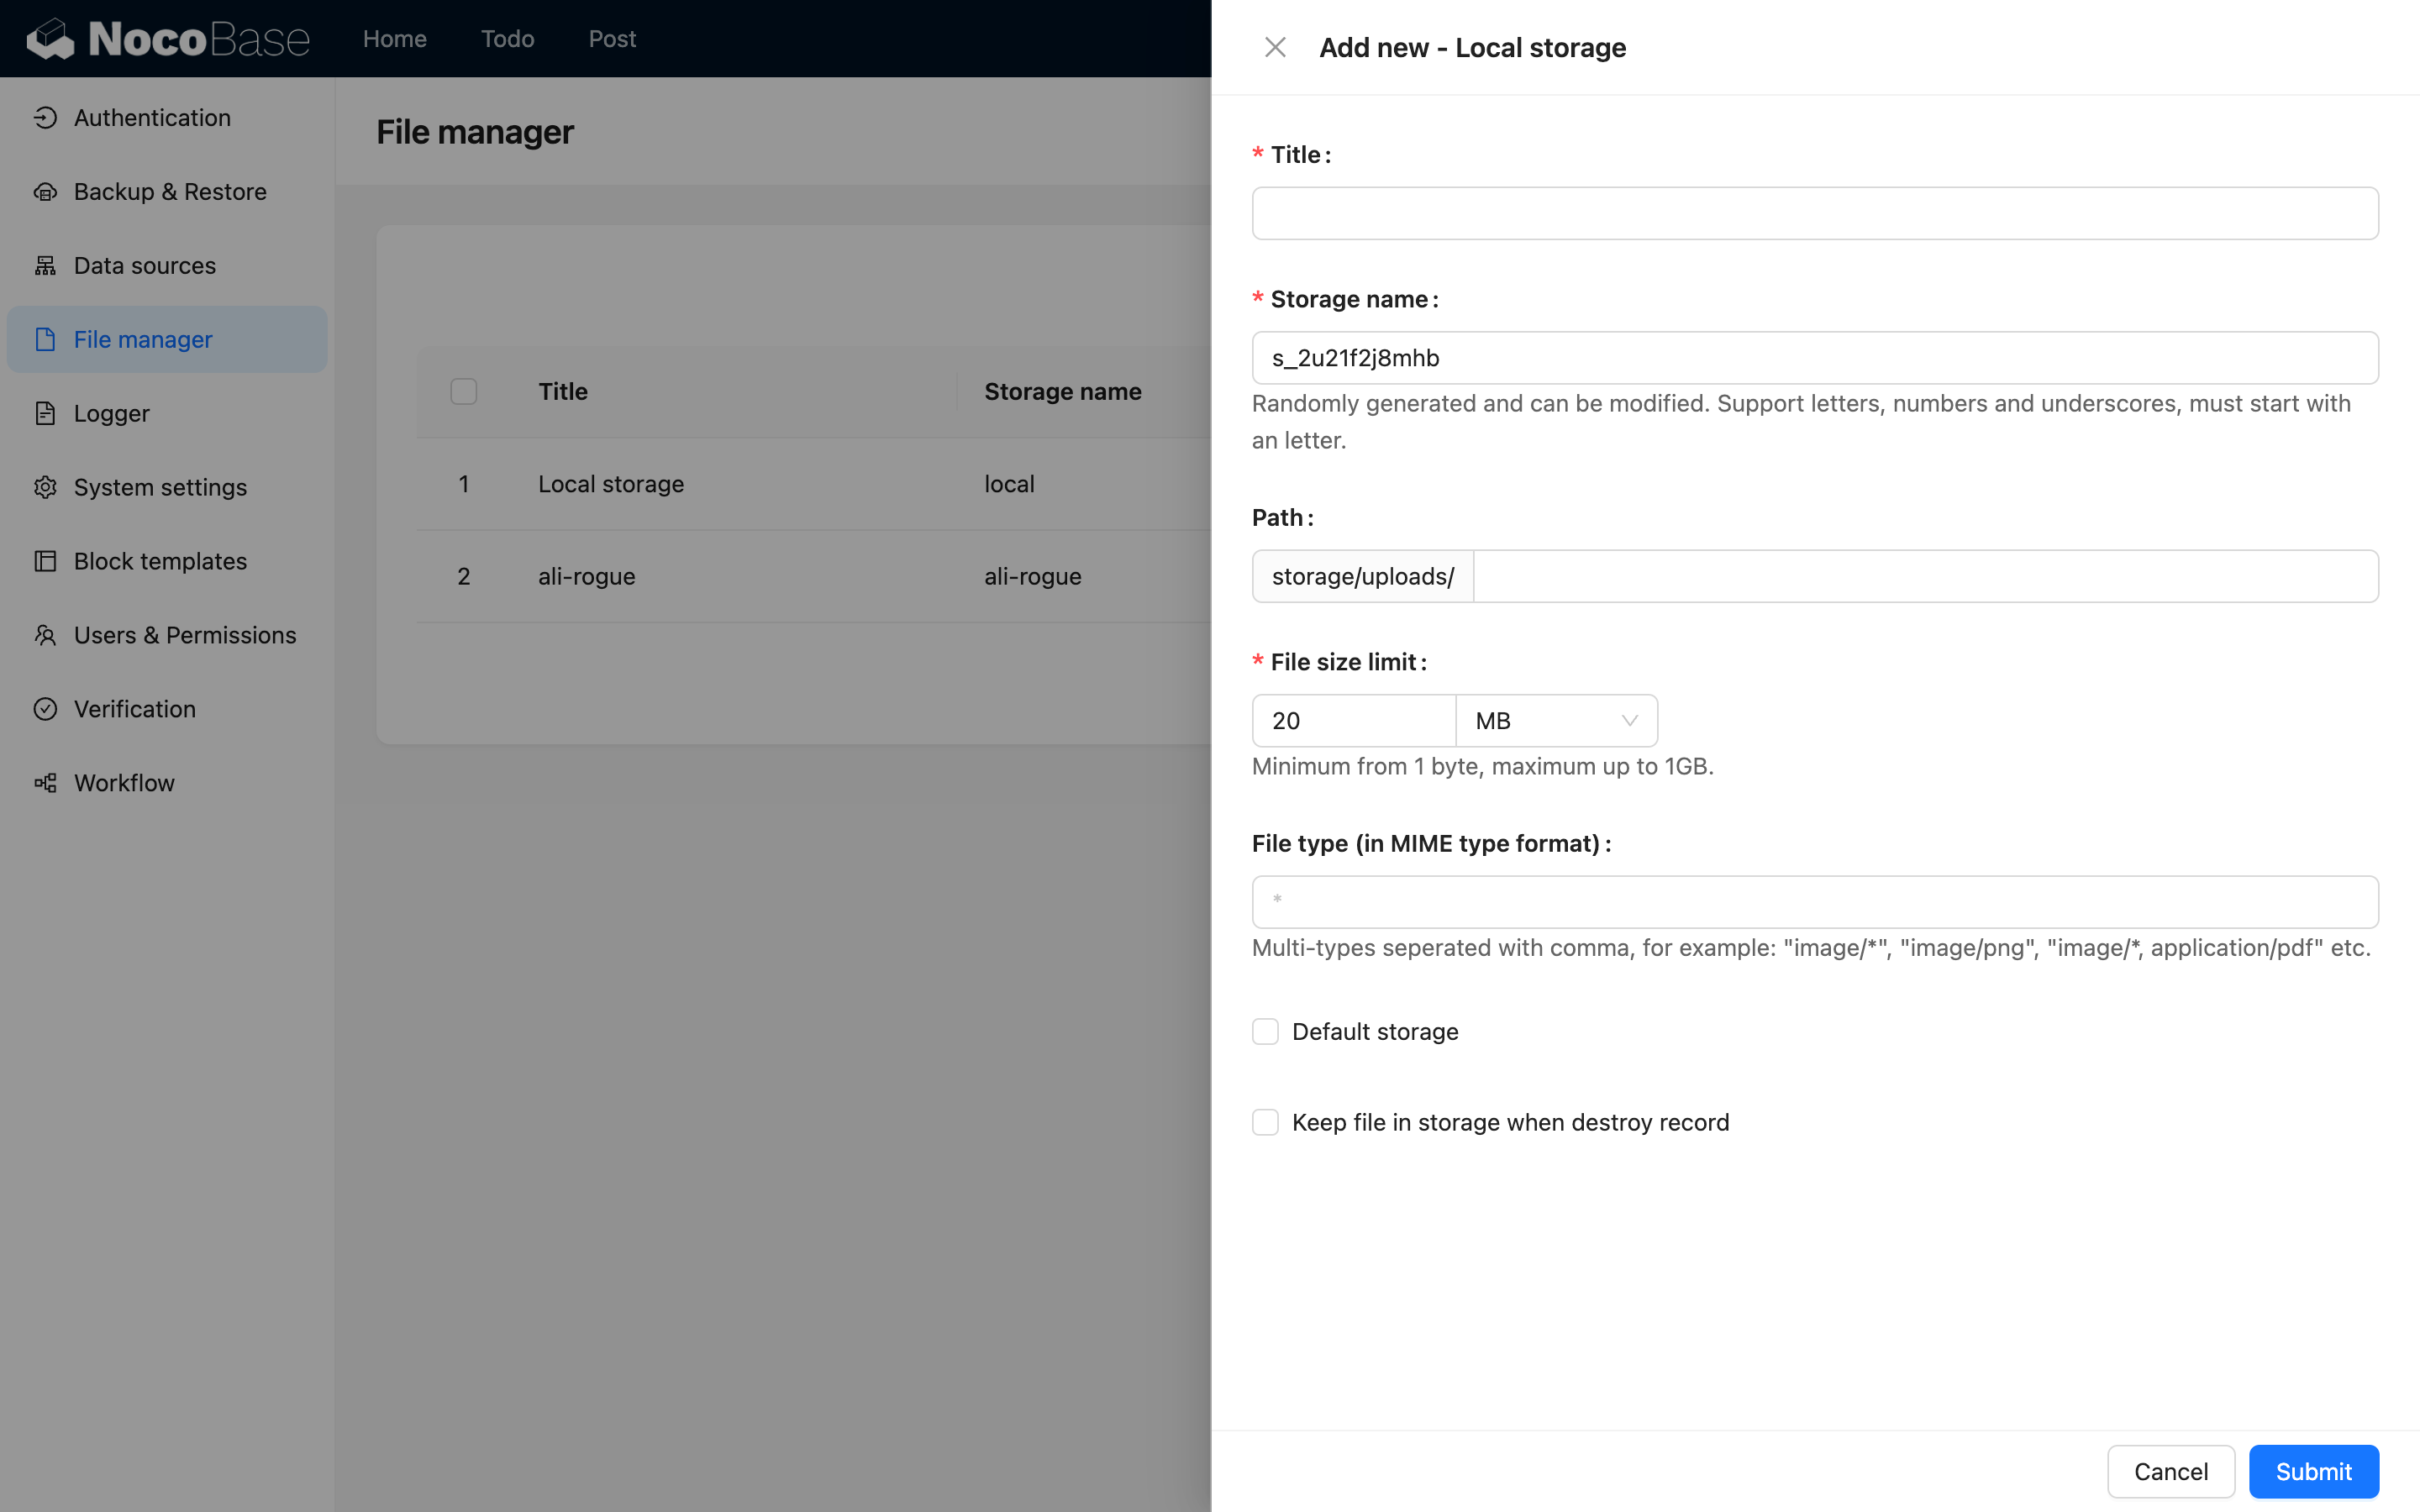
- Find the auto-created Local Storage entry
- Click Edit, check Set as default storage engine at the bottom of the config panel, then submit
 Note
NoteFor Docker deployments, local storage lives inside the container; deleting the container loses the files. In production, mount a volume or use cloud storage.
-
Option B — use your own OSS / S3 / COS:
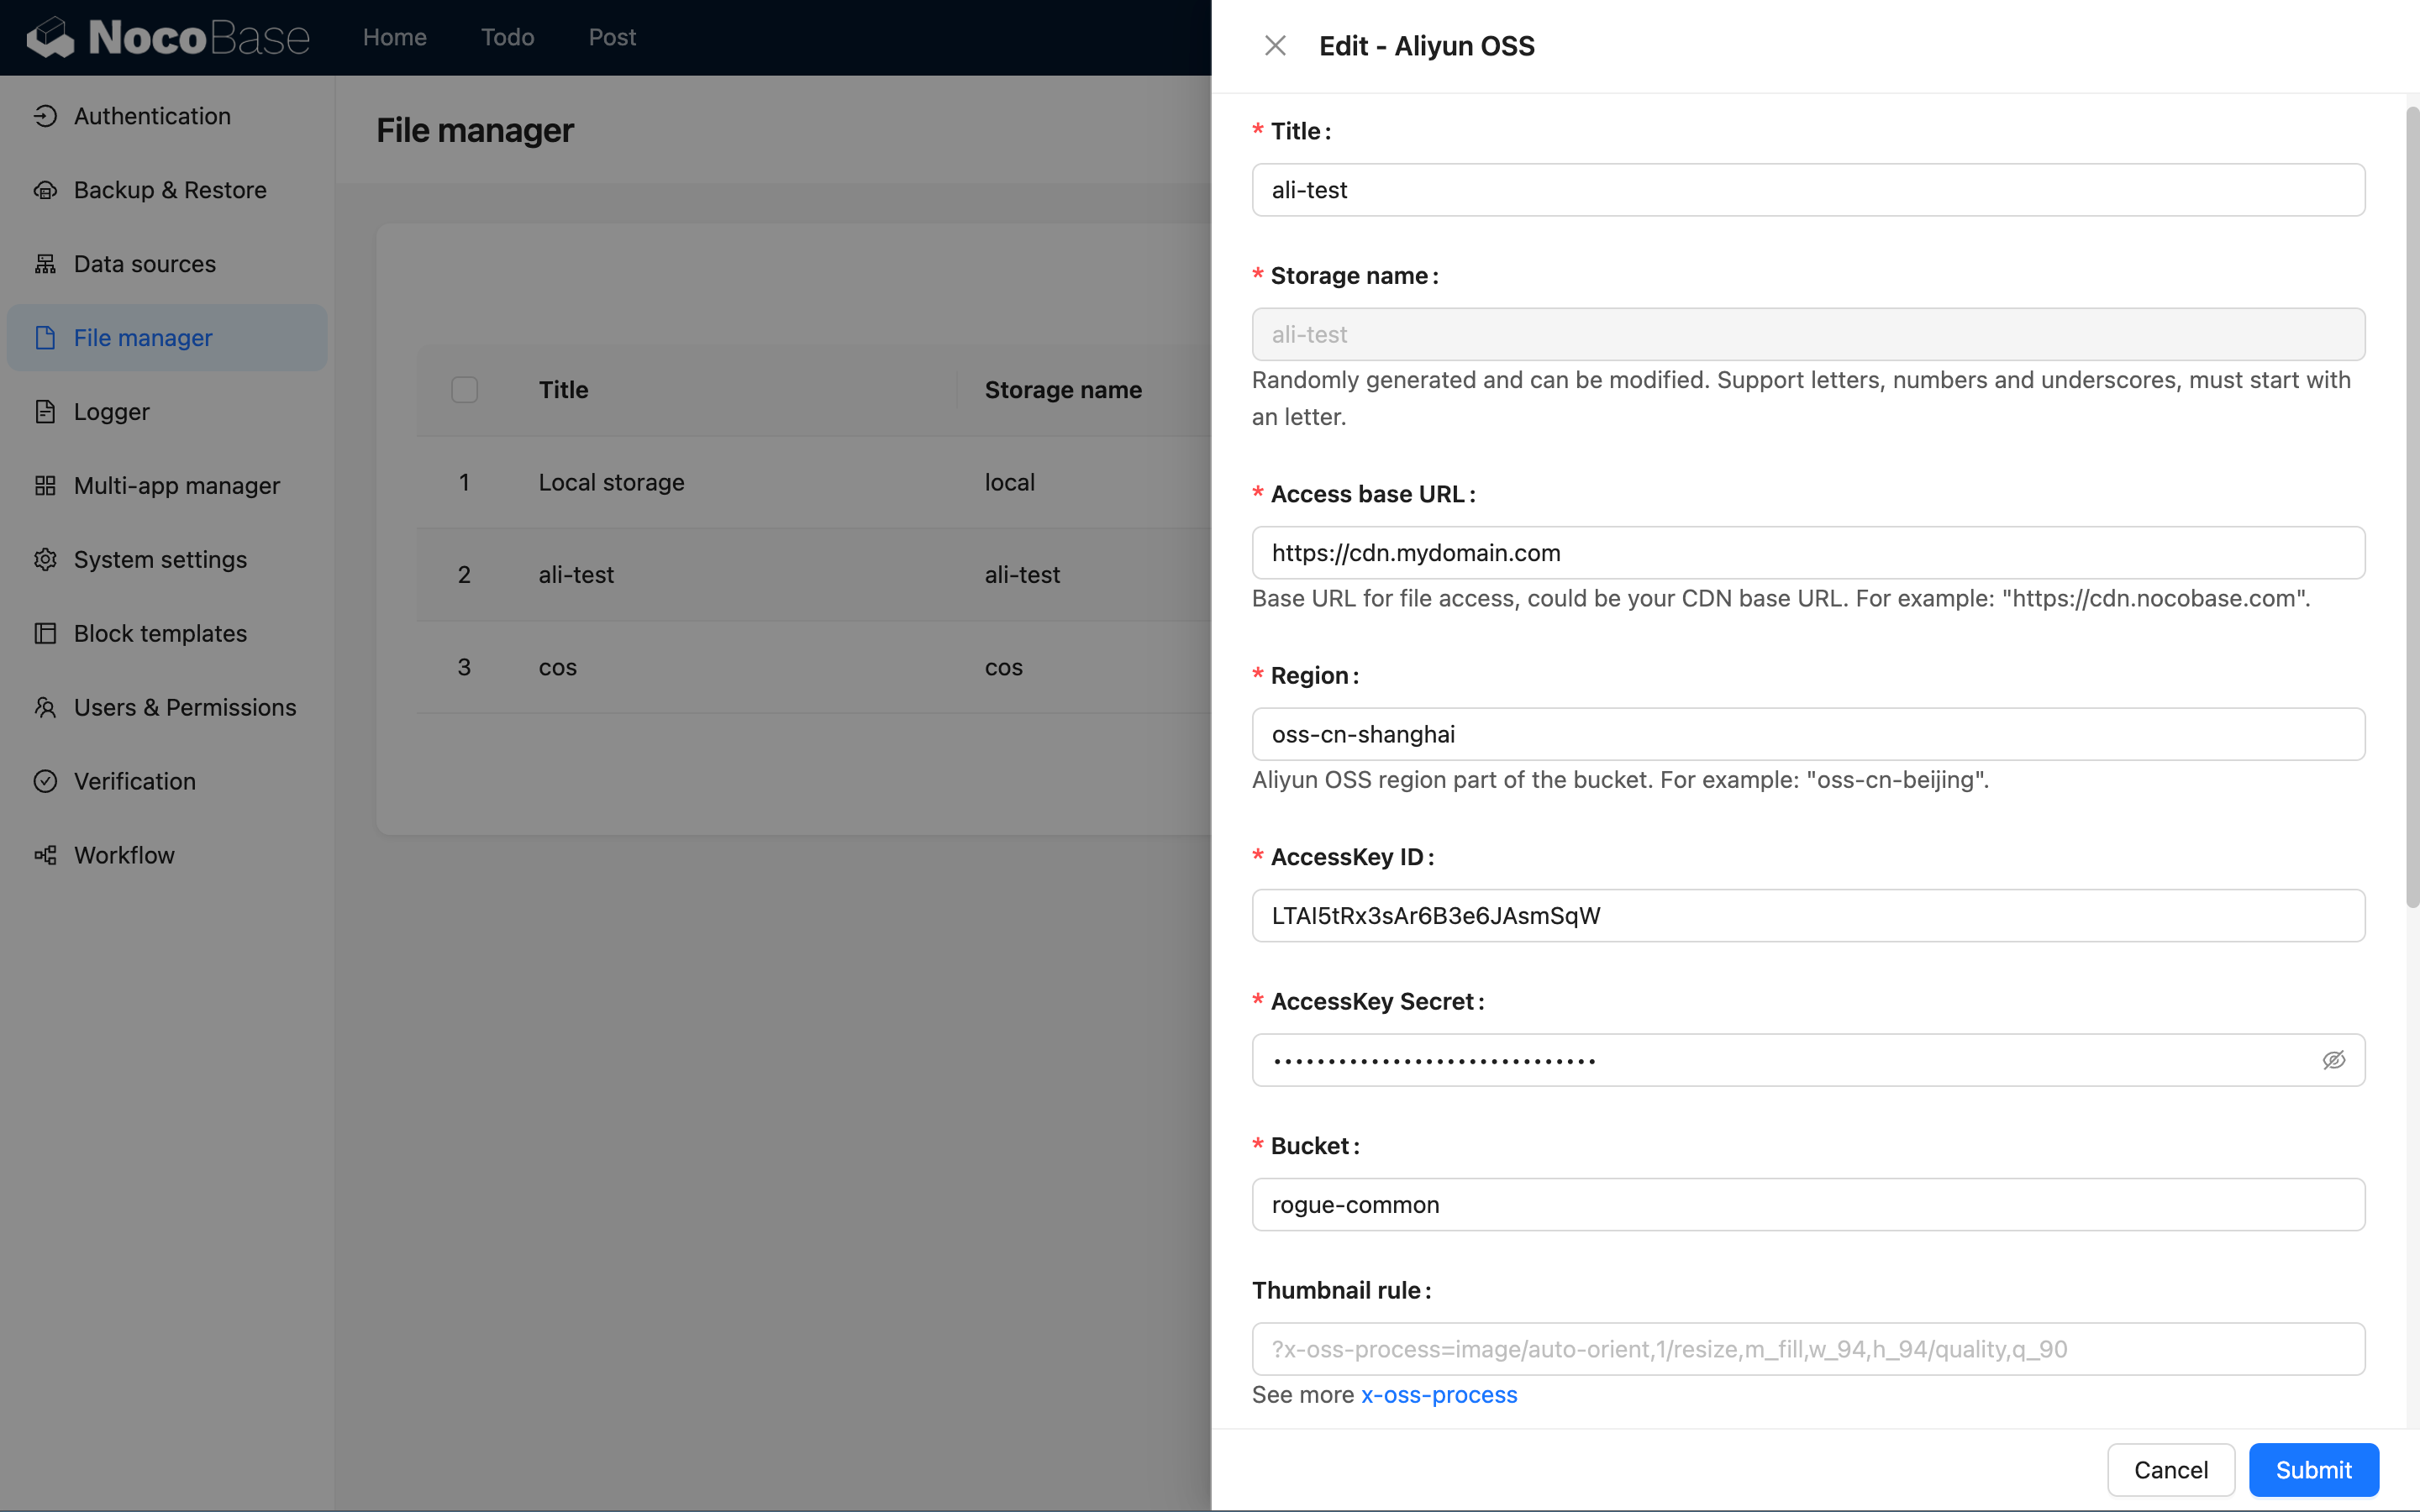
- Click Add new, choose the matching type (Alibaba Cloud OSS / Amazon S3 / Tencent Cloud COS / S3 Pro)
- Fill in Access Key, Bucket, Region, domain, and other parameters, check Set as default storage engine, then submit
-
Delete or disable the demo-preset OSS entry to avoid accidental use
See Storage engine overview for parameter details.
2. AI Employees LLM service keys
The demo backup preloads several LLM service entries (OpenAI, Claude, Gemini, DeepSeek, Qwen, Kimi, etc.) using our own API keys, which will not work for you. The AI Employees features are unusable until you swap them out.
Configuration steps:
-
Open System Settings / AI Employees / LLM service (or go to
/admin/settings/ai/llm-services)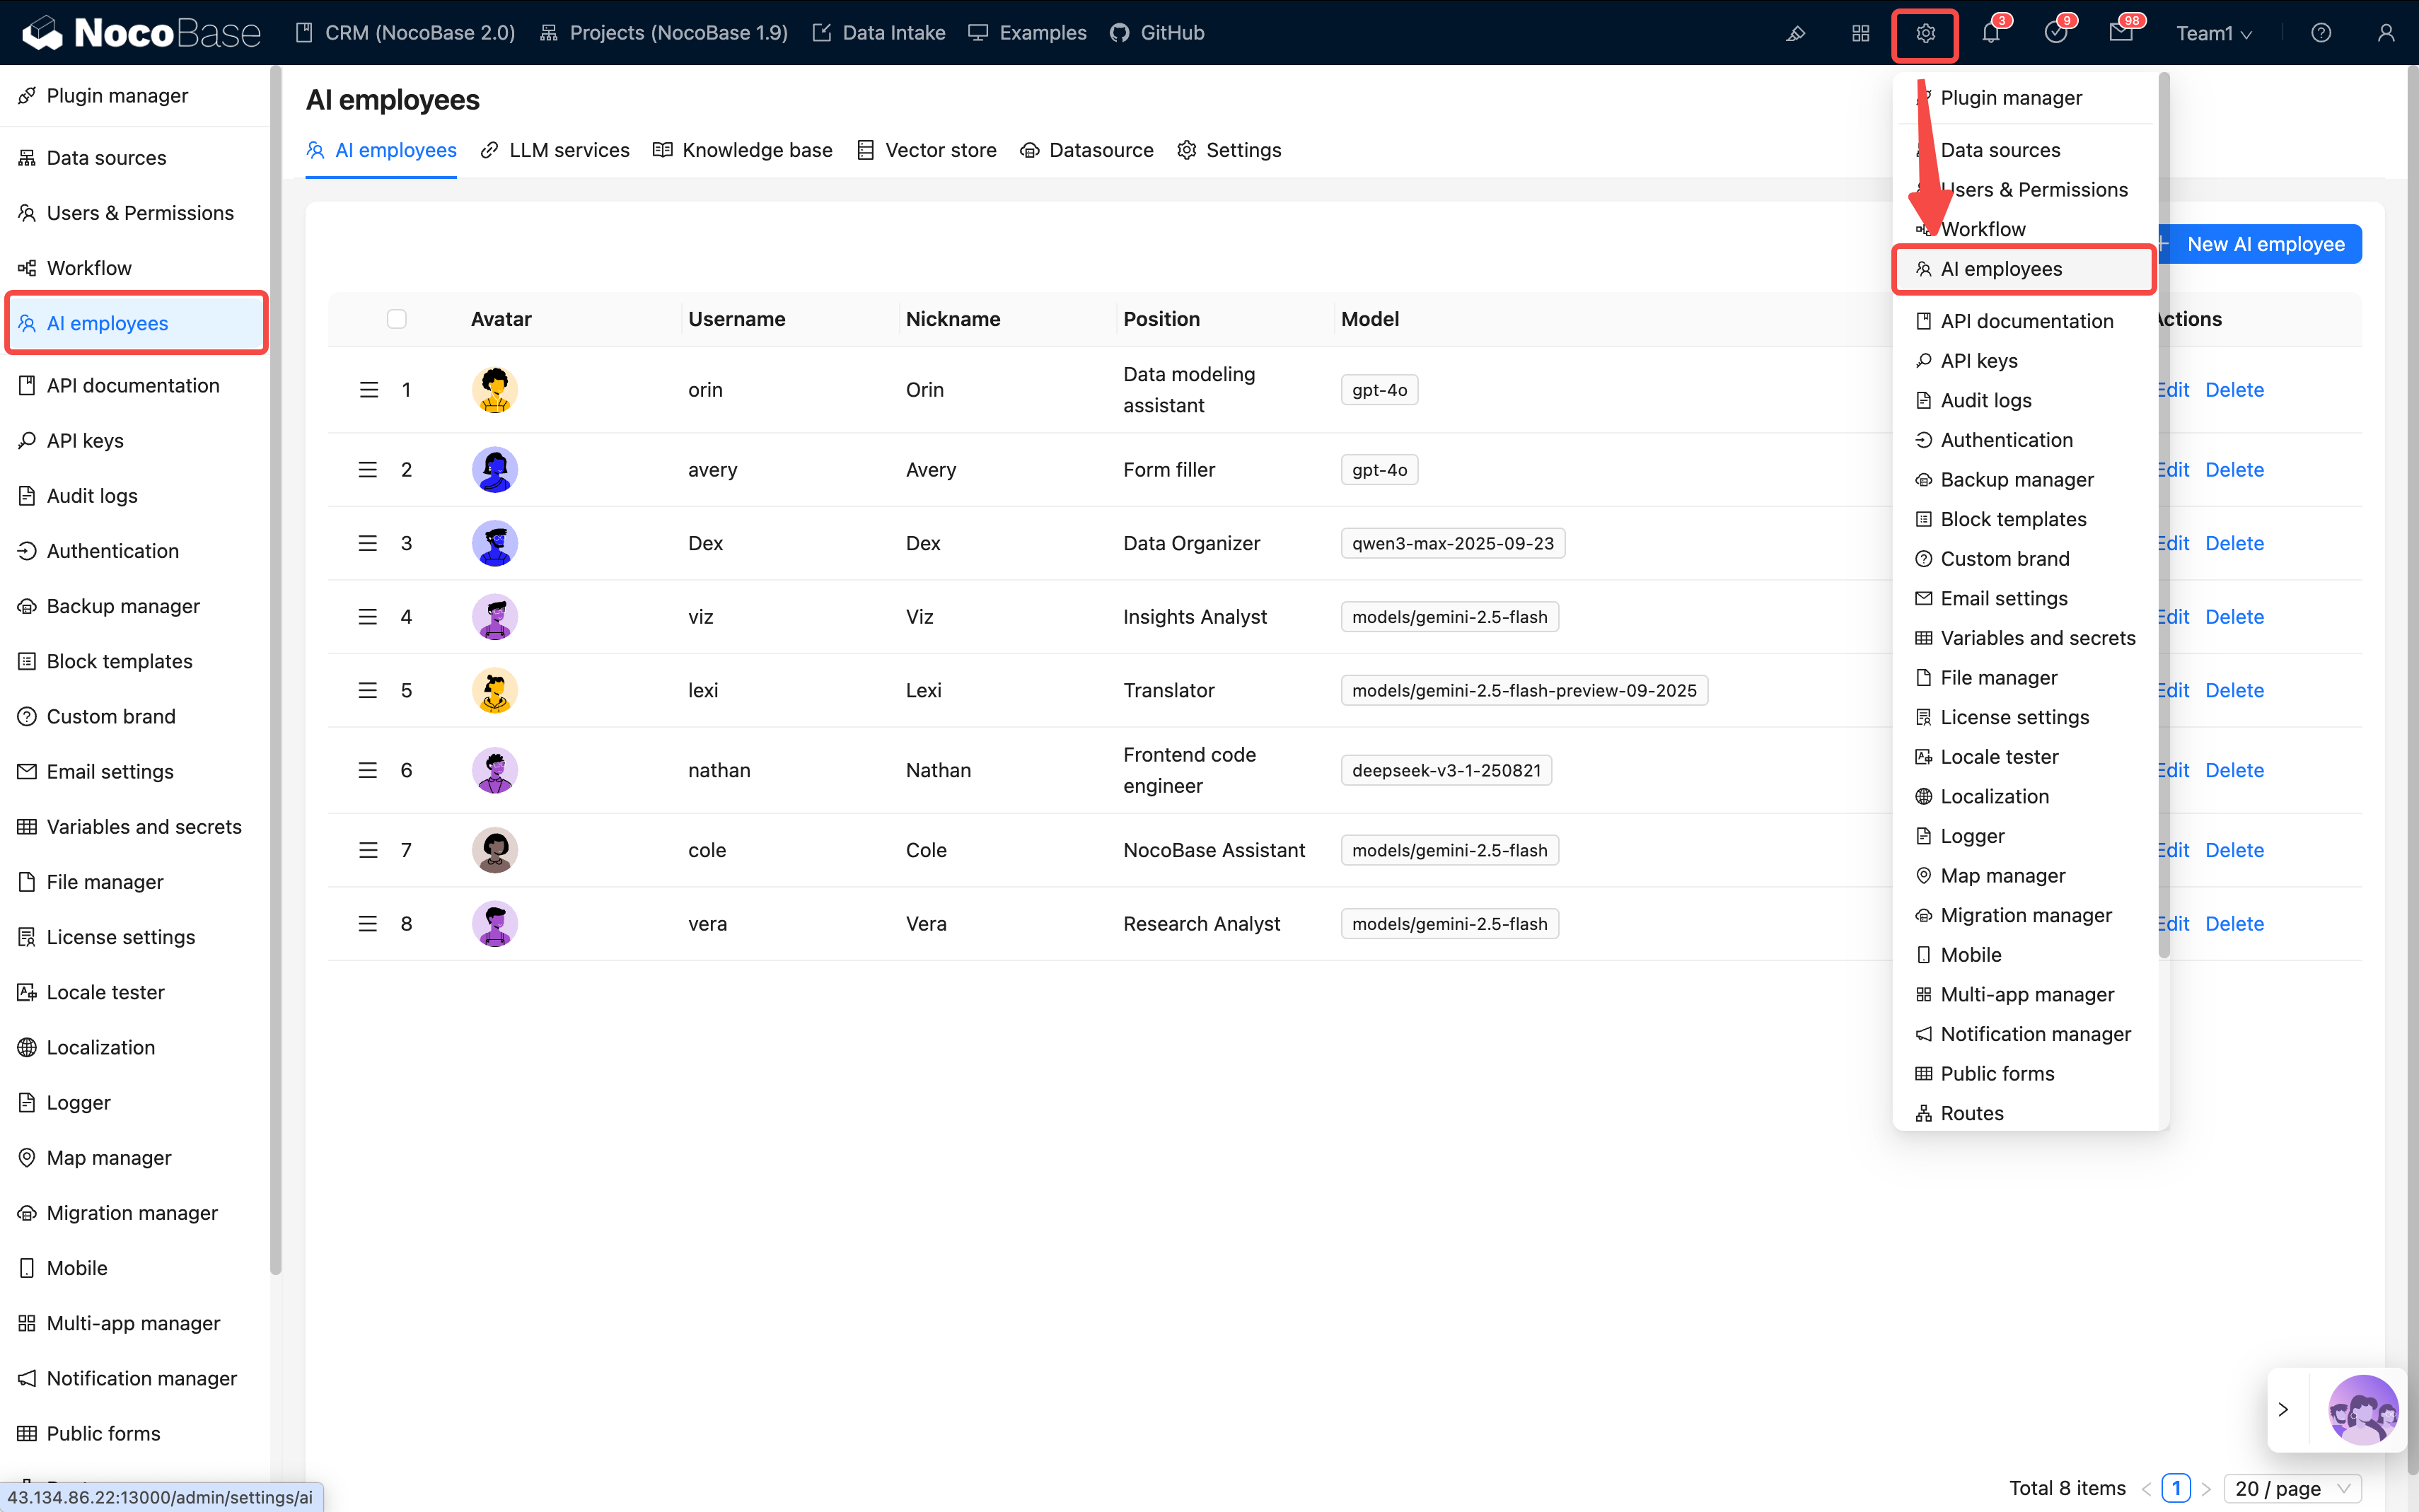
-
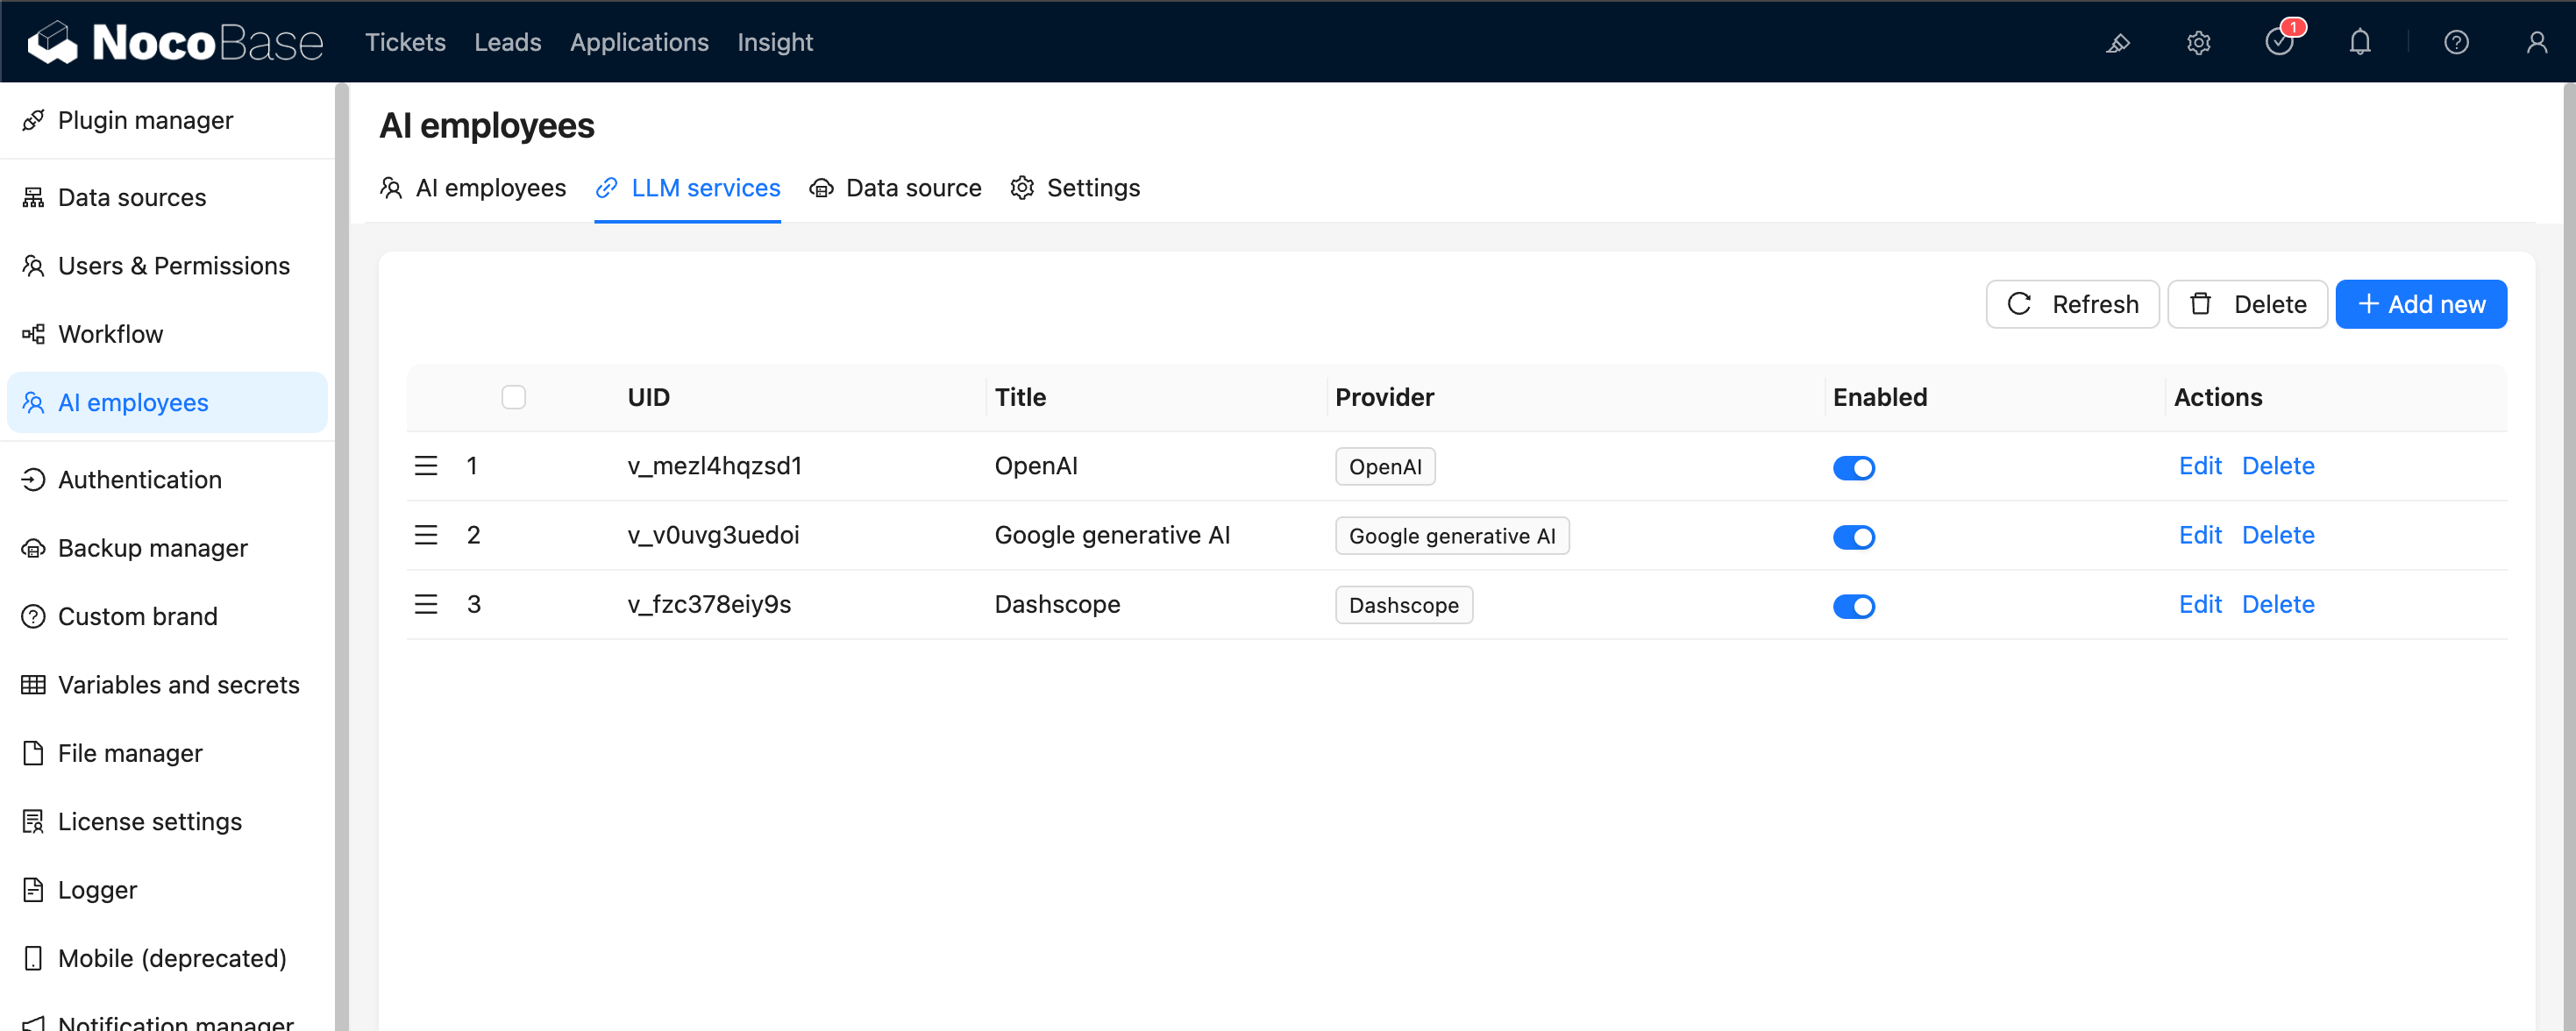
The preloaded service list supports drag-to-reorder and an Enabled toggle
-
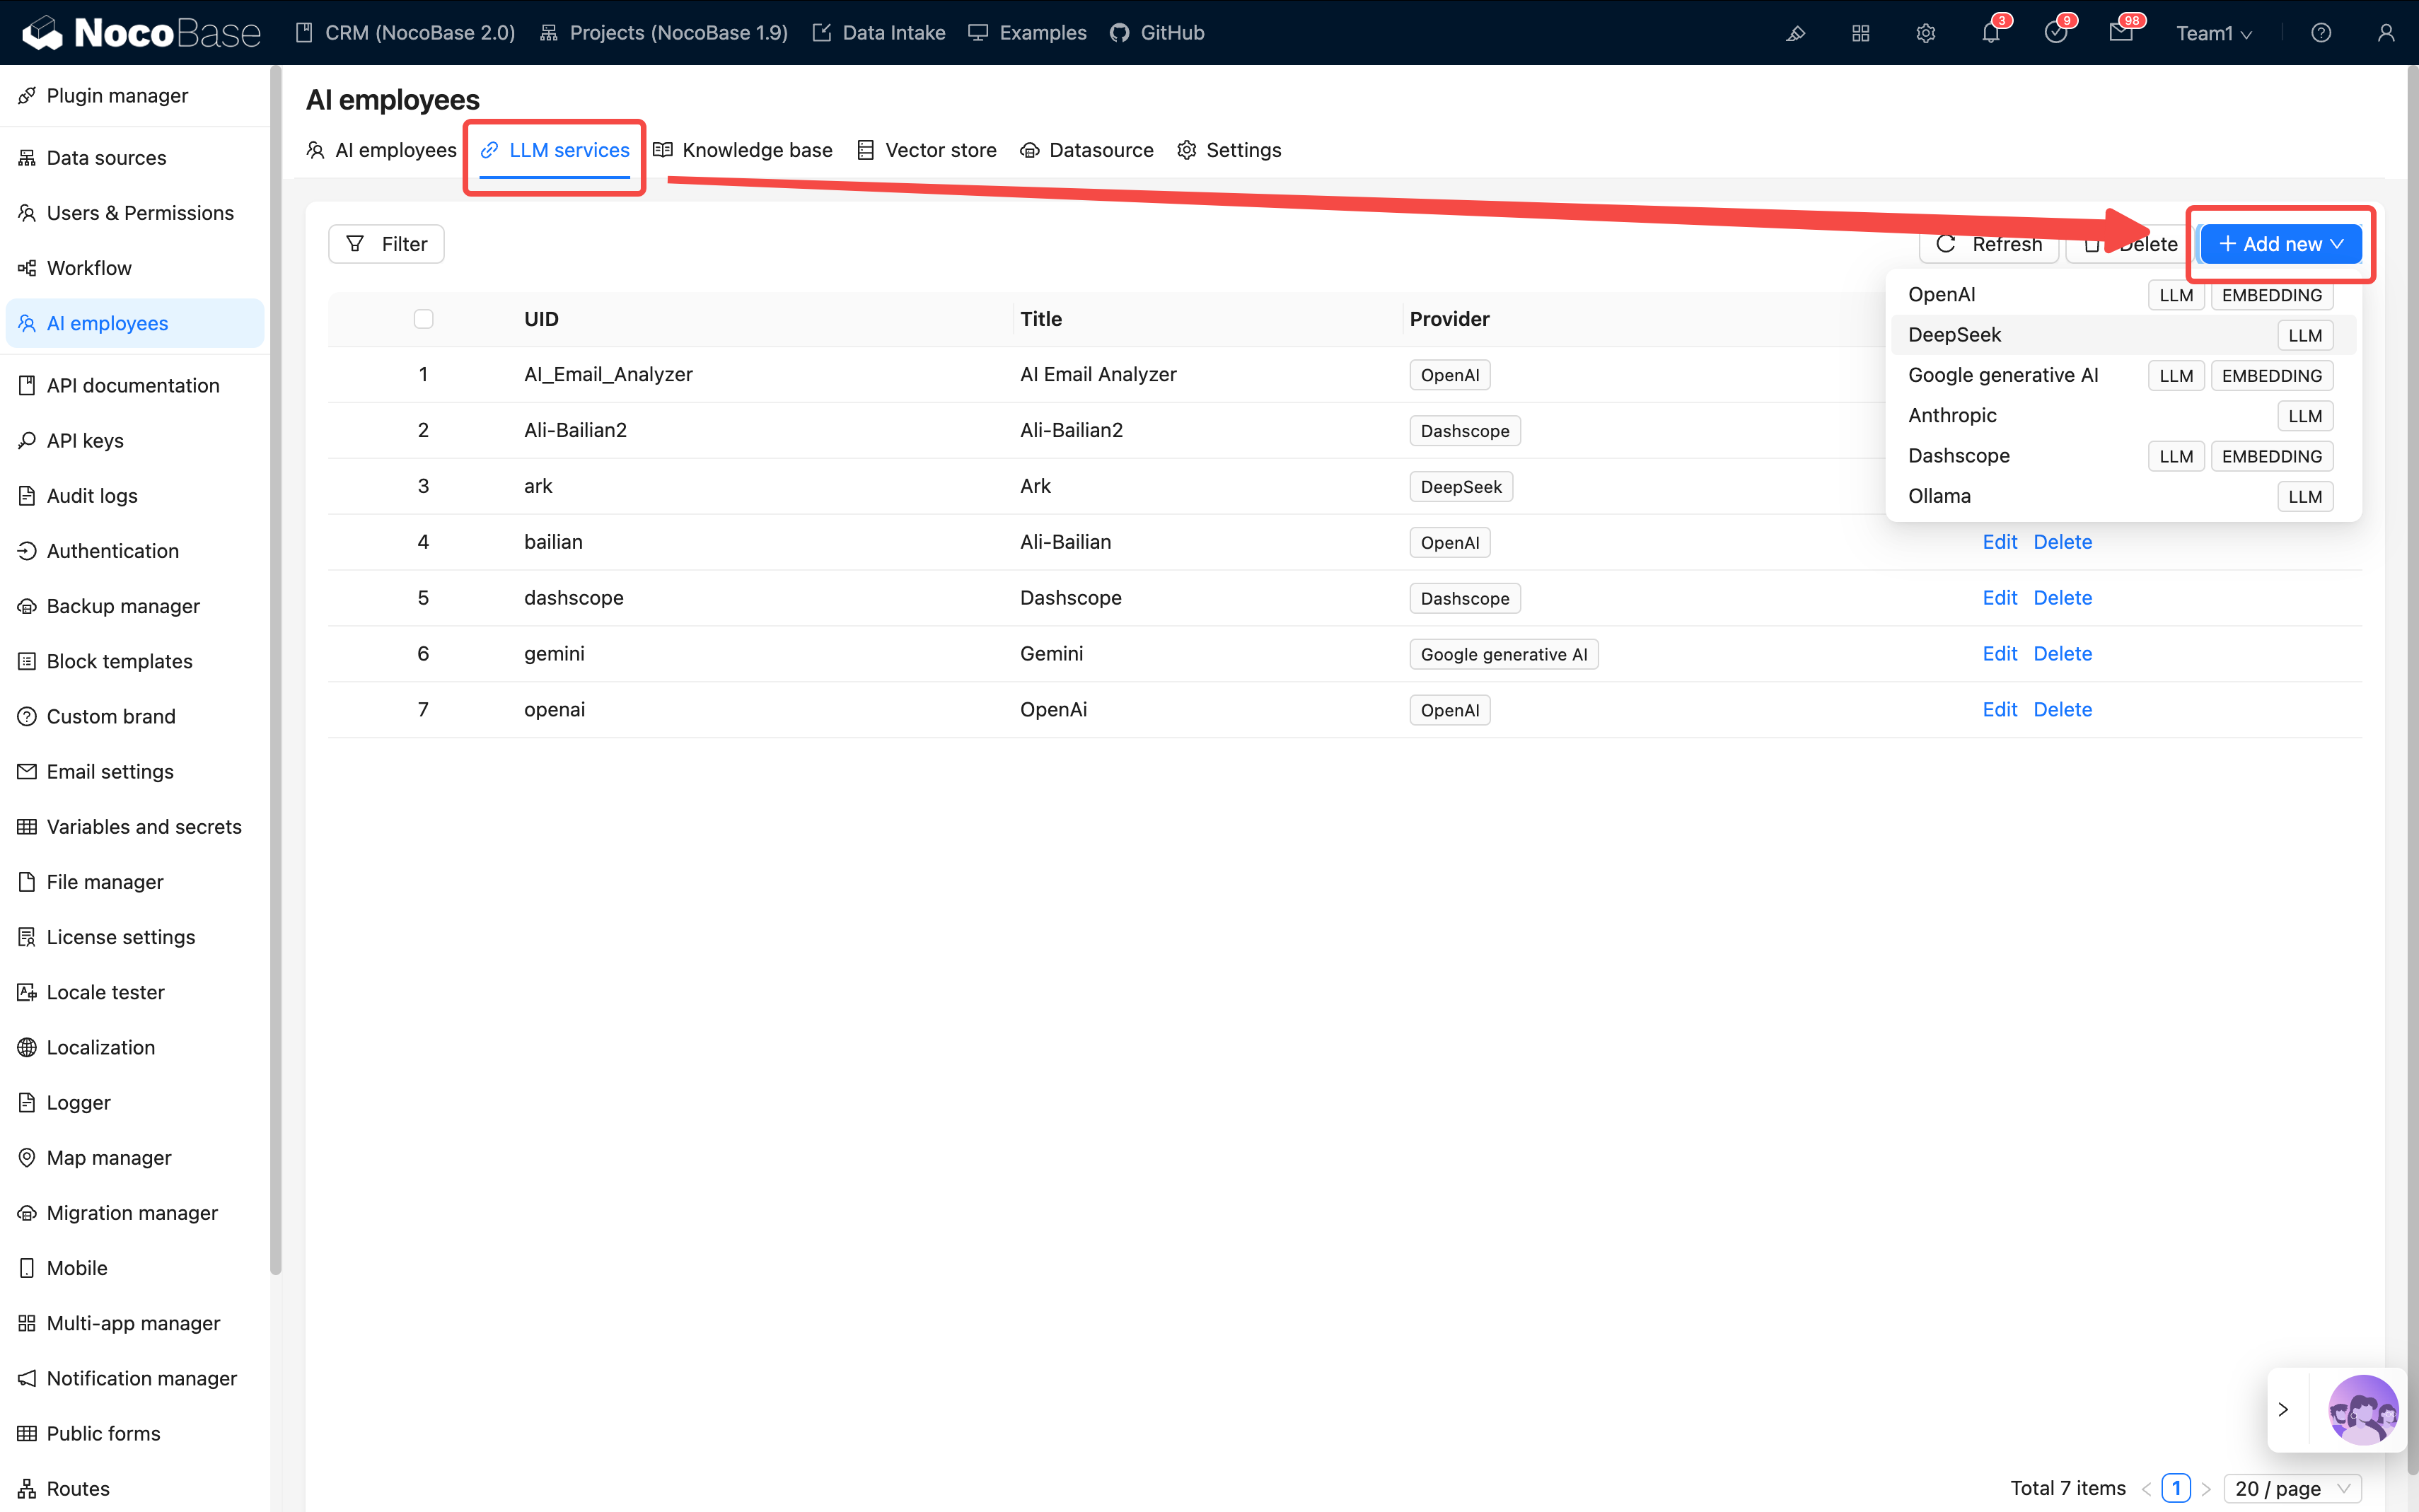
For each service you plan to use:
- Click Edit
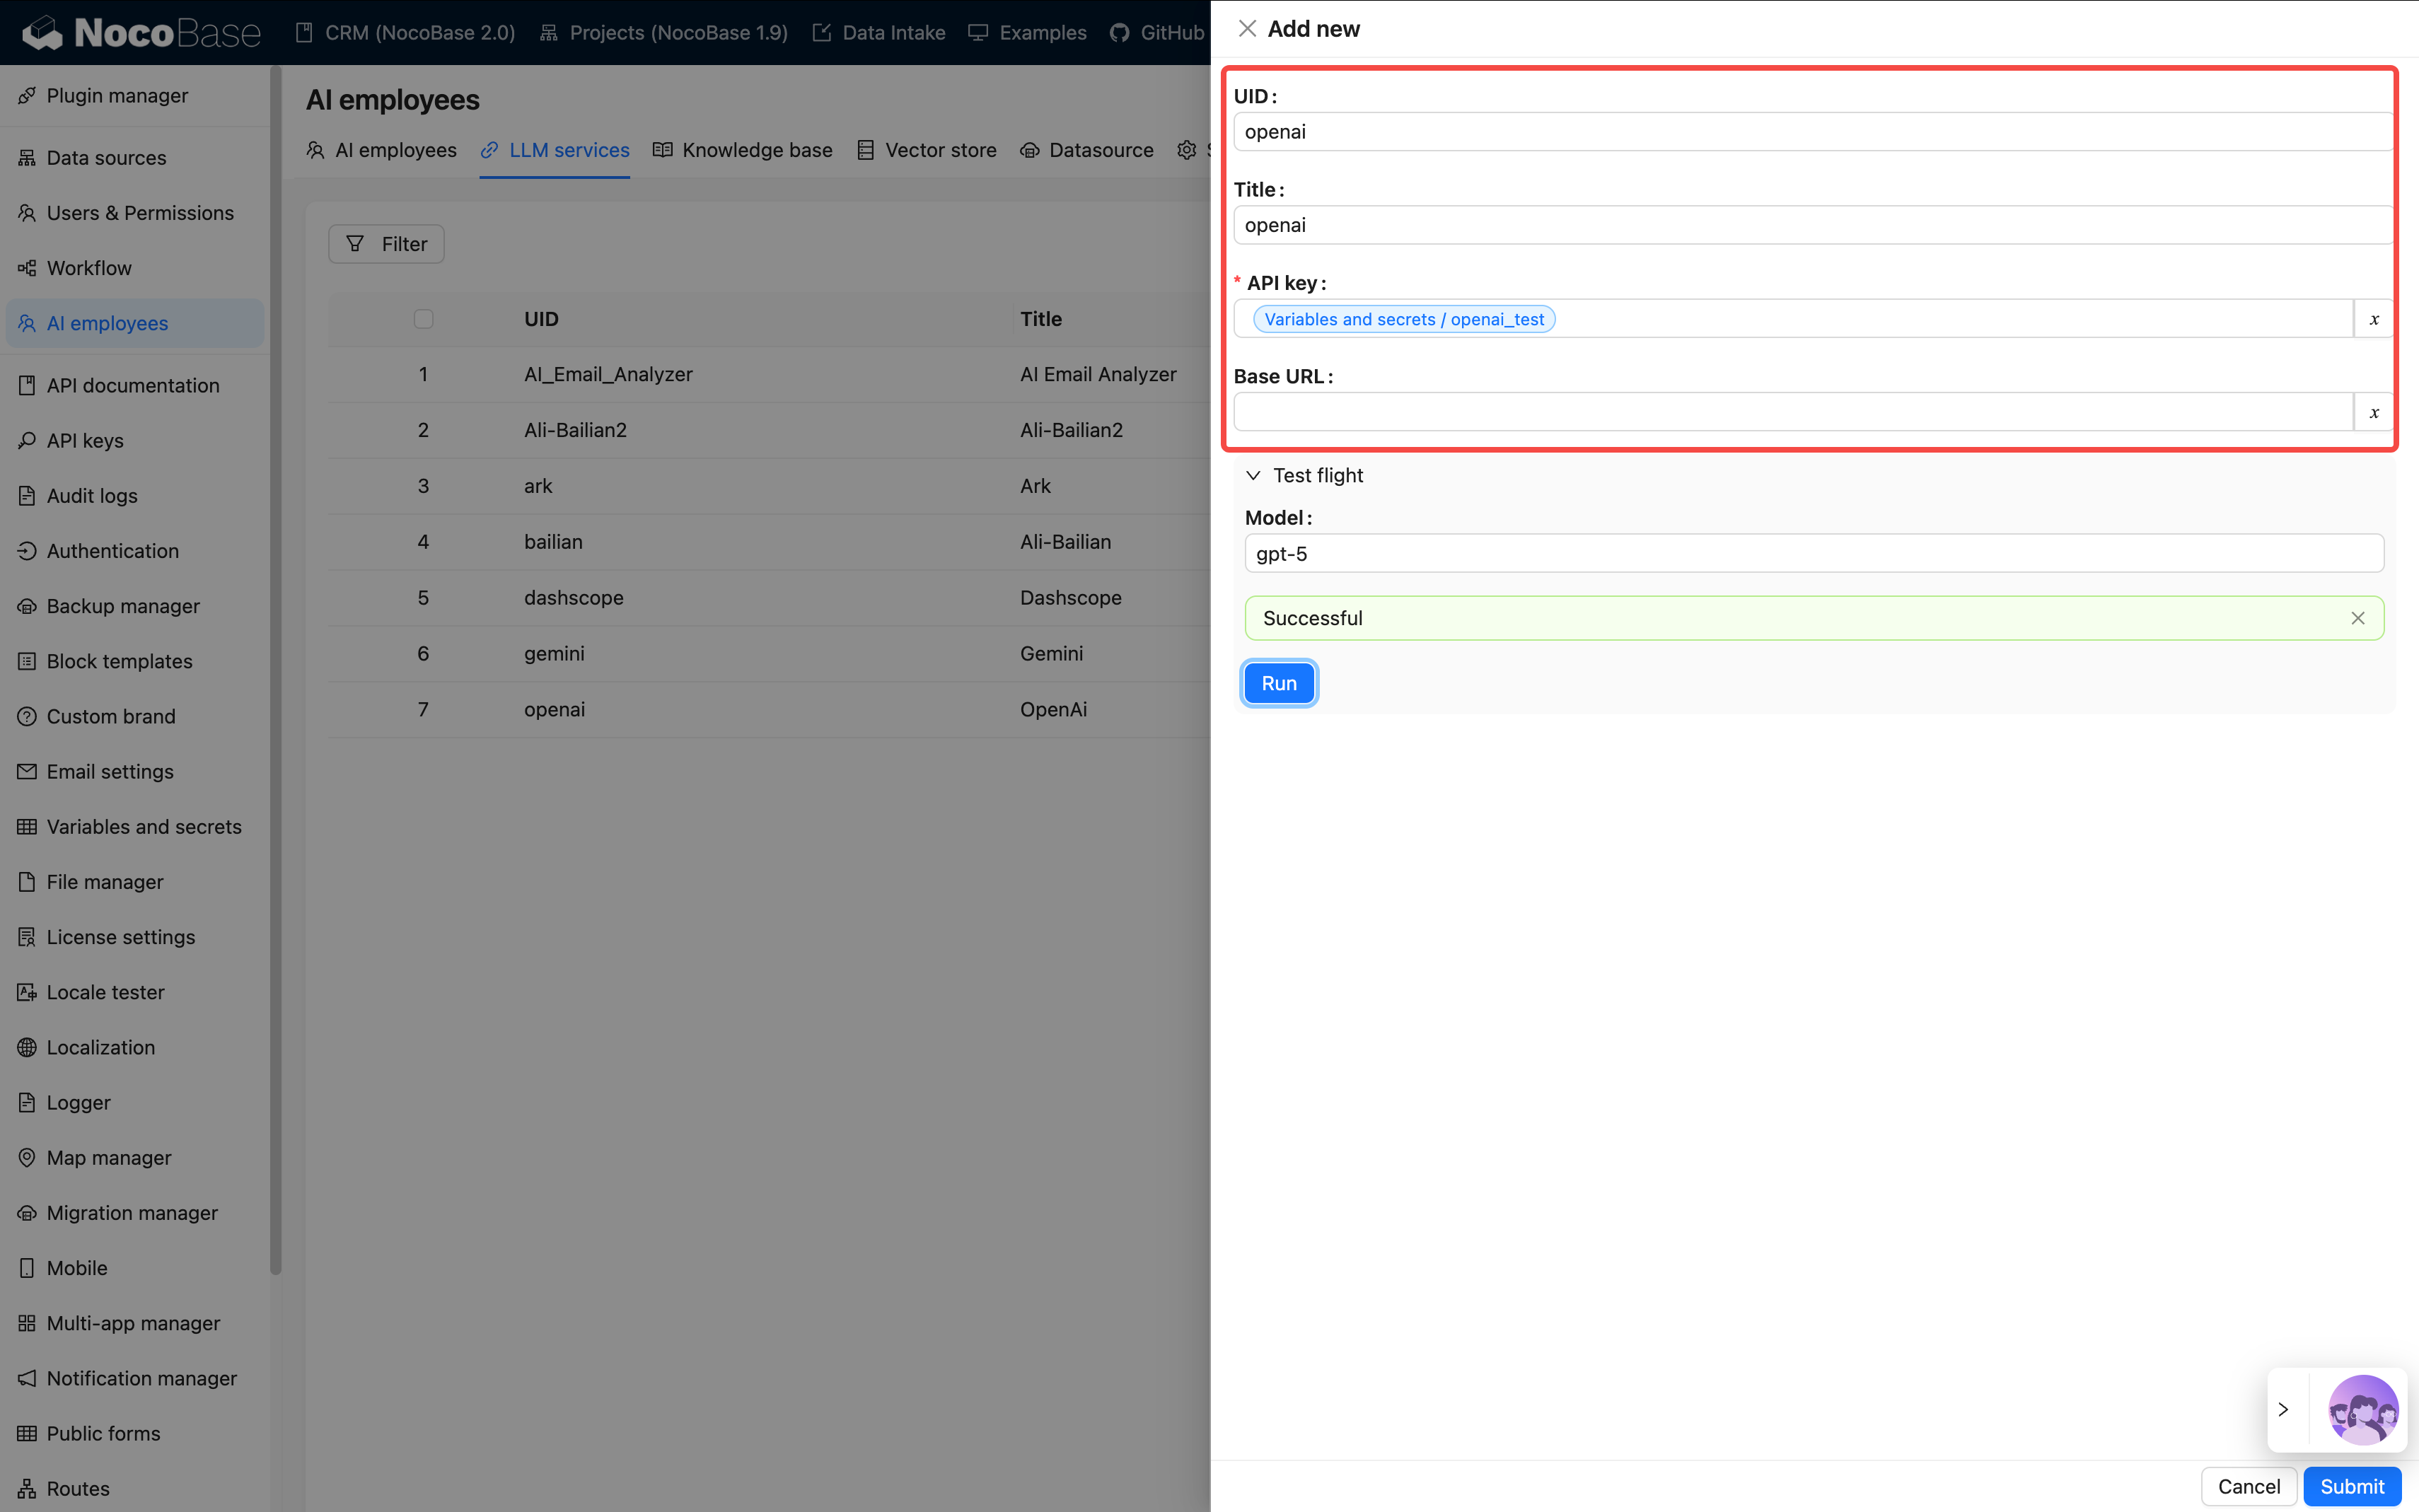
- Replace API Key with your own (from the matching provider account: OpenAI, Anthropic, Google AI Studio, DeepSeek, Qwen, Kimi, etc.)
- Adjust Base URL if you use a proxy or a regional relay
- In Enabled Models, keep the models you need and remove the rest
-
Click Test flight at the bottom to check connectivity, then Submit to save
-
For services you do not plan to use, just toggle Disabled — no need to delete
See Configure LLM service for the full configuration.
These two are the only must-change items after restoring the demo. Other settings (site logo, SMTP, Enterprise plugins, etc.) can be tuned as needed.
FAQ
Will it work on the Community Edition? Any errors?
Yes, it works out of the box with no errors. Backup Manager has been open source since v2.1.0-alpha.40, so the Community Edition can install it. The demo does use some Enterprise plugins (Email Manager, Audit Log, AI Employees, etc.); on the Community Edition, the entry points for those features simply do not appear, but other modules are unaffected. For example, the Audit Log entry disappears, while CRM, Sales, Help Desk, Project, Asset, HR, and other core modules work normally.
Which version should I use after restore?
Use the latest alpha-full image (nocobase/nocobase:alpha-full). The full image bundles the database client and other dependencies, avoiding restore failures caused by missing tools.
The logo does not display after restore?
The logo in the official online demo has a domain restriction and cannot load on a local domain. Open System Settings and upload your own logo.
File upload fails (OSS key error)?
The demo backup's preset storage engine points at our own OSS, and the key is not public. Open Plugin Manager / File Manager, set Local Storage as the default storage, save, and uploads will work again.
See the File storage engine section above for details.
How do I switch languages?
The All-in-One solution ships with localization for 20+ languages (under the nb_demo namespace). After restore, the default language is Chinese; switch via System Settings / enable the target language.
What about incremental upgrades?
Today the upgrade path is a full replacement, which means custom changes are overwritten. Always back up before upgrading. An incremental migration plan is in the works.