

Opportunities & Quotations
Opportunities are the core of the entire sales process — each one represents a potential deal. In this chapter, you will learn how to advance opportunities through stages using the Kanban board, create quotations, complete the approval workflow, and ultimately convert an approved quotation into a formal order.

Opportunity Page Overview
Navigate to Sales → Opportunities from the left sidebar. At the top of the page you will see two tabs:
- Pipeline Kanban: Displays all opportunities by stage in a Kanban layout — ideal for daily follow-ups and quick stage progression.
- Table View: Lists opportunities in a tabular format — ideal for bulk filtering and data export.
The Pipeline Kanban opens by default — it is the view sales reps use most often.
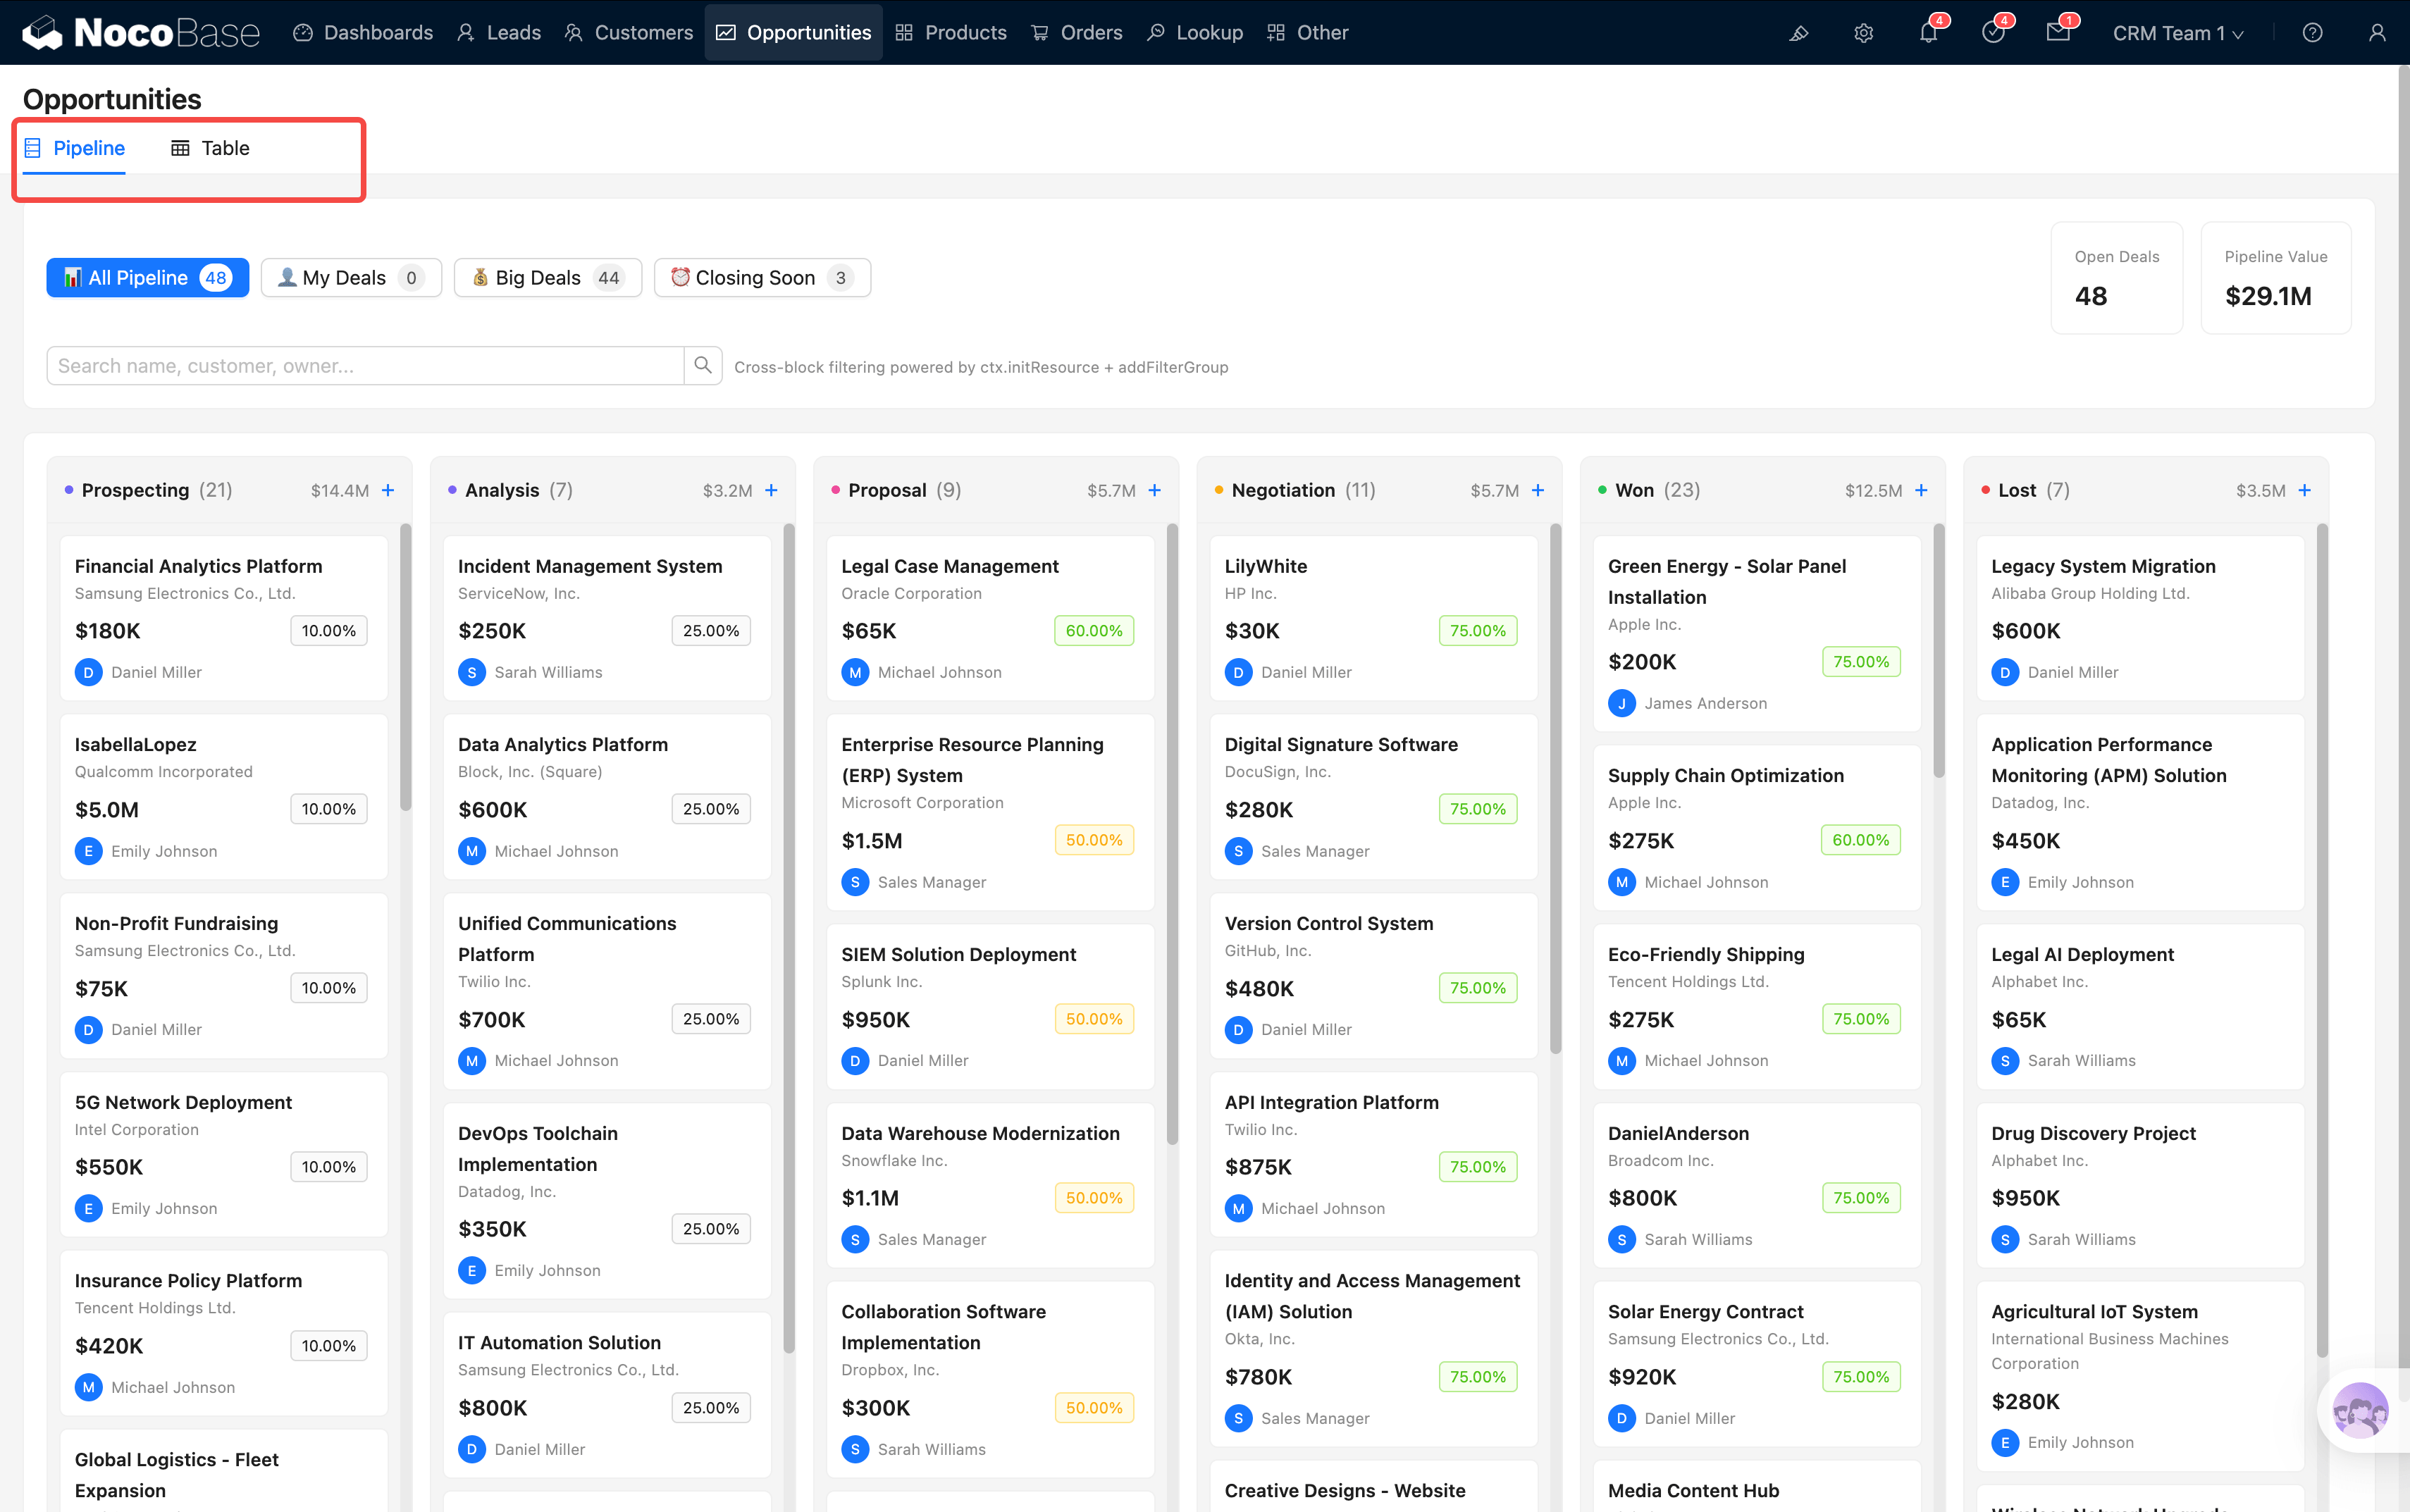
Pipeline Kanban
Filter Bar
A row of filter buttons sits at the top of the Kanban board, helping you quickly focus on different subsets of opportunities:
The filter bar also includes 2 stat cards — Open Deals (number of active opportunities) and Pipeline Value (total pipeline amount) — as well as a live search box where you can type an opportunity name, customer name, or owner to locate records instantly.
These filter buttons leverage NocoBase's cross-block linkage capability (initResource + addFilterGroup) to filter the Kanban data in real time without a page refresh.
Kanban Columns
The Kanban board is divided into 6 columns, one for each opportunity stage:
Each column header displays: the stage name, the number of opportunities in that stage, the total amount, and a "+" quick-add button.
Each card shows the following information:
- Opportunity Name: e.g., "Acme Corp ERP Project"
- Customer Name: the associated company
- Expected Amount: e.g., $50K
- Win Rate: shown as a color-coded tag (green = high probability, yellow = medium, red = low)
- Owner Avatar: who is working on this opportunity
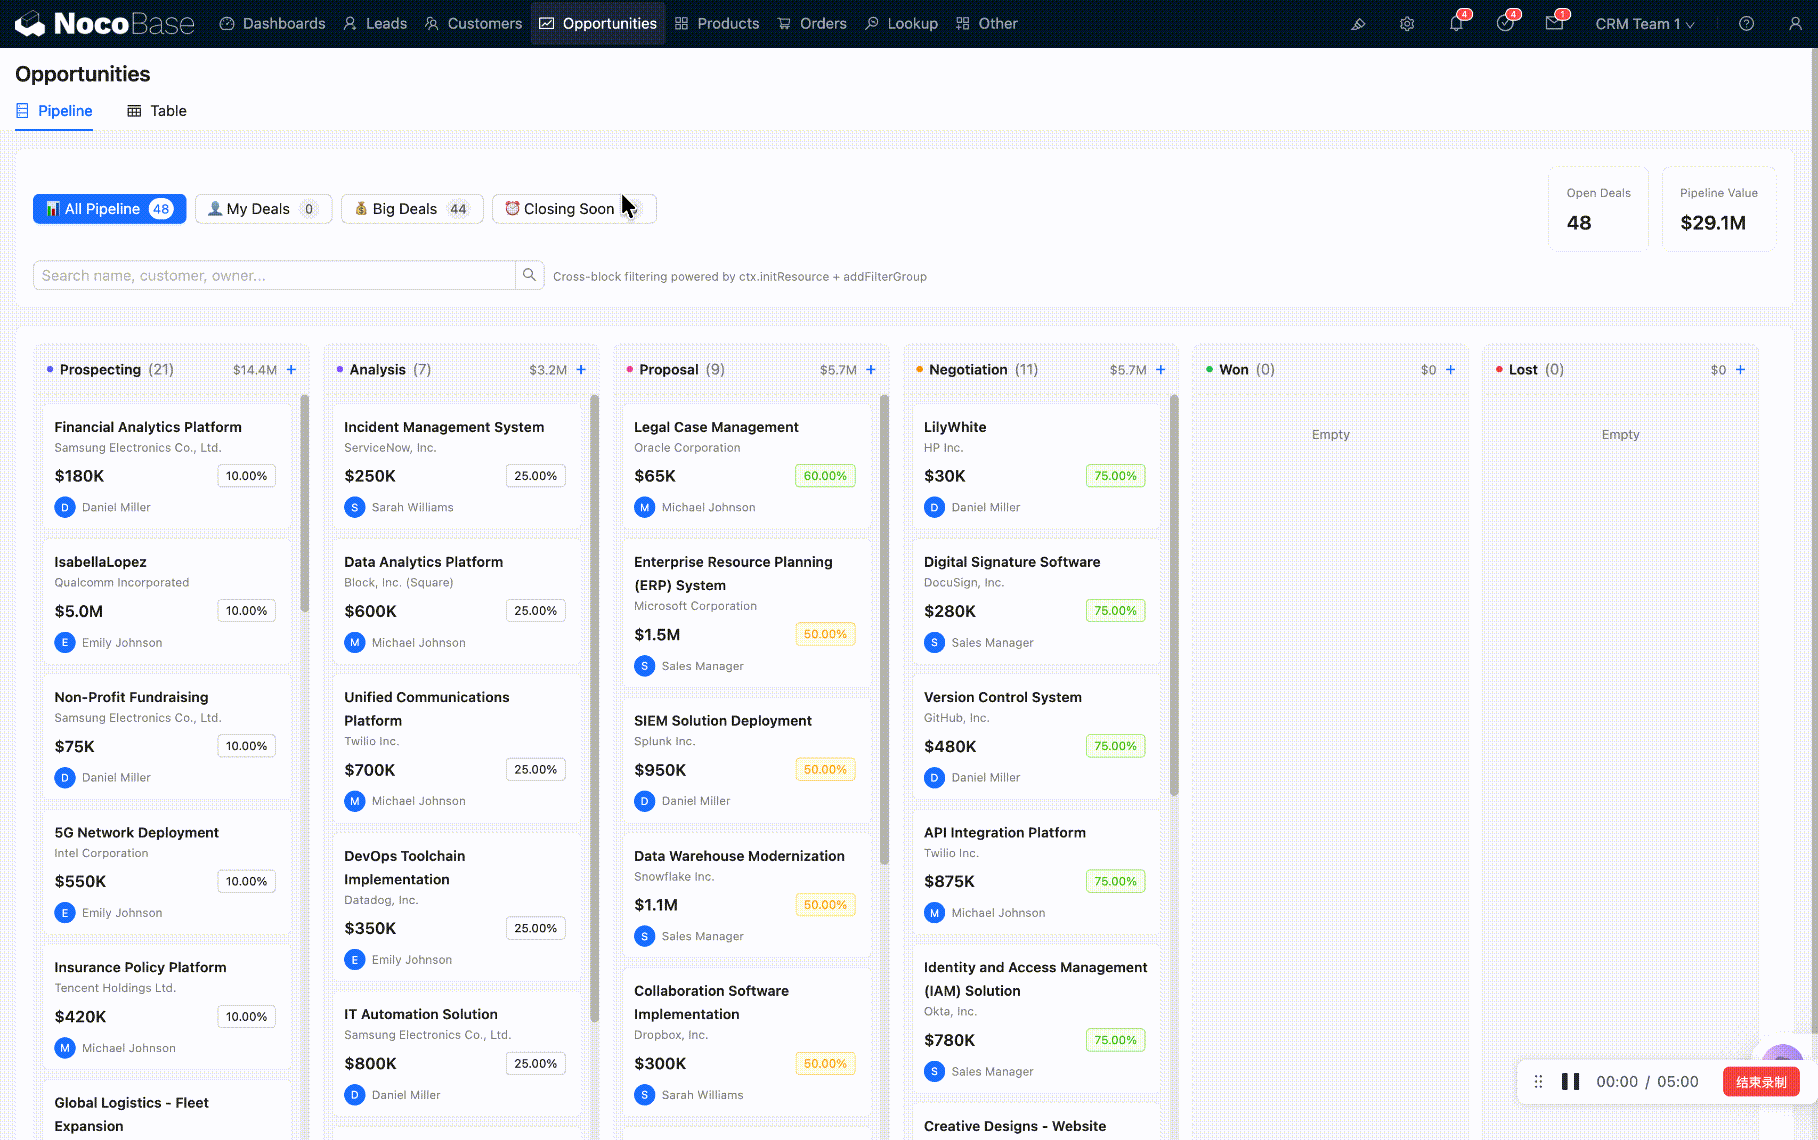
Drag-and-Drop Stage Progression
The most intuitive way to advance an opportunity: drag a card from one column to another. The system automatically updates the opportunity's stage.
For example, once you have completed the needs analysis and are ready to submit a proposal, simply drag the card from Analysis to Proposal.
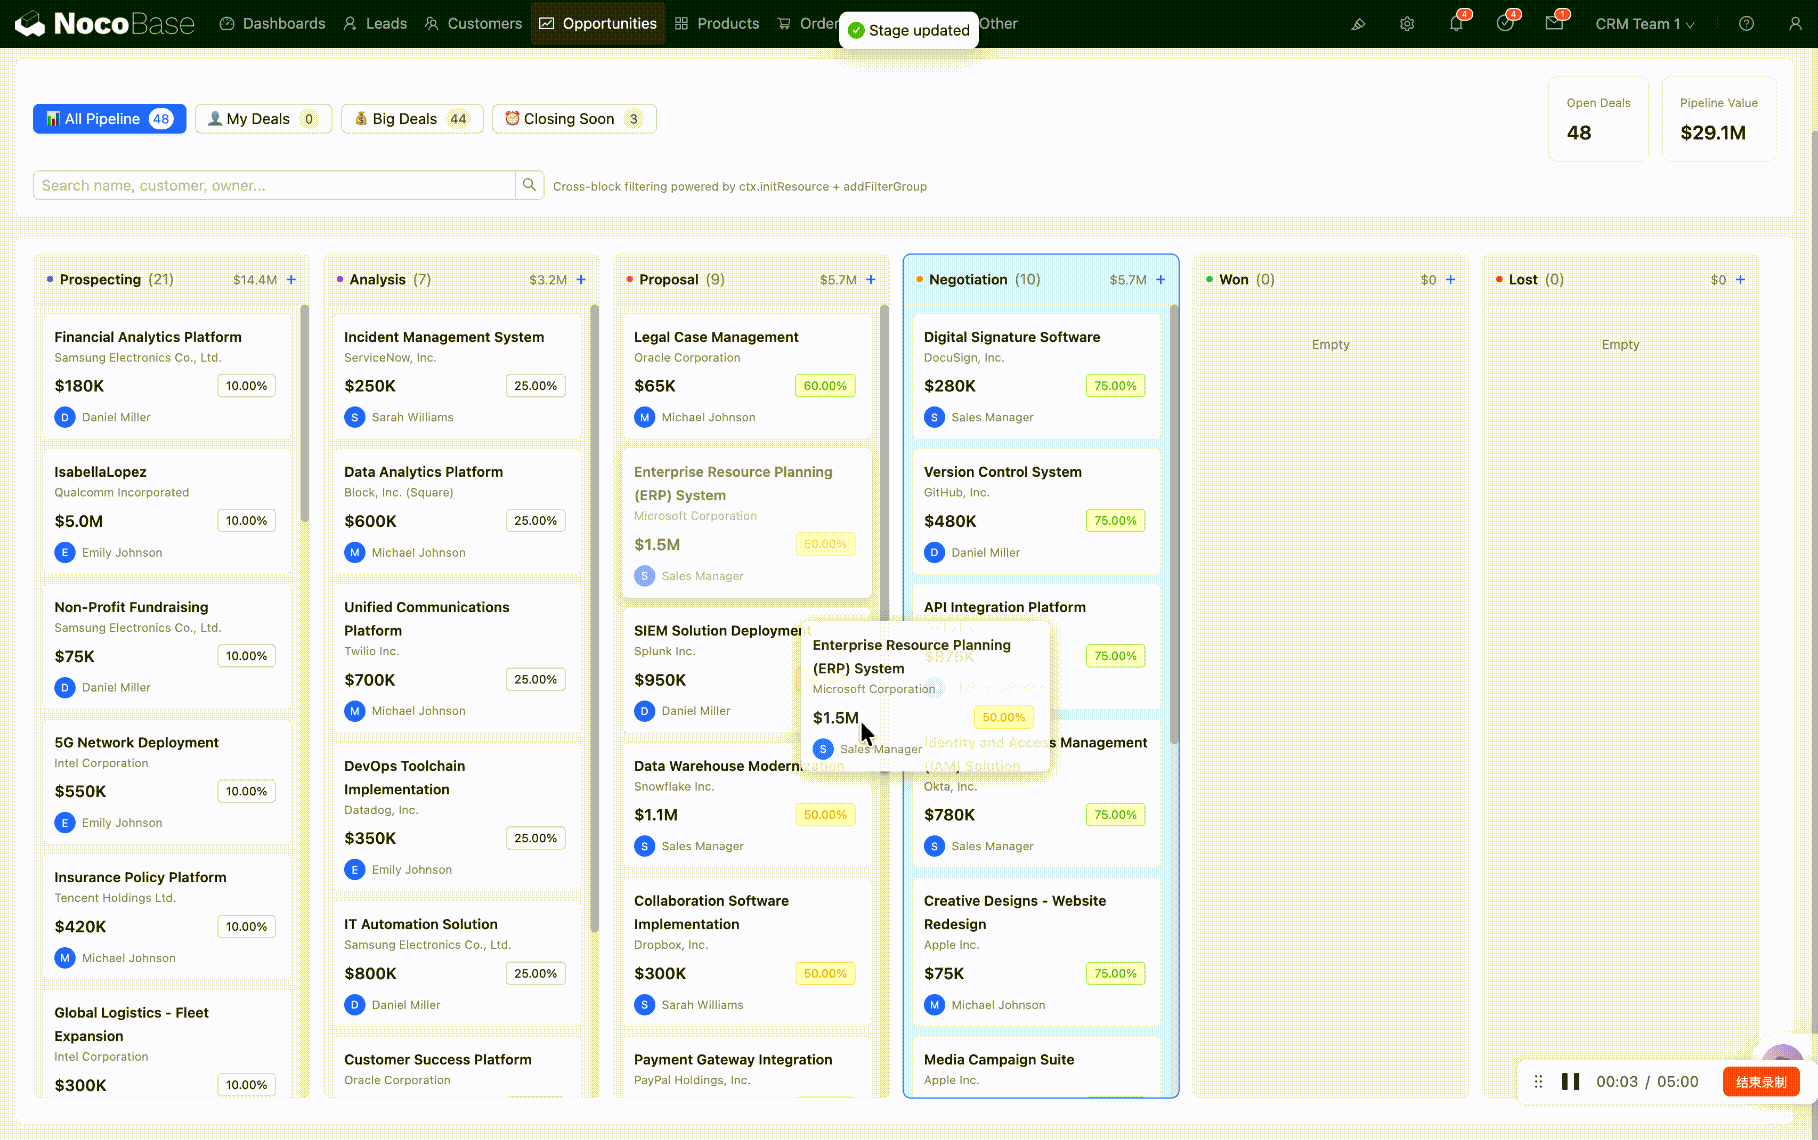
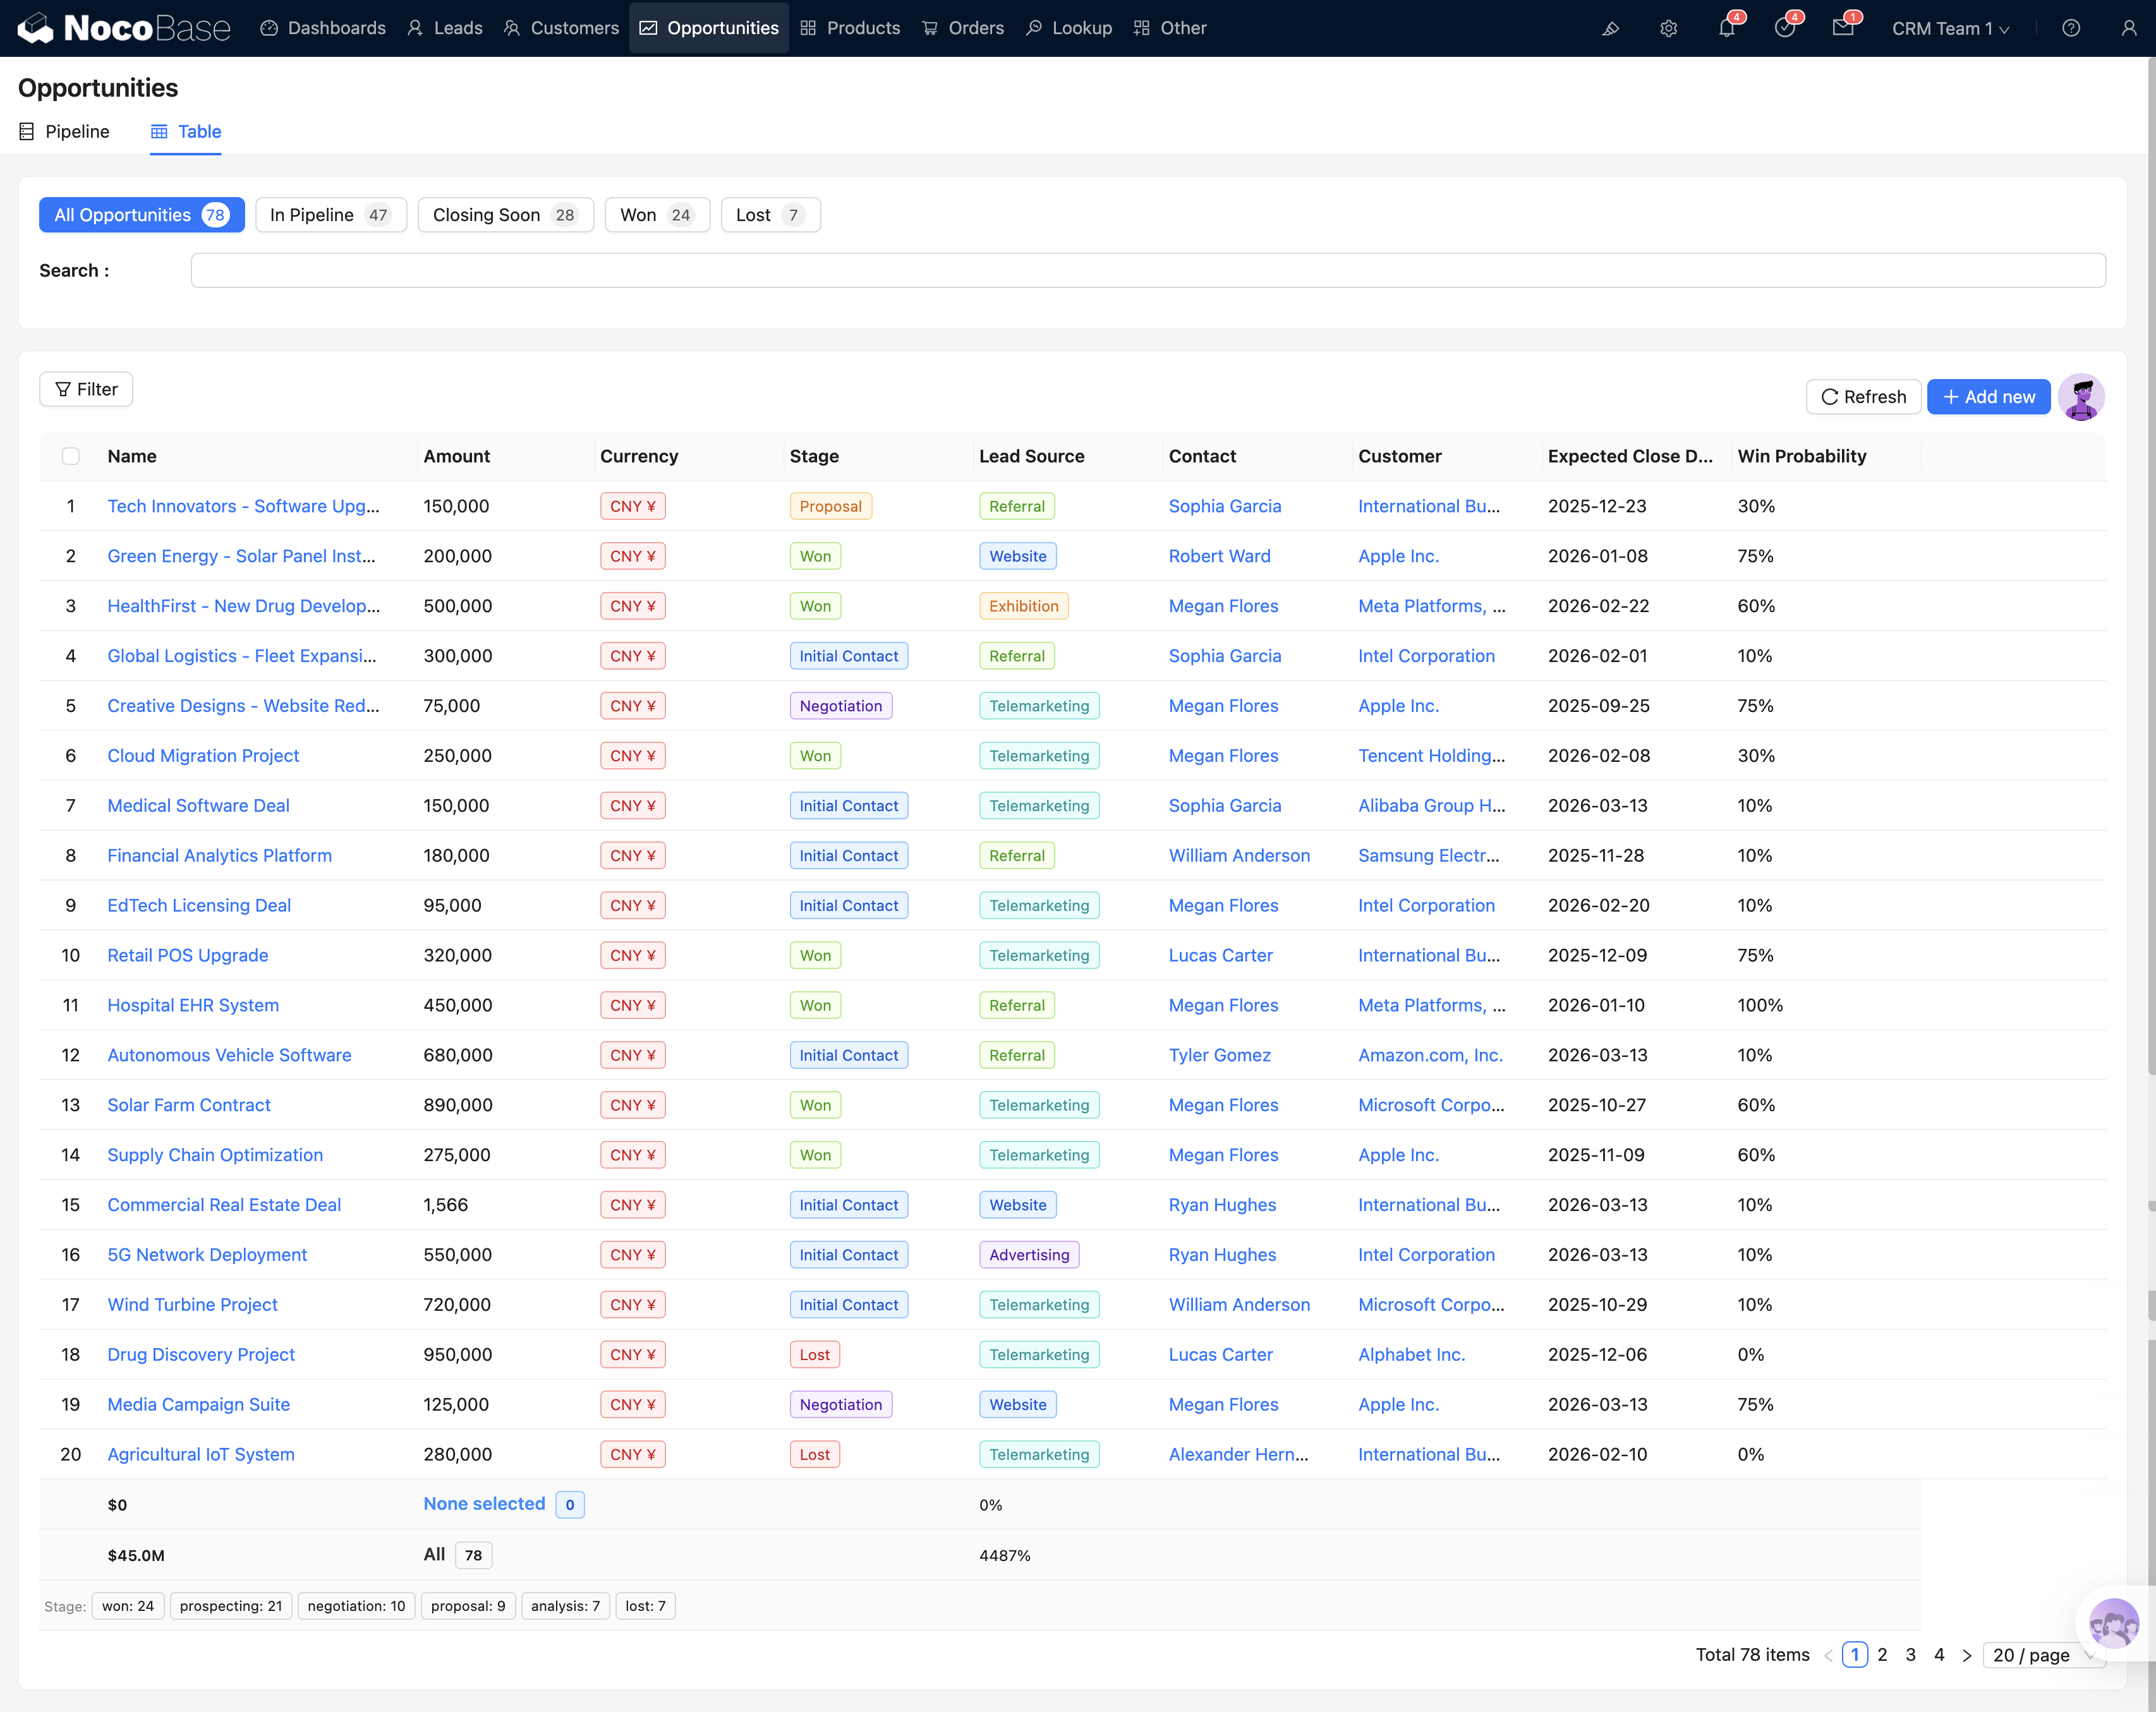
Table View
Switch to the Table View tab to see a standard data table.
Filter Buttons
A set of filter buttons appears above the table as well:
- All: All opportunities
- In Pipeline: Active opportunities (excluding Won and Lost)
- Closing Soon: Approaching their expected close date
- Won: Closed-won opportunities
- Lost: Lost opportunities
Each button includes a count badge so you can see the distribution across statuses at a glance.
A summary row at the bottom of the table shows the total amount for selected/all opportunities, along with stage distribution tags for a quick overview.
Viewing Details
Click any row in the table to open the opportunity detail popup — this is the main interface for managing an individual opportunity.
Opportunity Details
The opportunity detail popup is the most information-dense interface. From top to bottom, it contains the following sections:
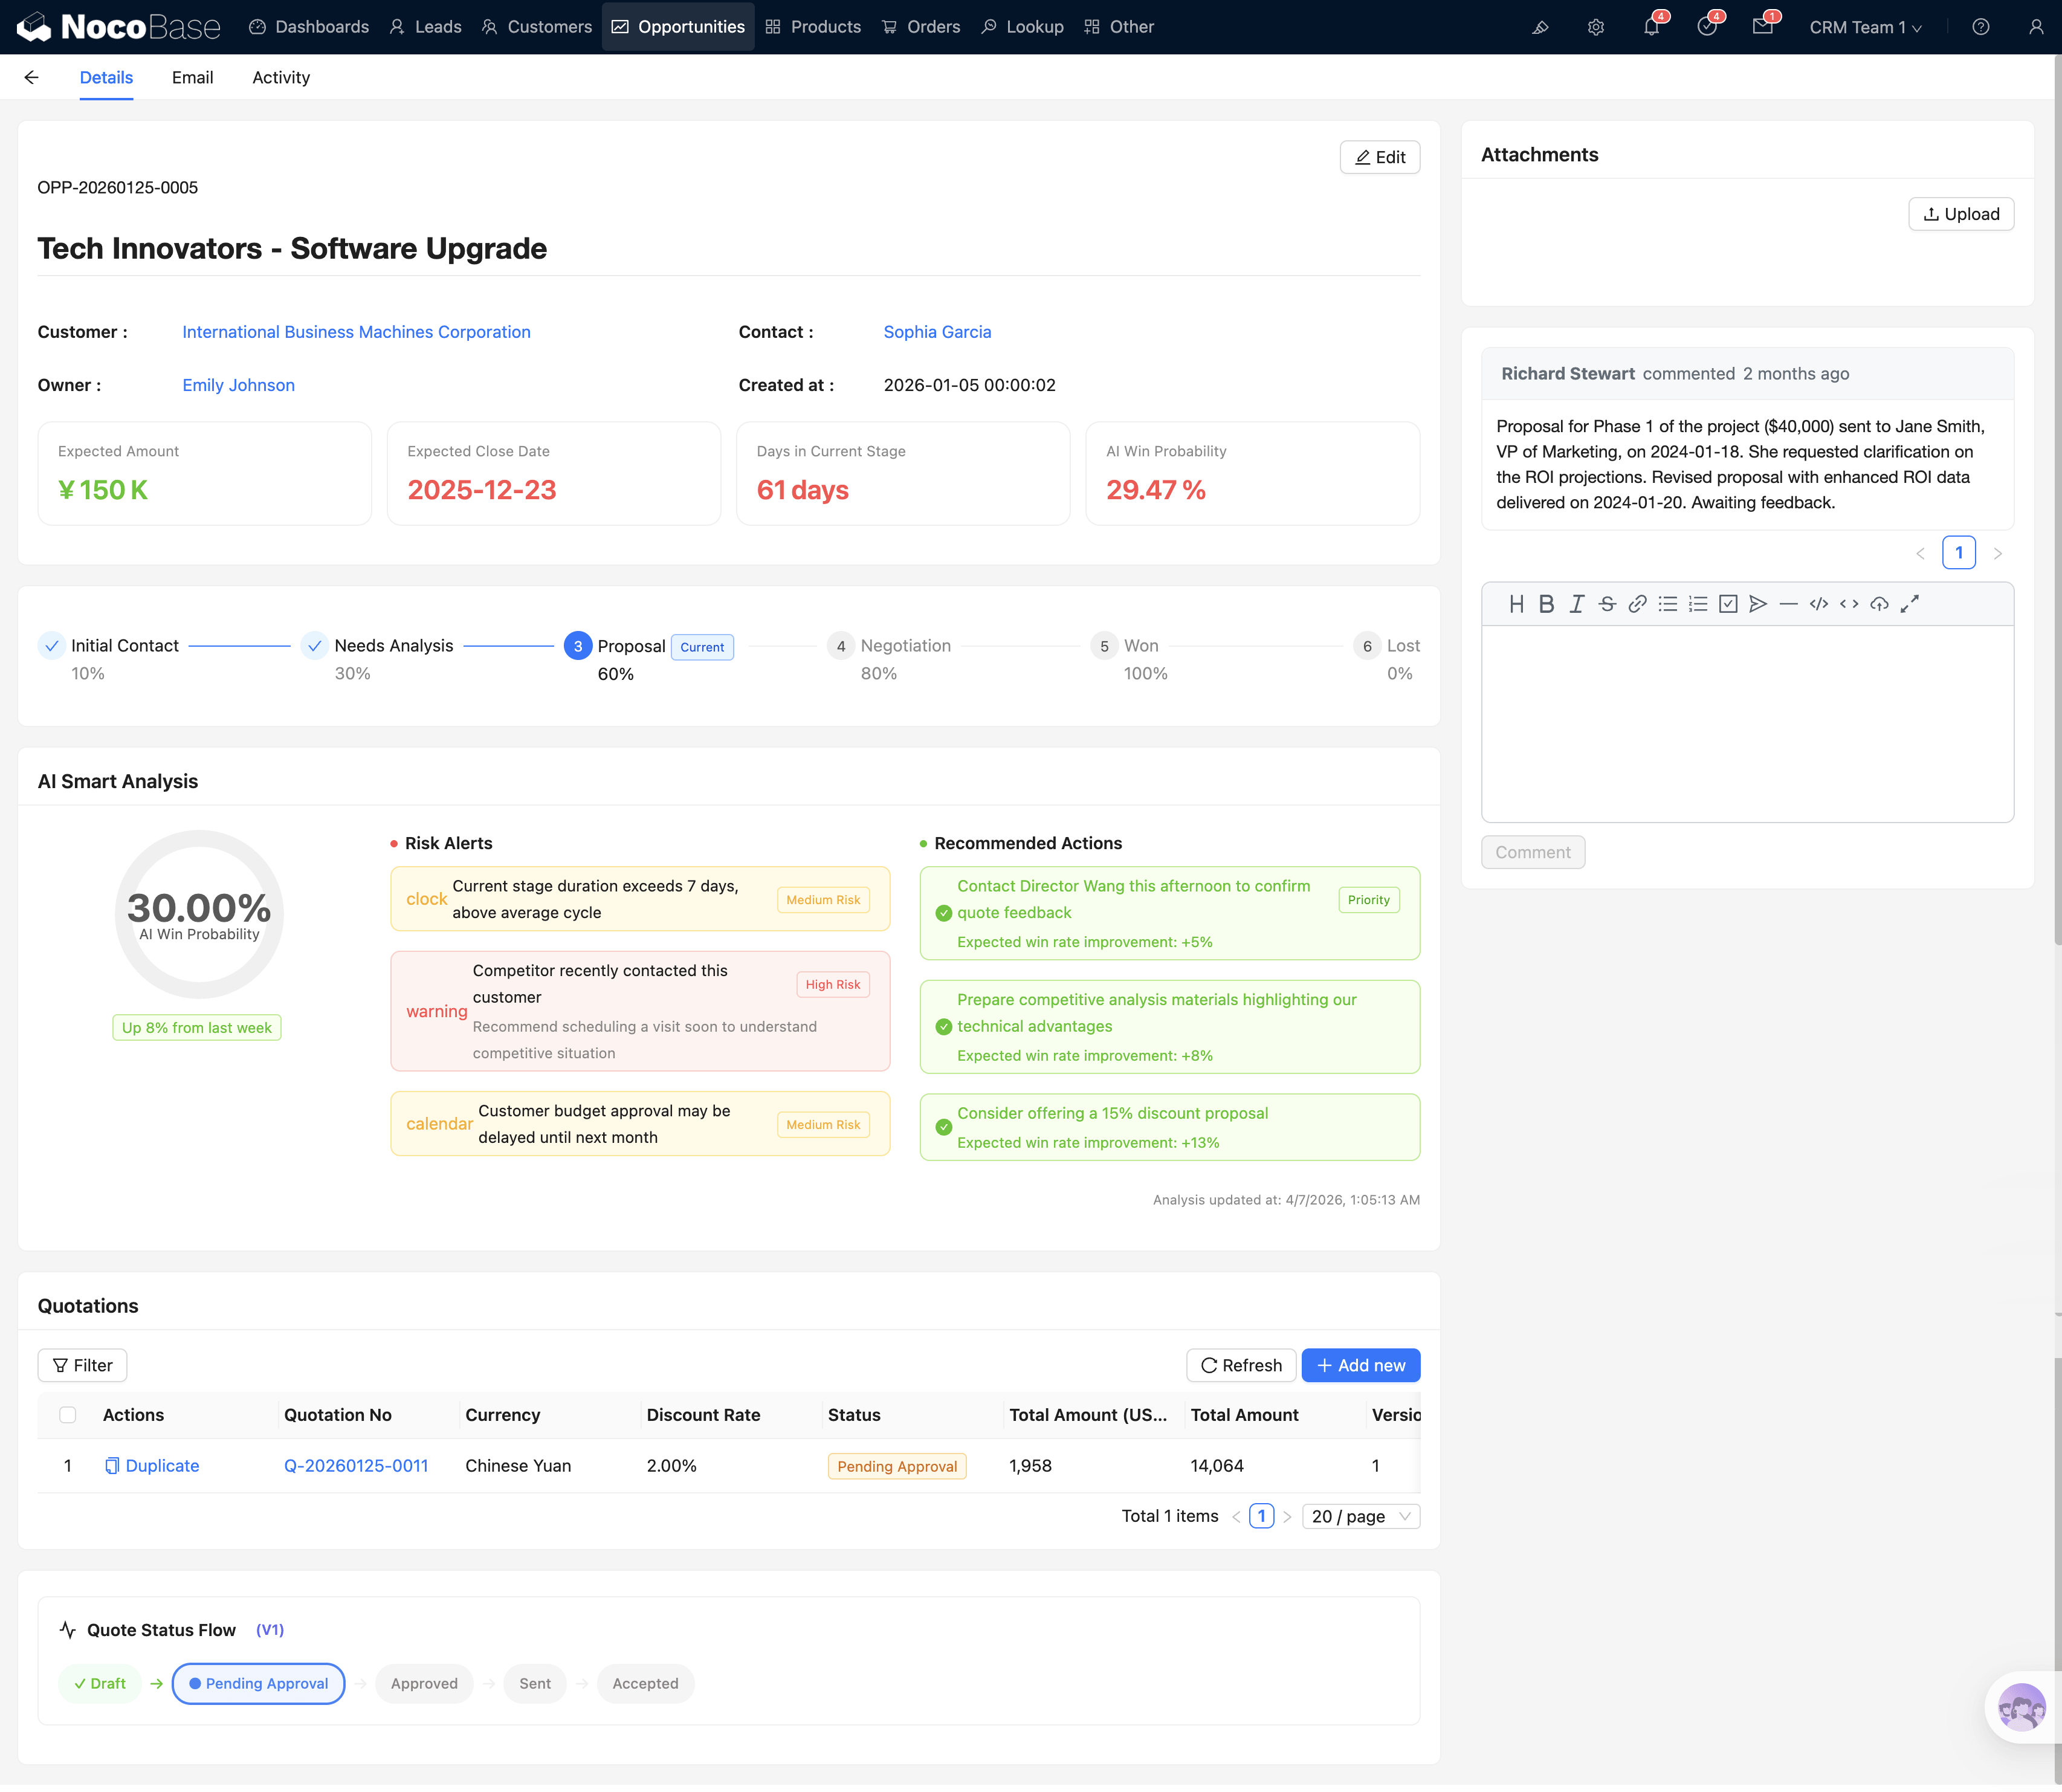
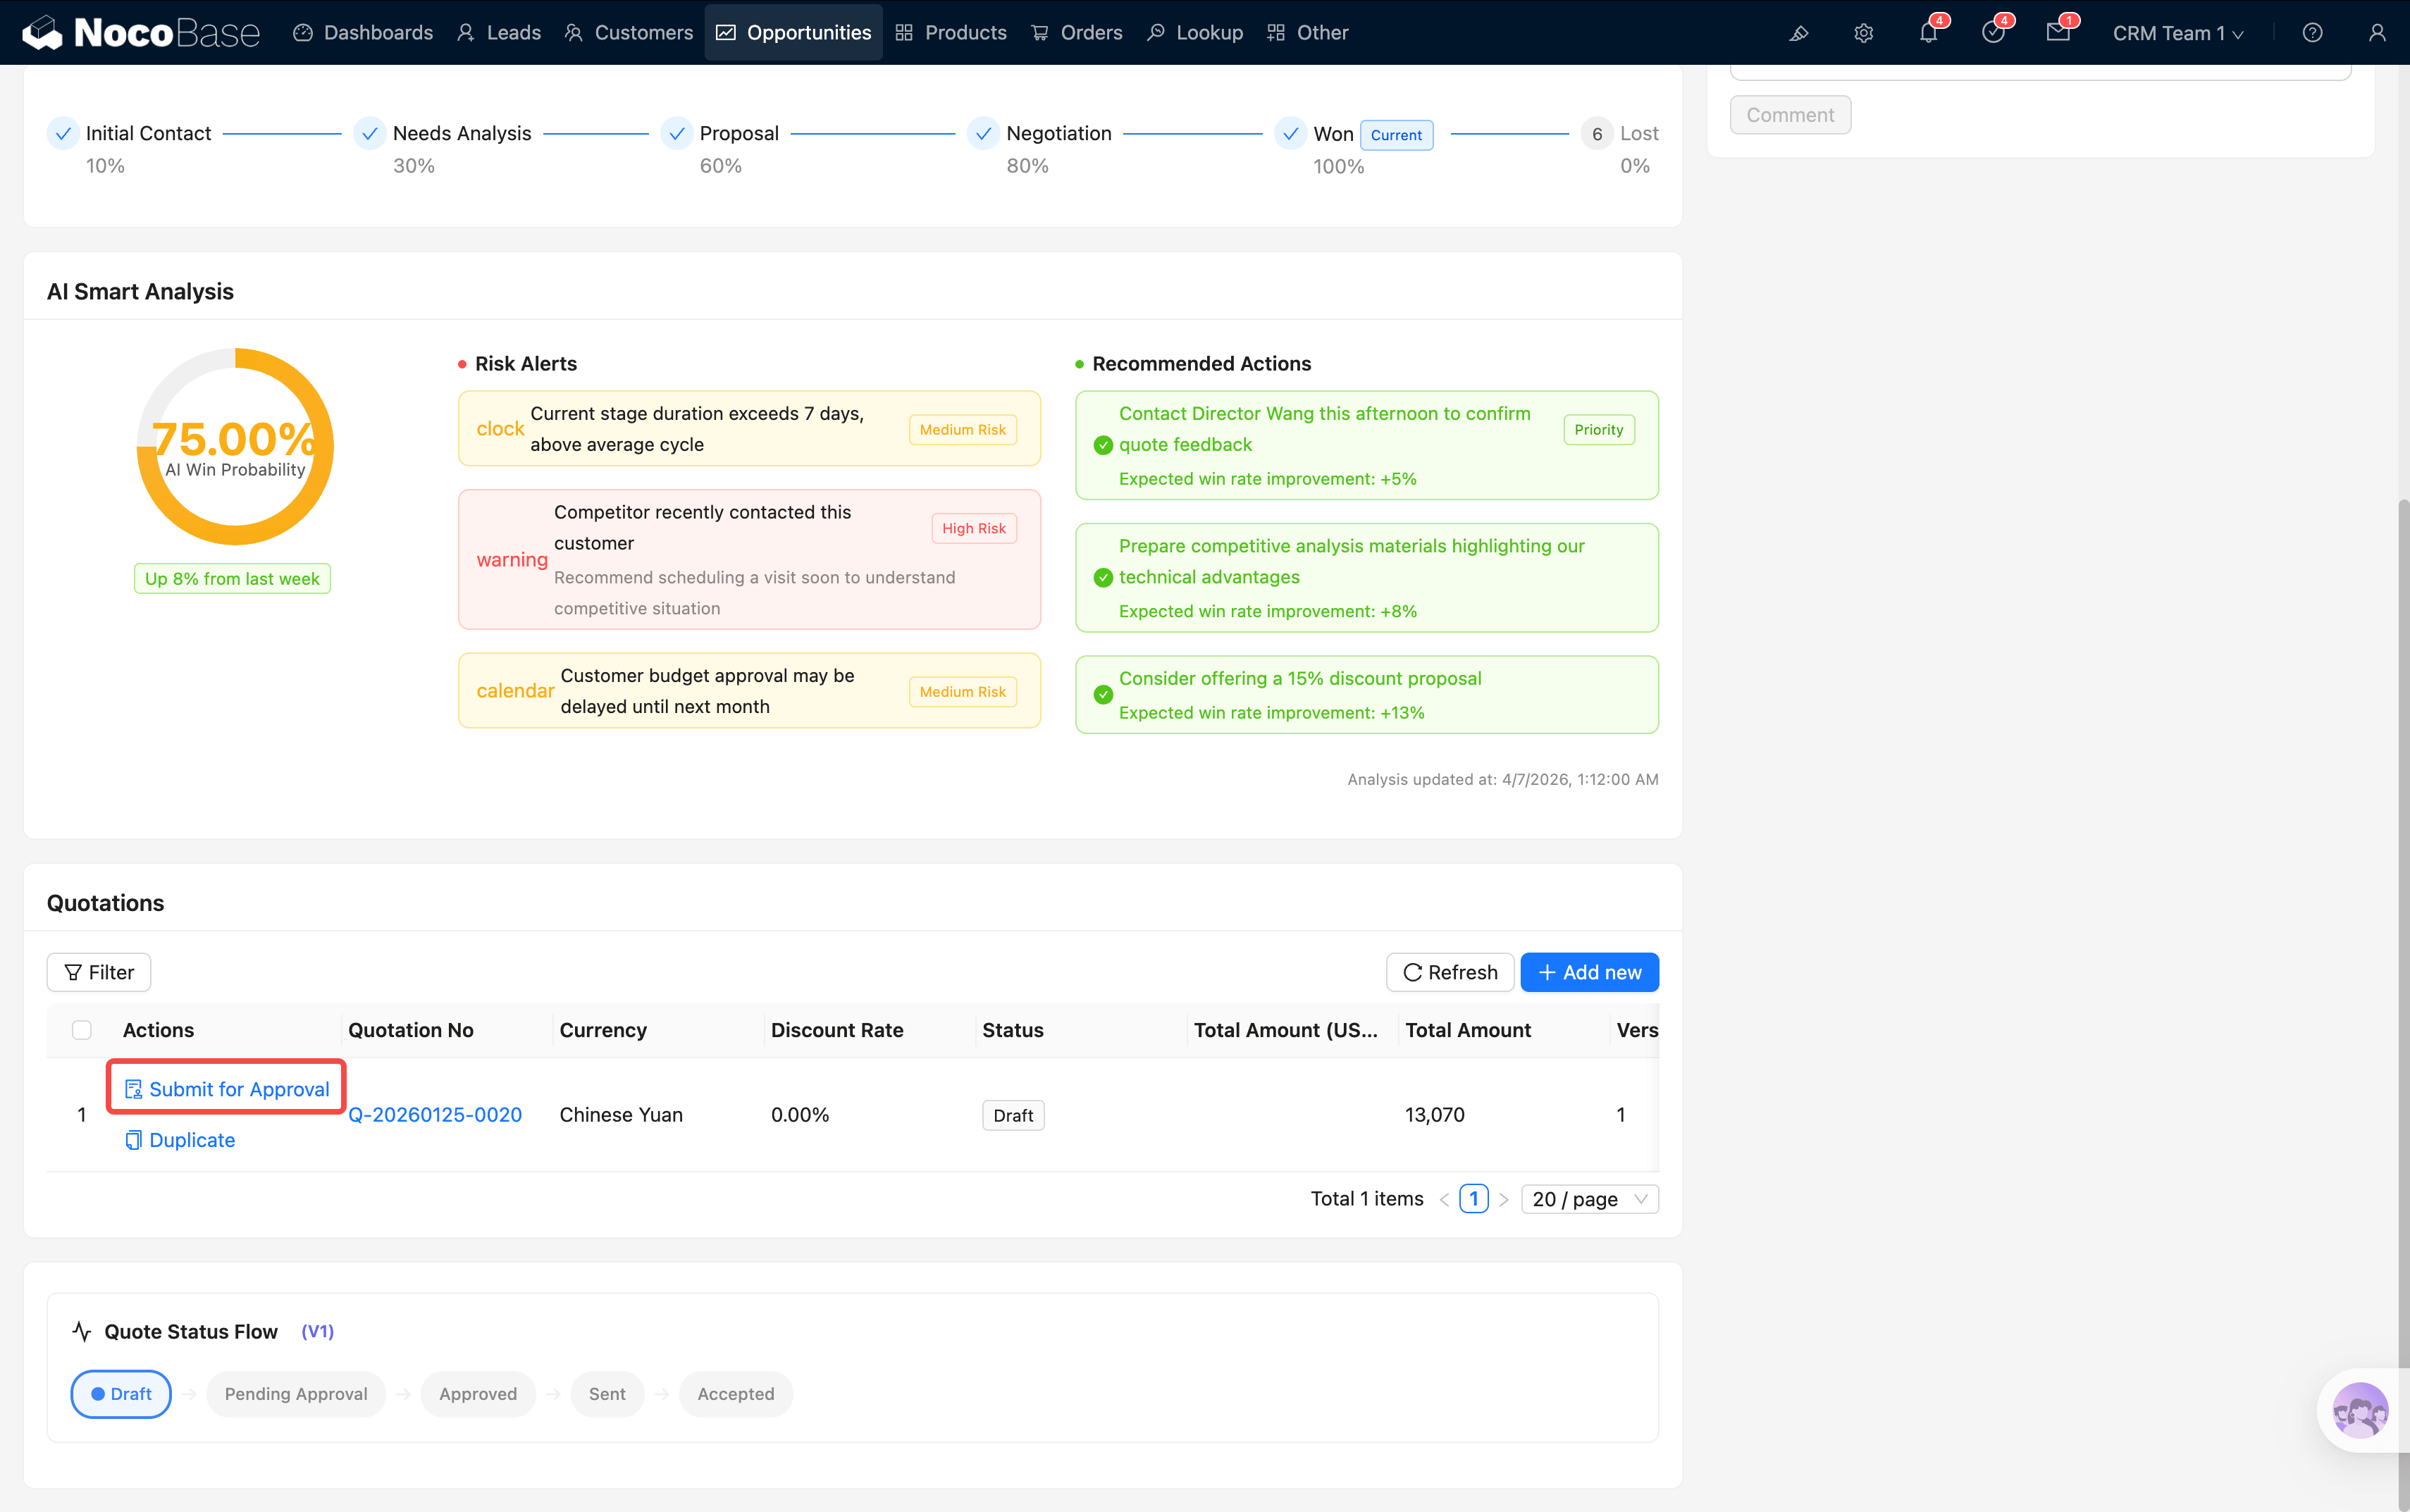
Stage Progress Bar
At the top of the detail view is an interactive stage bar (Steps component) that clearly shows the current stage of the opportunity.
You can click directly on any stage in the bar to advance the opportunity. When you click Won or Lost, the system displays a confirmation dialog because these are terminal states that cannot be easily reversed.

Key Metrics
Below the stage bar, four core metrics are displayed:
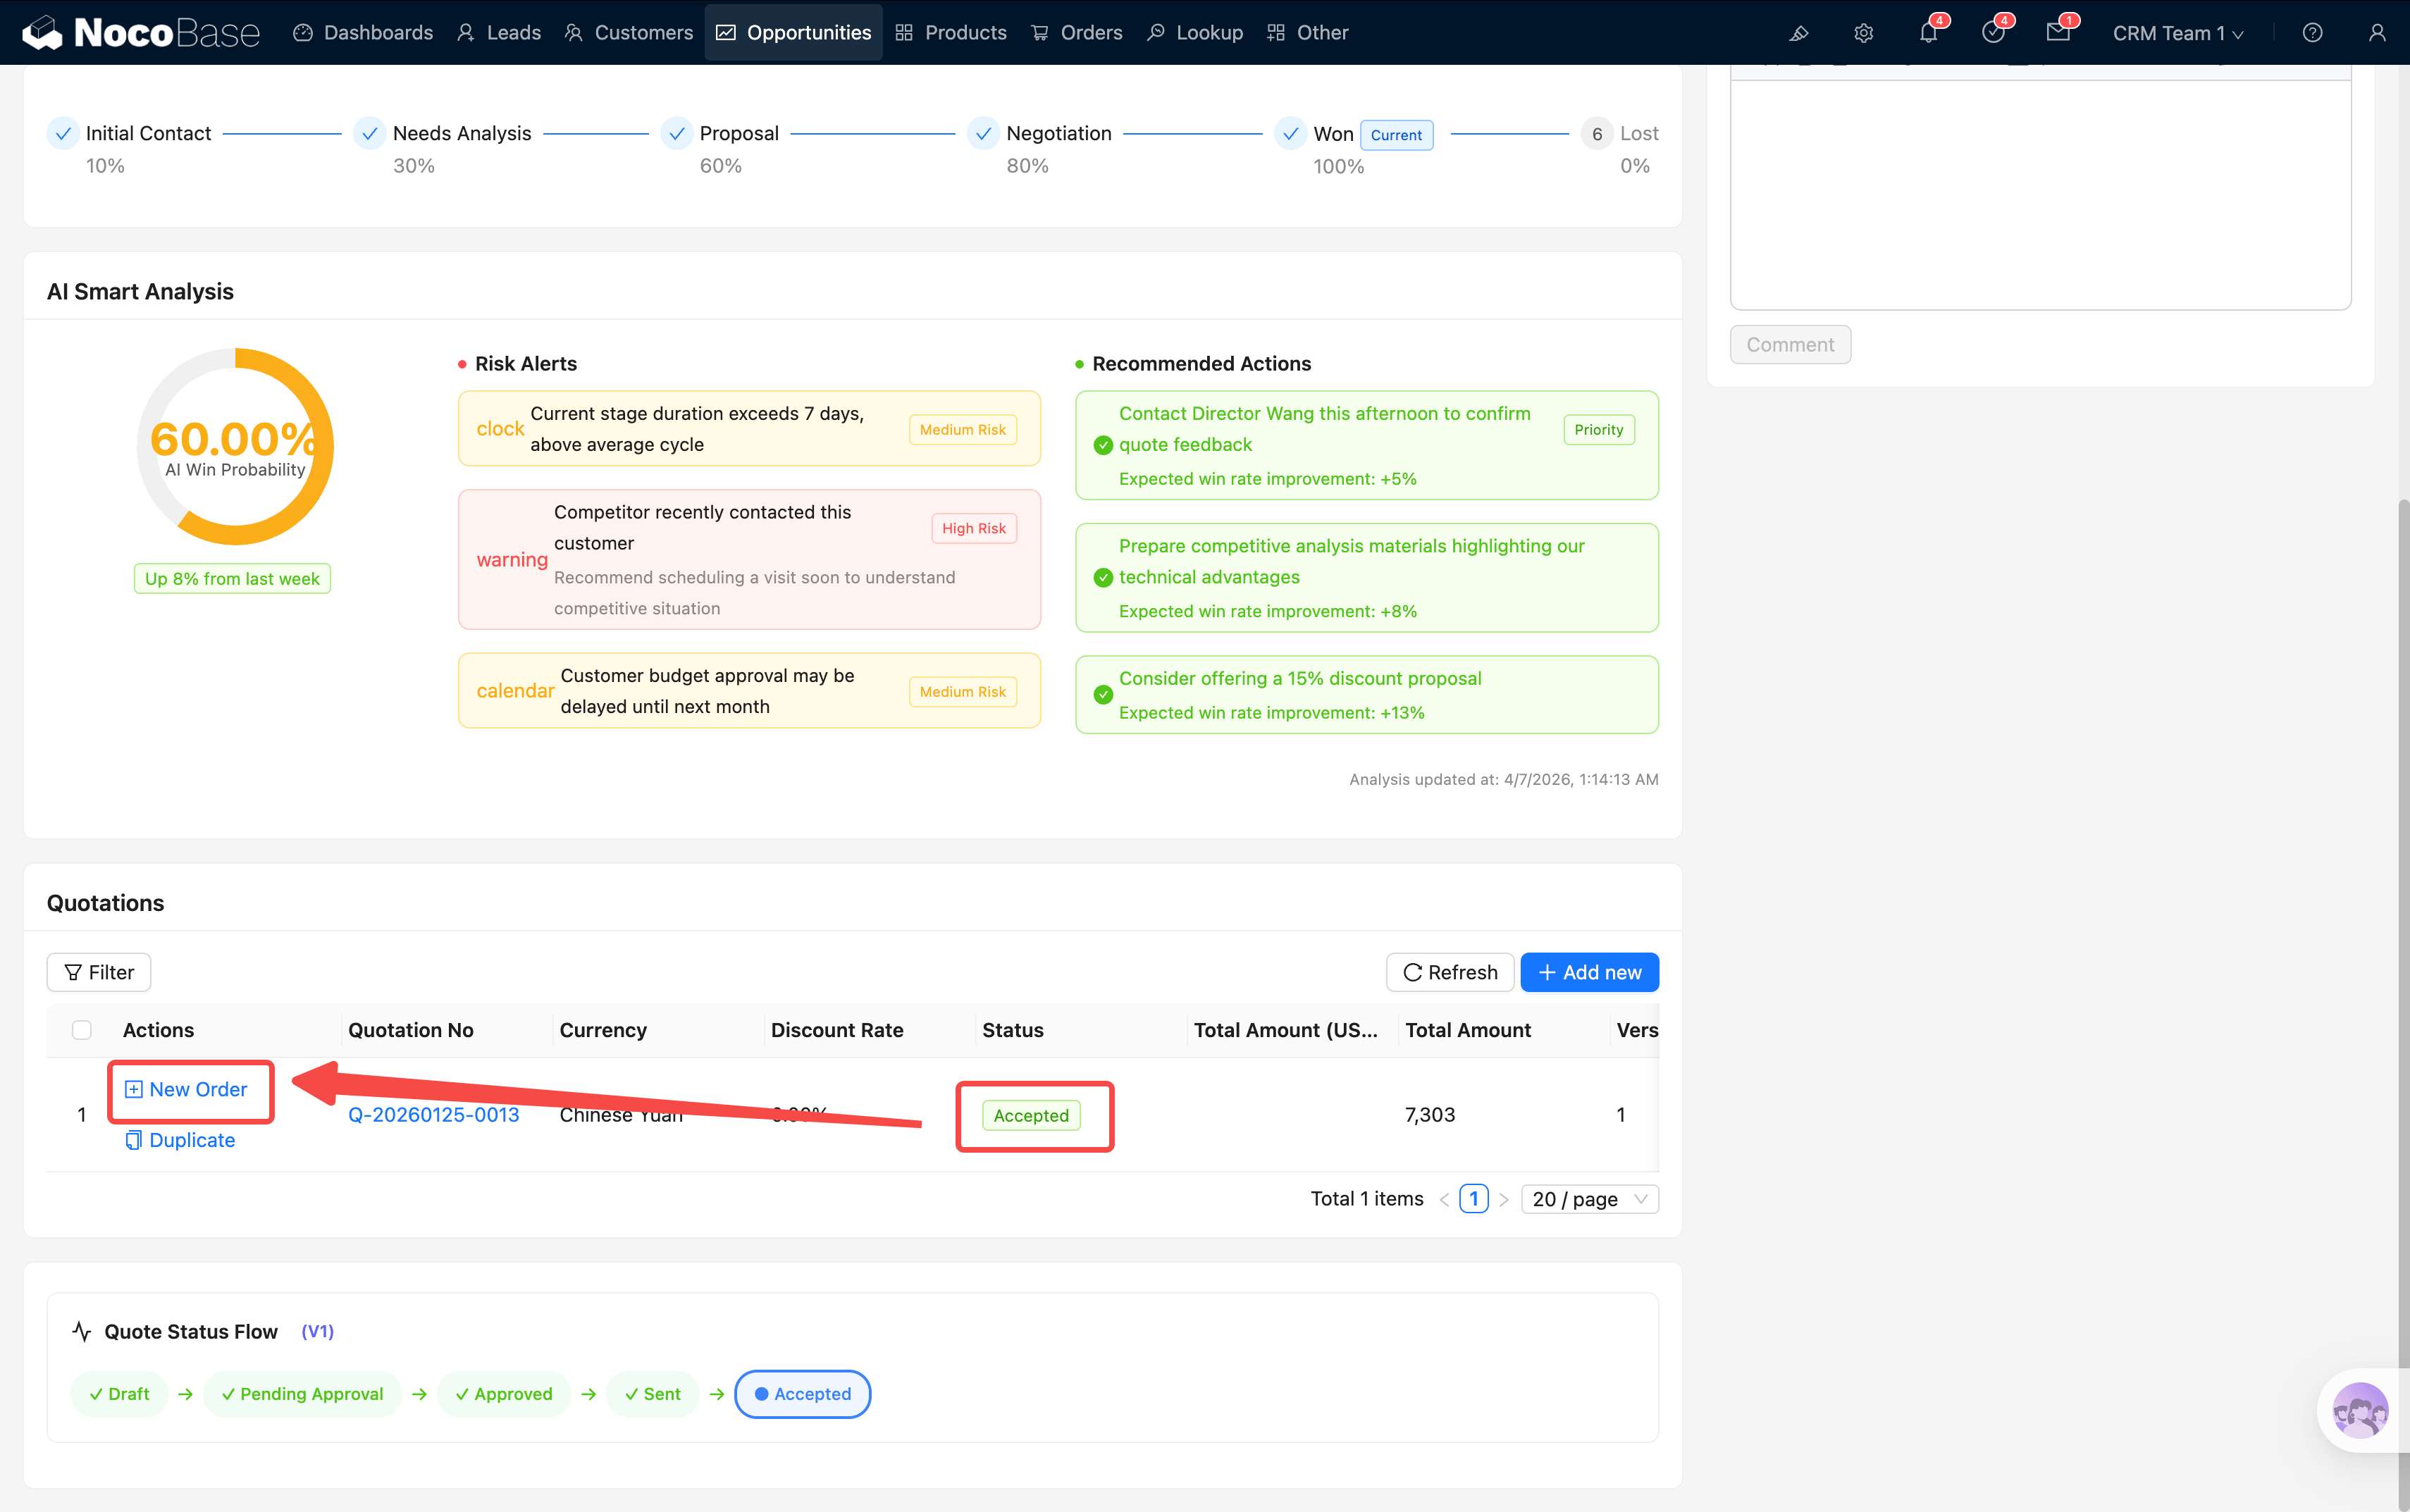
AI Risk Analysis
This is one of the CRM's highlight features. The system automatically analyzes opportunity health and displays:
- Win Rate Ring: An intuitive donut chart showing the win probability
- Risk Factor List: e.g., "No customer contact in over 14 days," "Competitor offered a lower price"
- Recommended Actions: AI-generated next-step suggestions, such as "Schedule a product demo"
Quotation List
 The middle section of the detail view shows all quotations associated with this opportunity in a sub-table. Each row displays the quotation number, amount, status, and other details. Approval status is shown as visual tags (Draft, Pending Approval, Approved, Rejected).
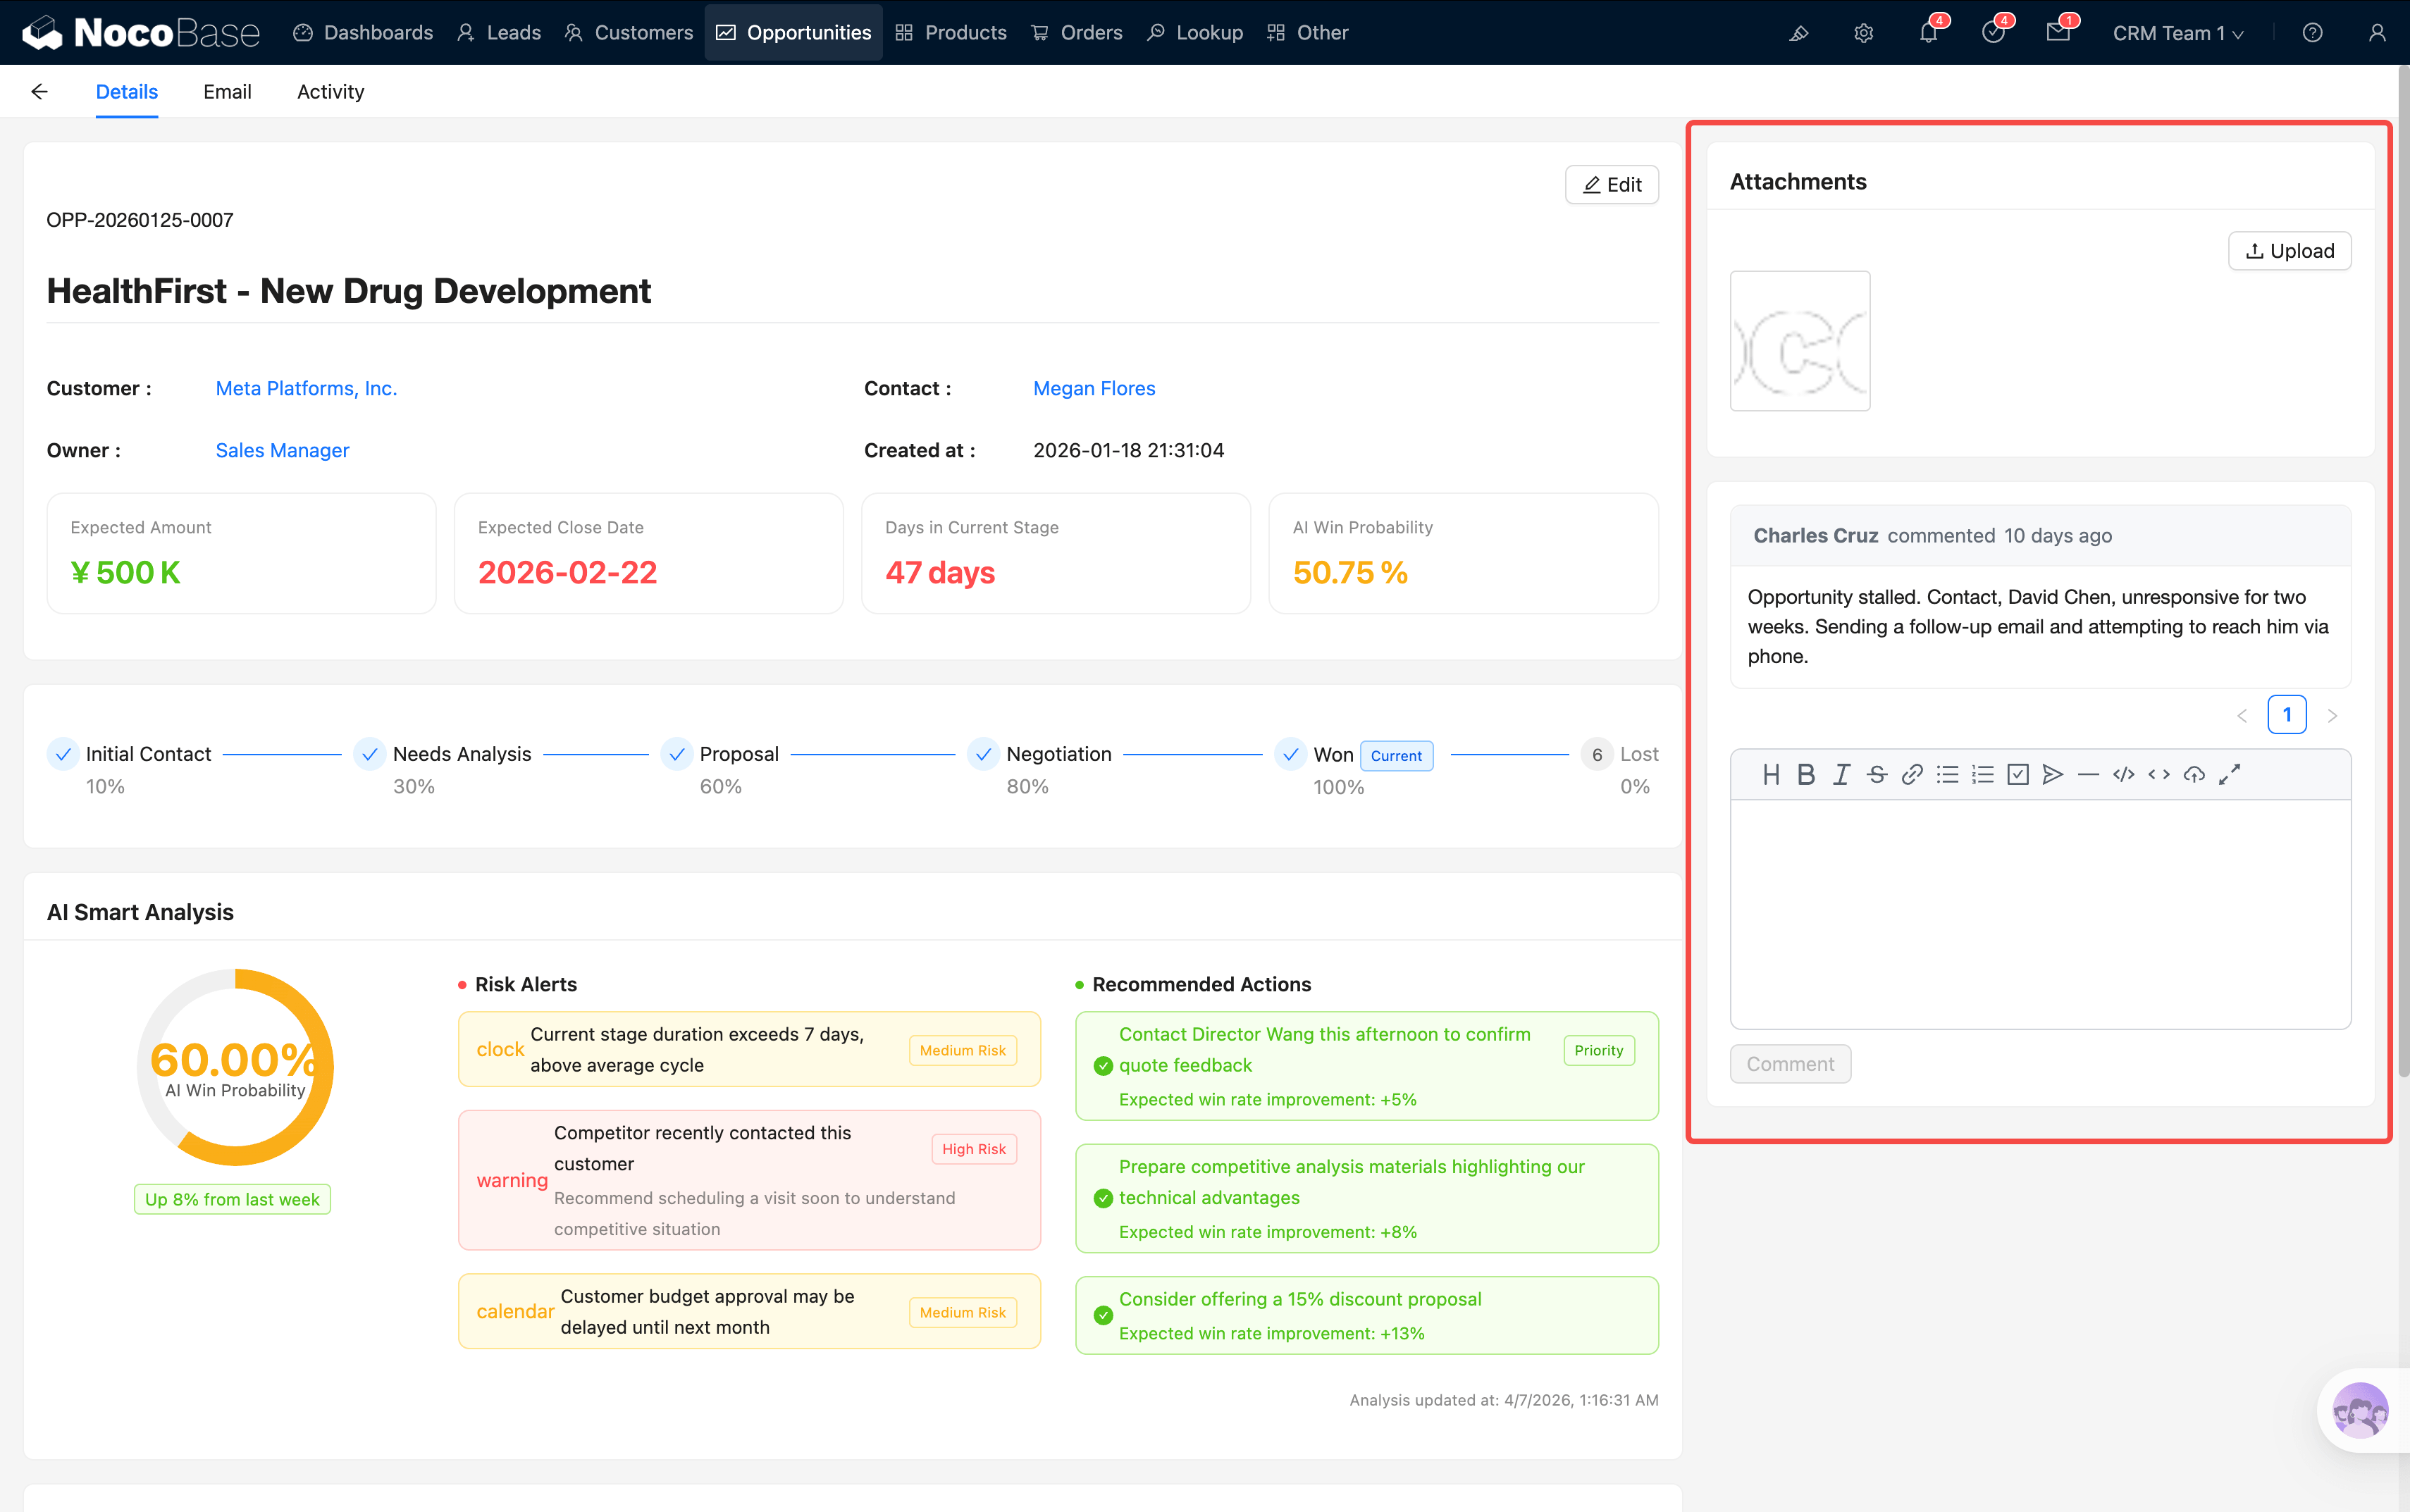
Comments & Attachments
On the right side of the detail view are the comments and attachments sections, where team members can discuss progress and upload related files.
Creating a Quotation
Ready to send a quote to your customer? Here is the workflow:
Step 1: Open the opportunity detail view and locate the quotation list section.
Step 2: Click the Add new button. The system opens a quotation form.
Step 3: Fill in the basic quotation information, including the quotation name and validity period.
Step 4: Add line items in the product detail sub-table:
The system automatically handles the full calculation chain: Subtotal → Discount → Tax → Shipping → Grand Total → USD Equivalent. A JS hint block in the form displays the auto-fill rules and calculation formulas.
Step 5: If the customer transacts in a non-USD currency, select the appropriate currency. The system locks the exchange rate at the time of creation and automatically converts to a USD equivalent, ensuring that subsequent reconciliation is unaffected by exchange rate fluctuations.
Step 6: After verifying all information, click Submit to save the quotation. At this point the quotation status is Draft.
Quotation Approval Workflow
A newly created quotation does not take effect immediately — it must go through an approval workflow to ensure the pricing is reasonable and discounts are within authorized limits.
Approval Workflow Overview
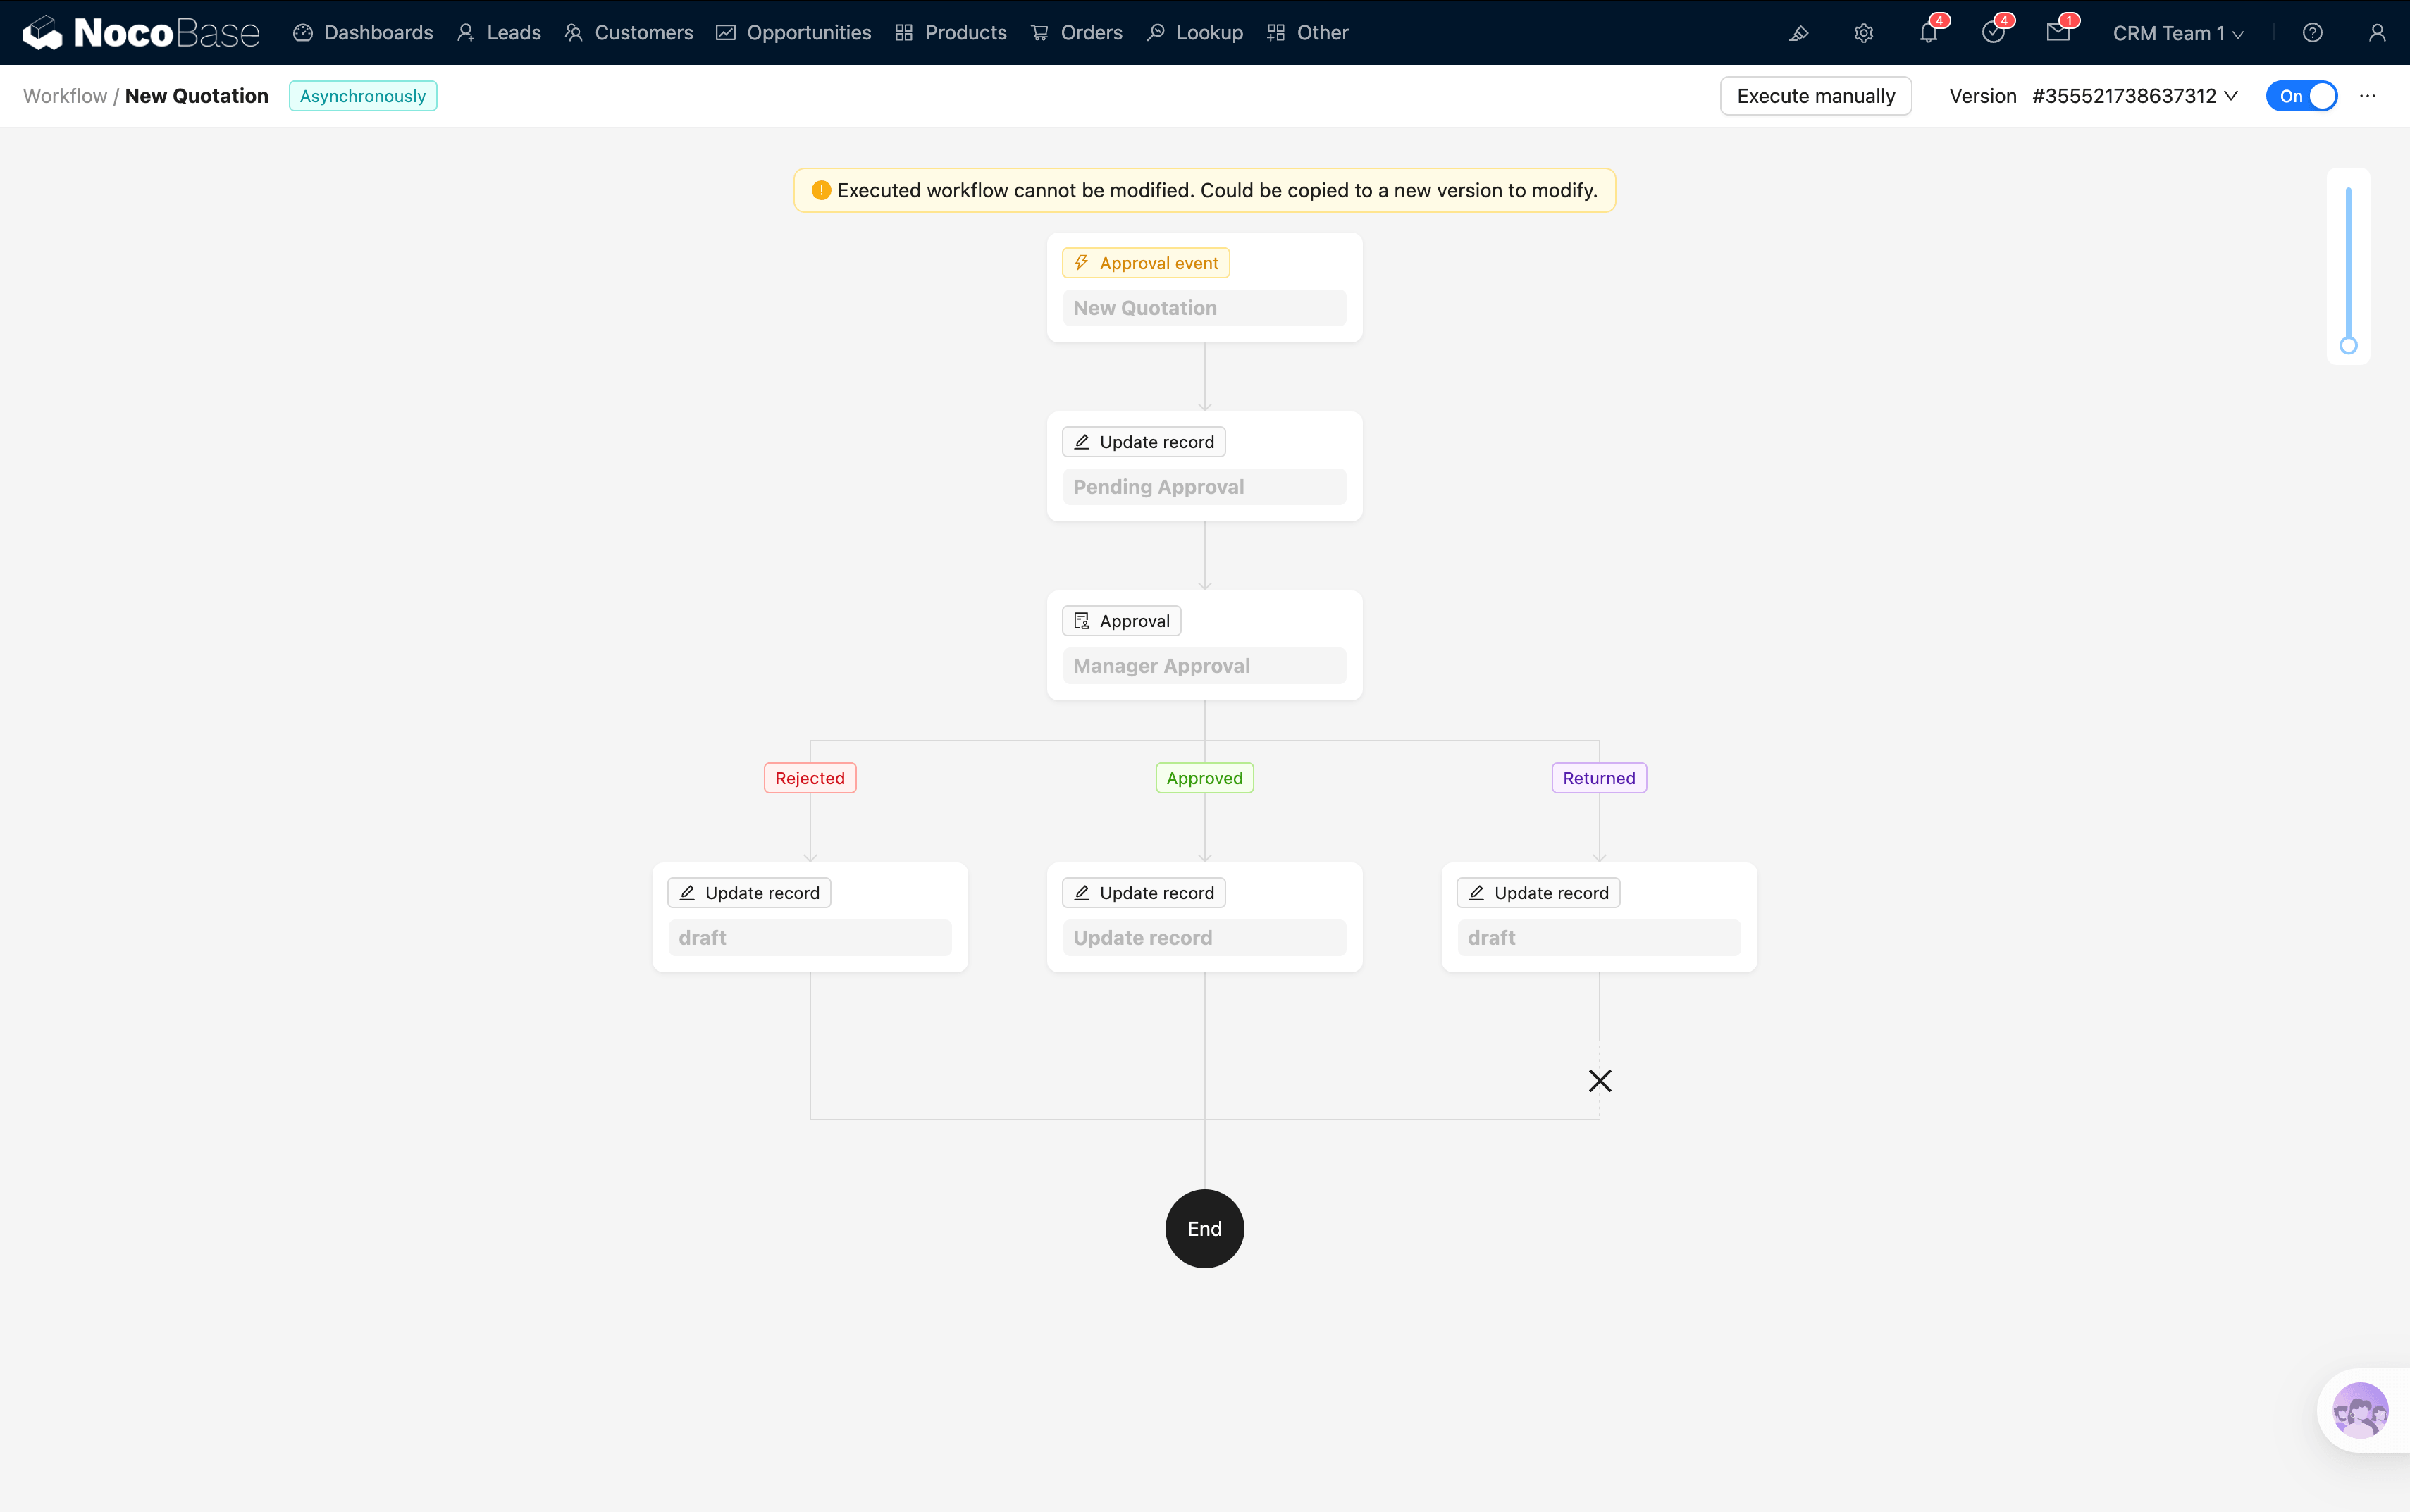
Submitting for Approval
Step 1: In the opportunity detail view, find the quotation with a Draft status and click the Submit for Approval button.
This button is only visible when the quotation status is Draft. Quotations that have already been submitted or approved will not show this button.
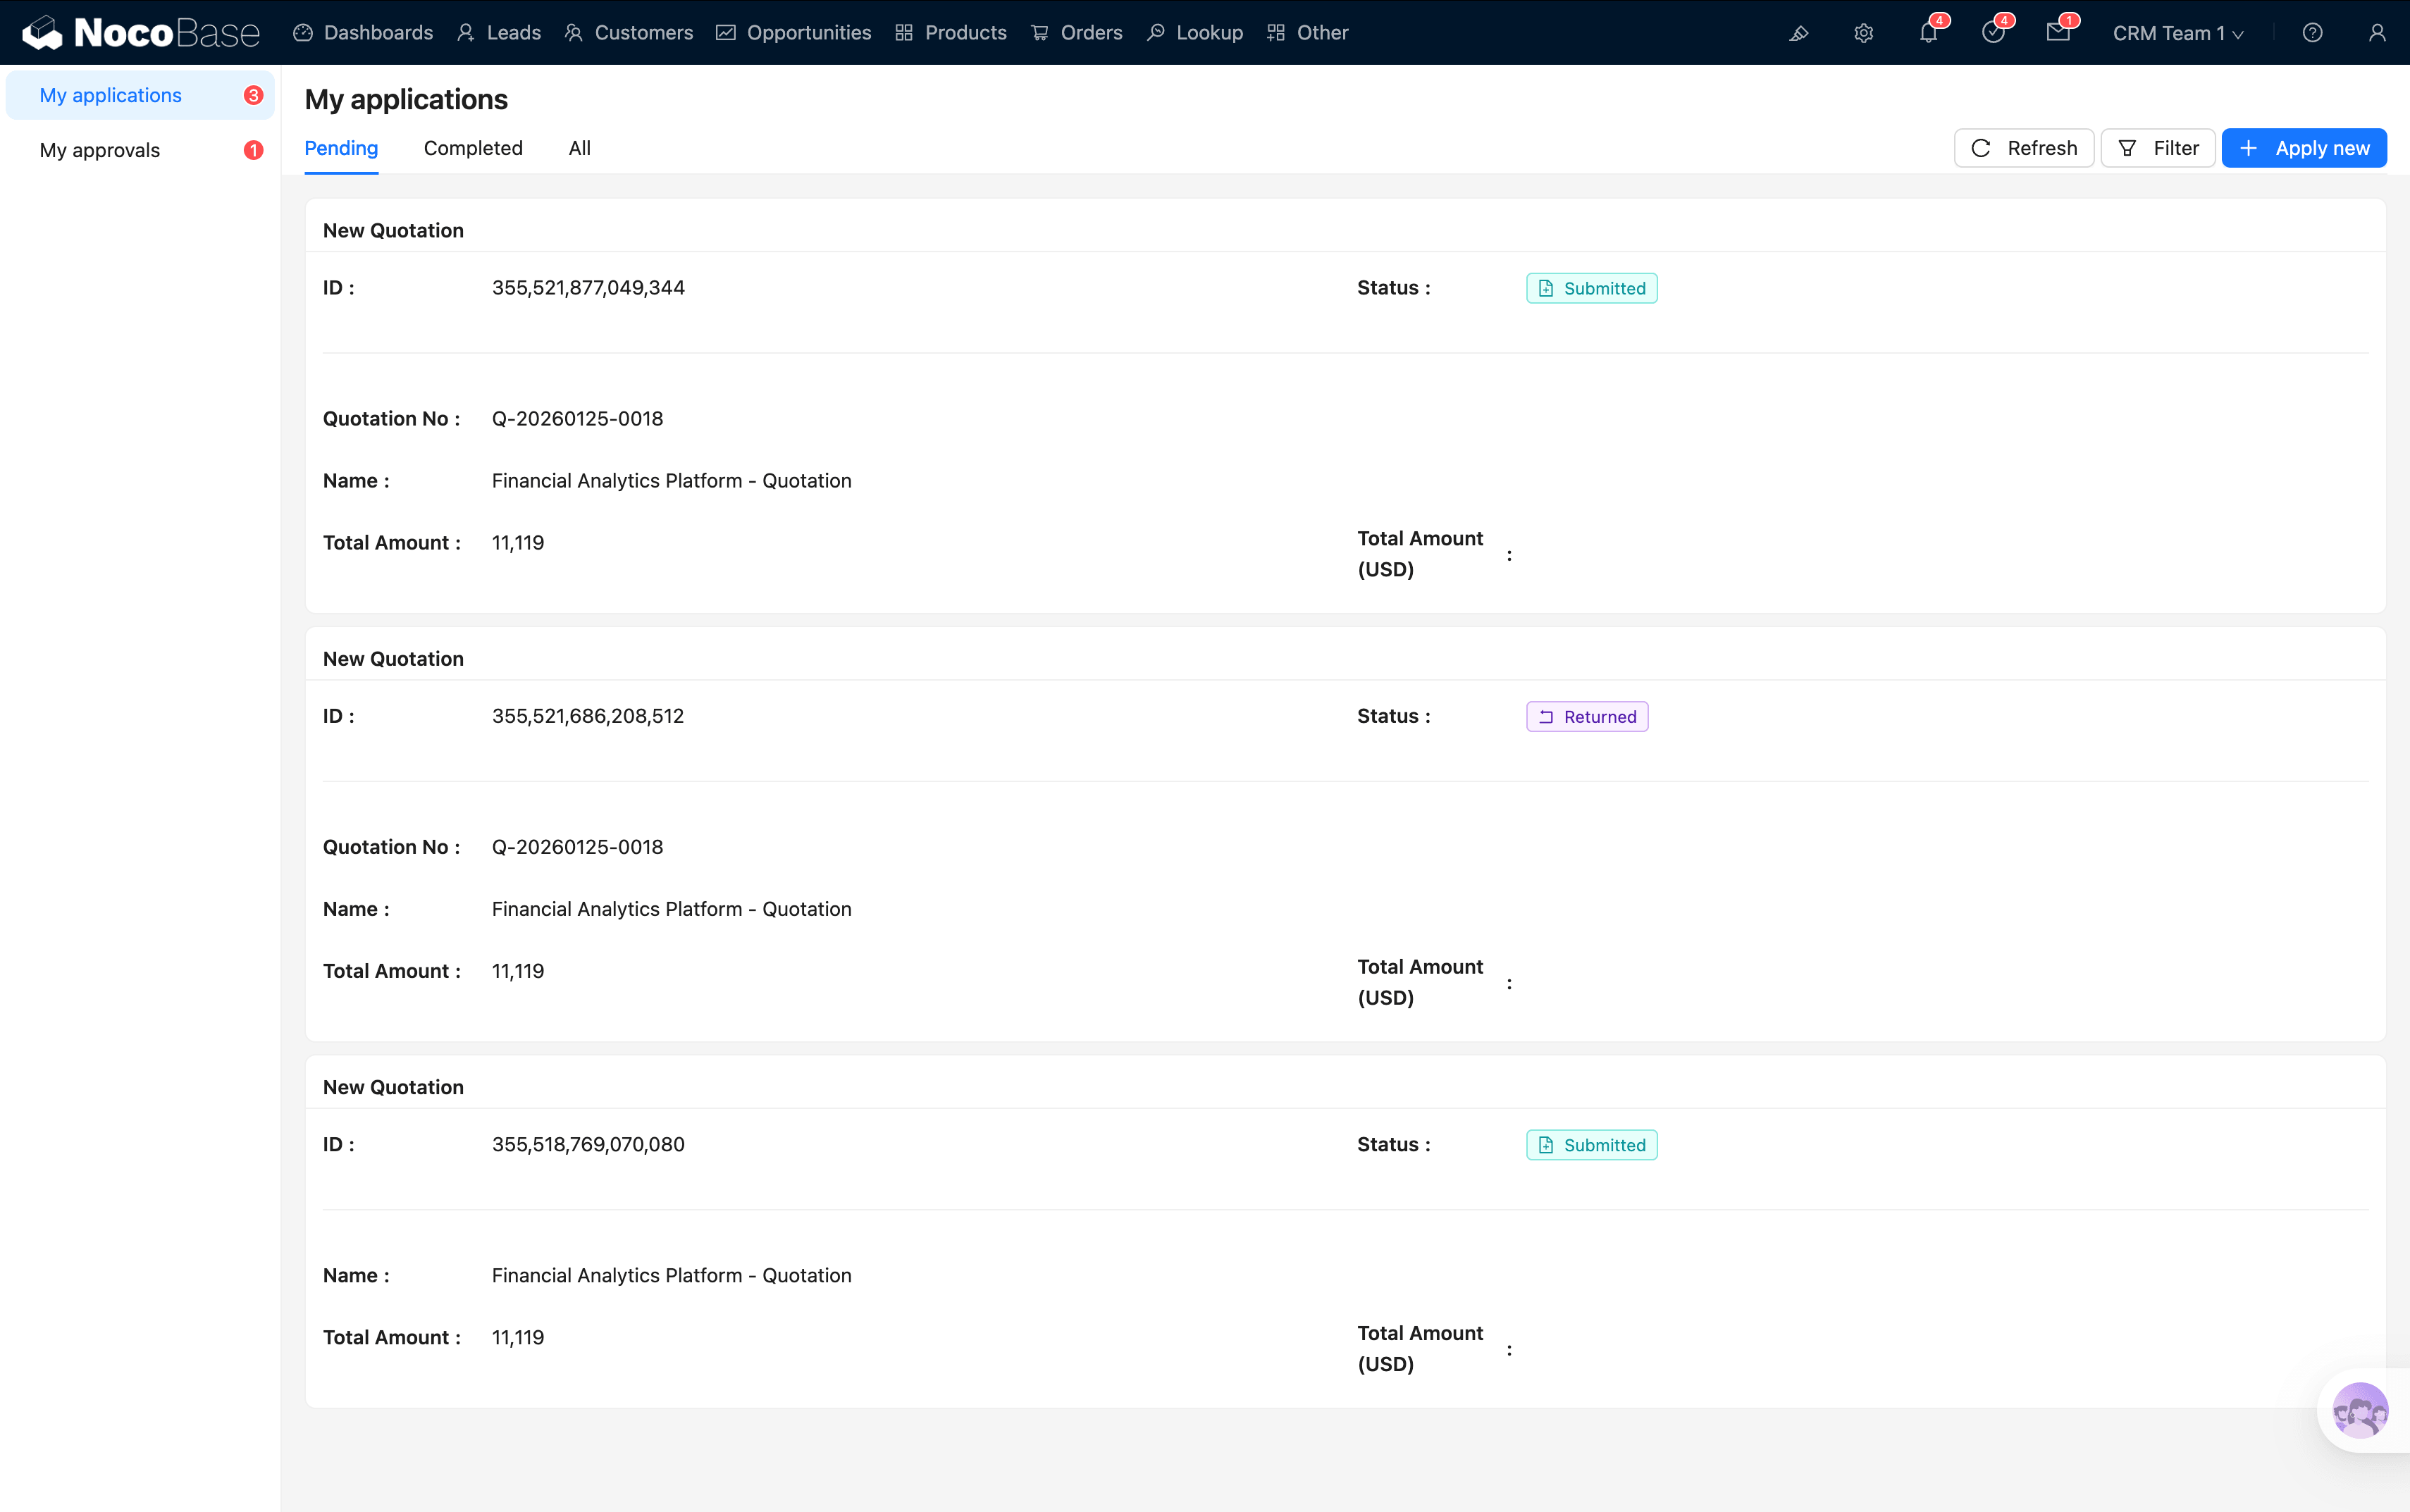
Step 2: The system automatically updates the quotation status to Pending Approval and triggers the approval workflow.
Step 3: The designated approval manager receives a task notification in the system.
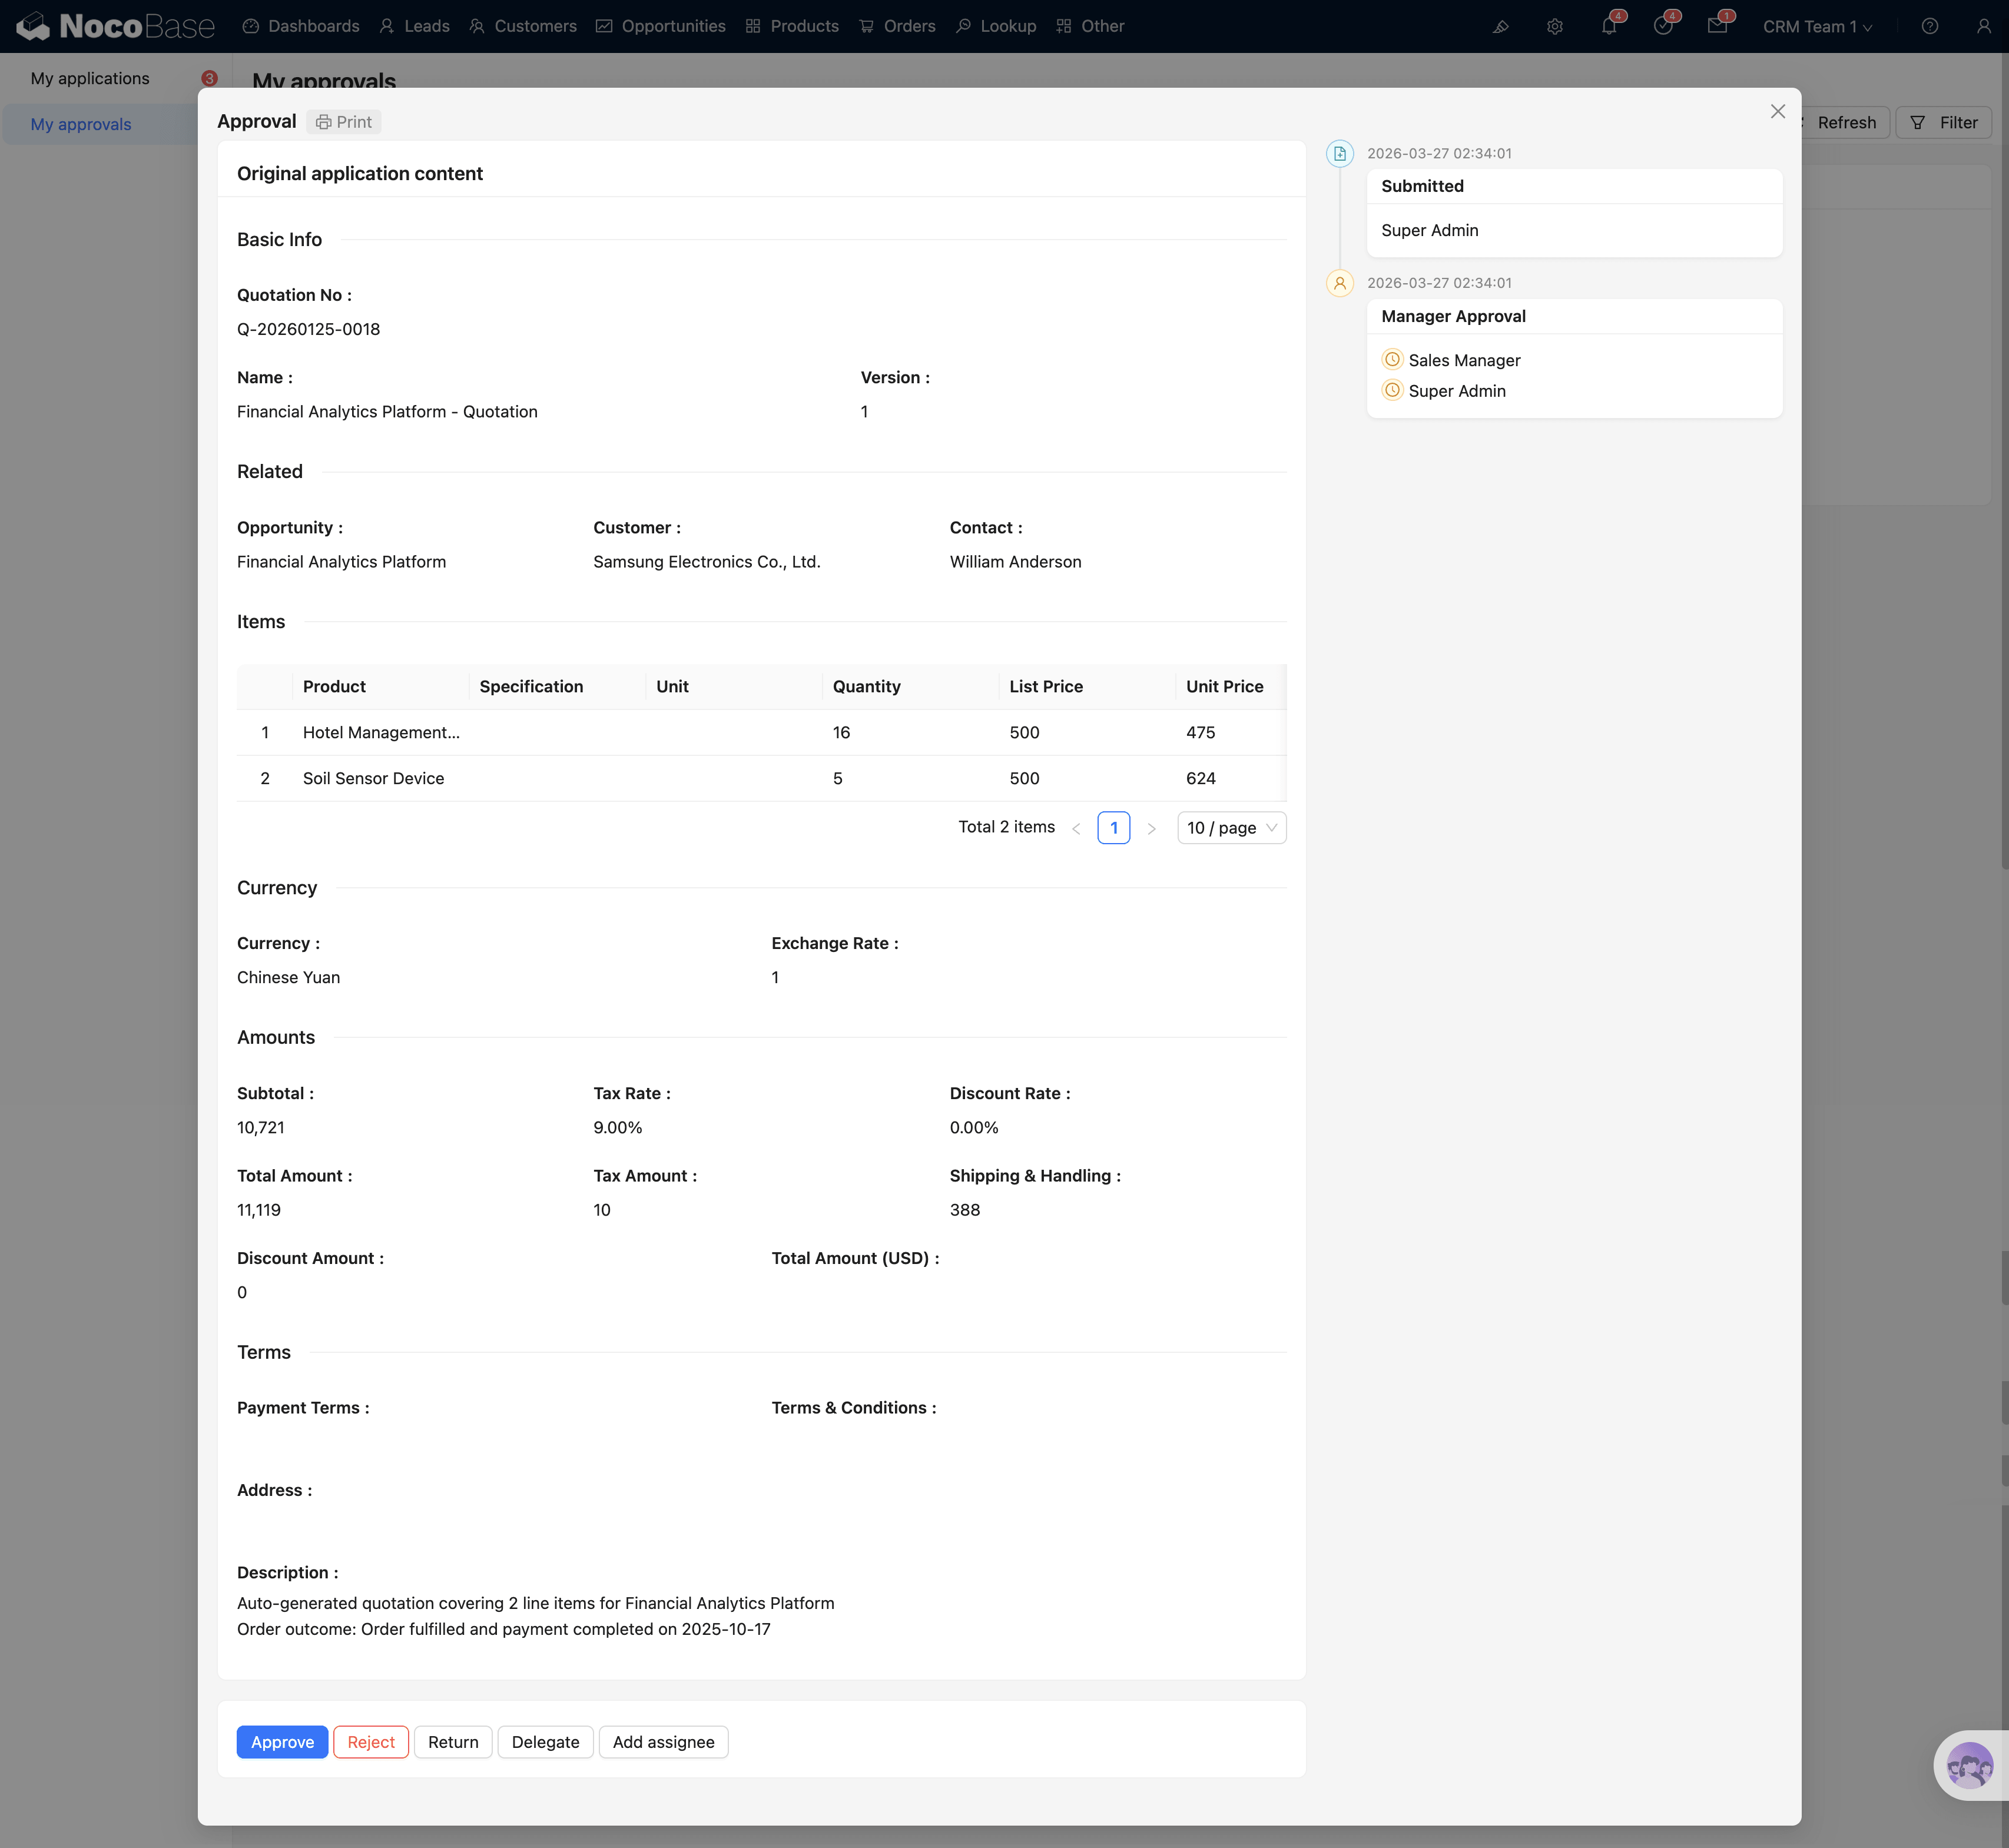
Manager Approval
When the approval manager opens the approval task, they will see the following:
Approval Card: Displays key quotation information — quotation number, name, amount (local currency + USD equivalent), and current status.
Approval Details: A read-only, complete view of the quotation, including:
- Basic information (quotation name, validity period, currency)
- Customer and opportunity associations
- Product detail sub-table (product, quantity, unit price, discount, subtotal)
- Summary amounts
- Terms and notes
Action Buttons: The approval manager can perform the following actions:
Handling the Approval Result
- Approved: The quotation status changes to Approved and can proceed to the next step — conversion to a formal order.
- Rejected / Returned: The quotation status reverts to Draft. The creator can revise and resubmit for approval.
Converting a Quotation to an Order
Once a quotation status is Approved, a New Order button appears in the quotation's action area.
This button is only visible when the quotation status is Approved. Draft or in-review quotations will not show this button.
Click New Order and the system automatically creates an order draft based on the quotation data, including product details, amounts, and customer information — eliminating the need for redundant data entry.
Once a quotation has been approved, it can be converted into a formal order. Next, head to Order Management to learn about the subsequent order workflow.