
Prepare a multi-portal app
Start with a configured multi-portal app that runs successfully. Keep your commercial registry token valid and use an administrator account with unrestricted permission for these steps.
This example creates Portal 1 (portal-1), starting with an empty portal you can open, then adding an Examples page. A portal is a local package that builds and deploys with the app; publishing it to npm is not required. Follow shadcn/ui conventions for pages, reusing existing components and NocoBase UI Library where possible.
Create your first portal
Work at the existing app root. Choose one of the following methods; do not generate the same portal twice.
Create with an Agent
Open your coding Agent at the app root and ask:
Add a portal called Portal 1 with the name portal-1 to this app. Start with a basic homepage I can open, without business data.The Agent uses the project's AGENTS.md, .agents/rules/multi-portal.md and local development Skills to generate and register it. Confirm that packages/app-portal-portal-1/ exists and that the portal is registered on both the app's Client and Server. You do not need to create another app.
Create with the command
Run this command at the app root to create a portal with English and Chinese names and descriptions:
PNPM_CONFIG_MINIMUM_RELEASE_AGE=0 pnpm create @nocobase/portal@beta portal-1 \
  --set-locale 'en-US.title=Portal 1' \
  --set-locale 'en-US.description=Explore pages and navigation.' \
  --set-locale 'zh-CN.title=门户 1' \
  --set-locale 'zh-CN.description=体验页面与导航。'
This command requires a generator version that supports --set-locale; check with pnpm create @nocobase/portal@beta --help. With an older version, omit these options and edit the locale files after generation.
Each --set-locale assigns one language.field=value: title is the name and description is the description. Specify only the fields you want to change; the others keep their defaults.
The text is written directly to the corresponding files, such as en-US.ts and zh-CN.ts, under packages/app-portal-portal-1/client/locales/. After creation, edit their title and description fields, keeping the existing imports, types and exports. There is no need to rerun the generator or change the portal ID, package name or route.
Locale parameter rules and generation preview
-
portal-1is the portal ID. IDs start with a lowercase letter and contain lowercase letters, numbers and single-hyphen-separated segments, up to 40 characters. -
Supported locales:
en-US,zh-CN,zh-TW,ja-JP,de-DE,es-ES,fr-FR,pt-BR,vi-VNandid-ID. -
Titles must be nonempty single-line text; descriptions can be empty.
-
Only the first
=is the separator, so values can contain=. -
A language/field pair cannot be assigned twice. Unsupported languages or fields are rejected.
-
Append
--dry-run --jsonto inspect the generation plan without writing files.
On success, the app contains packages/app-portal-portal-1/, with dependencies installed and Client/Server registration completed. The portal is still Not installed. Next, start the app and install the portal. The generator does not create business tables or CRUD pages, start services or change the database.
If dependency installation fails, keep the generated source and follow the recovery steps printed by the command. Do not rerun the generator over the existing directory.
Install and open the portal
Start or restart the app to load the newly registered portal:
pnpm devInstall in Portal management
As an administrator, open System settings → Portal management and find Portal 1. Its initial status is Not installed. Open the row's … menu and choose Install.
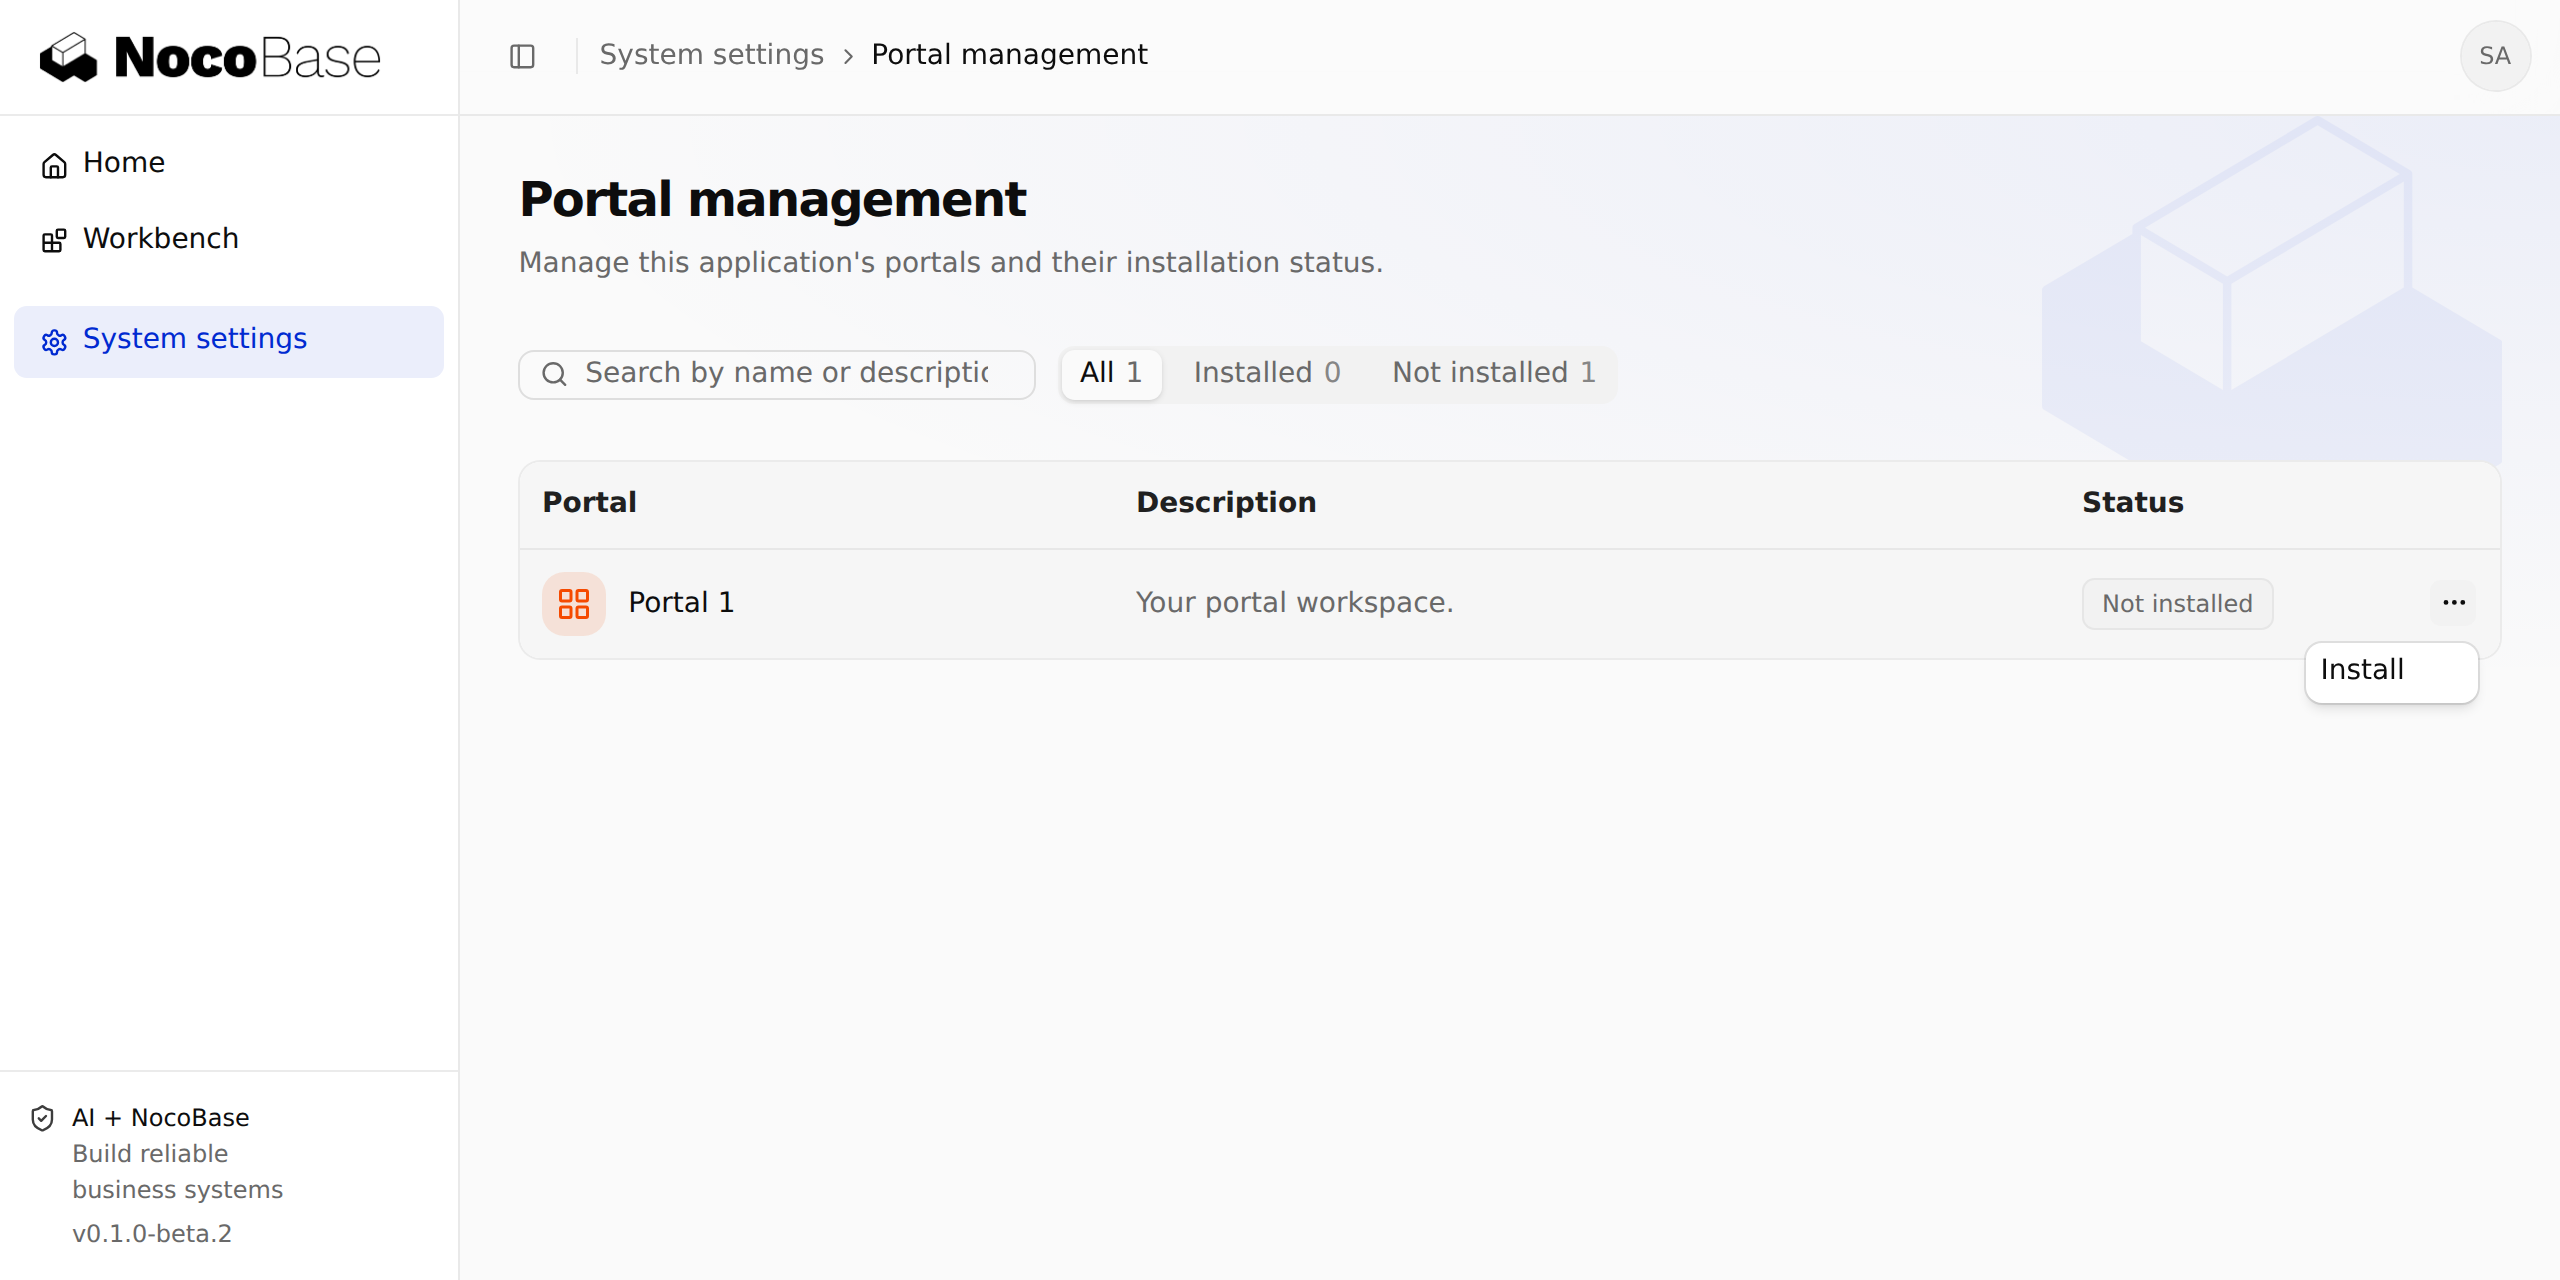
Wait for Installed, then choose Open from the same menu. Installation runs the portal's database tasks and starts the portal. If it fails, use Manage portals to identify the failed stage; do not delete migration history to start over.
Open from the workbench
Administrators can also open installed portal cards from Workbench. Home provides the app's landing content, Workbench provides portal entry points, and Portal management handles installation and uninstallation.
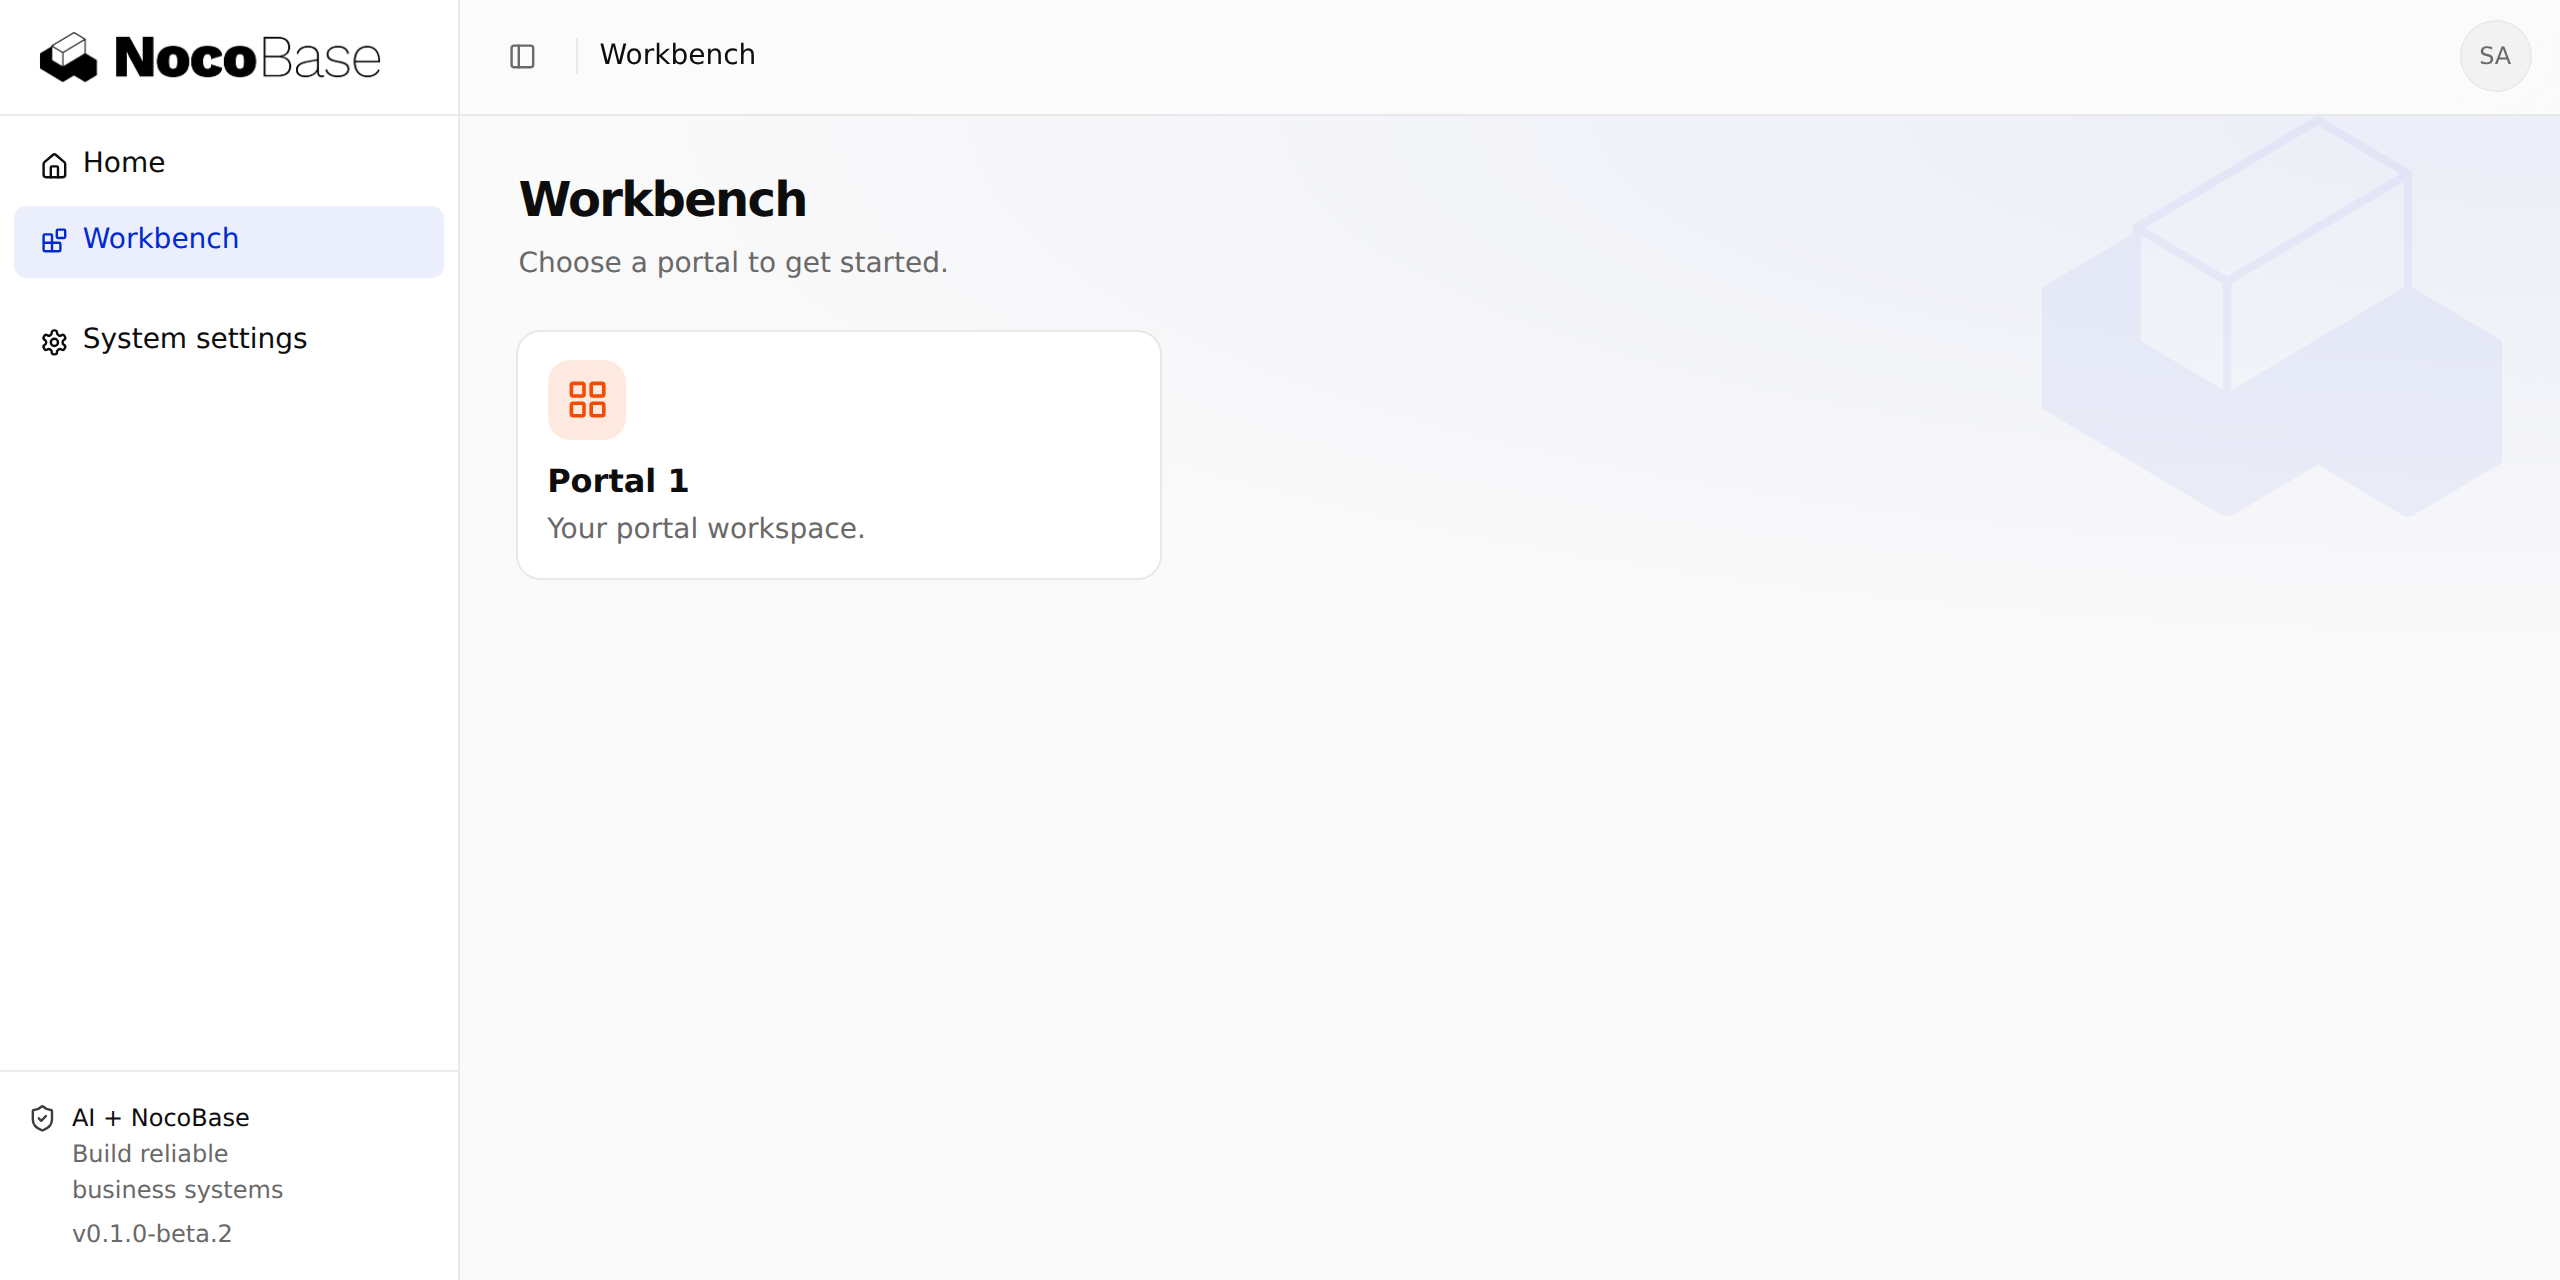
The separate workbench screenshots use a preview template. If your installed template does not yet have a separate Workbench menu, use the portal list on Home. Installation and opening through Portal management work the same way.
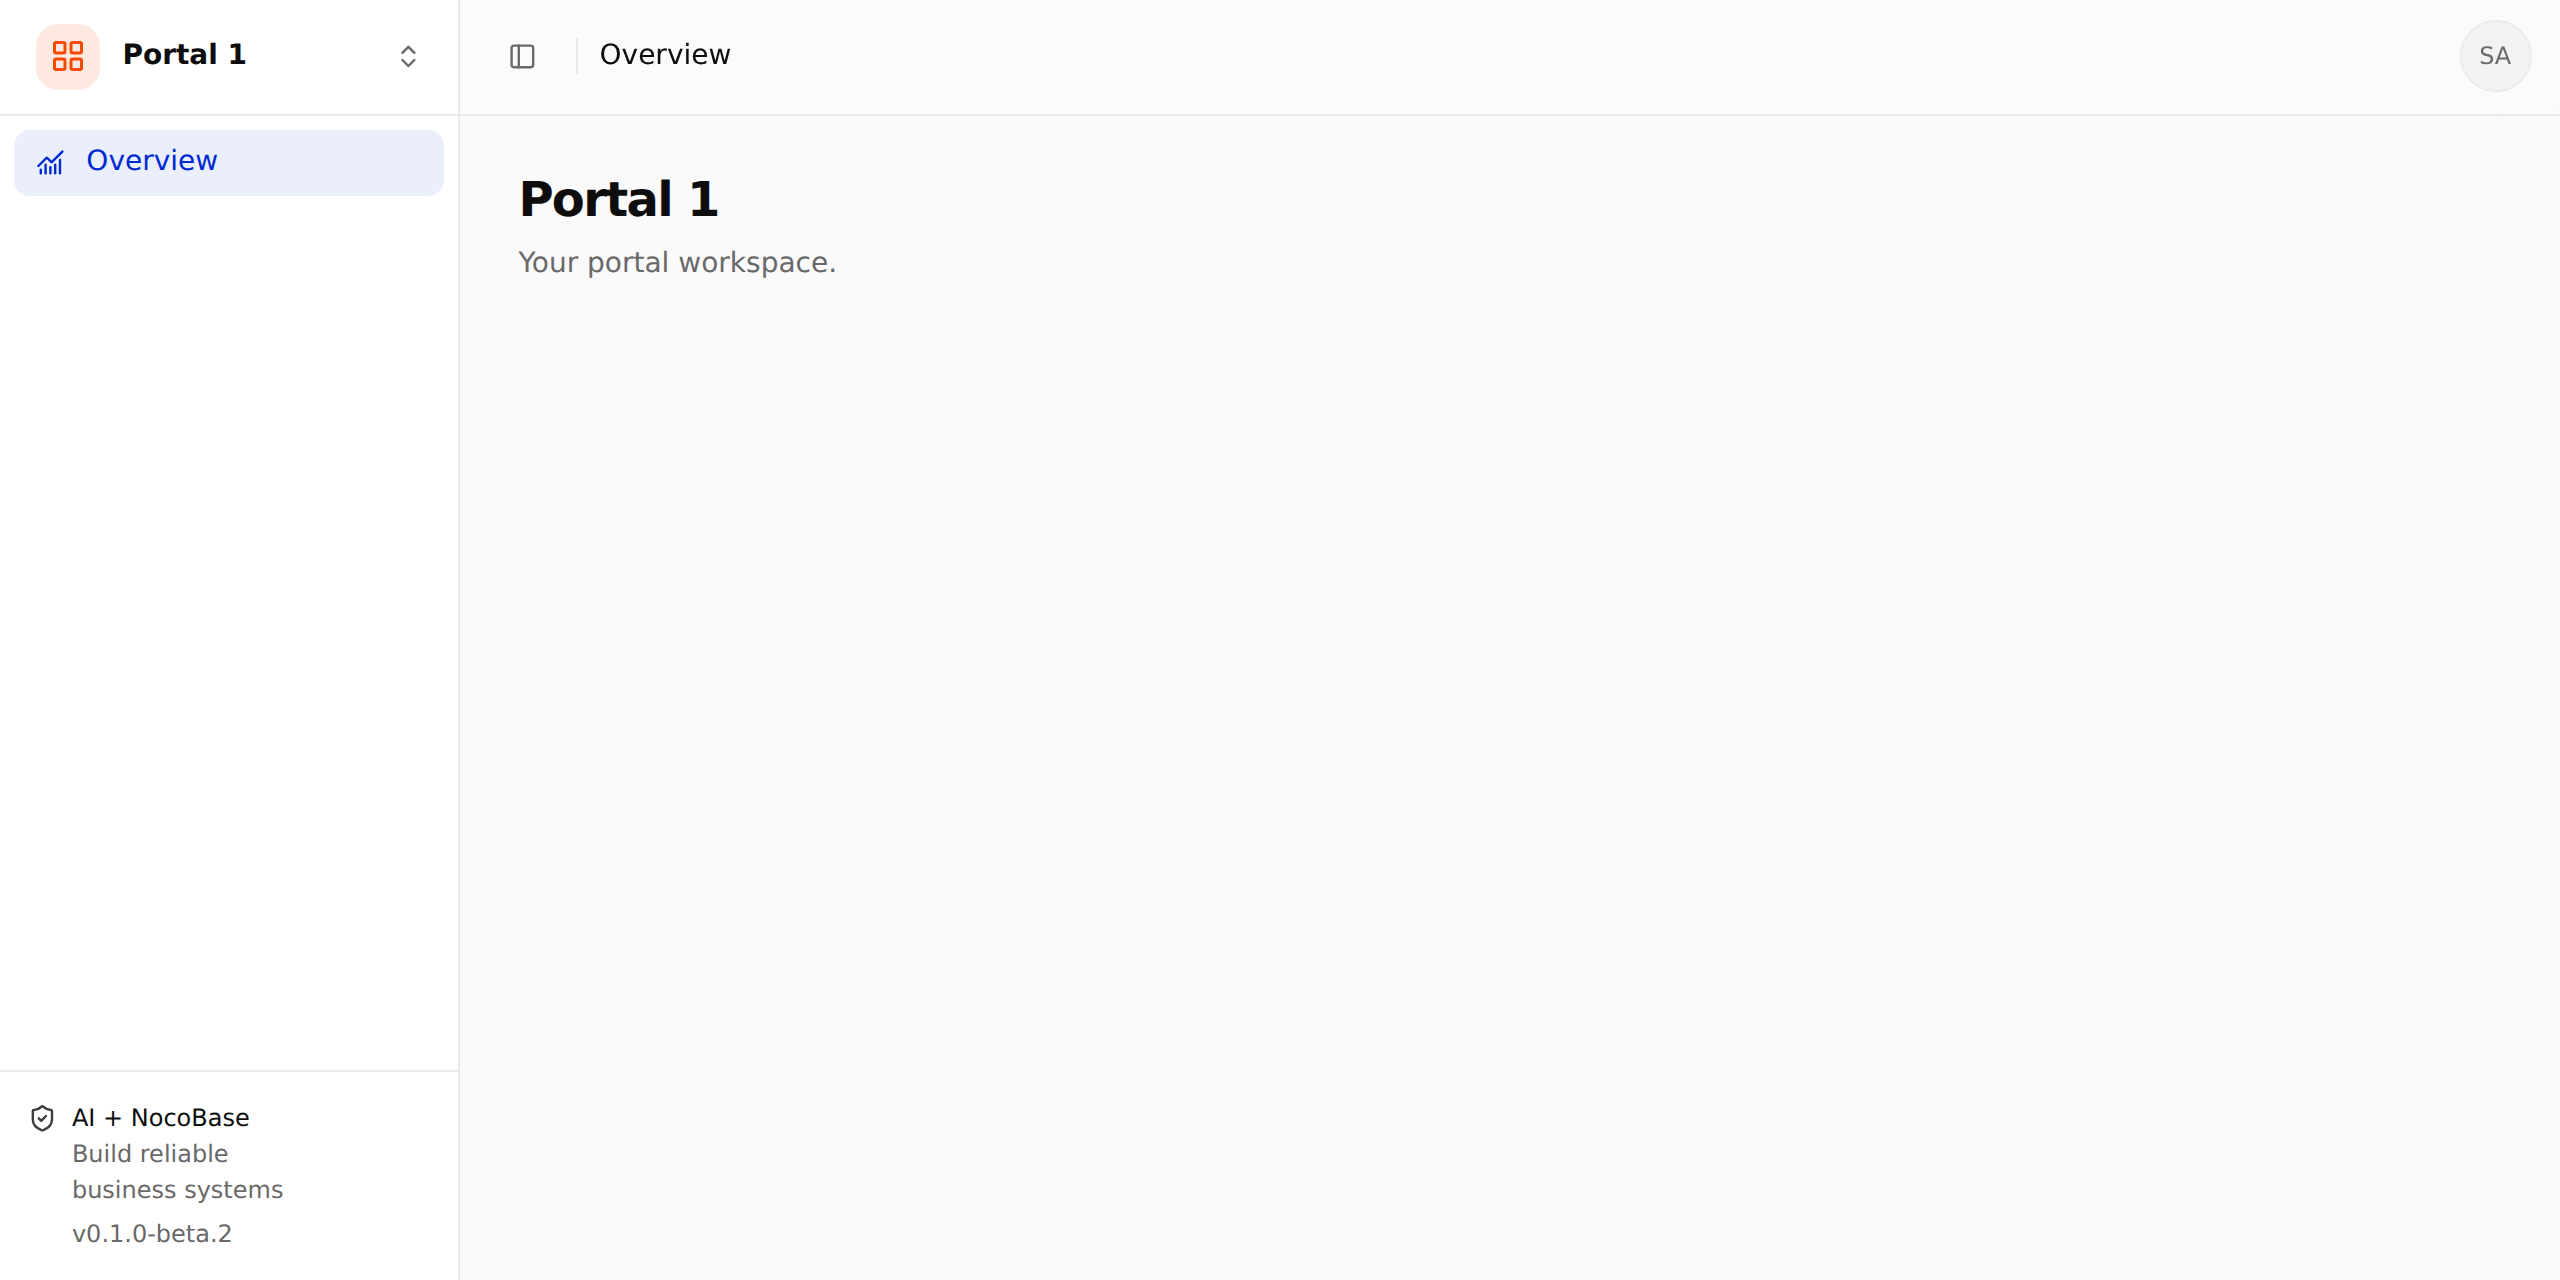
The portal should show its own Overview navigation and basic homepage. Refresh the page and confirm it still opens. This verifies the minimal portal; it has no business features yet.
Switch portals and return to the workbench
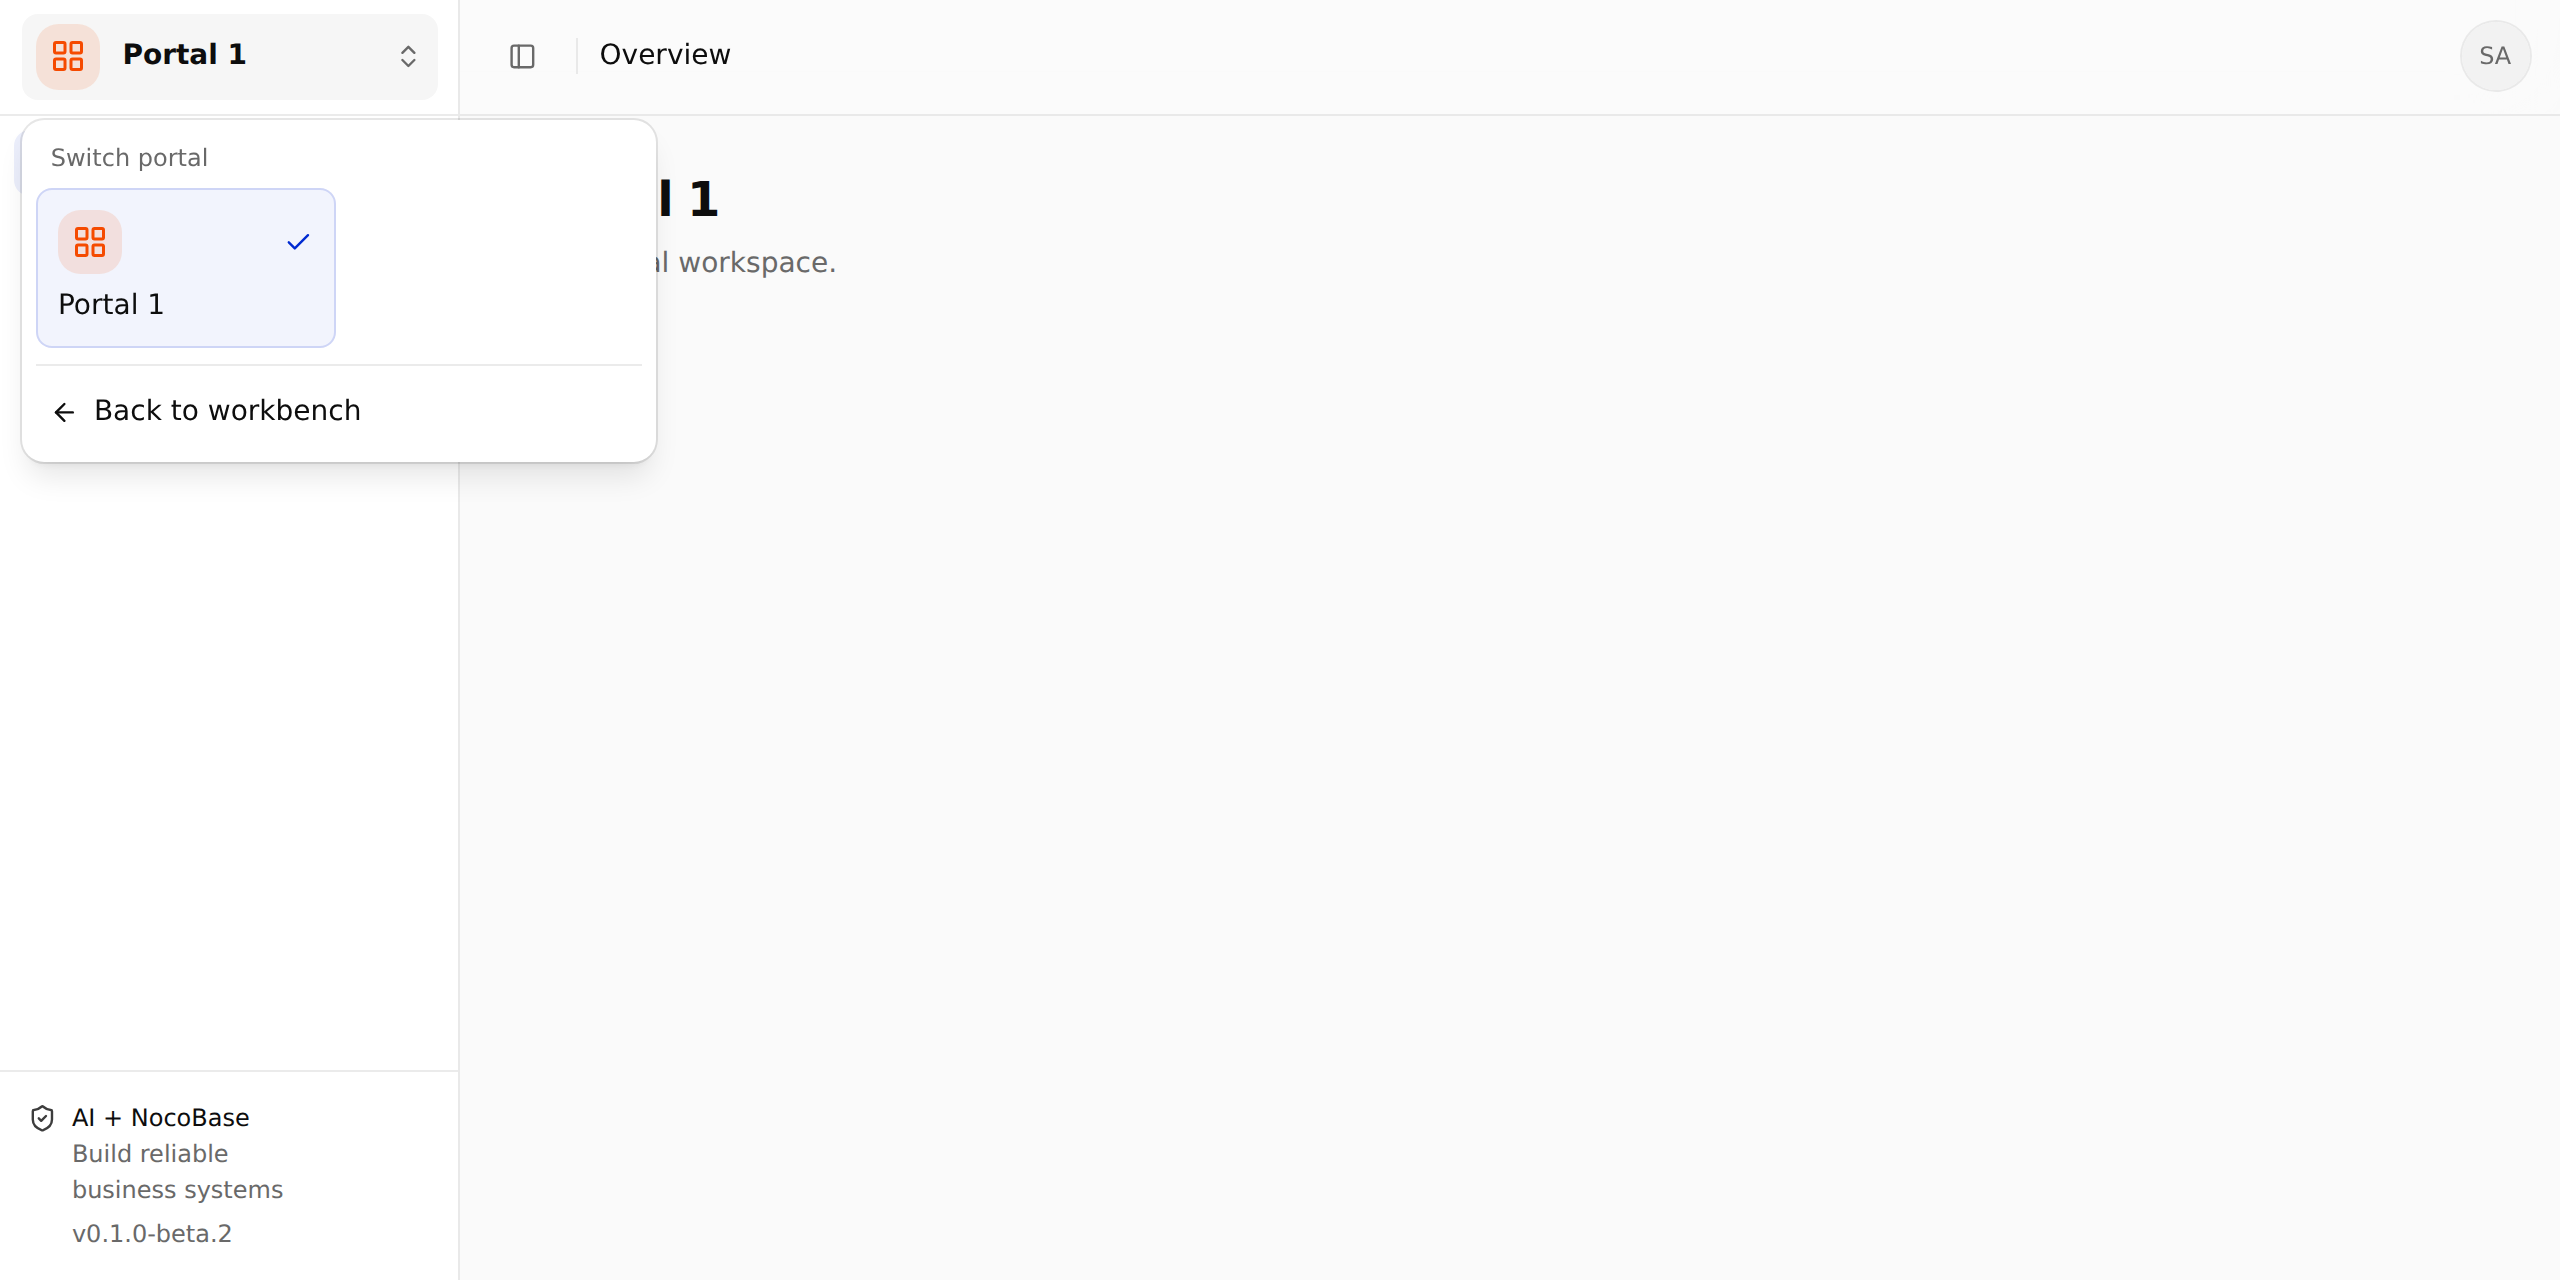
Click the portal name at the top left to open the switcher. Once other portals are installed and authorized, you can switch to them here. With only one portal, use Back to workbench.
Generated portal pages initially allow administrators only. Configure ordinary-user entry points, portal lists and page authorization through Portal access and permissions. Displaying a navigation item does not grant access.
Understand the portal directory structure
Portal code lives in packages/app-portal-portal-1/. Tooling configuration and build output are omitted below:
packages/app-portal-portal-1/
├── portal.ts                  # Identity, entry and appearance
├── package.json               # Package metadata, dependencies and scripts
├── client/                    # Client code
│   ├── index.ts               # Client entry
│   ├── plugin.ts              # Register routes and locale resources
│   ├── routes.ts              # Page routes and access requirements
│   ├── layout.tsx             # Layout and navigation
│   ├── styles.css             # Portal styles
│   ├── pages/
│   │   └── overview.tsx       # Default homepage
│   └── locales/               # Names, descriptions and page text
│       ├── index.ts           # Locale loaders
│       ├── en-US.ts           # English
│       ├── zh-CN.ts           # Simplified Chinese
│       └── …
├── server/                    # Server code
│   ├── index.ts               # Server entry
│   ├── plugin.ts              # Register services and database resources
│   └── providers/
│       ├── index.ts           # Service provider list
│       └── portal.ts          # Register the portal, initially uninstalled
└── database/
    └── main/                  # Host app's main connection
        ├── migrations/        # Schema migrations, initially empty
        └── seeds/             # Initial data
            └── portal_portal_1_installation.ts
                               # Initialize portal installation state
Add pages and navigation
Add a page and route
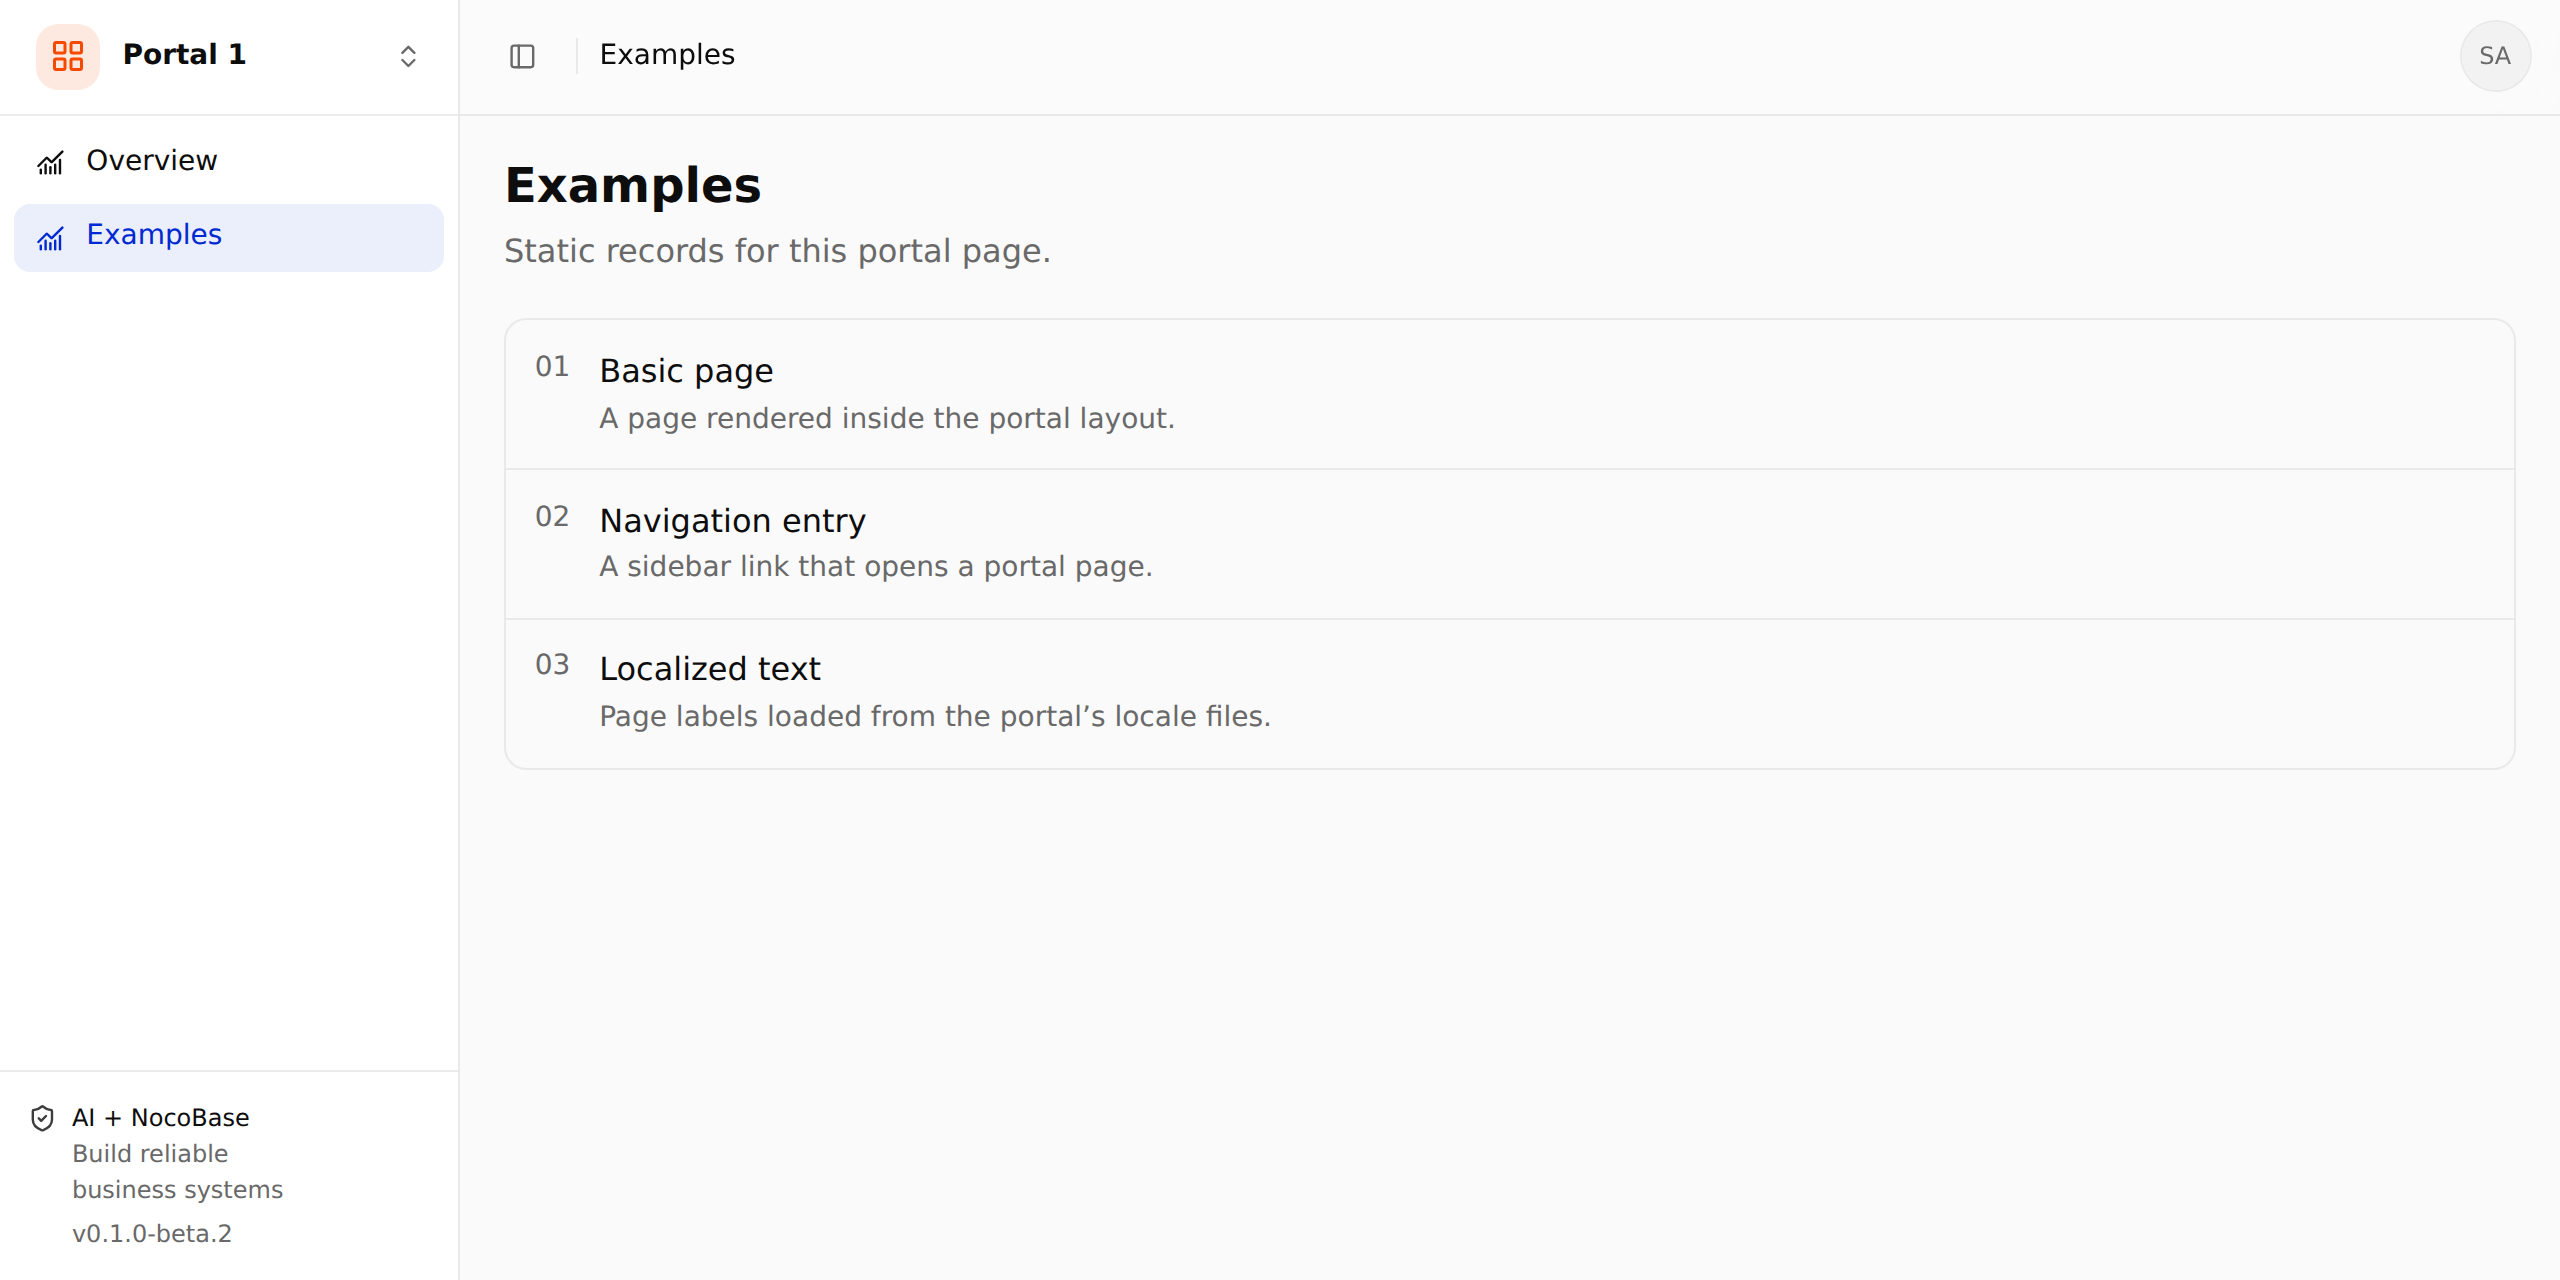
This example adds an Examples page to Portal 1 with three static records: Basic page, Navigation entry and Localized text. It uses the portal layout and requires administrator access, without a database or API.
You can ask an Agent:
Add an Examples page and navigation entry to Portal 1. Show three static records: Basic page, Navigation entry and Localized text, each with a name and short description. Allow administrators to view the page.For a manual implementation, default-export a page component from client/pages/examples.tsx, using the existing Layout:
import type { ReactElement } from 'react';
import { useTranslation } from '@nocobase/i18n/client';
import Layout from '../layout.js';

const examples = ['page', 'navigation', 'localization'] as const;

export default function ExamplesPage(): ReactElement {
  const { t } = useTranslation('@nocobase/app-portal-portal-1');
  return (
    <Layout>
      <section className='p-6'>
        <h1 className='text-2xl font-semibold'>{t('examples.title')}</h1>
        <p className='mt-2 text-muted-foreground'>
          {t('examples.description')}
        </p>
        <ul className='mt-6 divide-y rounded-xl border'>
          {examples.map((id, index) => (
            <li key={id} className='flex gap-4 p-4'>
              <span
                className='text-sm text-muted-foreground'
                aria-hidden='true'
              >
                {String(index + 1).padStart(2, '0')}
              </span>
              <div className='min-w-0'>
                <h2 className='font-medium'>
                  {t(`examples.items.${id}.title`)}
                </h2>
                <p className='mt-1 text-sm text-muted-foreground'>
                  {t(`examples.items.${id}.description`)}
                </p>
              </div>
            </li>
          ))}
        </ul>
      </section>
    </Layout>
  );
}
Add the following examples field to messages in the portal's client/locales/en-US.ts, and translations in the other locale files:
examples: {
  "title": "Examples",
  "description": "Static records for this portal page.",
  "items": {
    "page": {
      "title": "Basic page",
      "description": "A page rendered inside the portal layout."
    },
    "navigation": {
      "title": "Navigation entry",
      "description": "A sidebar link that opens a portal page."
    },
    "localization": {
      "title": "Localized text",
      "description": "Page labels loaded from the portal’s locale files."
    }
  }
},
Append this entry to the route array in client/routes.ts:
{
  name: 'portal1Examples',
  path: '/portals/portal-1/examples',
  auth: 'required',
  authz: 'unrestricted',
  breadcrumb: { title: 'examples.title' },
  componentLoader: () => import('./pages/examples.js'),
}
Add a navigation entry
Read the portal's translations in client/layout.tsx:
const { t: tPortal } = useTranslation('@nocobase/app-portal-portal-1');Keep the existing Overview item and append the following to navigation. The generated layout already imports ChartNoAxesCombined; you can choose another supported icon.
{
  path: `${portal.entry}/examples`,
  title: tPortal('examples.title'),
  icon: ChartNoAxesCombined,
}
Clicking Examples should display the three sample records. Opening /main/portals/portal-1/examples directly and refreshing should work too; substitute your actual app base path if it is not /main. Routes determine page matching and access; navigation provides entry points. Maintain both.
Adjust the portal layout
App shell and portal layout
The Examples page wraps its content in Layout. The generated client/layout.tsx passes portal information, navigation and page content to PortalLayout. The app's shared shell then supplies the sidebar, header and account menu.
Choose the file according to the scope of the change:
| What to adjust | File to edit | Scope |
|---|---|---|
| Spacing, columns or content in the Examples list | Portal's client/pages/examples.tsx | This page |
| Portal navigation or a shared content container | Portal's client/layout.tsx | Portal pages using this layout |
| Shared sidebar, header or account menu | App's client/layouts/portal-shell.tsx | All portals using this shell |
Customize the portal's page structure
For example, to center Portal 1's page content and limit its width, change the return value in the portal's client/layout.tsx:
return (
  <PortalLayout portal={portal} navigation={navigation}>
    <div className='mx-auto w-full max-w-5xl'>{children}</div>
  </PortalLayout>
);
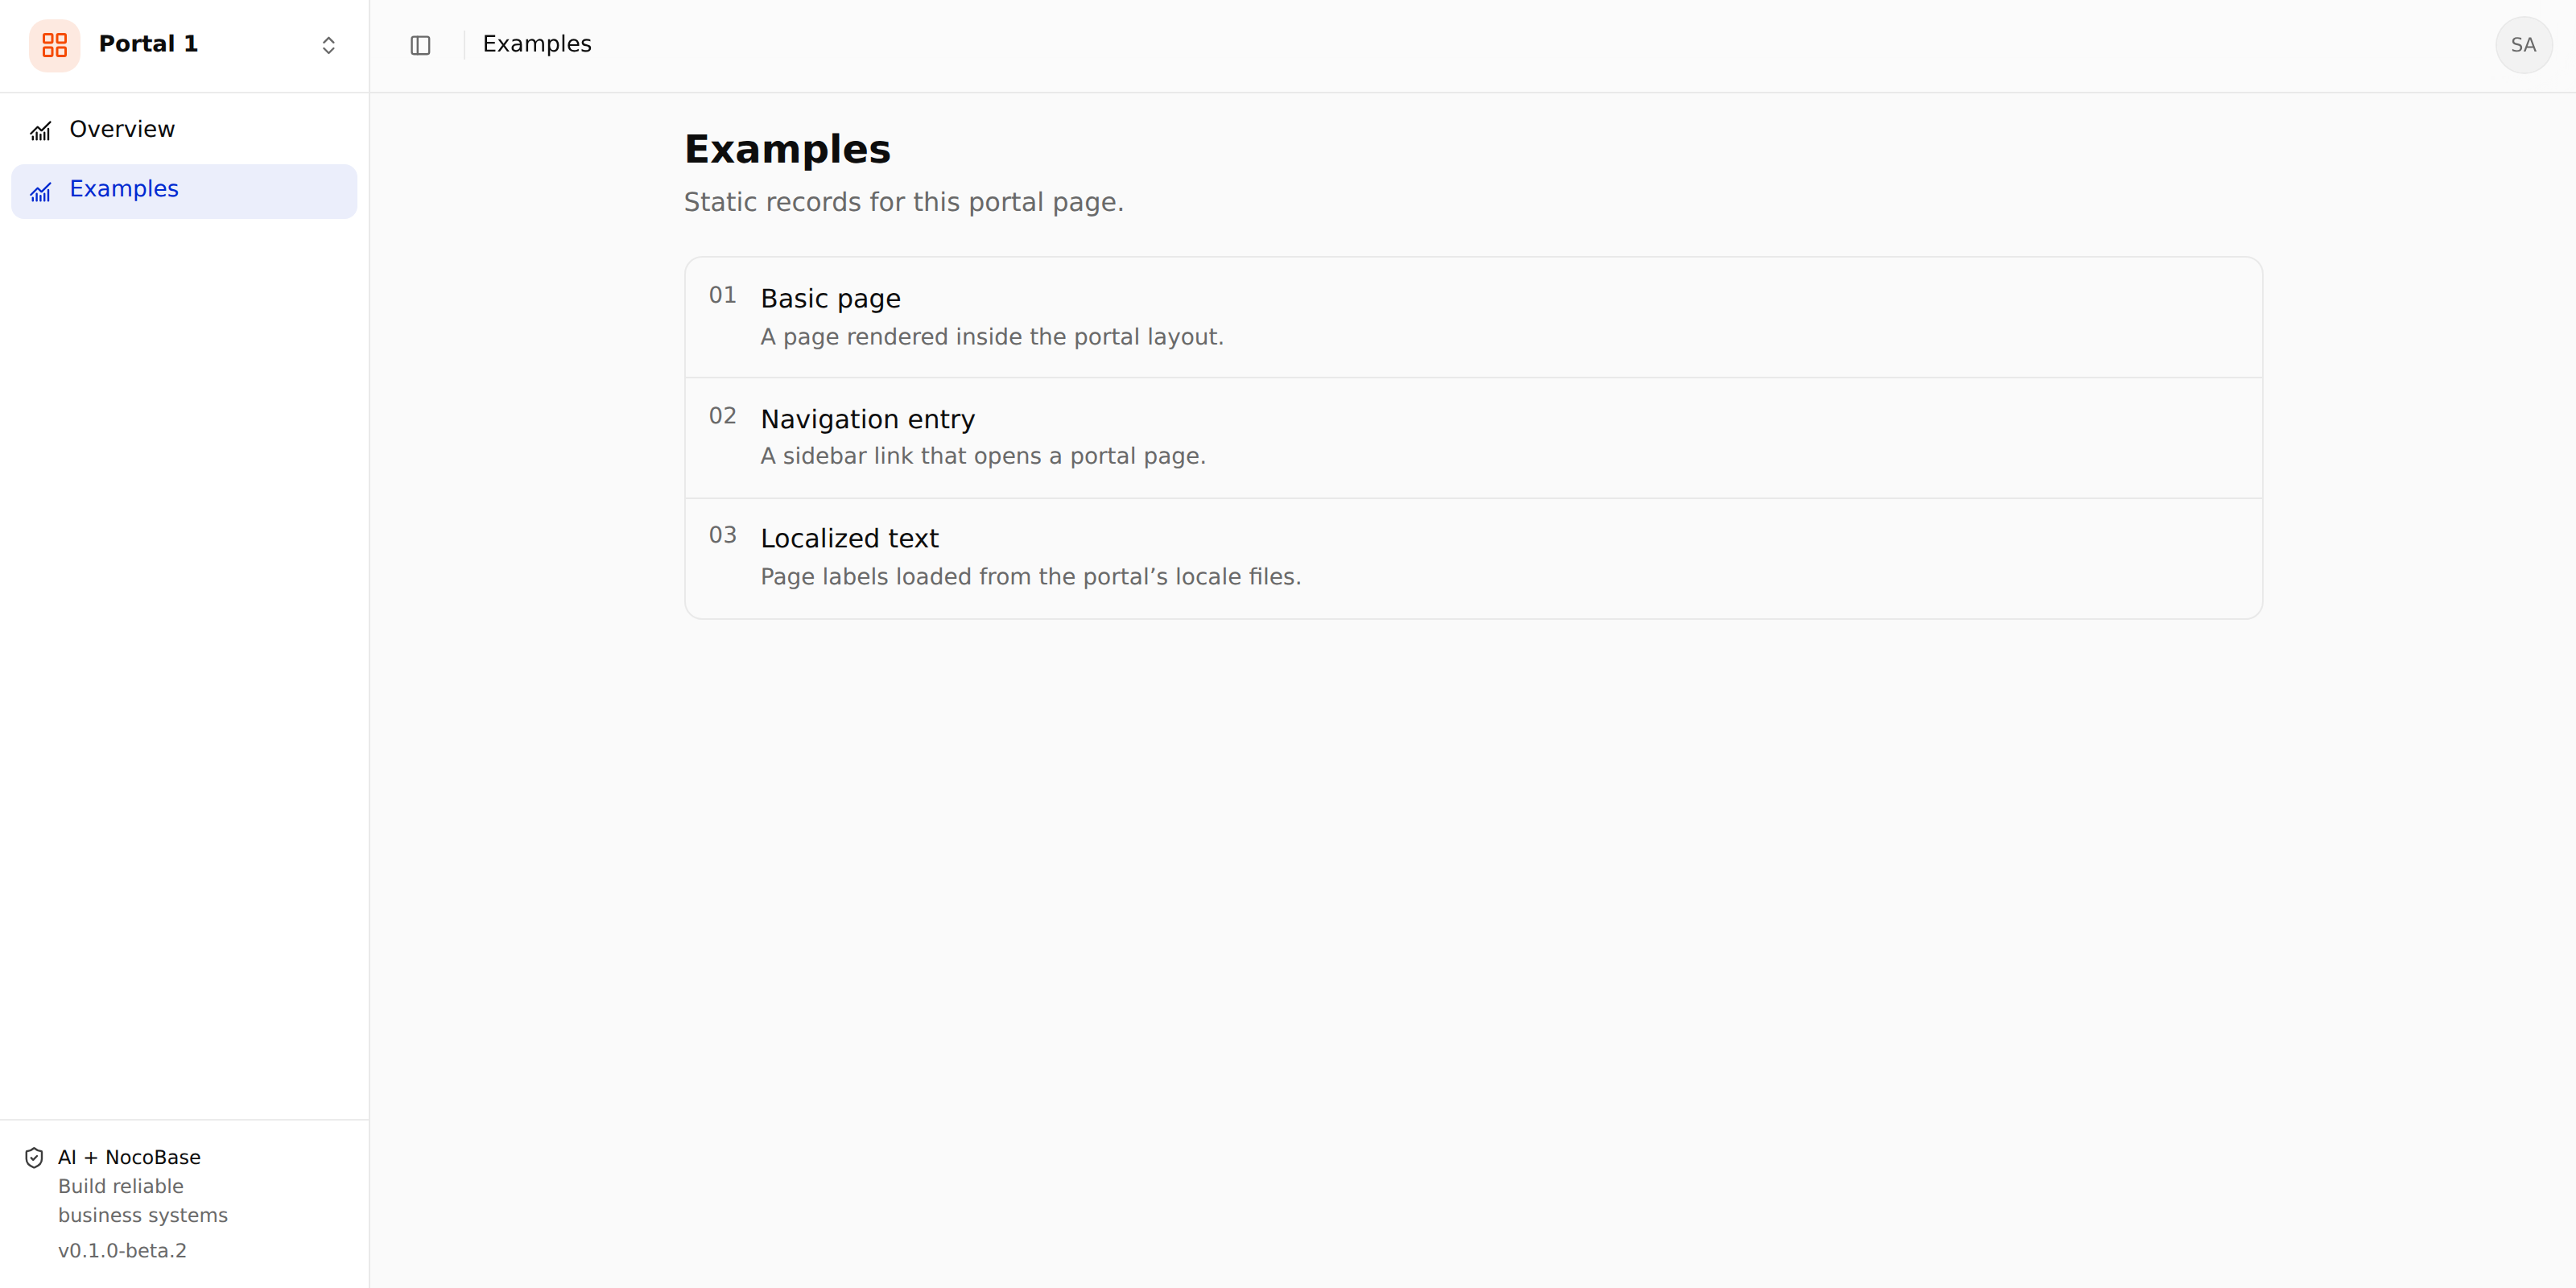
children is the current page content. Both Overview and Examples now use this centered container; the sidebar and header remain unchanged. To adjust only Examples, put the container in examples.tsx instead.
On a wide screen, the Examples list is centered with space on both sides. On narrower screens, the content shrinks to fit the available width.
If a portal needs top navigation or a completely different page structure, implement its own layout in client/layout.tsx. The default PortalLayout accepts portal information, navigation and content; it has no setting to switch between sidebar and top navigation. An independent layout should retain the account, sign-out and portal-switching entries you need, and preserve the routes' authentication and authorization requirements. See Pages and menus.
Add services and data
The three Examples records currently live in frontend code and locale resources. They are not loaded from a database. Add server endpoints and database resources when records need to be saved, edited or shared.
For example, extending the list to create and persist records involves the following files. This is a proposed extension, not functionality already supplied by the generator:
packages/app-portal-portal-1/
├── client/pages/examples.tsx         # Fetch, display and submit records
├── server/
│   ├── routes/examples.ts           # Query/create endpoints and access checks
│   ├── services/examples.ts         # Business rules and data access
│   └── providers/examples.ts        # Register injectable business services
└── database/main/
    ├── migrations/<migration>.ts    # Create the example records table
└── seeds/<seed>.ts # Optional initial records- Define the data structure. Create a table in a migration, for example with name and description fields. Add a seed only if initial records are needed; keep the generated portal installation-state seed intact.
- Implement services and endpoints. Endpoints validate input, authentication, business permissions and portal installation status. Business services handle rules and data access. Register new route contributions in
server/plugin.ts; register injectable services through a Provider included inserver/providers/index.ts. - Connect the page. Replace the static Examples records with endpoint responses and add loading, empty, failure and save feedback.
- Verify persistence. Create a record and confirm it remains after a refresh. Verify that unauthorized users cannot read or change data by calling endpoints directly.
The portal's server/plugin.ts already declares the main connection:
database: {
  connections: {
    main: {}, // Load database/main/migrations and database/main/seeds
  },
},
main names a connection configured by the host app. {} uses conventional directories; it does not create another database. The app owns database addresses, credentials and drivers. Portals sharing a connection should use business table names that do not conflict; sharing a connection does not automatically grant access to each other's data.
For implementation details, see Server APIs and Database and migrations. For additional connections, configure the connection and driver in the app first, then declare the same connection name in the portal; see Database connections. Installation requires every connection's database tasks to succeed. These connections do not form a cross-database atomic transaction: retain execution history, fix failures and retry.
Verify and deliver
At the app root, run:
pnpm --filter @nocobase/app-portal-portal-1 check
pnpm build
Then check actual behavior:
- After installation, open the portal from management and the portal list, and refresh it.
- Verify navigation and direct access to the new page, switching portals and the return entry.
- After configuring ordinary-user permissions, check pages and endpoints with an administrator, an authorized user and an unauthorized user.
The minimal generated package may have no business tests. Passing checks does not mean business behavior is covered. Local portals ship with the app. Run pnpm build --tar when you need a deployment archive, then follow Publish an app release.