

AI Chat box block
AI employeesCommunity Edition+In NocoBase, AI Chat box is an AI conversation block that can be added directly to a page. You can place it on a business page to provide a fixed AI assistant entry point for that page.
Each AI Chat box block has its own current conversation and input state. Page builders can also restrict the available AI employees, models, file uploads, web search, and work context to suit the current business scenario.
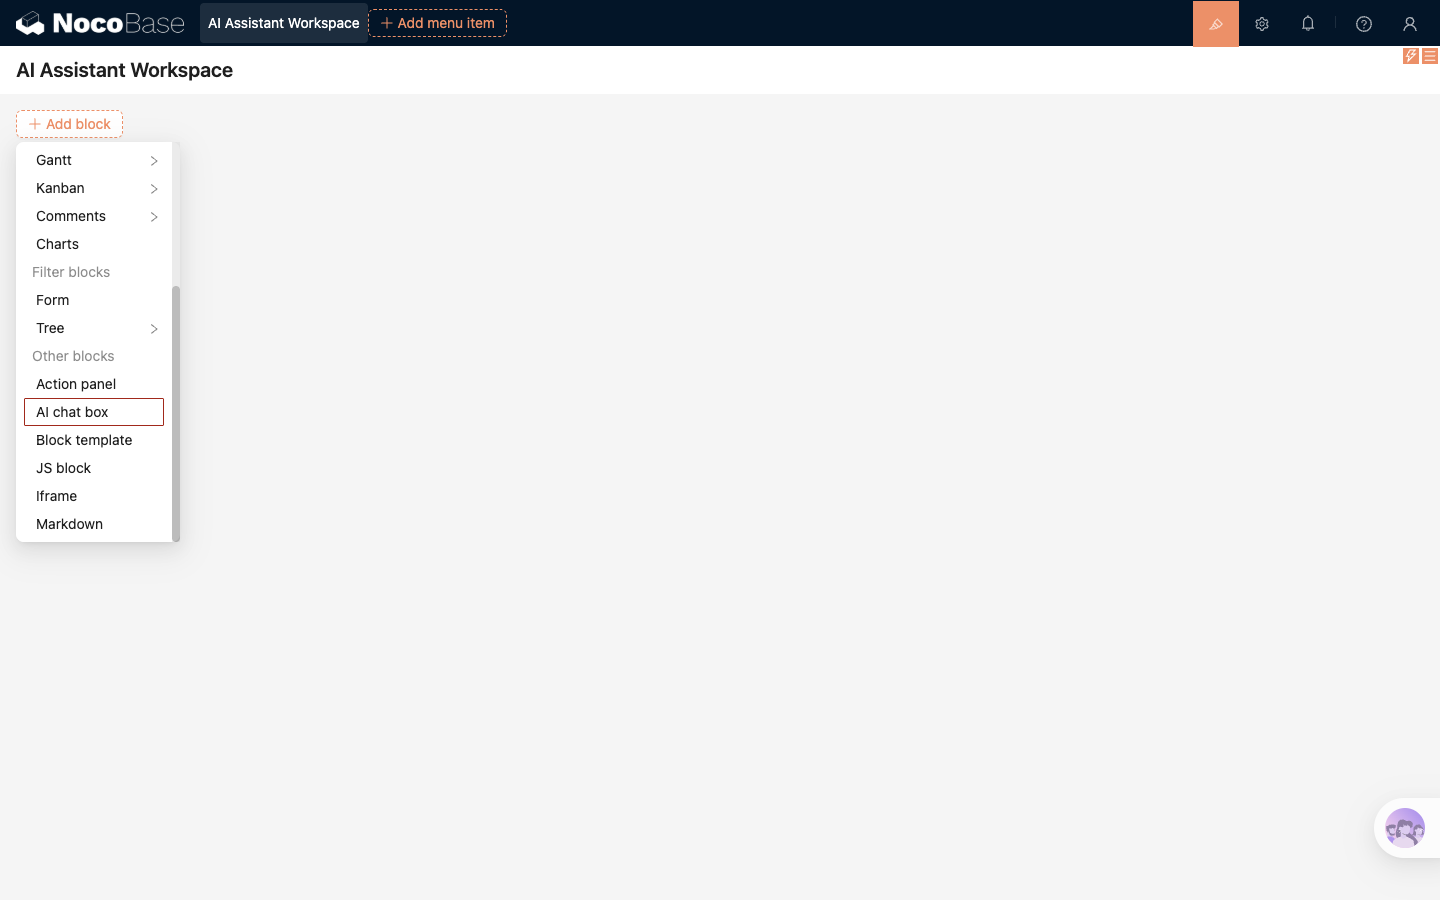
Add an AI Chat box block
- Open the page you want to configure.
- Click
UI Editorin the upper-right corner to enter page editing mode. - Click
Add block. - Under
Other blocks, selectAI chat box.
Understand the block structure
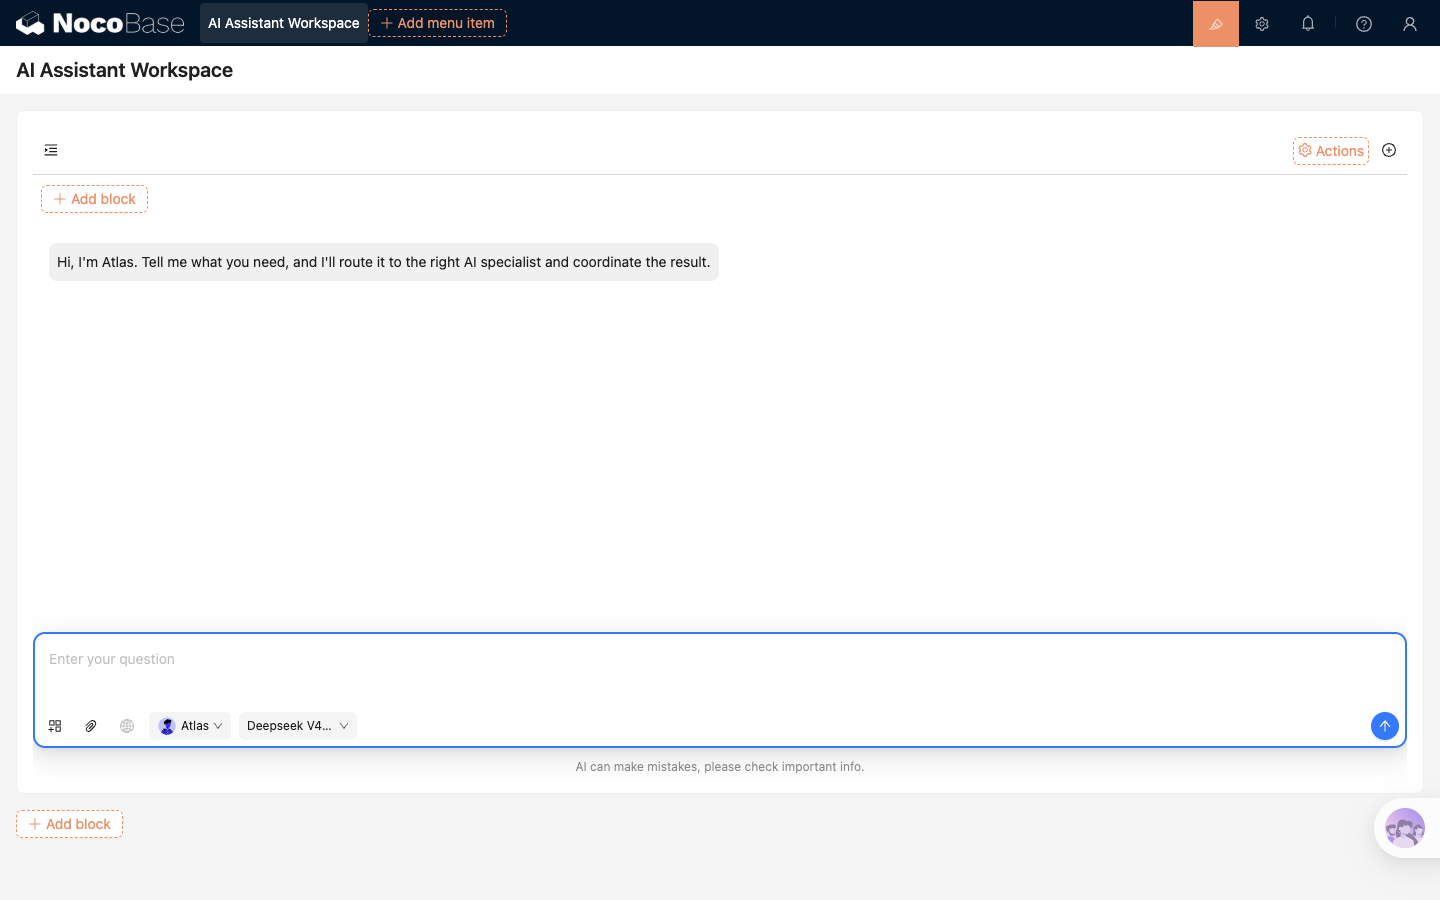
An AI Chat box contains three areas from top to bottom:
- Top action area — conversation list, Actions, custom actions, and new conversation buttons; a messages button also appears when the messages area is hidden
- Messages area — displays messages in the current draft or conversation
- Sender area — input box, context selection, file upload, web search, AI employee selection, model selection, send button, and disclaimer
Add display content inside the block body
In page editing mode, click Add block inside the AI Chat box to add any of the following blocks above the chat area:
- JS block
- Iframe
- Markdown
These blocks are useful for displaying instructions, external pages, or supporting information. The internal Add block menu only provides these three block types and does not allow another AI Chat box to be nested inside it.
Configure the AI Chat box
Move the pointer over the block and open its settings menu. Click Edit chat box to configure the conversation scope, default message, Work context, AI employees, and models.
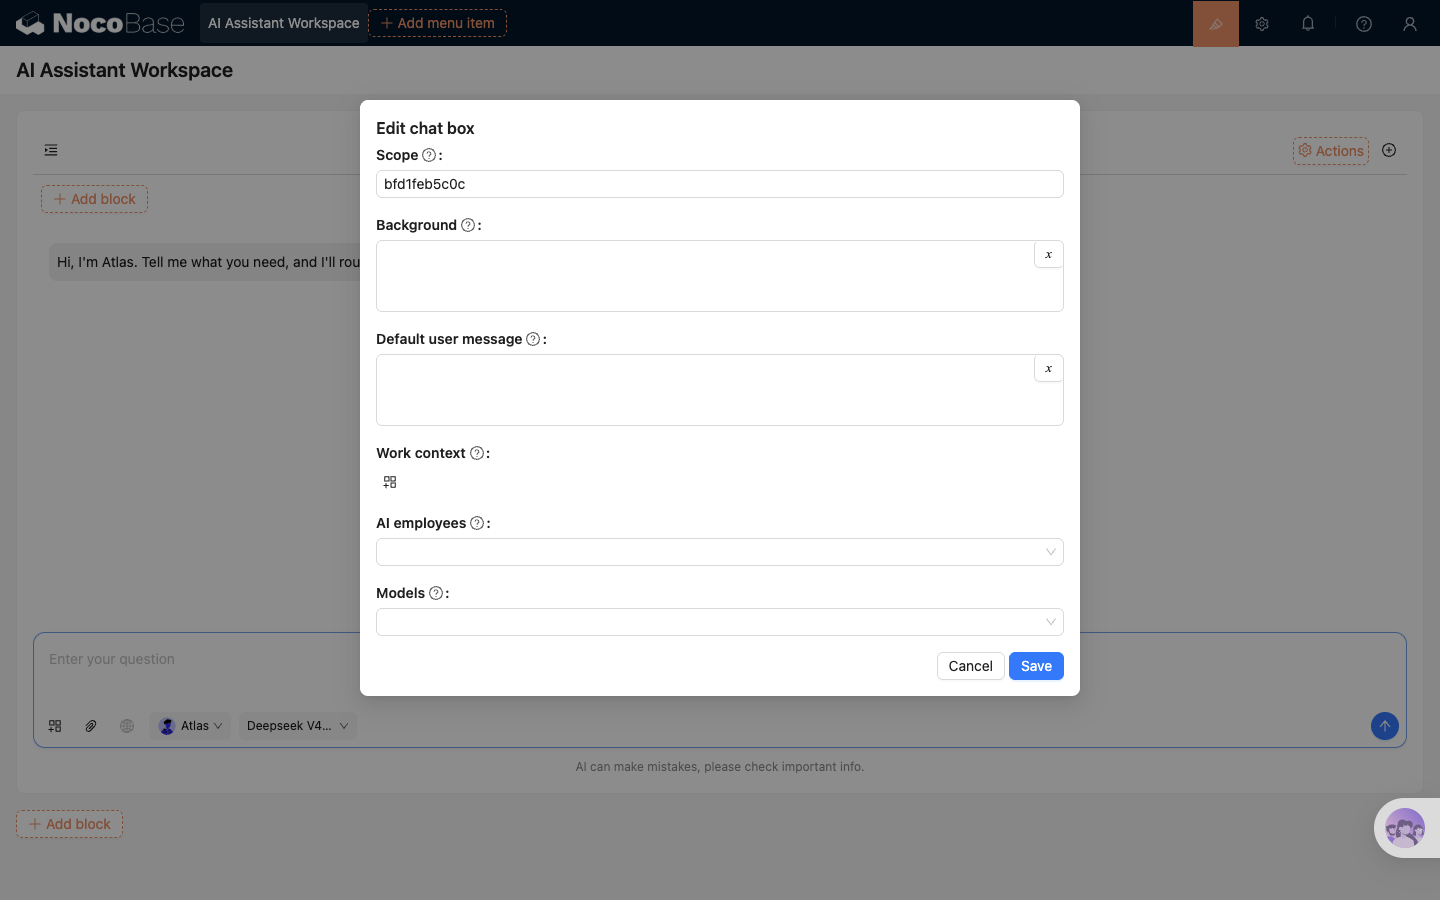
Edit chat box settings
Other block settings
Configure Work context
In Work context under Edit chat box, click the add context button, select Pick block, and then select the page block you want to provide to the AI. After saving, the selected block becomes the default work context for new conversations and can be removed from the sender before sending.
Hide the messages area and use the right-side panel
After disabling Show messages, the block body only keeps the sender area. A messages button appears at the top; click it to open the messages panel from the right.
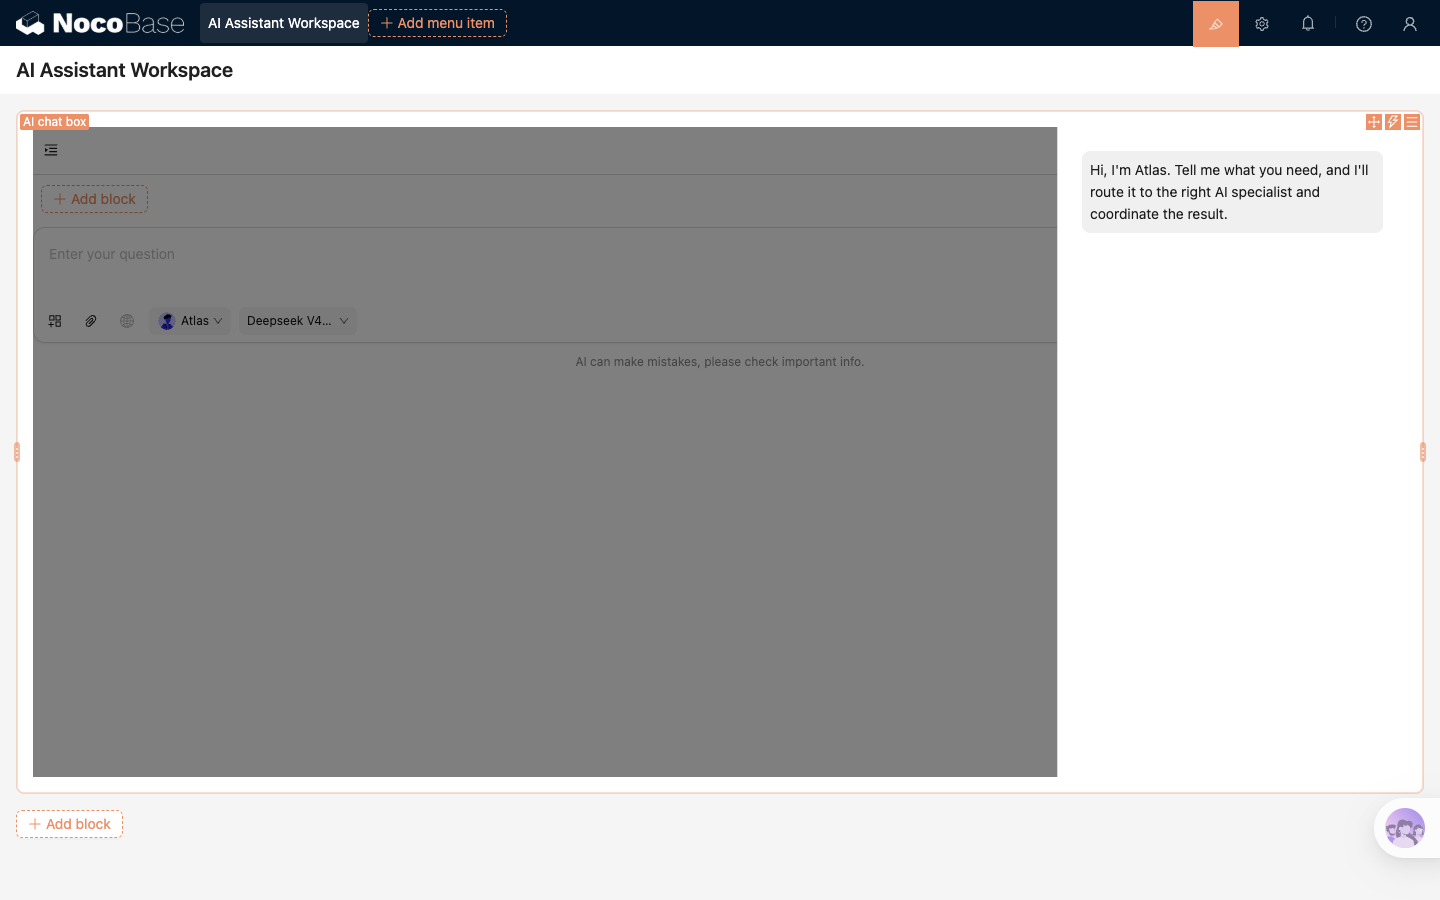
When the panel is open, the rest of the block is covered by an overlay. Click the overlay or click the messages button again to close the panel.
This layout works well when the AI Chat box is used as a lightweight input entry on a page: keep only the sender visible and open the panel when you need to review messages.
Manage conversation history
Click the conversation list button in the upper-left corner of the block to view conversation history under the current Scope.
Keep these rules in mind:
- Multiple AI Chat boxes with the same Scope can see the same conversation list
- Each block still has its own current conversation, sender draft, AI employee, model, attachments, and context state
- The global floating chatbox does not filter by block Scope, so it does not hide conversations with a Scope
- After clearing Scope, the block no longer filters the conversation list by Scope and displays both conversations without a Scope and conversations using other Scopes
Normally, keeping the Scope generated for a new block is enough to separate the history of each page assistant. Only configure the same Scope when multiple blocks need to share the same conversation list.
Add Actions
In page editing mode, click Actions at the top of the block to add either of the following actions:
- JS Action
- AI employee
After adding an AI employee, you can configure shortcut tasks for that employee.
The Chat box uid setting in a shortcut task specifies which AI Chat box runs the task. An AI employee added directly inside an AI Chat box points to the current block UID by default.
If the specified AI Chat box is not mounted, NocoBase reports that the target block cannot be found and does not fall back to the global floating chatbox. See AI employee shortcut tasks for detailed configuration.
Configure a page-specific assistant
The following steps create a lightweight AI assistant for a page:
- Add an AI Chat box block and move it to the appropriate position on the page.
- Enter a page-specific Background under
Edit chat box. - Select one or more Work contexts.
- Restrict the available employees and models under
AI employeesandModels. - Exit editing mode, enter a question, and send it.
Notes
- The AI Chat box block and the global floating chatbox in the lower-right corner are separate entry points; their current conversations and input states are not synchronized automatically
- Only JS block, Iframe, and Markdown can be added from
Add blockinside an AI Chat box - Changing Scope affects the conversation list query and does not copy the conversation or draft currently open in another block