

JS Item
Introduction
JS Item is used to render a custom action item in an action bar. You can write JavaScript / JSX directly to output any UI, such as buttons, button groups, dropdown menus, helper text, status tags, or small interactive components, and handle logic inside the component, including API calls, opening views, reading the current record, or refreshing block data.
It can be used in form toolbars, table toolbars (collection-level), table row actions (record-level), and similar locations. It is especially suitable for these scenarios:
- You need a custom button structure instead of only attaching click logic to an existing button.
- You want to combine multiple actions into a button group or a dropdown menu.
- You want to display real-time status, counts, or helper information in the action bar.
- You want to render different content dynamically based on the current record, selected rows, or form values.
.png)
Difference from JS Action
JS Action: Better for executing a script when a button is clicked. Its focus is action logic.JS Item: Better for rendering a custom action item by yourself. It controls both the UI and the interaction logic.
If you only need to add click behavior to an existing button, use JS Action. If you want to customize the action item's UI structure or render multiple controls together, use JS Item.
Runtime Context API (Commonly Used)
The JS Item runtime injects common capabilities that you can use directly in the script:
ctx.render(vnode): Renders a React element, HTML string, or DOM node into the current action item container.ctx.element: The DOM container of the current action item (ElementProxy).ctx.api.request(options): Sends an HTTP request.ctx.openView(viewUid, options): Opens a configured view (drawer / dialog / page).ctx.message/ctx.notification: Global messages and notifications.ctx.t()/ctx.i18n.t(): Internationalization.ctx.resource: The data resource for collection-level context, for example reading selected rows or refreshing a list.ctx.record: The current row record in record-level context.ctx.form: The AntD Form instance in form-level context.ctx.blockModel/ctx.collection: Metadata of the current block and collection.ctx.requireAsync(url): Asynchronously loads an AMD / UMD library by URL.ctx.importAsync(url): Dynamically imports an ESM module by URL.ctx.libs.React/ctx.libs.ReactDOM/ctx.libs.antd/ctx.libs.antdIcons/ctx.libs.dayjs/ctx.libs.lodash/ctx.libs.math/ctx.libs.formula: Built-in common libraries that can be used directly for JSX rendering, date-time processing, data manipulation, and mathematical operations.
The actual available variables may differ depending on where the action item is used. For example, table row actions usually have access to
ctx.record, form toolbars usually have access toctx.form, and table toolbars usually have access toctx.resource.
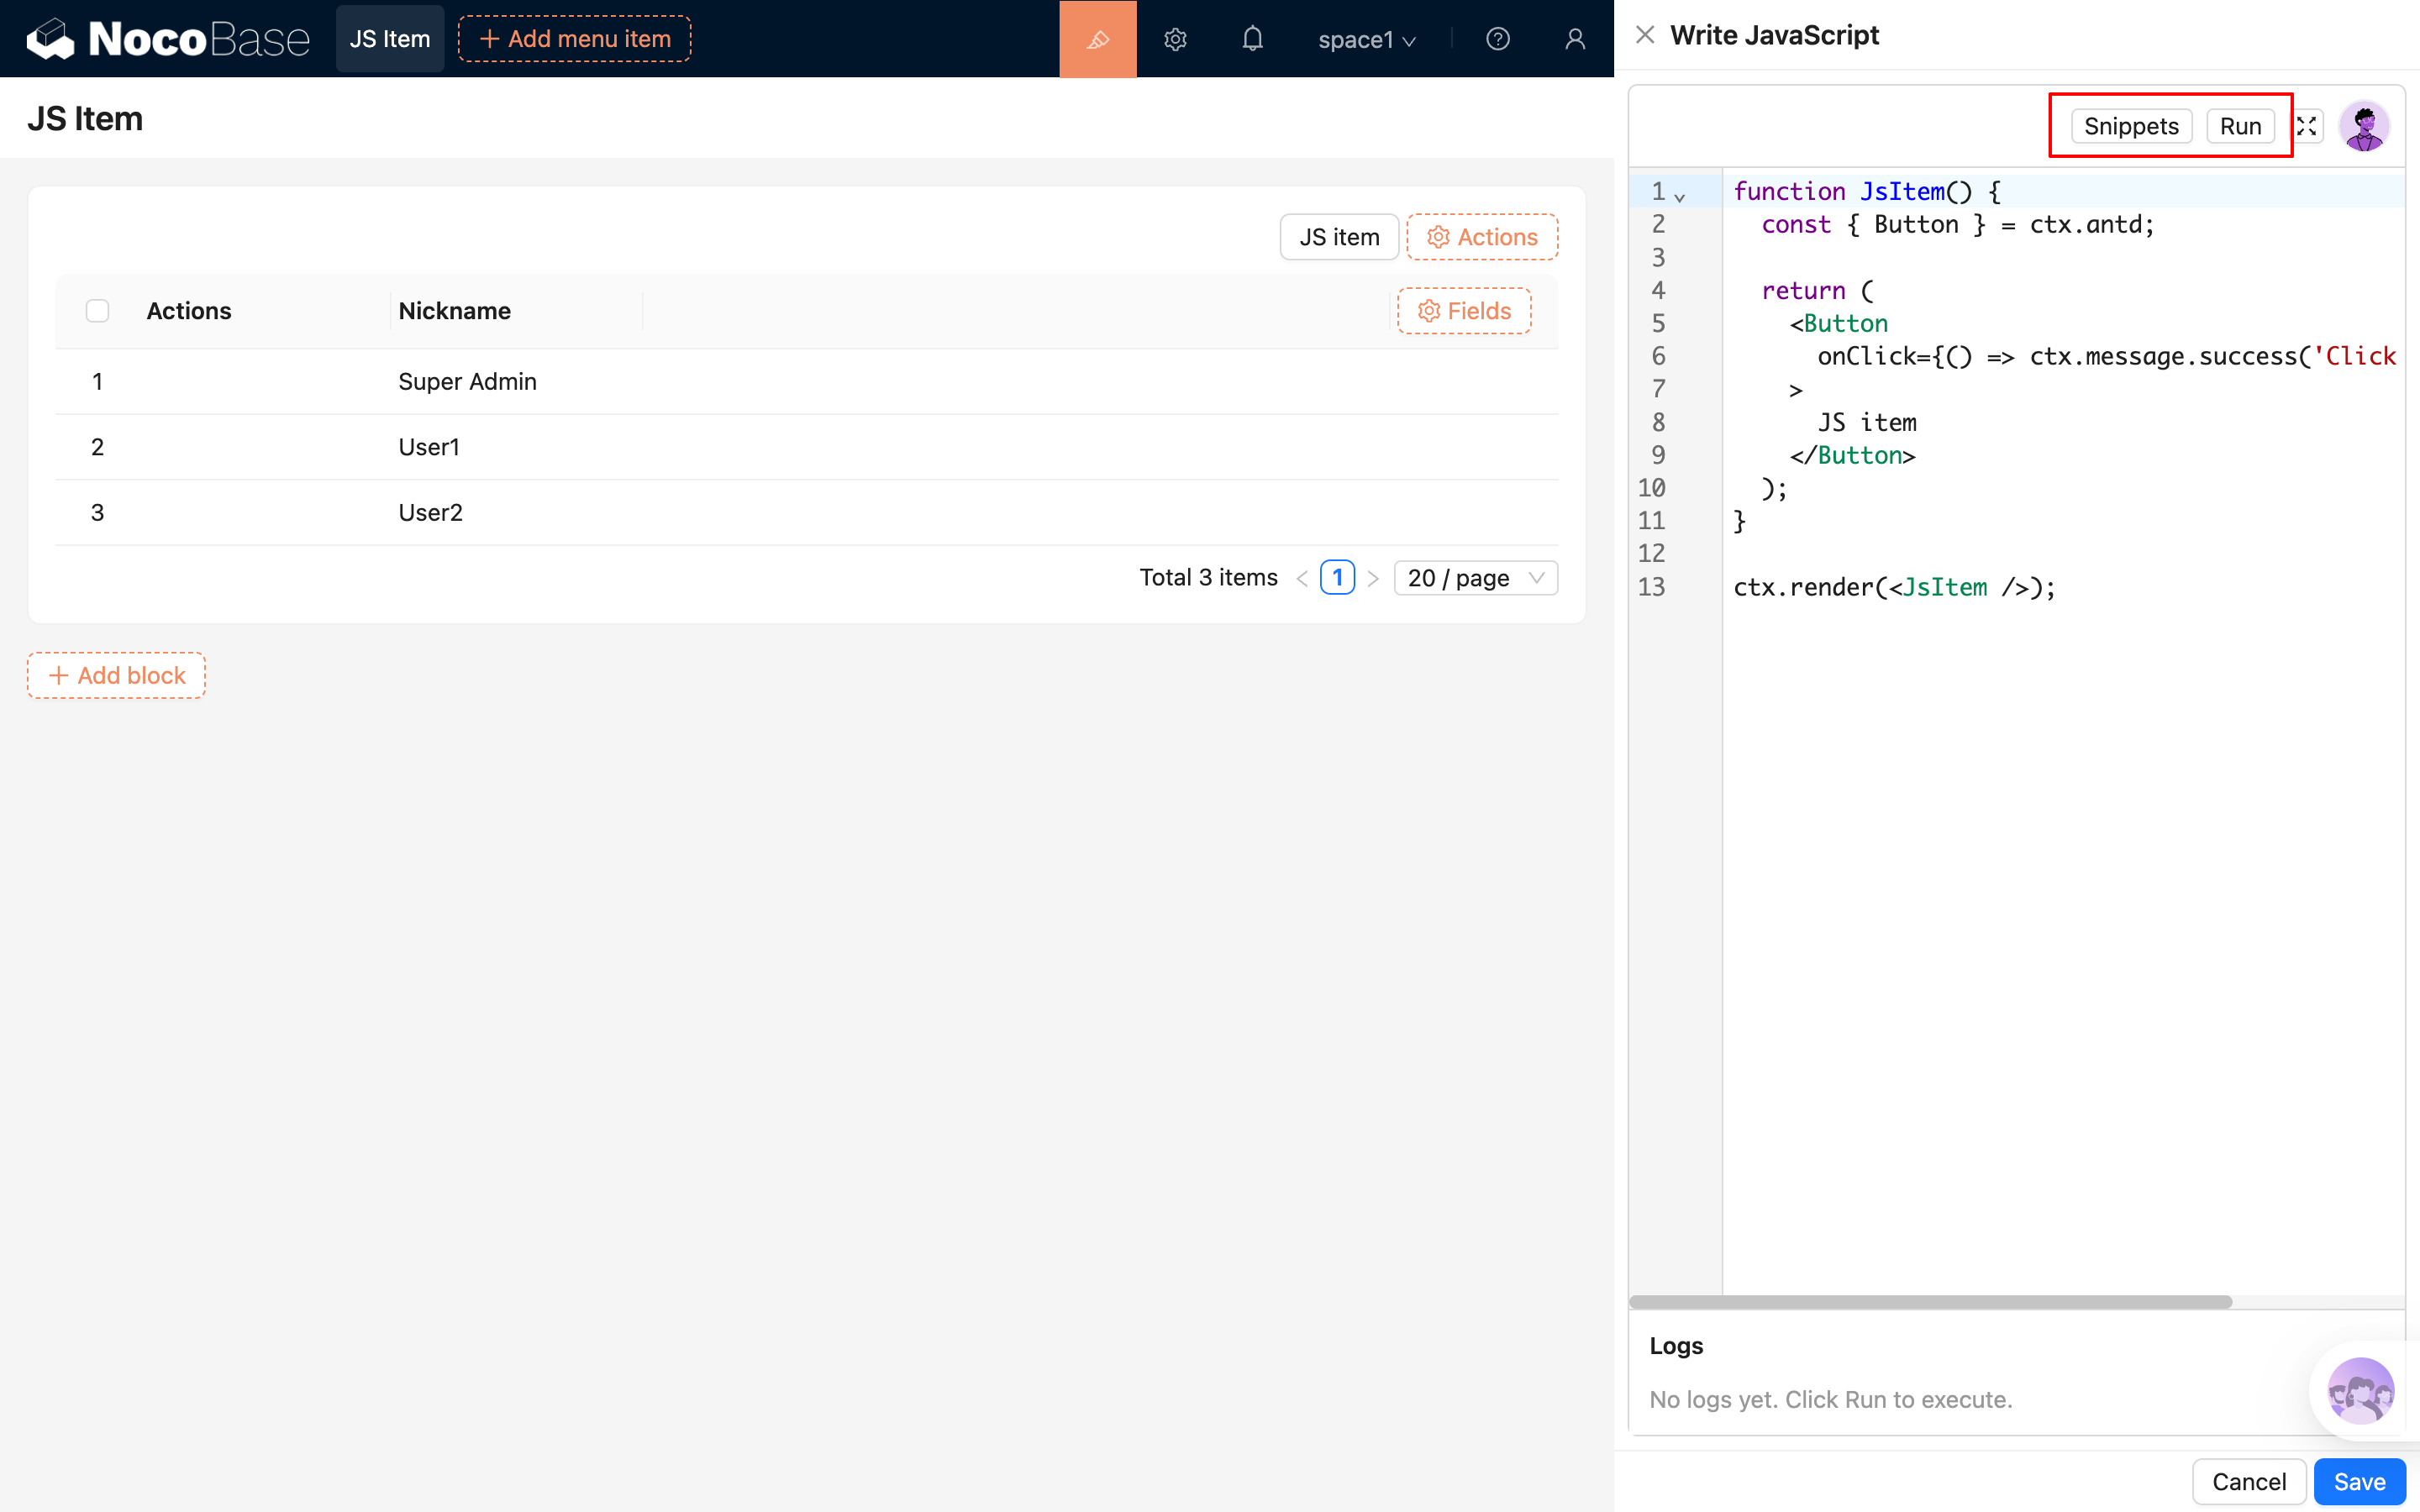
Editor and Snippets
Snippets: Opens a list of built-in code snippets that can be searched and inserted at the current cursor position with one click.Run: Executes the current code directly and outputs the execution logs to theLogspanel at the bottom. It supportsconsole.log/info/warn/errorand highlights errors for easy location.
- You can use AI employees to generate / modify scripts: AI Employee · Nathan: Frontend Engineer
Common Usage (Simplified Examples)
1) Render a Basic Button
2) Collection Action: Combine a Button and a Dropdown Menu
3) Record Action: Open a View for the Current Row
4) Render Custom Status Content
Notes
- If you only need to execute logic on click, prefer
JS Actionbecause it is more straightforward. - Add
try/catchand user-facing notifications for API calls to avoid silent failures. - When interacting with tables, lists, or popups, you can actively refresh data after a successful operation by calling
ctx.resource?.refresh?.()or the resource of the containing block. - When loading external libraries, use trusted CDNs and provide a fallback for load failures.